


 本文介绍如何在Spring环境中配置并使用Activiti工作流引擎。包括数据源、事务管理、流程引擎配置等关键步骤,并通过示例代码展示了如何启动流程引擎。
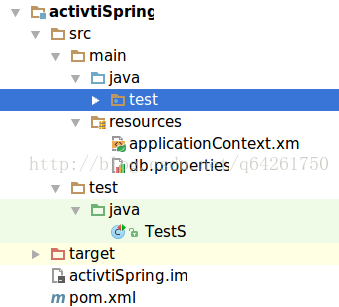
applicationContext.xml配置:
<?xml version="1.0" encoding="UTF-8"?>
<beans  xmlns="http://www.springframework.org/schema/beans"
        xmlns:context="http://www.springframework.org/schema/context"
        xmlns:aop="http://www.springframework.org/schema/aop"
        xmlns:tx="http://www.springframework.org/schema/tx"
		xmlns:xsi="http://www.w3.org/2001/XMLSchema-instance"
		xsi:schemaLocation="http://www.springframework.org/schema/beans
		                    http://www.springframework.org/schema/beans/spring-beans-3.0.xsd
		                    http://www.springframework.org/schema/context
		                    http://www.springframework.org/schema/context/spring-context-3.0.xsd
		                    http://www.springframework.org/schema/tx
		                    http://www.springframework.org/schema/tx/spring-tx-3.0.xsd
		                    http://www.springframework.org/schema/aop
		                    http://www.springframework.org/schema/aop/spring-aop-3.0.xsd">

	<!-- 由流程引擎对象,提供的方法,创建项目中使用的Activiti工作流的Service -->
	<bean id="repositoryService" factory-bean="processEngine" factory-method="getRepositoryService" />
	<!-- 创建流程引擎对象 -->
	<bean id="processEngine" class="org.activiti.spring.ProcessEngineFactoryBean">
		<property name="processEngineConfiguration" ref="processEngineConfiguration" />
	</bean>
	<!-- spring负责创建流程引擎的配置文件 -->
	<bean id="processEngineConfiguration" class="org.activiti.spring.SpringProcessEngineConfiguration">
		<!-- 数据源 -->
		<property name="dataSource" ref="dataSource" />
		<!-- 配置事务管理器,统一事务 -->
		<property name="transactionManager" ref="transactionManager" />
		<!-- 设置建表策略,如果没有表,自动创建表 -->
		<property name="databaseSchemaUpdate" value="true" />
	</bean>

	<!-- 配置数据源 -->
	<bean id="dataSource" class="org.apache.commons.dbcp.BasicDataSource">
		<property name="url" value="${jdbc.url}" />
		<property name="driverClassName" value="${jdbc.driverClassName}" />
		<property name="username" value="${jdbc.username}" />
		<property name="password" value="${jdbc.password}" />
	</bean>
	<!-- 配置外部数据库连接信息-->
	<context:property-placeholder location="classpath:db.properties"/>


	<!--<bean id="sqlSessionFactory" class="org.mybatis.spring.SqlSessionFactoryBean">-->
		<!--<property name="dataSource" ref="dataSource"/>-->
		<!--<!–<property name="mapperLocations" value="classpath*:mybatis/test.xml"/>–>-->
		<!--<!–<property name="configLocation" value="classpath:mybatis/mybatis-config.xml"/>–>-->
	<!--</bean>-->

	<!-- 配置事务管理器 -->
	<bean id="transactionManager" class="org.springframework.jdbc.datasource.DataSourceTransactionManager">
		<property name="dataSource" ref="dataSource"/>
		<property name="nestedTransactionAllowed" value="true"/>
	</bean>
	<tx:advice id="txAdvice" transaction-manager="transactionManager">
		<tx:attributes>
			<tx:method name="get*" read-only="true" rollback-for="UnexpectedRollbackException"/>
			<!--<tx:method name="*_tx" rollback-for="Exception" propagation="REQUIRED"/>-->
			<tx:method name="*" rollback-for="Exception" propagation="REQUIRED"/>
		</tx:attributes>
	</tx:advice>
	<aop:config>
		<aop:pointcut id="txPointCut" expression="execution(* test..*.*(..))"/>
		<aop:advisor advice-ref="txAdvice" pointcut-ref="txPointCut"/>
	</aop:config>


</beans>
使用示范TestS:
/**
 * Created by yan on 17-3-25.
 */
import org.activiti.engine.ProcessEngine;
import org.junit.Test;
import org.springframework.context.ApplicationContext;
import org.springframework.context.support.ClassPathXmlApplicationContext;

public class TestS {
    @Test
    public void test(){

        ApplicationContext context = new ClassPathXmlApplicationContext("applicationContext.xml");
        ProcessEngine processEngine=(ProcessEngine)context.getBean("processEngine");
        System.out.println(processEngine);
    }

}


 2万+
2万+

 被折叠的 条评论
为什么被折叠?
被折叠的 条评论
为什么被折叠?
 到【灌水乐园】发言


