


网络技术
1.WebView的用法
首先我们创建一个WebViewTest新项目
修改activity_main.xml
<LinearLayout xmlns:android="http://schemas.android.com/apk/res/android"
    xmlns:app="http://schemas.android.com/apk/res-auto"
    xmlns:tools="http://schemas.android.com/tools"
    android:layout_width="match_parent"
    android:layout_height="match_parent"
    tools:context=".MainActivity"
    android:orientation="vertical">
    <WebView
        android:id="@+id/webView"
        android:layout_width="match_parent"
        android:layout_height="match_parent"
></WebView>

</LinearLayout>
修改MainActivity‘
class MainActivity : AppCompatActivity() {

    override fun onCreate(savedInstanceState: Bundle?) {
        super.onCreate(savedInstanceState)
        setContentView(R.layout.activity_main)
        webView.settings.setJavaScriptEnabled(true)
        webView.webViewClient=WebViewClient()
        webView.loadUrl("https://www.youkuaiyun.com/")
    }
}
通过WebView的getSetting()方法,并传入了一个WebViewClient的实例。这段代码的作用是,当需要从一个网页跳转到另一个网页时,目标网页仍在当前WebView中显示,而不是打开系统浏览器。
调用setJavaScriptEnabled()方法,让WebView支持JavaScript脚本
另外我们需要声明访问网络的权限,再AndroidManifest.xml
<?xml version="1.0" encoding="utf-8"?>
<manifest xmlns:android="http://schemas.android.com/apk/res/android"
    package="com.example.webviewtest">
 <uses-permission android:name="android.permission.INTERNET"></uses-permission>
 </manifest>
2.使用HttpURLConnection
过去Android有两种方式:HttpURLConnection和HttpClient,由于HttpClient的API数量过多,扩展困难。在Android6.0系统中HttpClient的功能完全移除了。
1.首先我们要获取HttpURLConnection实例
val url = URL("https://www.baidu.com")
val connection = url.openConnection() as HttpURLConnection
2.得到HttpURLConnection之后,我们可以设置一下Http请求方式。GET/POST
connection.requestMethod = "GET"
3.接下来自由定制,设置连接超时,读取超时的毫秒数,以及服务器希望得到的一些消息头等
connection.connectTimeout=8000
connection.readTimeout=8000
4.之后再调用getInputStream()方法获取服务器返回的输入流
val input = connection.inputStream
5.最后调用disconnect()方法关闭HTTP连接
connection.disconnect()
**实例:**新建一个NetworkTest项目,修改activity_main.xml
<LinearLayout xmlns:android="http://schemas.android.com/apk/res/android"
    xmlns:app="http://schemas.android.com/apk/res-auto"
    xmlns:tools="http://schemas.android.com/tools"
    android:layout_width="match_parent"
    android:layout_height="match_parent"
    tools:context=".MainActivity"
    android:orientation="vertical">

    <Button
        android:id="@+id/sendRequestBtn"
        android:layout_width="match_parent"
        android:layout_height="wrap_content"
        android:text="发送请求"></Button>
    <ScrollView
        android:layout_width="match_parent"
        android:layout_height="match_parent">
        <TextView
            android:id="@+id/responseText"
            android:layout_width="match_parent"
            android:layout_height="wrap_content"
            ></TextView>
    </ScrollView>
</LinearLayout>
修改MainActivity代码
class MainActivity : AppCompatActivity() {

    override fun onCreate(savedInstanceState: Bundle?) {
        super.onCreate(savedInstanceState)
        setContentView(R.layout.activity_main)
        sendRequestBtn.setOnClickListener {
    sendRequestWithHttpURLConnection()
        }
    }
    private fun sendRequestWithHttpURLConnection(){
        //开启线程发起网络请求
        thread {
            var connection : HttpURLConnection?=null
            try {
                val response = StringBuilder()
                val url = URL("https://www.baidu.com/")
                connection = url.openConnection() as HttpURLConnection
                connection.connectTimeout=8000
                connection.readTimeout=8000
                val input = connection.inputStream
                //下面对获取到的输入流进行读取
                val reader = BufferedReader(InputStreamReader(input))
                reader.use {
                    reader.forEachLine {
                        response.append(it)
                    }
                }
                showResponse(response.toString())
            }catch (e:Exception){
                e.printStackTrace()
            }finally {
                connection?.disconnect()
            }
        }
    }
    private fun showResponse(response : String){
        runOnUiThread {
            //在这里进行UI操作,将结果显示到界面上
            responseText.text=response
        }
    }
}
最后再AndroidManifest.xml中声明网络权限
<manifest xmlns:android="http://schemas.android.com/apk/res/android"
    package="com.example.networktest">
    <uses-permission android:name="android.permission.INTERNET"></uses-permission>
   ...
</manifest>
那么如果我们想提交数据给服务器怎么办呢?
connection.requestMethod="POST"
val output = DataOutStream(connection.outputStream)
output.writeBytes("username=admin&password=123456")
3.使用OkHttp
OkHttp是由Square公司开发的,还开发了Retrofit,Picasso等知名的开源项目.
OkHttp的项目主页地址是:https://github.com/square/okhttp
使用OKHttp之前我们需要再项目中添加OkHttp库的依赖。编辑app/build.gradle文件
dependencies{
...
implementation 'com.squareup.okhttp3:okhttp:4.1.0'
}
1.首先我们需要创建一个OkHttpClient的实例
val client = OkHttpClient()
2.如果想发起一条HTTP请求,需要创建一个Request对象
val request = Request.Builder().build()
3.通过url()方法设置目标的网络地址
val request = Request.Builder()
					.url("https://www.baidu.com")
					.build()
4.调用OkHttpClient的newCall()方法来创建一个Call对象,并调用它的execute()方法来发送请求并获取服务器返回的数据
val response = client.newCall(request).execute()
5.Response对象就是服务器返回的数据,如下写法得到返回的具体内容
val responseData = response.body?.string()
6.如果发送一条POST请求
val requestBody = FormBody.Builder()
							.add("username","admin")
							.add("password","123456")
							.build()
然后再Request.Builder调用一下post()方法,并将RequestBody对象传入
val request = new Request.Builder()
					.url("https://www.baidu.com")
					.post(requestBody)
					.build()
修改MainActivity代码
...
private fun sendRequestWithHttpURLConnection(){
        //开启线程发起网络请求
        thread {

            try {
                val client =  OkHttpClient()
                val request = Request.Builder()
                    .url("https://www.baidu.com/")
                    .build()
                val response = client.newCall(request).execute()
                val responseData = response.body?.string()
                if (responseData !=null){
                    showResponse(responseData)
                }
            }catch (e:Exception){
                e.printStackTrace()
            }
        }
    }
这里我使用的是jar包,需要OkHttp库和Okio库一起导入
4.解析XML格式数据
1.下载一个Apache服务器的压缩包
2.打开解压目录Apache24\conf\httpd.conf文件
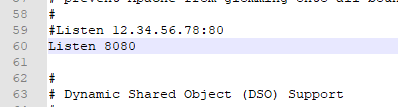
修改第37行为解压目录

修改第60行为监听端口
用管理员方式打开CMD,安装服务
G:\Apache HTTP\Apache24\bin>httpd.exe -k install -n"Apache24"
 如果卸载服务的话
G:\Apache HTTP\Apache24\bin>httpd.exe -k uninstall -n"Apache24"

然后在Apache\htdocs目录下创建一个名为get_data.xml文件
<apps>
	<app>
		<id>1</id>
		<name>Google Maps</name>
		<version>1.0</version>
	</app>
	<app>
		<id>2</id>
		<name>Chrome</name>
		<version>2.1</version>
	</app>
	<app>
		<id>3</id>
		<name>Google Play</name>
		<version>2.3</version>
	</app>
</apps>
修改MainActivity代码
class MainActivity : AppCompatActivity() {

    override fun onCreate(savedInstanceState: Bundle?) {
        super.onCreate(savedInstanceState)
        setContentView(R.layout.activity_main)
        sendRequestBtn.setOnClickListener {
    sendRequestWithHttpURLConnection()
        }
    }
    private fun sendRequestWithHttpURLConnection(){
        //开启线程发起网络请求
        thread {
            try {
                val client =  OkHttpClient()

                val request = Request.Builder()
                    .url("http://10.0.2.2/get_data.xml")
                    .build()
                val response = client.newCall(request).execute()
                val responseData = response.body?.string()
                if (responseData !=null){
                    showResponse(responseData)
                    parseXMLWithPull(responseData)
                }
            }catch (e:Exception){
                e.printStackTrace()
            }finally {
             //   connection?.disconnect()
            }
        }
    }

    private fun parseXMLWithPull(xmlData : String){
        try {
            val factory = XmlPullParserFactory.newInstance()
            val xmlPullParser = factory.newPullParser()
            xmlPullParser.setInput(StringReader(xmlData))
            var eventType=xmlPullParser.eventType
            var id =""
            var name =""
            var version =""
            while (eventType !=XmlPullParser.END_DOCUMENT){
                val nodeName = xmlPullParser.name
                when(eventType){
                //开始解析某个节点
                XmlPullParser.START_TAG -> {
                    when(nodeName){
                        "id" -> id=xmlPullParser.nextText()
                        "name" -> id=xmlPullParser.nextText()
                        "version" -> id=xmlPullParser.nextText()
                    }
                }
                    XmlPullParser.END_TAG ->{
                        if ("app" ==nodeName){
                            Log.d("MainActivity","id is $id")
                            Log.d("MainActivity","name is $name")
                            Log.d("MainActivity","version is $version")
                        }
                    }
                }
                eventType=xmlPullParser.next()
            }
        }catch (e:Exception){
            e.printStackTrace()
        }
    }
    ...
}
从Android9.0系统开始,应用程序默认只允许使用HTTPS类型的网络请求,HTTP类型的网络请求应为有安全隐患默认不再被支持,而我们搭建的Apache服务器现在使用的就是HTTP
右键res目录->New->Directory,创建一个xml目录,接着右击xml目录->New->File,创建一个newtwork_config.xml文件,修改其中的内容
<?xml version="1.0" encoding="utf-8"?>
<network-security-config>
    <base-config cleartextTrafficPermitted="true">
        <trust-anchors>
            <certificates src="system"/>
        </trust-anchors>
    </base-config>
</network-security-config>
接下来在AndroidManifest.xml配置文件添加属性
<?xml version="1.0" encoding="utf-8"?>
<manifest xmlns:android="http://schemas.android.com/apk/res/android"
    package="com.example.networktest">
    <uses-permission android:name="android.permission.INTERNET"></uses-permission>
    <application
        android:allowBackup="true"
        android:icon="@mipmap/ic_launcher"
        android:label="@string/app_name"
        android:roundIcon="@mipmap/ic_launcher_round"
        android:supportsRtl="true"
        android:theme="@style/AppTheme"
        --------------------------------------------
        android:networkSecurityConfig="@xml/network_config"
        -------------------------------------------
        >
</manifest>
SAX解析方式
首先创建一个类继承自DefaultHandler
class MyHandler : DefaultHandler() {

    private var nodeName=""
    private lateinit var id:StringBuilder
    private lateinit var name:StringBuilder
    private lateinit var version:StringBuilder

    override fun startDocument() {
       id= StringBuilder()
        name= StringBuilder()
        version= StringBuilder()
    }

    override fun startElement(
        uri: String?,
        localName: String?,
        qName: String?,
        attributes: Attributes?
    ) {
        //记录当前节点名
        if (localName != null) {
            nodeName=localName
        }
        Log.d("MyHandler","uri is $uri")
        Log.d("MyHandler","localName is $localName")
        Log.d("MyHandler","qName is $qName")
        Log.d("MyHandler","attributes is $attributes")
    }

    override fun characters(ch: CharArray?, start: Int, length: Int) {
       //根据当前节点名判断将内容添加到哪一个StringBuilder对象中
        when(nodeName){
            "id"-> id.append(ch,start,length)
            "name"->name.append(ch,start,length)
            "version"->version.append(ch,start,length)
        }
    }

    override fun endElement(uri: String?, localName: String?, qName: String?) {
        if ("app"==localName){
            Log.d("MyHandler","id is ${id.toString().trim()}")
            Log.d("MyHandler","name is ${name.toString().trim()}")
            Log.d("MyHandler","version is ${version.toString().trim()}")
            //最后要将StringBuilder清空
            id.setLength(0)
            name.setLength(0)
            version.setLength(0)
        }
    }

    override fun endDocument() {
        super.endDocument()
    }
}
目前id,name,version中都可能是包含回车或换行符。因此在打印之前我们还需要调用一些trim()方法,并且打印完成后要将StringBuilder的内容情况。
修改MainActivity
  private fun sendRequestWithHttpURLConnection(){
        //开启线程发起网络请求
        thread {
            try {
                val client =  OkHttpClient()
                val request = Request.Builder()
                    .url("http://10.0.2.2/get_data.xml")
                    .build()
                val response = client.newCall(request).execute()
                val responseData = response.body?.string()
                if (responseData !=null){
                    showResponse(responseData)
                    parseXMLWithSAX(responseData)
                }
            }catch (e:Exception){
                e.printStackTrace()
            }finally {
            }
        }
    }
    private fun parseXMLWithSAX(xmlData: String){
        try {
            val factory = SAXParserFactory.newInstance()
            val xmlReader = factory.newSAXParser().xmlReader
            val handler=MyHandler()
            //将MyHandler的实例设置到XMLReader中
            xmlReader.contentHandler=handler
            //开始执行
            xmlReader.parse(InputSource(StringReader(xmlData)))
        }catch (e:Exception){
            e.printStackTrace()
        }
    }
    ...
5.解析JSON格式数据
首先我们在Apache\htdocs目录创建一个get_data.json的文件
[{"id":"5","version":"5.5","name":"Clash od Clans"},
{"id":"6","version":"7.0","name":"Boom Beach"},
{"id":"7","version":"3.5","name":"Clash Royale"}
]
5.1使用JSONObject
修改MainActivity中的代码
class MainActivity : AppCompatActivity() {

    override fun onCreate(savedInstanceState: Bundle?) {
        super.onCreate(savedInstanceState)
        setContentView(R.layout.activity_main)
        sendRequestBtn.setOnClickListener {
    sendRequestWithHttpURLConnection()
        }
    }
    private fun sendRequestWithHttpURLConnection(){
        //开启线程发起网络请求
        thread {
            try {
                val client =  OkHttpClient()

                val request = Request.Builder()
                    .url("http://10.0.2.2/get_data.json")
                    .build()
                val response = client.newCall(request).execute()
                val responseData = response.body?.string()
                if (responseData !=null){
                    showResponse(responseData)
                    parseJsonWithJSONObject(responseData)
                }
            }catch (e:Exception){
                e.printStackTrace()
            }finally {
            }
        }
    }
    private fun parseJsonWithJSONObject(jsonData:String){
        try {
            val jsonArray = JSONArray(jsonData)
            for (i in 0 until jsonArray.length()){
                val jsonObject = jsonArray.getJSONObject(i)
                val id=jsonObject.getString("id")
                val name=jsonObject.getString("name")
                val version=jsonObject.getString("version")
                Log.d("MainActivity","id is $id")
                Log.d("MainActivity","name is $name")
                Log.d("MainActivity","version is $version")
            }
        }catch (e:java.lang.Exception){
            e.printStackTrace()
        }
    }

...
}
5.2使用GSON
首先编辑aapp/build.graadle文件,在dependencies闭包中添加如下内容
dependencies{
  implementation 'com.google.code.gson:gson:2.8.5'
...
}
如果一段JSON格式的数据如下
{"name":"Tom","age":20}
定义一个Person,并加入name和age两个字段,如下代码将JSON数据解析成一个Person对象
val gson = Gson()
val person = gson.fromJson(jsonDaataa,Person::class.java)
如果需要解析一段JSON数组,会稍微麻烦一点
[{"name":"Tom","age":20},{"name":"Jack","age":25},{"name":"Lily","age":22}]
val typeOf = object : TypeToken<List<Person>>(){}.type
val people = gson.fromJson<List<Person>>(jsonData,typeOf)
最后修改MainActivity中的代码
 private fun sendRequestWithHttpURLConnection(){
        //开启线程发起网络请求
        thread {
            try {
                val client =  OkHttpClient()

                val request = Request.Builder()
                    .url("http://10.0.2.2/get_data.json")
                    .build()
                val response = client.newCall(request).execute()
                val responseData = response.body?.string()
                if (responseData !=null){
                    showResponse(responseData)
                    parseJSONWithGSON(responseData)
                }
            }catch (e:Exception){
                e.printStackTrace()
            }finally {
            }
        }
    }
    private fun parseJSONWithGSON(jsonData : String){
        val gson = Gson()
        val typeOf = object :TypeToken<List<App>>(){}.type
        val appList =gson.fromJson<List<App>>(jsonData,typeOf)
        for (app in appList){
            Log.d("MainActivity","id is ${app.id}")
            Log.d("MainActivity","name is ${app.name}")
            Log.d("MainActivity","version is ${app.version}")
        }
    }
6.网络请求回调的实现方式
我们应该及那个这些通用的网络操作提取到一个公共的类力,并提取一个通用的方法,当想要发起网络请求时,简单调用一下这个方法即可。
object HttpUtil{
    fun sendHttpRequest(adress:String) :String{
        var connection : HttpURLConnection? = null
        val response = StringBuilder()
        try {
            val url = URL(adress)
            connection=url.openConnection() as HttpURLConnection
            connection.connectTimeout=8000
            connection.readTimeout=8000
            val input = connection.inputStream
            val reader=BufferedReader(InputStreamReader(input))
            reader.use {
                reader.forEachLine {
                    response.append(it)
                }
            }
        }catch (e:Exception){
            e.printStackTrace()
        }finally {
            connection?.disconnect()
        }
        return response.toString()
    }
}
以后每当需要发起一条HTTP请求的时候
val address = "https://www.baidu.com"
val response = HttpUtill.sendHttpRequest(address)
但是网络请求是耗时操作,sendHttpRequest()没有开启线程
如何使用回调机制
1.首先定义一个接口,将它命名成HttpCallbackListener
interface HttpCallbackListener{
	fun onFinish(response:String)
	fun onError(e:Exception)
}
onFinish()方法表示当服务器成功响应我们请求时候调用,onError()表示镜像网络操作出现错误时候调用
修改HttpUtil中的代码
object HttpUtil{
    fun sendHttpRequest(adress:String,listener:HttpCallbackListener) {
        Log.d("HttpUtil","已经执行")
        thread{
            Log.d("HttpUtil","进入线程")
            val response = StringBuilder()
            var connection : HttpURLConnection? = null
        try {
            val url = URL(adress)
            connection=url.openConnection() as HttpURLConnection
            connection.connectTimeout=8000
            connection.readTimeout=8000
            val input = connection.inputStream
            val reader=BufferedReader(InputStreamReader(input))
            reader.use {
                reader.forEachLine {
                    response.append(it)
                }
            }
            //回调onFinish()方法

            listener.onFinish(response.toString())
        }catch (e:Exception){
            e.printStackTrace()
            //回调onError()方法
            listener.onError(e)
        }finally {
            connection?.disconnect()
        }
    }

    }
}
再修改MainActivity中的代码,添加如下代码
 HttpUtil.sendHttpRequest("http://10.0.2.2/get_data.json",object:HttpCallbackListener{
                     override fun onFinish(response: String) {
                         //得到服务器返回的具体内容
                         showResponse(response)
                         parseJSONWithGSON(response)
                     }

                     override fun onError(e: java.lang.Exception) {
                        //在这里对异常情况进行处理
                         e.printStackTrace()
                     }
                 })
6.1Retrofit基本用法
首先我们需要在项目中添加必要的依赖库
dependencies {
 implementation 'com.squareup.retrofit2:retrofit:2.6.1'
  implementation 'com.squareup.retrofit2:converter-gson:2.6.1'
}
接下来我们需要新增一个APP类
class App (val id:String,val name:String,val version:String)
接下来我们可以根据服务器接口的功能进行归类,创建不同种类的接口文件,并在其中定义对应具体服务器接口的方法。
interface AppService {
    @GET("get_data.json")
    fun getAppData(): Call<List<App>>
}
在MainActivity中添加代码
   getAppDataBtn.setOnClickListener {
        val retrofit = Retrofit.Builder()
            .baseUrl("http://10.0.2.2/")
            .addConverterFactory(GsonConverterFactory.create())
            .build()
         val appService=retrofit.create(AppService::class.java)
         appService.getAppData().enqueue(object :Callback<List<App>>{
             override fun onResponse(p0: Call<List<App>>, p1: Response<List<App>>) {
                 val list=p1.body()
                 if(list!=null){
                     for (app in list){
                         Log.d("MainActivity","id is ${app.id}")
                         Log.d("MainActivity","name is ${app.name}")
                         Log.d("MainActivity","version is ${app.version}")
                     }
                 }

             }

             override fun onFailure(p0: Call<List<App>>, p1: Throwable) {
                 p1.printStackTrace()
             }
         })
        }
当调用了AppService的getAppData()方法时,会返回一个Call<List< App>>对象,这时我们再调用一下它的enqueue()方法,Retrofit就会根据注解中配置的服务器接口地址去进行网络请求。
注意,当发起请求的时候,Retrofit会自动在内部开启子线程,当数据回到Callback中之后,Retrofit又会自动切换回主线程,整个过程我们不需要考虑线程切换的问题
6.2处理复杂的接口地址类型
为方便先定义一个Data类,并包含id和content这两个字段如下
class Data(val id : String,val content : String)
1.在很多场景下,接口地址中的部分内容可能时动态变化的,比如
GET http://example.com/<page>/get_data.json
interface ExampleService {
    @GET("{page}get_data.json")
    fun getData(@Path("page") page: Int): Call<Data>
}
2.很多服务器要求我们传入一系列参数
GET http://example.com/get_data.json?u=<user>&t=<token>
interface ExampleService {
    @GET("get_data.json")
    fun getData(@Query("u") user:String,@Quert("t") token:String): Call<Data>
}
HTTP不仅只有GET这一种请求方式,常见的又GET,POST,PUT,PATCH,DELETE这几种
1.比如根据id删除一条指定的数据
DELETE http://example.com/data/<id>
interface ExampleService {
    @DELETE("data/{id}")
    fun deleteData(@Path("id") id : String): Call<ResponseBody>
}
2.使用POST请求来提交数据,将数据放在HTTP请求的body部分,借助Retrofit中@Body注解来完成
POST http://example.com/data/create
{"id" : 1,"content" : "The description for this data."}
interface ExampleService {
    @DELETE("data/create")
    fun createData(@Body data : Data): Call<ResponseBody>
}
最后有些服务器接口还需要我们在HTTP请求的header中指定参数
GET http://example.com/get_data.json
User-Agent:okhttp
Cache-Control : max-age=0
我们可以在Retrofit中直接使用@Headers注解来对他们进行声明(静态header声明)
interface ExampleService {
	@Headers("User-Agent : okhttp","Cache-Control : max-age=0")
    @GET("get_data.json")
    fun getData() : Call<Data>
}
动态指定header的值,则需要使用@Header
interface ExampleService {
    @GET("get_data.json")
    fun getData(@Header("User-Agent") userAgent : String,@Header("Cache-Control") cacheControl : String) : Call<Data>
}
6.3Retrofit构建器的最佳写法
新建一个ServiceCreator单例类
object ServiceCreator {
    private const val BASE_URL = "http://10.0.2.2/"

    private val retrofit = Retrofit.Builder()
        .baseUrl(BASE_URL)
        .addConverterFactory(GsonConverterFactory.create())
        .build()

    fun <T> create(serviceClass: Class<T>) : T= retrofit.create(serviceClass)
}
经过这样的封装后,我们可以这样获取一个AppService接口的动态代理对象
val appService = ServiceCreator.create(AppService::class.java)
还可以继续优化一些(根据上一节泛型实体化)
object ServiceCreator{
	...
	inline fun <reified T> create() : T = create(T::class.java)
}
val appService = ServiceCreator.create<Appservice>()
Kotlin协程编写高效的并发程序
1.协程的基本用法
首先在app.build.gradle中添加如下依赖库
dependencies{
...
implementation "org.jetbrains.kotlinx:kotlinx-coroutines-core:1.1.1"
implementation "org.jetbrains.kotlinx:kotlinx-coroutines-android:1.1.1"
}
第二个依赖库是在Android项目中才会用到
接下来创建一个CoroutinesTest.kt文件,并定义一个main()函数
fun main(){
	GlobalScope.launch{
	println("codes run in coroutine scope")
	}
}
GlobaalScope.launch函数每次创建都是一个顶层协议
delay()函数可以让当前协程延迟指定时间后再运行,但它和Tread.sleep()方法不同。delay()函数是一个非阻塞式挂起函数,它只会挂起当前协程并不会影响其他协程的运行。
2.让应用程序在协程中所有代码都运行完之后再结束(借助runBlocking函数实现这个功能)
fun main(){
	runBlocking{
	println("codes run in coroutine scope")
	delay(1500)
	println("codes run in coroutine scope finished")
}
}
runBlocking函数通常只应该在测试环境下使用,在正式环境中使用容易产生一些性能上的问题
创建多个协程只需要使用launch函数就可以了
fun main(){
	runBlocking{
	launch{
	println("lauch1")
	delay(1500)
	println("lauch1 finished")
				}
	launch{
	println("lauch2")
	delay(1500)
	println("lauch2 finished")
				}
}
}
3.kotlin提供了一个suspend关键字,使用它可以将任意函数声明成挂起函数,挂起函数之间可以互相调用
suspend fun printDot(){
	println(".")
	delay(1000)
}
在任何其他挂起函数中调用coroutineScope函数.它的特点式会继承外部的协程作用于并创建一个子作用域。
suspend fun printDot() = coroutineScope{
	launch{
	println(".")
	delay(1000)
	}
}
coroutineScope函数只会阻塞当前协程,既不影响其他协程,也不影响任何线程,因此不会造成任何性能上的问题。而runBlocking函数会阻塞当前线程,如果在主线程中调用了它的话,可能会导致界面卡死的情况
4.更多的作用域构建器
不管GlobalScope.launch函数还是launch函数,他们都会返回一个Job对象,只需要调用Job对象的cancel()方法就可以取消协程
val job=GlobalScope.launch{
	//处理具体的逻辑
}
job.cancel()
项目中常用的写法:
val job = Job()
val scope = CoroutineScope(job)
scope.launch{
	//处理具体逻辑
	}
job.cancel()
}
async函数必须在协程作用域当中才能调用,他会创建一个新的子协程并返回一个Defered对象。如果我们想获取async函数代码块的执行结果,只需要调用Deferred对象的await()
fun main(){
	runBlocking{
	val result = async{
	5+5
}.await()
println(result)
}

}
两个async函数完全可以同时执行从而提高运行效率
fun main(){
	runBlocking{
		val deferred1 =async{
		delay(1000)
		5+5
		}
		val deferred2=async{
		delay(1000)
		4+6
		}
		println("result is ${deferred1.await() + deferred2.await()}.")
}

}
一个比较特殊的作用域构建器:withContext()函数。withContext()函数是一个挂起函数,大体可以理解成async函数的一种简化版写法
fun main(){
	runBlocking{
	va; result = withContext(Dispatchers.Default){
5+5
	}
	println(result)
}
}
线程参数主要有以下3种可选:Dispatchers.Default,Dispatchers.IO和Dispatchers.Main。
Dispatchers.Default表示会使用一种默认低并发的线程策略
Dispatchers.IO表示会使用一种高并发的线程策略
Dispatchers.Main表示不会开启子线程,而是在Android主线程种执行代码,只能在Android项目中使用
5.使用协程简化回调的写法
回调机制基本上是依靠匿名类来实现的,但匿名类的写法比较繁琐
suspendCoroutine函数必须在协程作用域或挂起函数种才能调用。它接收一个Lambda表示式参数,主要作用是将当前协程立即挂起,然后在普通的线程中执行。
suspend fun request(address : String) : String{
	return suspendCoroutine { continuation ->
	HttpUtil.sendHttpRequest(address,object : HttpCallbackListener{
		override fun onFinish(response : String){
		continuation.resume(response)
	}
		override fun onError(e:Exception){
		continuation.resumeWithException(e)
	}
	})
	}
}
HttpUtil.sendCoroutine方法发起网络请求,并通过回调的方式监听请求结果。如果成功就调用Continuation函数的返回值。如果请求失败就调用Continuation的resumeWithException()恢复被挂起的协程。
suspend fun getBaiduResponse(){
	try{
		val response = request("https://www.baidu.com")
		//对服务器响应的数据进行处理
	}catch(e : Exception){
		//对异常情况进行处理
	}
}
简化Retrofit来发起网络请求
	suspend fun<T> Call <T>.await(): T{
	return suspendCoroutine{ continuation ->
		enqueue(object : Callback<T> {
			val body = response.body()
			if(body != null) continuation.resume(body)
			else continuation.resumeWithException(
				RuntimeException("response body is null"))
		}
		override fun onFailure(call : Call<T>, t : Throwable){
			continuation.resumeWithException(t)
	}
	})
	}
}
有了await()函数以后,我们调用所有Retrofit的Service接口都会变得极其简单
suspend fun getAppData(){
	try{
	val appList = ServiceCreator.create<AppService>().getAppData().await()
	//对服务器响应的数据进行处理
	}catch(e : Exception){
	//对异常情况进行处理
	}
}


 463
463

 被折叠的 条评论
为什么被折叠?
被折叠的 条评论
为什么被折叠?
 到【灌水乐园】发言


