


 本文详细介绍ElasticSearch(ES)的入门知识及如何与SpringBoot框架结合使用,包括全文检索概念、ES安装步骤、常见错误处理及配置远程连接权限等关键信息。
ES(Elastic Search)入门和springboot结合
ES(Elastic Search)入门和springboot结合
带你熟悉和了解ES 和结合SpringBoot来编写demo
1、ES入门
1、全文检索概念和ES基本介绍
-
全文检索:计算机程序通过扫描,对每个词建立一个索引,指明该词在文章中出现的次数和位置,当用户查询时,根据索引去查,类似字典的检索字表查字的过程
-
全文检索和数据库检索区别
全文:效率高于数据库、搜索结果存在相关度排序、不区分大小写
2、安装
2.1、下载ES,
各版本集合:
https://www.elastic.co/cn/downloads/past-releases#elasticsearch
7-4-2:
https://www.elastic.co/cn/downloads/past-releases/elasticsearch-7-4-2
linux:
https://artifacts.elastic.co/downloads/elasticsearch/elasticsearch-7.4.2-linux-x86_64.tar.gz
2.2、创建用户》上传》安装
创建用户 之后再上传和解压
groupadd es
创建cxq用户到 es组下
useradd cxq -g es
==修改密码:cxq ==
passwd cxq
使用普通用户登录:
tar -zxvf elasticsearch-7.4.2-linux-x86_64.tar.gz
2.3、启动
./elasticsearch
出现: Security is disabled 启动成功
报错:can not run elasticsearch as root ES默认不能用root用户》》参考上面提到的创建用户要用cxq(普通用户来启动)
2.4、验证:
curl localhost:9200
2.5、ES开启远程连接权限:
修改配置文件:elasticsearch.yml 修改如下配置: 注意格式空格
network.host: 0.0.0.0
2.6、启动报错处理:
修改配置记得切换到root
ERROR: [3] bootstrap checks failed
报错[1]: max file descriptors [4096] for elasticsearch process is too low, increase to at least [65535]
处理方法:
vim /etc/security/limits.conf
在后面追加如下内容,修改系统配置:
* soft nofile 65536
* hard nofile 65536
* soft nproc 4096
* hard nproc 4096
退出当前所有用户,重新登陆 验证:
[root@localhost ~]# ulimit -Hn
65536
[root@localhost ~]# ulimit -Hu
4096
[root@localhost ~]# ulimit -Su
4096
[root@localhost ~]# ulimit -Sn
65536
报错[2]: max virtual memory areas vm.max_map_count [65530] is too low, increase to at least [262144]
处理方法:
修改:vim /etc/security/limits.d/20-nproc.conf
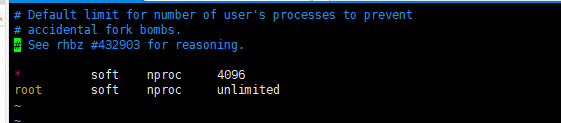
修改为启动ES的用户名:

报错[3]: the default discovery settings are unsuitable for production use; at least one of [discovery.seed_hosts, discovery.seed_providers, cluster.initial_master_nodes] must be configured
解决方法:
修改:追加:
vm.max_map_count=655360
保存退出后执行:
sysctl -p
重新启动ES
报错:ERROR: [4] bootstrap checks failed
[1]: the default discovery settings are unsuitable for production use; at least one of [discovery.seed_hosts, discovery.seed_providers, cluster.initial_master_nodes] must be configured
解决方法:
cd ..
cd config
vim elasticsearch.yml
# Use a descriptive name for the node:
#
node.name: node-1
# Bootstrap the cluster using an initial set of master-eligible nodes:
#
cluster.initial_master_nodes: ["node-1"]
注意空格
重新启动ES :Security is disabled 成功
浏览器输入:http://服务器IP:9200/


 1886
1886

 被折叠的 条评论
为什么被折叠?
被折叠的 条评论
为什么被折叠?
 到【灌水乐园】发言


