 SpringBoot整合JDBC与Druid数据源配置


 本文介绍了如何在SpringBoot项目中整合JDBC,并详细讲述了配置Druid数据源的步骤,包括导入相关依赖、配置属性,以及设置Druid监控过滤器。
1、导入mysql和JDBC的依赖
<dependency>
    <groupId>org.springframework.boot</groupId>
    <artifactId>spring-boot-starter-data-jdbc</artifactId>
</dependency>
<dependency>
    <groupId>mysql</groupId>
    <artifactId>mysql-connector-java</artifactId>
    <scope>runtime</scope>
</dependency>
2、在配置文件中配置相关属性
具体实现类:

@ConfigurationProperties(prefix = "spring.datasource")
public class DataSourceProperties
      implements BeanClassLoaderAware, EnvironmentAware, InitializingBean {

   private ClassLoader classLoader;

   private Environment environment;

   /**
    * Name of the datasource.
    */
   private String name = "testdb";

   /**
    * Generate a random datasource name.
    */
   private boolean generateUniqueName;

   /**
    * Fully qualified name of the connection pool implementation to use. By default, it
    * is auto-detected from the classpath.
    */
   private Class<? extends DataSource> type;

   /**
    * Fully qualified name of the JDBC driver. Auto-detected based on the URL by default.
    */
   private String driverClassName;

   /**
    * JDBC url of the database.
    */
   private String url;

   /**
    * Login user of the database.
    */
   private String username;

   /**
    * Login password of the database.
    */
   private String password;
SpringBoot自动配置类DataSourceAutoConfiguration,在启动时可以执行schema文件和sql
@Configuration
@ConditionalOnClass({ DataSource.class, EmbeddedDatabaseType.class })
@EnableConfigurationProperties(DataSourceProperties.class)
@Import({ Registrar.class, DataSourcePoolMetadataProvidersConfiguration.class })
public class DataSourceAutoConfiguration {

   private static final Log logger = LogFactory
         .getLog(DataSourceAutoConfiguration.class);

   @Bean
   @ConditionalOnMissingBean
   public DataSourceInitializer dataSourceInitializer(DataSourceProperties properties,
         ApplicationContext applicationContext) {
      return new DataSourceInitializer(properties, applicationContext);
   }
* Bean to handle {@link DataSource} initialization by running {@literal schema-*.sql} on
* {@link PostConstruct} and {@literal data-*.sql} SQL scripts on a
* {@link DataSourceInitializedEvent}.

*
 * @author Dave Syer
 * @author Phillip Webb
 * @author Eddú Meléndez
 * @author Stephane Nicoll
 * @author Kazuki Shimizu
 * @since 1.1.0
 * @see DataSourceAutoConfiguration
 */
class DataSourceInitializer implements ApplicationListener<DataSourceInitializedEvent> {
默认情况下,只要将sql文件按照其要求的命名方式schema-.sql(建表的sql),data-.sql(插入数据的sql文件)类路径下即可。
private void runSchemaScripts() {
   List<Resource> scripts = getScripts("spring.datasource.schema",
         this.properties.getSchema(), "schema");
   if (!scripts.isEmpty()) {
      String username = this.properties.getSchemaUsername();
      String password = this.properties.getSchemaPassword();
      runScripts(scripts, username, password);
      try {
         this.applicationContext
               .publishEvent(new DataSourceInitializedEvent(this.dataSource));
         // The listener might not be registered yet, so don't rely on it.
         if (!this.initialized) {
            runDataScripts();
            this.initialized = true;
         }
      }
      catch (IllegalStateException ex) {
         logger.warn("Could not send event to complete DataSource initialization ("
               + ex.getMessage() + ")");
      }
   }
}

private void runDataScripts() {
   List<Resource> scripts = getScripts("spring.datasource.data",
         this.properties.getData(), "data");
   String username = this.properties.getDataUsername();
   String password = this.properties.getDataPassword();
   runScripts(scripts, username, password);
}

private List<Resource> getScripts(String propertyName, List<String> resources,
      String fallback) {
   if (resources != null) {
      return getResources(propertyName, resources, true);
   }
   String platform = this.properties.getPlatform();
   List<String> fallbackResources = new ArrayList<String>();
   fallbackResources.add("classpath*:" + fallback + "-" + platform + ".sql");
   fallbackResources.add("classpath*:" + fallback + ".sql");
   return getResources(propertyName, fallbackResources, false);
}
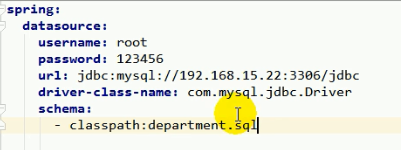
也可以自己指定,从properties中的schema属性中获取,是list类型,所以配置要符合list的形式。
使用druid数据源
引入依赖
<dependency>
    <groupId>com.alibaba</groupId>
    <artifactId>druid</artifactId>
    <version>1.1.19</version>
</dependency>
配置文件中的属性spring.datasource.type指定数据源的全类名
spring.datasource.type=com.alibaba.druid.pool.DruidDataSource
除了配置默认的spring.datasource的属性外,还可以添加一些druid自己的属性,由于没有对应默认Properties中的属性,需要自己创建druid的数据源
spring:
  datasource:
      type: com.alibaba.druid.pool.DruidDataSource
      driverClassName: com.mysql.jdbc.Driver
      url: jdbc:mysql://localhost:3306/bidb?useUnicode=true&characterEncoding=utf8
      username: root
      password: root
      initialSize: 1
      minIdle: 3
      maxActive: 20
      # 配置获取连接等待超时的时间
      maxWait: 60000
      # 配置间隔多久才进行一次检测,检测需要关闭的空闲连接,单位是毫秒
      timeBetweenEvictionRunsMillis: 60000
      # 配置一个连接在池中最小生存的时间,单位是毫秒
      minEvictableIdleTimeMillis: 30000
      validationQuery: select 'x'
      testWhileIdle: true
      testOnBorrow: false
      testOnReturn: false
      # 打开PSCache,并且指定每个连接上PSCache的大小
      poolPreparedStatements: true
      maxPoolPreparedStatementPerConnectionSize: 20
      # 配置监控统计拦截的filters,去掉后监控界面sql无法统计,'wall'用于防火墙
      filters: stat,wall,slf4j
      # 通过connectProperties属性来打开mergeSql功能;慢SQL记录
      connectionProperties: druid.stat.mergeSql=true;druid.stat.slowSqlMillis=5000
创建数据源配置类
@Configuration
public class DruidDBConfig {
    private Logger logger = LoggerFactory.getLogger(DruidDBConfig.class);
    @Value("${spring.datasource.url}")
    private String dbUrl;

    @Value("${spring.datasource.username}")
    private String username;

    @Value("${spring.datasource.password}")
    private String password;

    @Value("${spring.datasource.driverClassName}")
    private String driverClassName;

    @Value("${spring.datasource.initialSize}")
    private int initialSize;

    @Value("${spring.datasource.minIdle}")
    private int minIdle;

    @Value("${spring.datasource.maxActive}")
    private int maxActive;

    @Value("${spring.datasource.maxWait}")
    private int maxWait;

    @Value("${spring.datasource.timeBetweenEvictionRunsMillis}")
    private int timeBetweenEvictionRunsMillis;

    @Value("${spring.datasource.minEvictableIdleTimeMillis}")
    private int minEvictableIdleTimeMillis;

    @Value("${spring.datasource.validationQuery}")
    private String validationQuery;

    @Value("${spring.datasource.testWhileIdle}")
    private boolean testWhileIdle;

    @Value("${spring.datasource.testOnBorrow}")
    private boolean testOnBorrow;

    @Value("${spring.datasource.testOnReturn}")
    private boolean testOnReturn;

    @Value("${spring.datasource.poolPreparedStatements}")
    private boolean poolPreparedStatements;

    @Value("${spring.datasource.maxPoolPreparedStatementPerConnectionSize}")
    private int maxPoolPreparedStatementPerConnectionSize;

    @Value("${spring.datasource.filters}")
    private String filters;

    @Value("{spring.datasource.connectionProperties}")
    private String connectionProperties;

    @Bean(initMethod = "init", destroyMethod = "close")   //声明其为Bean实例
    @Primary  //在同样的DataSource中,首先使用被标注的DataSource
    public DataSource dataSource() {
        DruidDataSource datasource = new DruidDataSource();

        datasource.setUrl(this.dbUrl);
        datasource.setUsername(username);
        datasource.setPassword(password);
        datasource.setDriverClassName(driverClassName);

        //configuration
        datasource.setInitialSize(initialSize);
        datasource.setMinIdle(minIdle);
        datasource.setMaxActive(maxActive);
        datasource.setMaxWait(maxWait);
        datasource.setTimeBetweenEvictionRunsMillis(timeBetweenEvictionRunsMillis);
        datasource.setMinEvictableIdleTimeMillis(minEvictableIdleTimeMillis);
        datasource.setValidationQuery(validationQuery);
        datasource.setTestWhileIdle(testWhileIdle);
        datasource.setTestOnBorrow(testOnBorrow);
        datasource.setTestOnReturn(testOnReturn);
        datasource.setPoolPreparedStatements(poolPreparedStatements);
        datasource.setMaxPoolPreparedStatementPerConnectionSize(maxPoolPreparedStatementPerConnectionSize);
        try {
            datasource.setFilters(filters);
        } catch (SQLException e) {
            logger.error("druid configuration initialization filter", e);
        }
        datasource.setConnectionProperties(connectionProperties);

        return datasource;
    }
配置druid监控
    @Bean
    public ServletRegistrationBean druidServlet() {
        ServletRegistrationBean reg = new ServletRegistrationBean();
        reg.setServlet(new StatViewServlet());
        reg.addUrlMappings("/druid/*");
        reg.addInitParameter("allow", ""); //白名单,允许所有
        return reg;
    }
配置druid监控的Filter
    @Bean public FilterRegistrationBean filterRegistrationBean() {
        FilterRegistrationBean filterRegistrationBean = new FilterRegistrationBean();
        filterRegistrationBean.setFilter(new WebStatFilter());
        filterRegistrationBean.addUrlPatterns("/*");
        filterRegistrationBean.addInitParameter("exclusions", "*.js,*.gif,*.jpg,*.png,*.css,*.ico,/druid/*");
        filterRegistrationBean.addInitParameter("profileEnable", "true");
        filterRegistrationBean.addInitParameter("principalCookieName","USER_COOKIE");
        filterRegistrationBean.addInitParameter("principalSessionName","USER_SESSION");
        filterRegistrationBean.addInitParameter("DruidWebStatFilter","/*");
        return filterRegistrationBean;
    }


 1712
1712

 被折叠的 条评论
为什么被折叠?
被折叠的 条评论
为什么被折叠?
 到【灌水乐园】发言


