


 本文介绍了Spring框架的IOC(控制反转)和DI(依赖注入)概念,阐述了如何通过XML配置Bean。Spring提供了BeanFactory和ApplicationContext两种IOC容器,以及ClassPathXmlApplicationContext和FileSystemXmlApplicationContext等实现。依赖注入可通过属性注入、构造器注入和工厂方法注入等方式实现。此外,文章还讨论了Bean自动装配、Bean的关系、作用域、外部文件配置以及Spring表达式语言(SpEL)的应用。
IOC:其思想是反转资源获取的方向,传统的资源查找方式要求组件向容器发起请求查找资源,作为回应,容器适时的返回资源。而应用了IOC之后,则是容器主动的将资源推送给它所管理的组件,组件所要做的仅是选择一种合适的方式来接受资源,这种行为也被称为查找的被动形式。
DI:IOC的另外一种表述方式,即组件以一些预先定义好的方式(例如:setter方法)接受来自容器的资源注入,相对于IOC而言,这种表述更直接。
基于XML文件的形式
class:bean的全类名,通过反射的方式在IOC容器中创建Bean,所以要求Bean中必须有无参构造器
id:标识容器中的bean.id ,是唯一的


  	<bean id="helloWorld" class="com.cmzy.spring.pojo.HelloWorld">
		<property name="name" value="world"/>
	</bean>
在Spring IOC容器读取Bean配置创建Bean实例之前,必须对它进行实例化,只有在容器实例化之后,才可以从IOC容器里获取Bean实例并使用。
Spring提供了两种类型的IOC容器实现
BeanFactory:IOC容器的基本实现,是Spring框架的基础设施,面向的是Spring本身
ApplicationContext:提供了更多的高级特性,是BeanFactory的子接口。面向使用Spring框架的开发者,几乎所有的应用场合都直接使用ApplicationContext而非更底层的BeanFactory
两种方式无论使用何种,其配置文件都是相同的。
ApplicationContext的主要实现类:
ClassPathXmlApplicationContext:从类路径下加载配置文件
FileSystemXmlApplicationContext:从文件系统中加载配置文件

ConfigurableApplicationContext扩展与ApplicationContext,新增了两个主要的方法refresh()和close(),让ApplicationContext具有启动、刷新、和关闭上下文的能力。
ApplicationContext在初始化上下文时就实例化所有的单例Bean。
WebApplicationContext是专门为WEB应用而准备的,它允许从相对于WEB根目录的路径完成初始化工作。
依赖注入的方式:
属性注入
构造器注入
工厂方法注入(很少使用,不推荐)
属性注入:
通过setter方法注入Bean的属性值或依赖的对象,属性注入使用标签,name属性指定Bean的属性名称,value属性或子节点指定属性值。
<bean id="helloWorld" class="com.cmzy.spring.pojo.HelloWorld">
		<property name="name">
			<value>world</value>
		</property>
	</bean>
构造方法注入:
通过构造方法注入bean的属性值或依赖的对象,它保证了Bean实例在初始化后就可以使用,构造器注入在元素里声明属性。使用构造器注入属性值可以指定参数的位置和参数的类型,以区分重载的构造器
	<bean id="helloWorld1" class="com.cmzy.spring.pojo.HelloWorld">
		<constructor-arg>
			<value><!CDATA[world~<>Test]</value>
		</constructor-arg>
		<constructor-arg value="male"></constructor-arg>
	</bean>
字面值:可以用字符串表示的值,可以同构标签或value属性进行注入。
基本数据类型及其封装类、String等类型都可以采取字面值注入的方式
若字面值中包含特殊的字符,可以使用<![CDATA[]]>把字面值包裹起来。
可以使用property的ref属性建立bean之间的引用关系,也可以使用标签
<property name="对应JavaBean属性" ref="引用Bean的ID"></property>
可以使用内部Bean,无需写id,不能被外部所引用,其他的使用跟外部Bean没有区别
<property name="car">
    <bean class="car类的全类名"></bean>
</property>
对象赋值为null ,为
级联属性赋值,级联属性赋值需要先将级联的对象先初始化,不然是null,会初始化失败。
<property name="car.maxSpeed" value="250"></property>
集合属性:
使用list标签
<property name="cars">
    <list>
        <ref bean="car"/>
        <bean class="com.cmzy.spring.pojo.Car">
        	<property name="name" value="dazhong"></property>
        	<property name="price" value="2000"></property>
        	<property name="maxSpeed" value="260"></property>
        </bean>
        <ref bean="car1"/>
    </list>
</property>

//使用map标签
<property name="mapCars">
    <map>
        <entry key="aodi" value-ref="car"></entry>
        <entry key="dazhong">
        	<bean class="com.cmzy.spring.pojo.Car">
        		<property name="name" value="dazhong"></property>
        		<property name="price" value="2000"></property>
        		<property name="maxSpeed" value="260"></property>
        	</bean>
        </entry>
        <entry key="baoma" value-ref="car1"></entry>
    </map>
</property>
上面的集合配置都是配置在单个Bean中的,如果想要将集合配置单独配置,以供其他Bean调用。
首先需要添加util命名空间
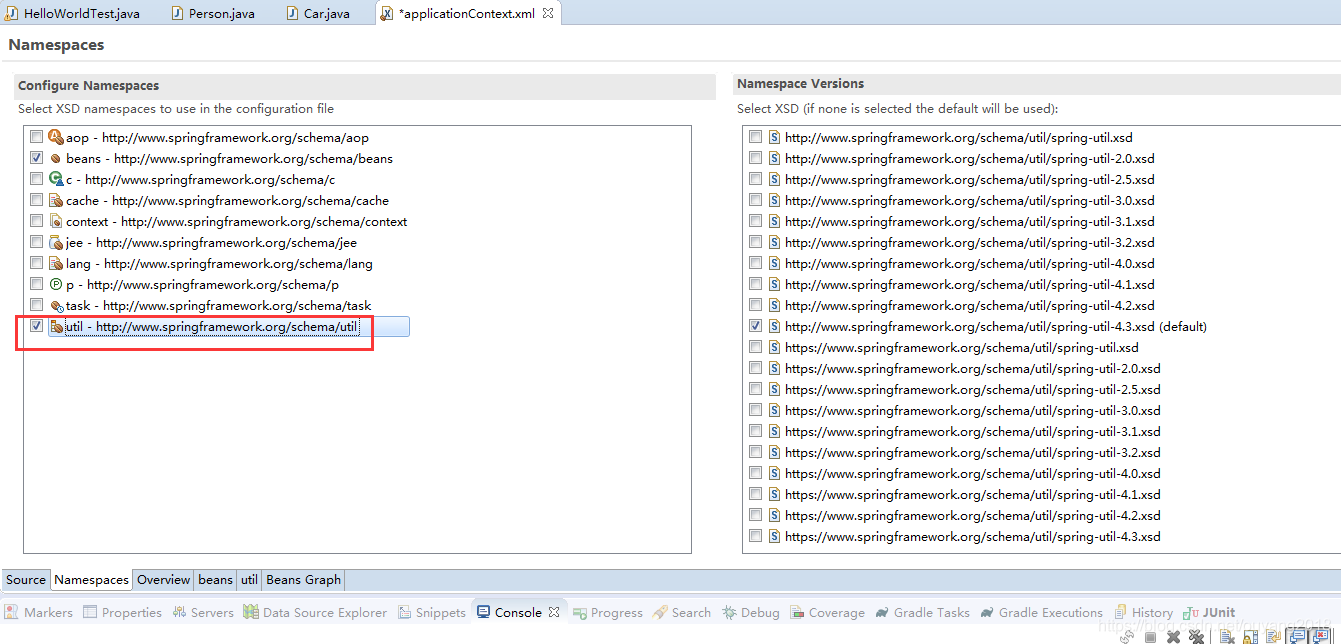
接着使用util标签
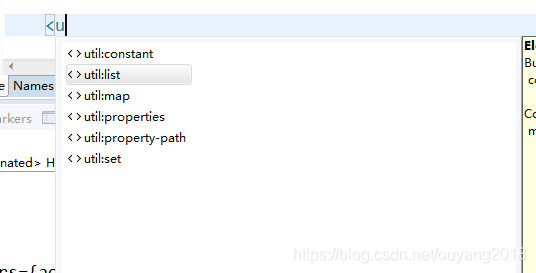
<util:list id="listCars">
		<ref bean="car"/>
		<bean class="com.cmzy.spring.pojo.Car">
			<property name="name" value="dazhong"></property>
			<property name="price" value="2000"></property>
			<property name="maxSpeed" value="260"></property>
		</bean>
		<ref bean="car1"/>
</util:list>
然后在需要引用的Bean中引用该集合
<property name="cars" ref="listCars"></property>
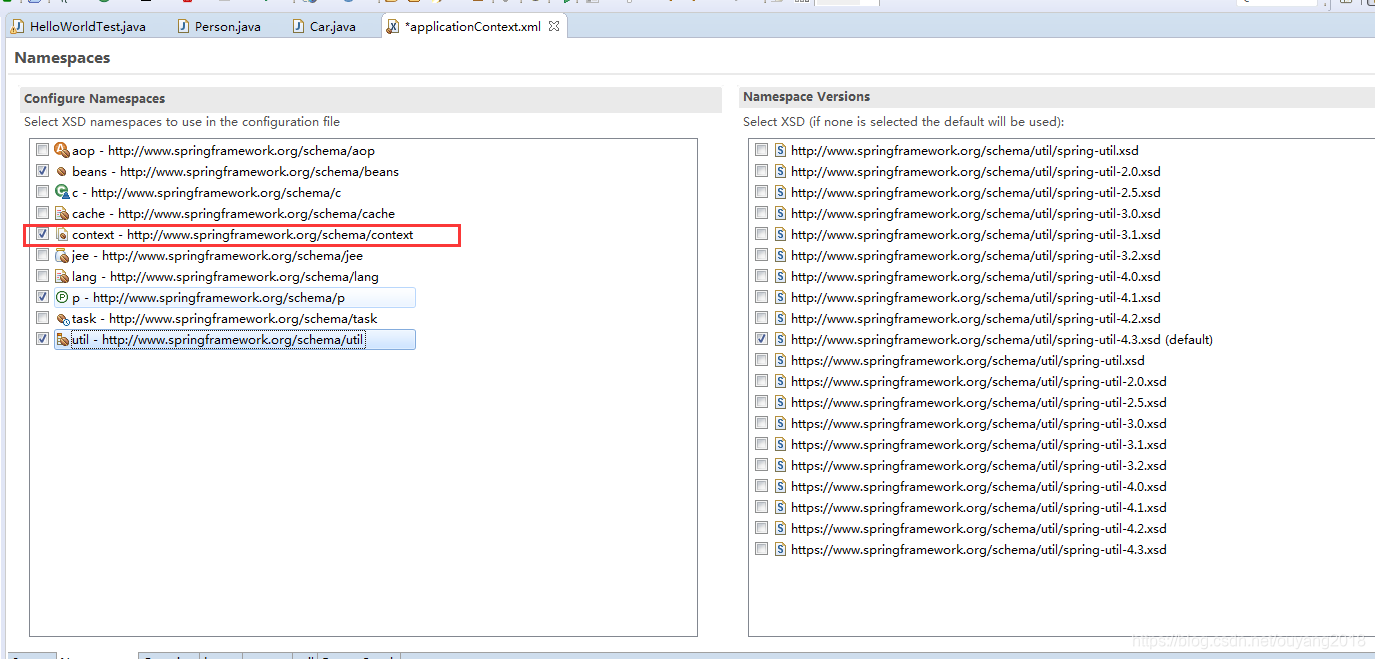
为了简化XML文件的配置,可以使用p命名空间,需要先导入p命名空间
<bean id="car2" class="com.cmzy.spring.pojo.Car" p:name="sangtana" p:price="1000" p:maxSpeed="200"/>
Bean自动装配(XML配置)
Spring IOC容器可以自动装配Bean,配置做的仅仅是在的autowire属性里指定自动装配模式
byType:根据类型自动装配,若IOC容器中有多个与目标Bean类型一致的Bean,在这种情况下,Spring将无法判定哪个Bean最合适该属性,所以不能执行自动装配。
//如果设置是byType的自动注入,那么得确保配置的Bean只有一个类型与之匹配的Bean,不然会报错。
<bean id="carAutowireTest" name="carAutowire"  class="com.cmzy.spring.pojo.Car" p:name="测试车" p:price="1000" p:maxSpeed="200"></bean>
<bean id="personAutowire" class="com.cmzy.spring.pojo.Person" p:name="测试人" autowire="byType"></bean>
byName:根据名称自动装配,必须将目标Bean的名称和属性名设置的完全相同。通过属性setter方法注入,如果Bean没有配置name属性,默认name属性和id属性一致。
//Person中有属性Car属性carAutowire,当使用autowire设置byName的时候,自动注入name是carAutowire的Bean

<bean id="carAuowireTest" name="carAutowire"  class="com.cmzy.spring.pojo.Car" p:name="测试车" p:price="1000" p:maxSpeed="200"></bean>
<bean id="personAutowire" class="com.cmzy.spring.pojo.Person" p:name="测试人" autowire="byName"></bean>
constructor:通过构造器自动装配,当Bean中存在多个构造器时,此种自动装配方式将会很复杂,不推荐使用。
xml配置下的自动装配缺点:
在Bean配置文件设置autowire属性会装配所有属性,不够灵活
autowire属性只能选择一种,要么是byType,要么是byName
一般在实际开发中很少使用在XMl配置的自动装配功能
Bean之间的关系:继承、依赖
Spring允许继承Bean的配置,被继承的Bean称为父Bean,继承的这个父Bean的Bean称为子Bean。
子Bean从父Bean中继承配置,包括Bean的属性配置,子Bean也可以覆盖从父Bean继承过来的配置。
父Bean可以作为模板,也可以作为Bean实例,如果是只作为模板,可以设置的abstract属性为true,这样Spring将不会实例化这个Bean。并不是元素里的所有属性都会被继承,比如autowire,abstract等。
如果Bean中的class属性没有指定,那么该Bean必须设置abstract为true,说明是一个抽象Bean
 <bean id="parentCar" class="com.cmzy.spring.pojo.Car" abstract="true" p:name="抽象车" p:price="100"></bean>
 <bean id="childCar" name="carAutowire" parent="parentCar" p:maxSpeed="100"></bean>
依赖:
Spring允许用户通过depends-on属性设定Bean的前置依赖Bean,前置依赖的Bean会在本Bean实例化之前创建好。如果前置依赖于多个Bean,则可以通过逗号或者空格的方式配置Bean的名称。
如果使用下面着这种方式,使用depends-on则说明该Bean依赖于carAutowire Bean,需要先定义,会先根据Id去寻找,如果Id没有找到,再会根据name去找。
<bean id="dependsonPerson" class="com.cmzy.spring.pojo.Person" p:name="测试人" depends-on="carAutowire"></bean>
Bean的作用域:
使用Bean的scope属性来配置Bean的作用域
singleton:默认值,容器初始化时创建bean实例,都是单例的,只会创建一个
prototype:容器初始化时并不会创建bean的实例,而是在每次请求使用时创建一个新的bean实例
request和session分别对应Request和Session作用域的Bean
使用外部文件:
Spring提供了一个PropertyPlaceHolderConfigurer的BeanFactory后置处理器,这个处理器允许用户将Bean配置的部分内容外移到属性文件中,可以在Bean配置文件里使用形式为var的变量,PropertyPlaceHolderConfigurer从属性文件里加载属性,并使用这些属性来替换变量。Spring还允许在属性文件中使用{var}的变量,PropertyPlaceHolderConfigurer从属性文件里加载属性,并使用这些属性来替换变量。Spring还允许在属性文件中使用var的变量,PropertyPlaceHolderConfigurer从属性文件里加载属性,并使用这些属性来替换变量。Spring还允许在属性文件中使用{propName},以实现属性之间的相互引用。
在Spring2.5之后,可以导入Context命名空间,使用context标签来导入外部的资源文件
<context:property-placeholder location="classpath:database.properties"/>
<bean id="database" class="c3p0的类">
    <property name="username" value="${username}"></property>
    <property name="password" value="${password}"></property>
</bean>
Spring表达式语言:SpELl
语法类似于EL表达式,使用#{…}作为定界符,所有在大括号中的字符都将被认为是SpEL。
通过SpELl可以实现:
通过Bean的id对Bean进行引用
调用方法以及引用对象中的属性
计算表达式的值
正则表达式匹配
//使用SpELl引用类的静态属性
<property name="mianji" value="#{T(java.lang.Math).PI * 80}"></property>
//使用SpEL来引用其他Bean
<property name="car" value="#{car}"></property>
//使用SpEL来引用其他Bean的属性
<property name="city" value="#{address.city}"></property>

//在SpELl中使用运算符
<property name="info" value="#{car.price >30000 ? '金领' : '白领'}"></property>
通过工厂静态方法创建Bean
调用静态工厂方法创建Bean是将对象的创建过程封装到静态方法中,当客户端需要对象时,只需要简单地调用静态方法。
要声明通过静态方法创建的Bean,需要在Bean的class属性里指定拥有该工厂方法的类名称,在factory-method属性里指定该静态工厂方法的名称,最后使用元素为该方法传递方法参数。
//定义静态工厂
public class StudentFactory {
	private static Student student;
	public static Student getStudent(String name) {
		System.out.println("*************name********"+name);
		if(student == null) {
			student = new Student();
		}
		return student;
	}
}

//配置bean
//class属性指向静态工厂的全类名
//factory-method:指定静态工厂方法的名字
//constructor-arg:如果工厂方法需要传入参数,则使用此标签指定
	<bean id="student" class="com.cmzy.spring.factory.StudentFactory" factory-method="getStudent" >
		<constructor-arg value="zhangsan"></constructor-arg>
	</bean>
通过实例工厂方法创建Bean
将对象的创建过程封装到另外的一个对象实例方法里,当客户端需要对象时,是调用实例方法
要声明通过实例工厂方法创建的Bean,在bean的factory-bean属性里指定拥有该工厂方法的Bean,在factory-method属性里指定该工厂方法的名称,使用元素为工厂方法传递方法参数。
public class StudentFactory {
	private Student student1;
	public StudentFactory() {

	}
	public Student getStudent1(String name) {
		System.out.println("*************name********"+name);
		if(student1 == null) {
			student1 = new Student();
			student1.setUsername(name);
			student1.setAge(20);
		}
		return student1;
	}
}

//使用指定的实例工厂,需要先初始化实例工厂,再初始化实例化对象
	<bean id="factory" class="com.cmzy.spring.factory.StudentFactory" ></bean>
//下面的class属性可以不设置
	<bean id="student1" class="com.cmzy.spring.pojo.Student" factory-bean="factory" factory-method="getStudent1">
		<constructor-arg value="lisi"></constructor-arg>
	</bean>
通过spring容器自带的FactoryBean实例化
实现FactoryBean接口,并实现其相应的方法,也可以在FactoryBean定义属性,在配置文件中使用property 赋值
配置Bean的实例化
public class FactoryBeanFactory implements FactoryBean<Student> {

    //在getObject中实现Bean的初始化
	public Student getObject() throws Exception {
		// TODO Auto-generated method stub
		Student student = new Student();
		student.setUsername("wangwu");
		student.setAge(100);
		return student;
	}

	public Class<?> getObjectType() {
		// TODO Auto-generated method stub
		return Student.class;
	}

	public boolean isSingleton() {
		// TODO Auto-generated method stub
		return true;
	}

}

//class属性指定FactoryBean
<bean id="student2" class="com.cmzy.spring.factory.FactoryBeanFactory"></bean>


 900
900

 被折叠的 条评论
为什么被折叠?
被折叠的 条评论
为什么被折叠?
 到【灌水乐园】发言


