


- 上传离线安装包
如下图:

- 解压离线安装包:tar xf mysql-5.7.22-1.el7.x86_64.rpm-bundle.tar
如下图: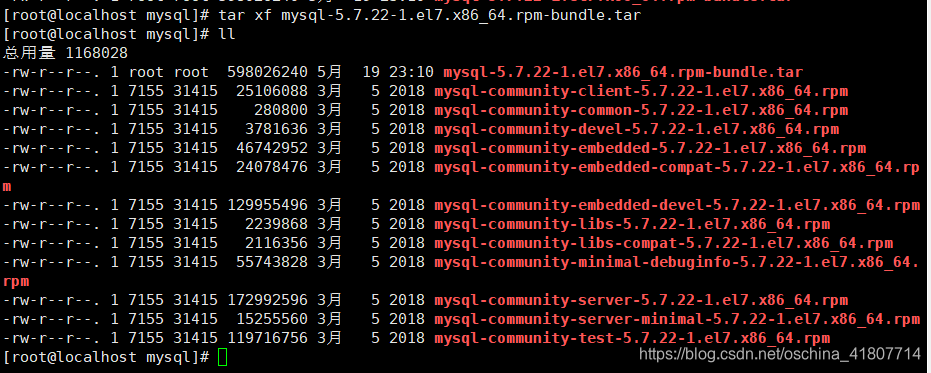
- 检索是否有多余mysql、mariadb包,进行卸载
检索 mariadb :rpm -qa |grep -i mariadb
检索 mysql:rpm -qa |grep -i mysql
卸载:rpm -e xxxxx --nodeps
如下图
- yum源配置:https://blog.youkuaiyun.com/oschina_41807714/article/details/117015018
- 用yum安装解压包(检查是否配置好yum源,需要在解压的文件目录之下进行操作)
yum -y localinstall mysql-community-client-5.7.22-1.el7.x86_64.rpm
mysql-community-server-5.7.22-1.el7.x86_64.rpm
mysql-community-common-5.7.22-1.el7.x86_64.rpm
mysql-community-libs-5.7.22-1.el7.x86_64.rpm
mysql-community-devel-5.7.22-1.el7.x86_64.rpm
mysql-community-embedded-5.7.22-1.el7.x86_64.rpm
mysql-community-embedded-compat-5.7.22-1.el7.x86_64.rpm
mysql-community-embedded-devel-5.7.22-1.el7.x86_64.rpm
- 删除配置文件 :rm -rf /etc/my.cnf
- 创建文件,给文件赋权
mkdir -p /data/mysqldb/{data,logs,bin_log}
chown mysql:mysql -R /data
chmod -R 755 /data
如下图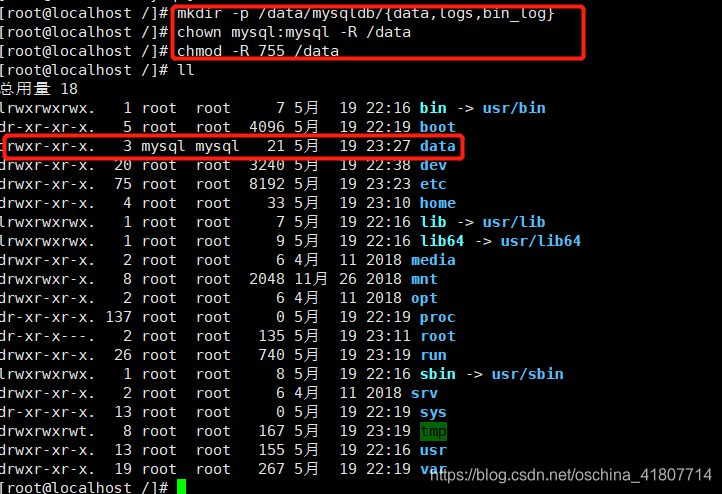
- 修改配置文件
vi /etc/my.cnf
如下图:

配置文件内容
[mysql]
socket=/data/mysqldb/mysql.sock
prompt=mysql[\d] >
no-auto-rehash
[mysqld]
user=mysql
port=13306
datadir=/data/mysqldb/data
socket=/data/mysqldb/mysql.sock
default_storage_engine=InnoDB
lower_case_table_names=1
max_allowed_packet=16M
#Disabling symbolic-links is recommended to prevent assorted security risks
symbolic-links=0
pid-file=/var/run/mysqld/mysqld.pid
#binlog
server-id=11
log-bin=/data/mysqldb/bin_log/mysql_bin
log-bin-index=/data/mysqldb/bin_log/mysql_bin.index
sync_binlog=0
max_binlog_size=200M
expire_logs_days=15
log-slave-updates=ON
relay-log = relay-bin
relay-log-index = slave-relay-bin.index
#auto_increment_increment=2 #步进值auto_imcrement。一般有n台主MySQL就填n
#auto_increment_offset=1 #起始值。一般填第n台主MySQL。此时为第一台主MySQL
#InnoDB
innodb_buffer_pool_size=8192M
innodb_log_file_size=48M
innodb_file_per_table=1
innodb_flush_method=O_DIRECT
##character-set
character-set-server=utf8
collation-server=utf8_general_ci
#name-reaolve
skip-host-cache
skip-name-resolve
#LOG
log-error=/data/mysqldb/logs/mysqld.log
#log_query_time=1
#slow-query-log
#slow_query_log_file=/data/mysqldb/logs/mysql-slow.log
#other
explicit_defaults_for_timestamp=true
max_connections=500
#open_files_limit=65534
sql_mode=‘STRICT_TRANS_TABLES,NO_ZERO_IN_DATE,NO_ZERO_DATE,ERROR_FOR_DIVISION_BY_ZERO,NO_AUTO_CREATE_USER,NO_ENGINE_SUBSTITUTION’
- 临时关闭selinux模式
setenforce 0 - 数据库服务启动
systemctl start mysqld.service
备用启动命令
mysqld --user=mysql - 设置开机自启动
systemctl enable mysqld.service - 关闭开机自启动
systemctl disable mysqld.service - 查找初始化密码
cat /data/mysqldb/logs/mysqld.log | grep -i password - 修改密码,给root用户赋权,刷新权限数据表
mysql -u root -p
set password for ‘root’@‘localhost’=password(‘paswd’);
grant all privileges on . to ‘root’@‘localhost’ identified by ‘paswd’ with grant option;
grant all privileges on . to ‘root’@’%’ identified by ‘paswd’ with grant option;
刷新权限表使之生效
flush privileges; - 数据库创建用户,给用户赋权,刷新权限数据表
创建库
create database TEST; //实物ID生成
创建用户并赋予访问权限%,所有的远程都可以访问
create user ‘test’@’%’ identified by ‘paswd’;
创建用户并赋予访问权限localhost,只有安装mysql服务器可以访问
create user ‘test’@‘localhost’ identified by ‘paswd’;
给用户赋予库权限
grant all privileges on TEST.* to ‘test’@’%’ identified by ‘paswd’;
刷新权限表使之生效
flush privileges;


 4786
4786

 被折叠的 条评论
为什么被折叠?
被折叠的 条评论
为什么被折叠?
 到【灌水乐园】发言


