


 本文详细介绍如何将CAS客户端与Spring Security进行集成,包括搭建测试工程、配置关键文件spring-security.xml,实现登录名获取及退出登录等功能。
咱们接着上一篇的入门接着做
4. CAS 客户端与 SpringSecurity 集成
4.1 Spring Security 测试工程搭建
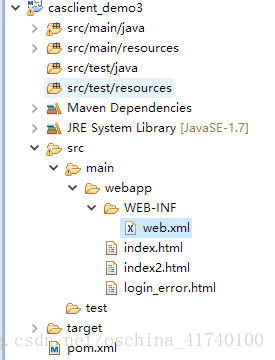
(1)建立 Maven 项目 casclient_demo3 ,引入 spring 依赖和 spring secrity 相关依赖 ,tomcat 端口设置为 9003(2)建立 web.xml ,添加过滤器等配置
(3)创建配置文件 spring-security.xml
(4)添加 html 页面
4.2 Spring Security 与 CAS 集成
(1)引入依赖
<dependency>
    <groupId>org.springframework.security</groupId>
    <artifactId>spring-security-cas</artifactId>
    <version>4.1.0.RELEASE</version>
</dependency>
<dependency>
        <groupId>org.jasig.cas.client</groupId>
        <artifactId>cas-client-core</artifactId>
        <version>3.3.3</version>
        <exclusions>
            <exclusion>
                <groupId>org.slf4j</groupId>
                <artifactId>log4j-over-slf4j</artifactId>
            </exclusion>
        </exclusions>
</dependency>
(2)修改 spring-security.xml (重点配置文件)
<?xml version="1.0" encoding="UTF-8"?>
<beans:beans xmlns="http://www.springframework.org/schema/security"
	xmlns:beans="http://www.springframework.org/schema/beans" xmlns:xsi="http://www.w3.org/2001/XMLSchema-instance"
	xsi:schemaLocation="http://www.springframework.org/schema/beans http://www.springframework.org/schema/beans/spring-beans.xsd
						http://www.springframework.org/schema/security http://www.springframework.org/schema/security/spring-security.xsd">

	<http pattern="/index2.html" security="none"></http>
	<!-- entry-point-ref 入口点引用 -->
	<http use-expressions="false" entry-point-ref="casProcessingFilterEntryPoint">
		<intercept-url pattern="/**" access="ROLE_USER" />
		<csrf disabled="true" />
		<!-- custom-filter为过滤器, position 表示将过滤器放在指定的位置上,before表示放在指定位置之前 ,after表示放在指定的位置之后 -->
		<custom-filter ref="casAuthenticationFilter" position="CAS_FILTER" />
		<custom-filter ref="requestSingleLogoutFilter" before="LOGOUT_FILTER" />
		<custom-filter ref="singleLogoutFilter" before="CAS_FILTER" />
	</http>

	<!-- CAS入口点 开始 -->
	<beans:bean id="casProcessingFilterEntryPoint"
		class="org.springframework.security.cas.web.CasAuthenticationEntryPoint">
		<!-- 单点登录服务器登录URL -->
		<beans:property name="loginUrl" value="http://localhost:9100/cas/login" />
		<beans:property name="serviceProperties" ref="serviceProperties" />
	</beans:bean>
	<beans:bean id="serviceProperties"
		class="org.springframework.security.cas.ServiceProperties">
		<!--service 配置自身工程的根地址+/login/cas -->
		<beans:property name="service" value="http://localhost:9003/login/cas" />
	</beans:bean>
	<!-- CAS入口点 结束 -->


	<!-- 认证过滤器 开始 -->
	<beans:bean id="casAuthenticationFilter"
		class="org.springframework.security.cas.web.CasAuthenticationFilter">
		<beans:property name="authenticationManager" ref="authenticationManager" />
	</beans:bean>
	<!-- 认证管理器 -->
	<authentication-manager alias="authenticationManager">
		<authentication-provider ref="casAuthenticationProvider">
		</authentication-provider>
	</authentication-manager>
	<!-- 认证提供者 -->
	<beans:bean id="casAuthenticationProvider"
		class="org.springframework.security.cas.authentication.CasAuthenticationProvider">
		<beans:property name="authenticationUserDetailsService">
			<beans:bean
				class="org.springframework.security.core.userdetails.UserDetailsByNameServiceWrapper">
				<beans:constructor-arg ref="userDetailsService" />
			</beans:bean>
		</beans:property>
		<beans:property name="serviceProperties" ref="serviceProperties" />
		<!-- ticketValidator 为票据验证器 -->
		<beans:property name="ticketValidator">
			<beans:bean
				class="org.jasig.cas.client.validation.Cas20ServiceTicketValidator">
				<beans:constructor-arg index="0"
					value="http://localhost:9100/cas" />
			</beans:bean>
		</beans:property>
		<beans:property name="key"
			value="an_id_for_this_auth_provider_only" />
	</beans:bean>
	<!-- 认证类 -->
	<beans:bean id="userDetailsService" class="cn.guyue.demo.service.UserDetailServiceImpl" />

	<!-- 认证过滤器 结束 -->


	<!-- 单点登出 开始 -->
	<beans:bean id="singleLogoutFilter"
		class="org.jasig.cas.client.session.SingleSignOutFilter" />
	<!-- 经过此配置,当用户在地址栏输入本地工程 /logout/cas -->
	<beans:bean id="requestSingleLogoutFilter"
		class="org.springframework.security.web.authentication.logout.LogoutFilter">
		<beans:constructor-arg
			value="http://localhost:0421/cas/logout?service=http://localhost:9003/index2.html" />
		<beans:constructor-arg>
			<beans:bean
				class="org.springframework.security.web.authentication.logout.SecurityContextLogoutHandler" />
		</beans:constructor-arg>
		<beans:property name="filterProcessesUrl" value="/logout/cas" />
	</beans:bean>
	<!-- 单点登出 结束 -->

</beans:beans>
(3)创建 UserDetailsServiceImpl (认证类)这个类的主要作用是在登陆后得到用户名,可以根据用户名查询角色或执行一些逻辑。
public class UserDetailServiceImpl implements UserDetailsService {
 @Override
 public UserDetails loadUserByUsername(String username) throws
UsernameNotFoundException {
  //构建角色集合
  List<GrantedAuthority> authorities=new ArrayList();
  authorities.add(new SimpleGrantedAuthority("ROLE_USER"));
  return new User(username, ""  , authorities);
 }
}
4.3 获取登录名
我们在处理后端逻辑需要获得登录名,那么如何获取单点登录的用户名呢? 其实和之前 获得用户名的方式是完全相同的,我们下面来做个测试。
(1)web.xml 添加 springmvc
 <servlet>
   <servlet-name>springmvc</servlet-name>

 <servlet-class>org.springframework.web.servlet.DispatcherServlet</servlet-class>
   <!-- 指定加载的配置文件 ,通过参数 contextConfigLocation 加载-->
   <init-param>
    <param-name>contextConfigLocation</param-name>
    <param-value>classpath:springmvc.xml</param-value>
   </init-param>
  </servlet>

  <servlet-mapping>
   <servlet-name>springmvc</servlet-name>
   <url-pattern>*.do</url-pattern>
  </servlet-mapping>
(2)创建 springmvc.xml 配置文件
<?xml version="1.0" encoding="UTF-8"?>
<beans xmlns="http://www.springframework.org/schema/beans"
	xmlns:xsi="http://www.w3.org/2001/XMLSchema-instance" xmlns:p="http://www.springframework.org/schema/p"
	xmlns:context="http://www.springframework.org/schema/context"
	xmlns:dubbo="http://code.alibabatech.com/schema/dubbo" xmlns:mvc="http://www.springframework.org/schema/mvc"
	xsi:schemaLocation="http://www.springframework.org/schema/beans http://www.springframework.org/schema/beans/spring-beans.xsd
        http://www.springframework.org/schema/mvc http://www.springframework.org/schema/mvc/spring-mvc.xsd
        http://code.alibabatech.com/schema/dubbo http://code.alibabatech.com/schema/dubbo/dubbo.xsd
        http://www.springframework.org/schema/context http://www.springframework.org/schema/context/spring-context.xsd">


	<context:component-scan base-package="cn.guyue.demo"></context:component-scan>

	<mvc:annotation-driven></mvc:annotation-driven>
</beans>
(3)创建 UserController
@RestController
public class UserController {
 @RequestMapping("/findLoginUser")
 public void  findLoginUser(){
  String name =
SecurityContextHolder.getContext().getAuthentication().getName();
  System.out.println(name);
 }
} 4.4 退出登录
修改 spring-security.xml<beans:bean id="requestSingleLogoutFilter"
class="org.springframework.security.web.authentication.logout.LogoutFilter">
<beans:constructor-arg
value="http://localhost:9100/cas/logout?service=http://localhost:9003/index2.html"/
>
<beans:constructor-arg>
<beans:bean
class="org.springframework.security.web.authentication.logout.SecurityContextLogout
Handler"/>
</beans:constructor-arg>
<beans:property name="filterProcessesUrl" value="/logout/cas"/>
</beans:bean> <a href="/logout/cas">退出登录</a>
创建 index2.html,将 index2.html 设置为可匿名访问
<http pattern="/index2.html" security="none"></http>
这样就和安全框架Security整合使用完成了,接下来就测试步骤了
---------------------------------------------------------------------
详细的CAS服务端配置在(一)系统开发单点登录解决方案-CAS快速入门
如需要完整代码可以上GitHub下载:点击跳转下载
如有错误之处欢迎之处


 6958
6958

 被折叠的 条评论
为什么被折叠?
被折叠的 条评论
为什么被折叠?
 到【灌水乐园】发言


