


 本文档详细记录了从零开始安装Manjaro Linux,配置Vim、Fish Shell和i3窗口管理器的过程,包括虚拟机安装、双系统设置、软件安装、终端美化、快捷键定制、窗口管理等。此外,还涉及了vim配置、桌面美化、文件传输、软件下载和配置等方面,旨在打造个性化的Linux工作环境。
本博客最新更新于 2021年11月18日
一、前言
笔者此前几乎没有vim使用经验,也没有安装过linux虚拟机,偶然在b站上看到TheCW的视频,遂惊异于linux和vim配合的巧妙与vim配置和fish shell等结合的惊艳。决定从零开始对其进行研究,并将学习路线和遇到的障碍及解决方式记录下来。在配置fish shell 和 i3的时候会用到一些最简单的vi语法,读者可以先在这里学习一些最简单的vi和vim操作,大概很快就能上手vim。
目录
二、虚拟机安装和系统盘双系统安装
1.安装VMware16
官网安装较慢,我是在网上某个软件园用下载器下载的,但是那个可能会有广告进电脑里面,这里还有一个网盘下载的方式[VMware 16 pro](https://pan.baidu.com/wap/init?surl=jLFy9A3zzCHM3T53W4mnag) 提取码是:knxg
- 安装好后是30天的试用期,笔者购买了激活码,也可以在淘宝上购买验证码和远程安装服务。如果是在校学生的话,可以咨询一下教网络的教授之类的。
- 在官网上下载manjaro的iso文件,笔者下载的是xfce版本官网下载链接。笔者直接用迅雷加速下载,感觉速度比较快,此外还可以用清华等的镜像进行下载。
- 安装方式笔者参考的是这篇文章:VMware虚拟机下Manjaro20.0安装教程
2.制作系统盘安装双系统
制作系统盘笔者用的是Rufus官网链接,详情可以参考如下文章和视频:
win10环境下安装manjaro kde 双系统(安装篇)
【教程】如何安装Manjaro双系统?
三、安装vim,fish和oh-my-fish
0.在安装之前一定要换源
笔者换的清华的源
首先用其自带的nano编辑pacman的配置文件`sudo nano /etc/pacman.conf
然后在最下面加上如下代码即可:
[archlinuxcn]
SigLevel = Never
Server = https://mirrors.tuna.tsinghua.edu.cn/archlinuxcn/$arch
sudo pacman-mirrors -c China
记得输入 sudo pacman -Syyu 刷新一下
笔者的配置文件:
#
# /etc/pacman.conf
#
# See the pacman.conf(5) manpage for option and repository directives

#
# GENERAL OPTIONS
#
[options]
# The following paths are commented out with their default values listed.
# If you wish to use different paths, uncomment and update the paths.
#RootDir     = /
#DBPath      = /var/lib/pacman/
#CacheDir    = /var/cache/pacman/pkg/
#LogFile     = /var/log/pacman.log
#GPGDir      = /etc/pacman.d/gnupg/
#HookDir     = /etc/pacman.d/hooks/
#HookDir     = /home/xz/.local/share/pacman.d/hooks
HoldPkg     = pacman glibc
#XferCommand = /usr/bin/curl -L -C - -f -o %o %u
#XferCommand = /usr/bin/wget --passive-ftp -c -O %o %u
#CleanMethod = KeepInstalled
CleanMethod = KeepCurrent
Architecture = auto

#IgnorePkg   =
#IgnorePkg   =
#IgnoreGroup =

#NoUpgrade   =
#NoExtract   =

# Misc options
#UseSyslog
Color
TotalDownload
CheckSpace
#VerbosePkgLists

# By default, pacman accepts packages signed by keys that its local keyring
# trusts (see pacman-key and its man page), as well as unsigned packages.
#SigLevel    = Required DatabaseOptional
SigLevel     = PackageRequired
LocalFileSigLevel = Optional
#RemoteFileSigLevel = Required

# NOTE: You must run pacman-key --init before first using pacman; the local
# keyring can then be populated with the keys of all official Arch Linux
# packagers with pacman-key --populate archlinux.

#
# REPOSITORIES
#   - can be defined here or included from another file
#   - pacman will search repositories in the order defined here
#   - local/custom mirrors can be added here or in separate files
#   - repositories listed first will take precedence when packages
#     have identical names, regardless of version number
#   - URLs will have $repo replaced by the name of the current repo
#   - URLs will have $arch replaced by the name of the architecture
#
# Repository entries are of the format:
#       [repo-name]
#       Server = ServerName
#       Include = IncludePath
#
# The header [repo-name] is crucial - it must be present and
# uncommented to enable the repo.
#

# The testing repositories are disabled by default. To enable, uncomment the
# repo name header and Include lines. You can add preferred servers immediately
# after the header, and they will be used before the default mirrors.

#[testing]
#Include = /etc/pacman.d/mirrorlist

[core]
Include = /etc/pacman.d/mirrorlist

[extra]
Include = /etc/pacman.d/mirrorlist

#[community-testing]
#Include = /etc/pacman.d/mirrorlist

[community]
Include = /etc/pacman.d/mirrorlist

# If you want to run 32 bit applications on your x86_64 system,
# enable the multilib repositories as required here.

#[multilib-testing]
#Include = /etc/pacman.d/mirrorlist

[multilib]
Include = /etc/pacman.d/mirrorlist

# An example of a custom package repository.  See the pacman manpage for
# tips on creating your own repositories.
#[custom]
#SigLevel = Optional TrustAll
#Server = file:///home/custompkgs

[archlinuxcn]
#Include = /etc/pacman.d/archlinuxcn-mirrorlist
SigLevel = Never
Server = https://mirrors.tuna.tsinghua.edu.cn/archlinuxcn/$arch
1. 安装vim
manjaro的一大优势是可以用sudo pacman -S来安装非常多的文件。
以vim为例,只需要输入
sudo pacman -S vim
2. 安装fish
#安装fish
sudo pacman -S fish
#将fish设置为默认shell
chsh -s /user/bin/fish
3. 安装oh-my-fish(并解决443错误和证书错误)
理论上讲,应该用curl -L https://get.oh-my.fish | fish
但是执行这个命令之后,笔者的manjaro报了两个错误,第一个是443错误,这个错误比较好解决,详见:使用 curl 命令出现 Failed to connect to XXX port 443: 拒绝连接
另一个错误的报错信息如下:
curl: (60) SSL certificate problem: unable to get local issuer certificate...
...
...
笔者在网络上查阅大量资料之后,按其指示的方法尝试了一天也没有解决。直到笔者跳出问题本身思考:**自己应该要解决的不是某个具体的错误,而是要安装好oh-my-fish。**基于这个重要思想,笔者放弃了原来的安装方式,直接进行离线安装:
git clone https://github.com/oh-my-fish/oh-my-fish
cd oh-my-fish
bin/install --offline
这中间又遇到一个新的问题,通过git config --global http.sslVerify "false"解决
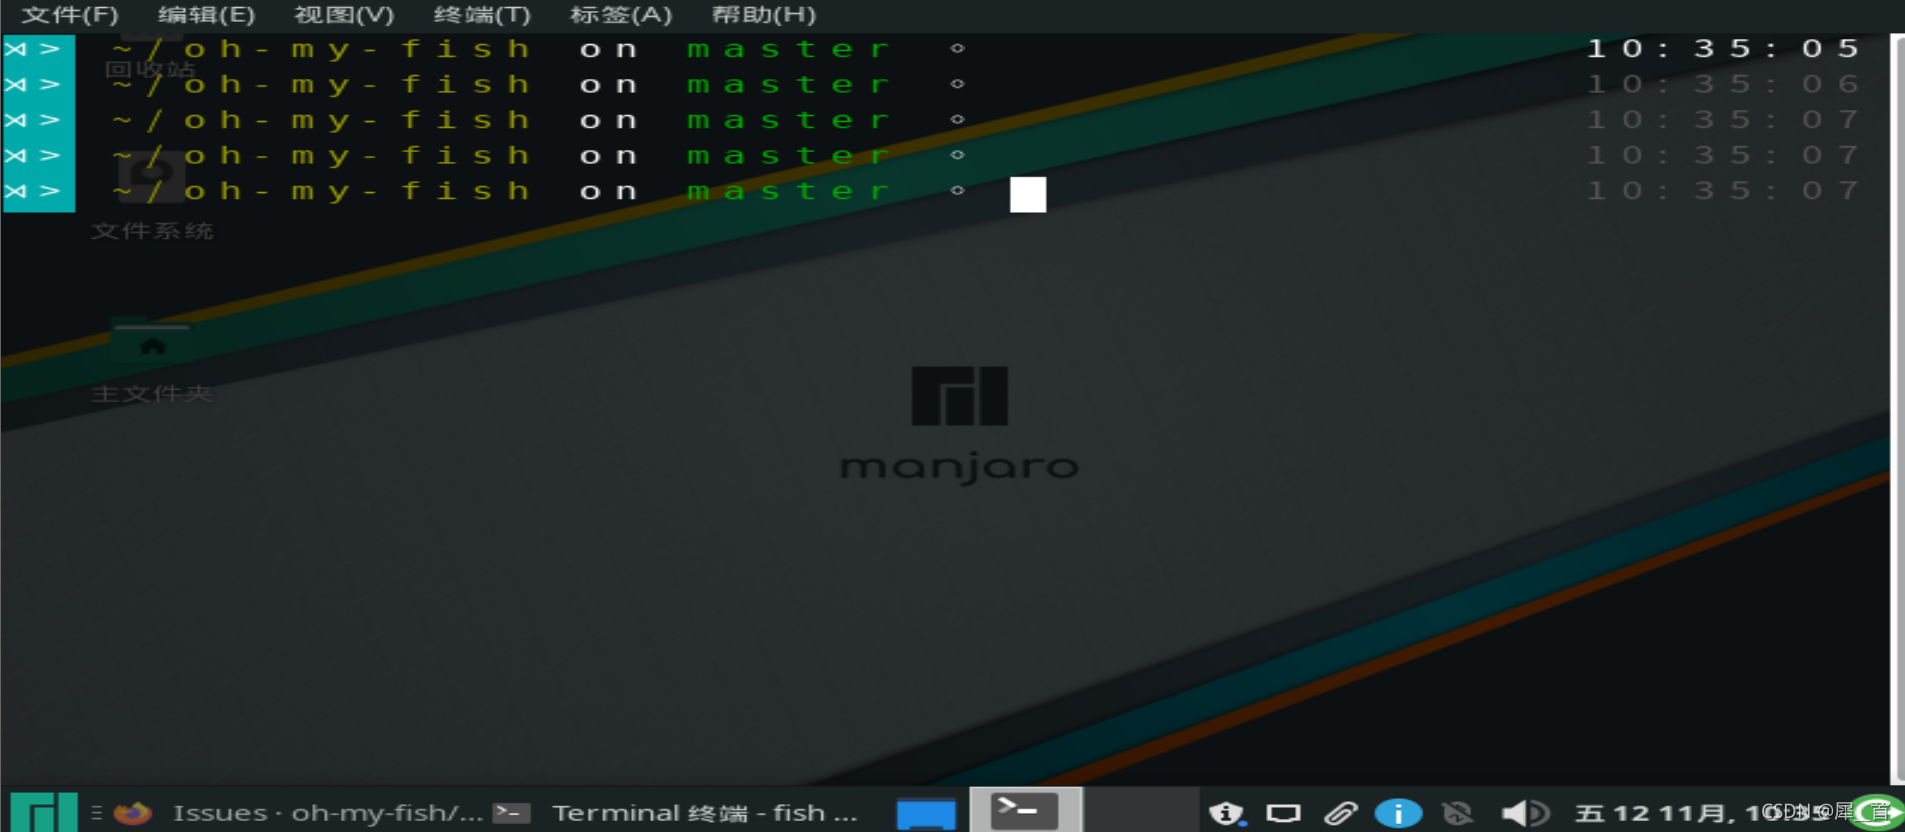
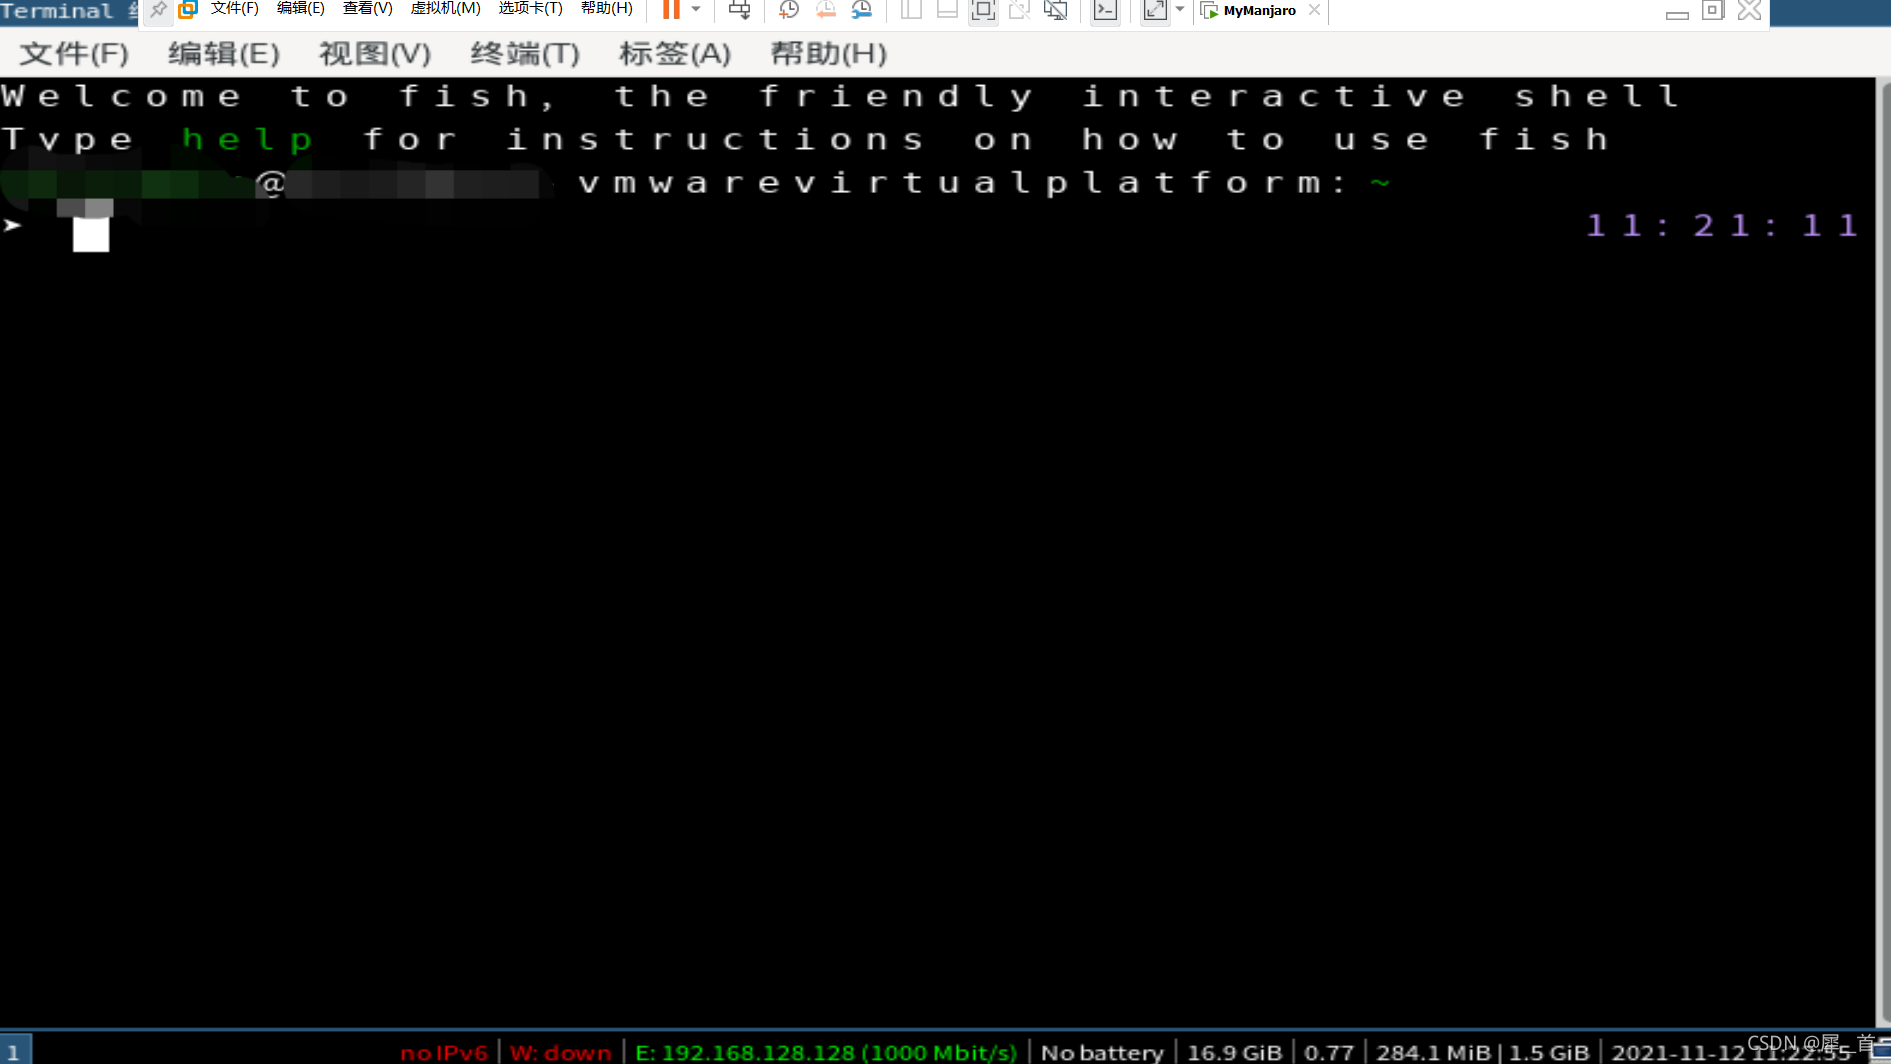
安装完oh-my-fish后的效果展示:
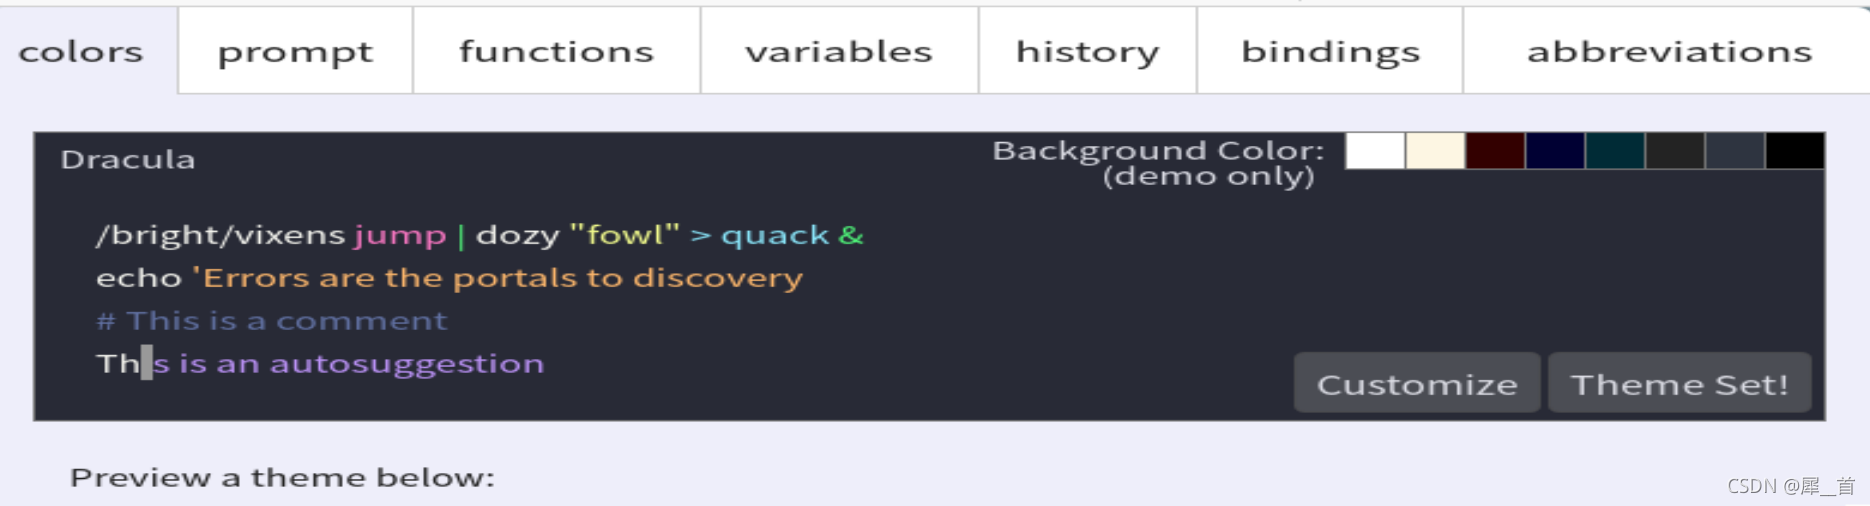
四、配置喜欢的fish样式,使shell更好看
这是让linux终端好看的一个关键之一
直接键入fish_config即可进入一个浏览器页面,在其中选择即可。
五、用FileZilla给虚拟机里的linux传文件
首先参考了FileZilla正确连接虚拟机方法,但是这篇文章针对的是ubuntu等linux系统,这时的另一个重要方法论就是:关注目的和结果而不是关注具体代码,比如其它很多linux查ip的方式都是ifconfig,但是ifconfig在manjaro中却是无效的。这时候应该关注我们的目标是查ip,所以应该检索如何在manjaro中查ip地址,得到应用ip addr指令,从而查到ip。同理针对ssh服务的配置也不应直接搬其它文章的代码,而是找到manjaro是如何配置ssh的,可以参考Manjaro打开ssh功能以及root ssh.
六、i3安装及一些基本配置
0.笔者的i3配置文件(更新于2121.11.17)
# This file has been auto-generated by i3-config-wizard(1).
# It will not be overwritten, so edit it as you like.
#
# Should you change your keyboard layout some time, delete
# this file and re-run i3-config-wizard(1).
#

# i3 config file (v4)
#
# Please see https://i3wm.org/docs/userguide.html for a complete reference!

set $mod Mod4

# Font for window titles. Will also be used by the bar unless a different font
# is used in the bar {} block below.
font pango:monospace 8

# This font is widely installed, provides lots of unicode glyphs, right-to-left
# text rendering and scalability on retina/hidpi displays (thanks to pango).
#font pango:DejaVu Sans Mono 8

# The combination of xss-lock, nm-applet and pactl is a popular choice, so
# they are included here as an example. Modify as you see fit.

# xss-lock grabs a logind suspend inhibit lock and will use i3lock to lock the
# screen before suspend. Use loginctl lock-session to lock your screen.
exec --no-startup-id xss-lock --transfer-sleep-lock -- i3lock --nofork

# NetworkManager is the most popular way to manage wireless networks on Linux,
# and nm-applet is a desktop environment-independent system tray GUI for it.
exec --no-startup-id nm-applet

# Use pactl to adjust volume in PulseAudio.
set $refresh_i3status killall -SIGUSR1 i3status
bindsym XF86AudioRaiseVolume exec --no-startup-id pactl set-sink-volume @DEFAULT_SINK@ +10% && $refresh_i3status
bindsym XF86AudioLowerVolume exec --no-startup-id pactl set-sink-volume @DEFAULT_SINK@ -10% && $refresh_i3status
bindsym XF86AudioMute exec --no-startup-id pactl set-sink-mute @DEFAULT_SINK@ toggle && $refresh_i3status
bindsym XF86AudioMicMute exec --no-startup-id pactl set-source-mute @DEFAULT_SOURCE@ toggle && $refresh_i3status

# Use Mouse+$mod to drag floating windows to their wanted position
floating_modifier $mod

# start a terminal
#bindsym $mod+Return exec i3-sensible-terminal
bindsym $mod+Return exec alacritty

#start firefox
bindsym $mod+c exec firefox

# kill focused window
bindsym $mod+Shift+q kill

#always starts
#exec_always variety
exec_always --no-startup-id ~/.config/polybar/forest/lauch.sh
exec_always picom
exec_always --no-startup-id feh --randomize --bg-fill ~/图片/
# start dmenu (a program launcher)
bindsym $mod+d exec --no-startup-id dmenu_run
# A more modern dmenu replacement is rofi:
# bindcode $mod+40 exec "rofi -modi drun,run -show drun"
# There also is i3-dmenu-desktop which only displays applications shipping a
# .desktop file. It is a wrapper around dmenu, so you need that installed.
# bindcode $mod+40 exec --no-startup-id i3-dmenu-desktop

# change focus
bindsym $mod+j focus left
bindsym $mod+k focus down
bindsym $mod+l focus up
bindsym $mod+semicolon focus right

# alternatively, you can use the cursor keys:
bindsym $mod+Left focus left
bindsym $mod+Down focus down
bindsym $mod+Up focus up
bindsym $mod+Right focus right

# move focused window
bindsym $mod+Shift+j move left
bindsym $mod+Shift+k move down
bindsym $mod+Shift+l move up
bindsym $mod+Shift+semicolon move right

# alternatively, you can use the cursor keys:
bindsym $mod+Shift+Left move left
bindsym $mod+Shift+Down move down
bindsym $mod+Shift+Up move up
bindsym $mod+Shift+Right move right

# split in horizontal orientation
bindsym $mod+h split h

# split in vertical orientation
bindsym $mod+v split v

# enter fullscreen mode for the focused container
bindsym $mod+f fullscreen toggle

# change container layout (stacked, tabbed, toggle split)
bindsym $mod+s layout stacking
bindsym $mod+w layout tabbed
bindsym $mod+e layout toggle split

# toggle tiling / floating
bindsym $mod+Shift+space floating toggle

# change focus between tiling / floating windows
bindsym $mod+space focus mode_toggle

# focus the parent container
bindsym $mod+a focus parent

# focus the child container
#bindsym $mod+d focus child

# Define names for default workspaces for which we configure key bindings later on.
# We use variables to avoid repeating the names in multiple places.
set $ws1 "1"
set $ws2 "2"
set $ws3 "3"
set $ws4 "4"
set $ws5 "5"
set $ws6 "6"
set $ws7 "7"
set $ws8 "8"
set $ws9 "9"
set $ws10 "10"

# switch to workspace
bindsym $mod+1 workspace number $ws1
bindsym $mod+2 workspace number $ws2
bindsym $mod+3 workspace number $ws3
bindsym $mod+4 workspace number $ws4
bindsym $mod+5 workspace number $ws5
bindsym $mod+6 workspace number $ws6
bindsym $mod+7 workspace number $ws7
bindsym $mod+8 workspace number $ws8
bindsym $mod+9 workspace number $ws9
bindsym $mod+0 workspace number $ws10

# move focused container to workspace
bindsym $mod+Shift+1 move container to workspace number $ws1
bindsym $mod+Shift+2 move container to workspace number $ws2
bindsym $mod+Shift+3 move container to workspace number $ws3
bindsym $mod+Shift+4 move container to workspace number $ws4
bindsym $mod+Shift+5 move container to workspace number $ws5
bindsym $mod+Shift+6 move container to workspace number $ws6
bindsym $mod+Shift+7 move container to workspace number $ws7
bindsym $mod+Shift+8 move container to workspace number $ws8
bindsym $mod+Shift+9 move container to workspace number $ws9
bindsym $mod+Shift+0 move container to workspace number $ws10

# reload the configuration file
bindsym $mod+Shift+c reload
# restart i3 inplace (preserves your layout/session, can be used to upgrade i3)
bindsym $mod+Shift+r restart
# exit i3 (logs you out of your X session)
bindsym $mod+Shift+e exec "i3-nagbar -t warning -m 'You pressed the exit shortcut. Do you really want to exit i3? This will end your X session.' -B 'Yes, exit i3' 'i3-msg exit'"

# resize window (you can also use the mouse for that)
mode "resize" {
        # These bindings trigger as soon as you enter the resize mode

        # Pressing left will shrink the window’s width.
        # Pressing right will grow the window’s width.
        # Pressing up will shrink the window’s height.
        # Pressing down will grow the window’s height.
        bindsym j resize shrink width 10 px or 10 ppt
        bindsym k resize grow height 10 px or 10 ppt
        bindsym l resize shrink height 10 px or 10 ppt
        bindsym semicolon resize grow width 10 px or 10 ppt

        # same bindings, but for the arrow keys
        bindsym Left resize shrink width 10 px or 10 ppt
        bindsym Down resize grow height 10 px or 10 ppt
        bindsym Up resize shrink height 10 px or 10 ppt
        bindsym Right resize grow width 10 px or 10 ppt

        # back to normal: Enter or Escape or $mod+r
        bindsym Return mode "default"
        bindsym Escape mode "default"
        bindsym $mod+r mode "default"
}

bindsym $mod+r mode "resize"
new_window 1pixel
# Start i3bar to display a workspace bar (plus the system information i3status
# finds out, if available)
#bar {
#        status_command i3status
#}
gaps inner 10
1. i3的安装
如图所示:
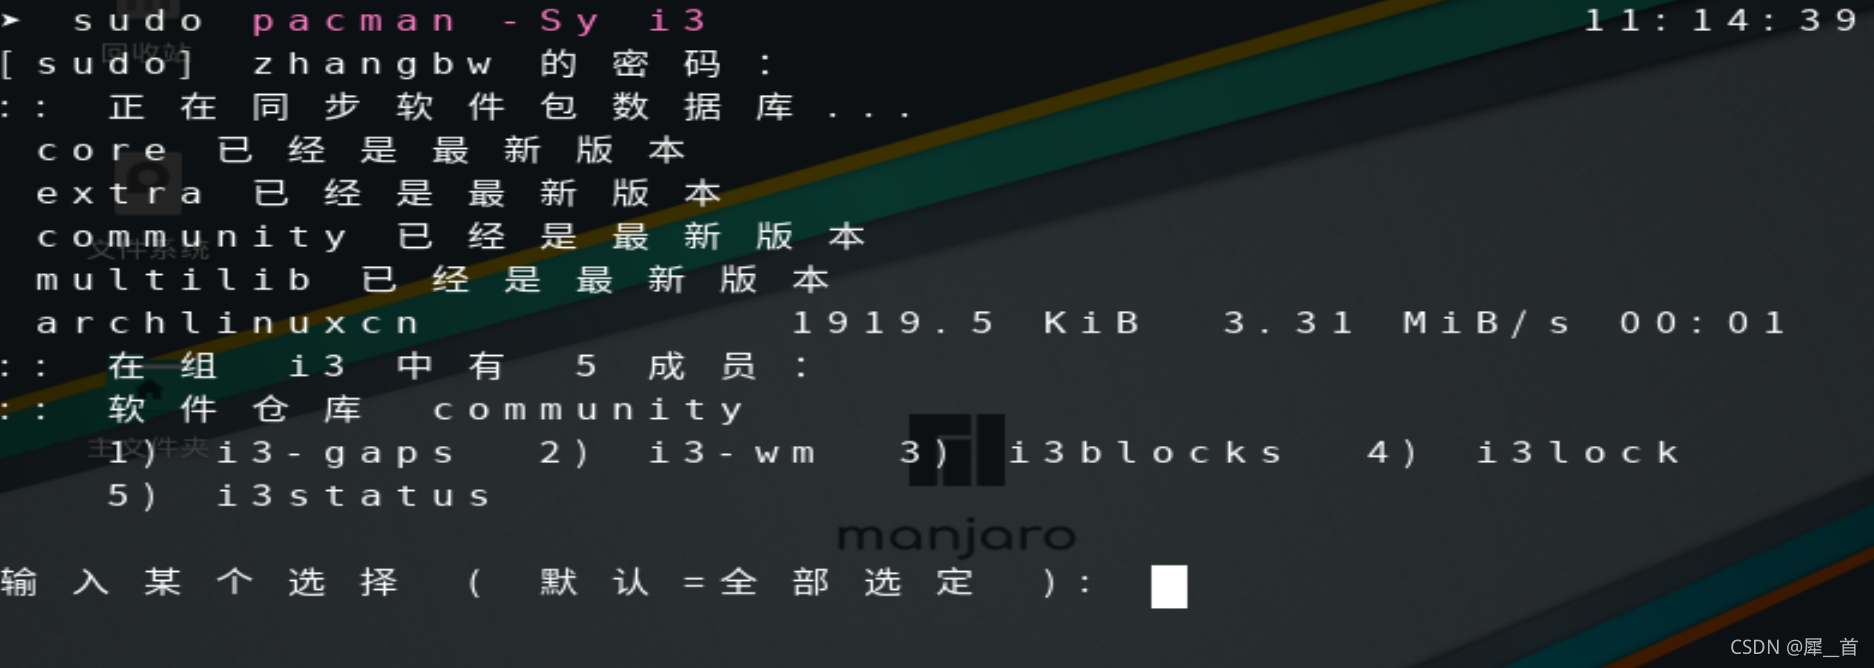
直接回车全部选择即可
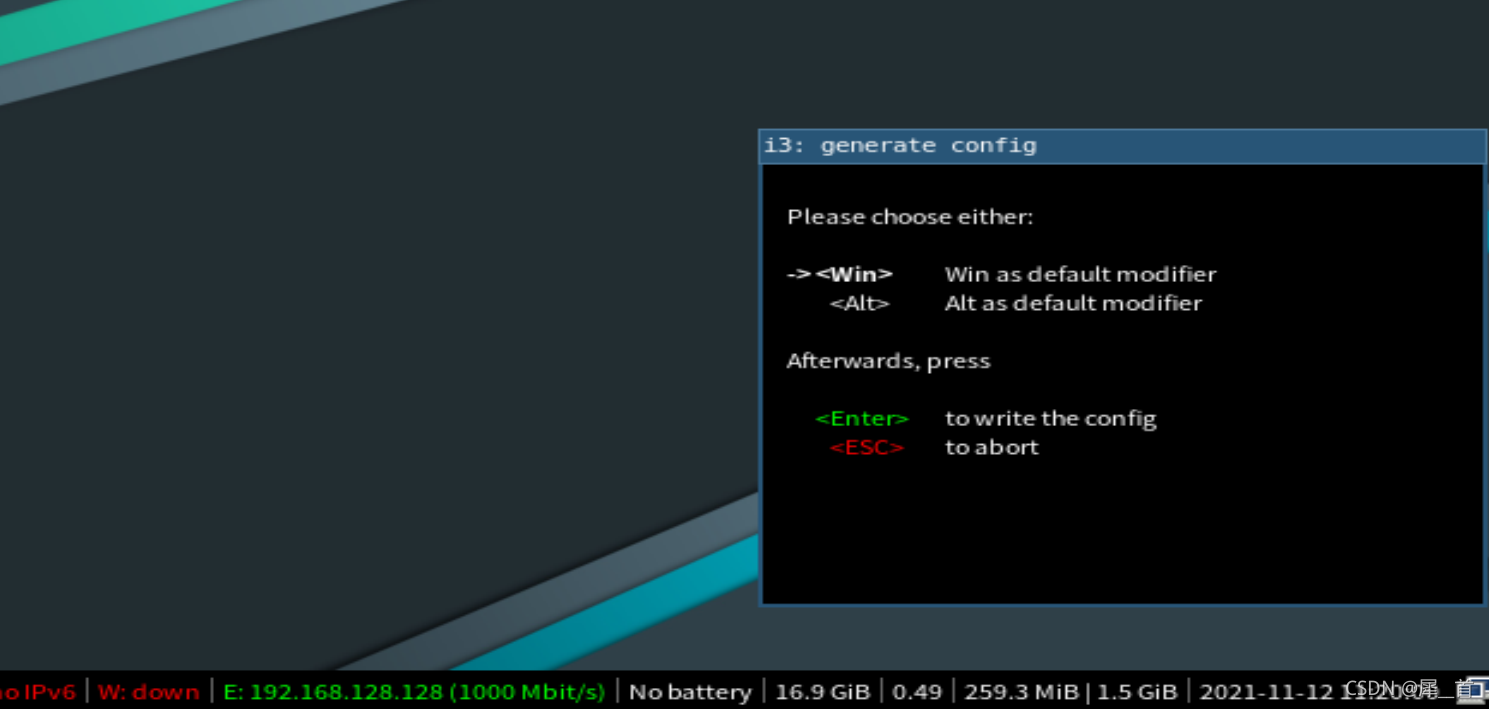
2. 进入i3
重启之后,在输入密码登录之前,在右下角选择i3,如图所示:

然后出现选择框进行默认配置,按回车即可
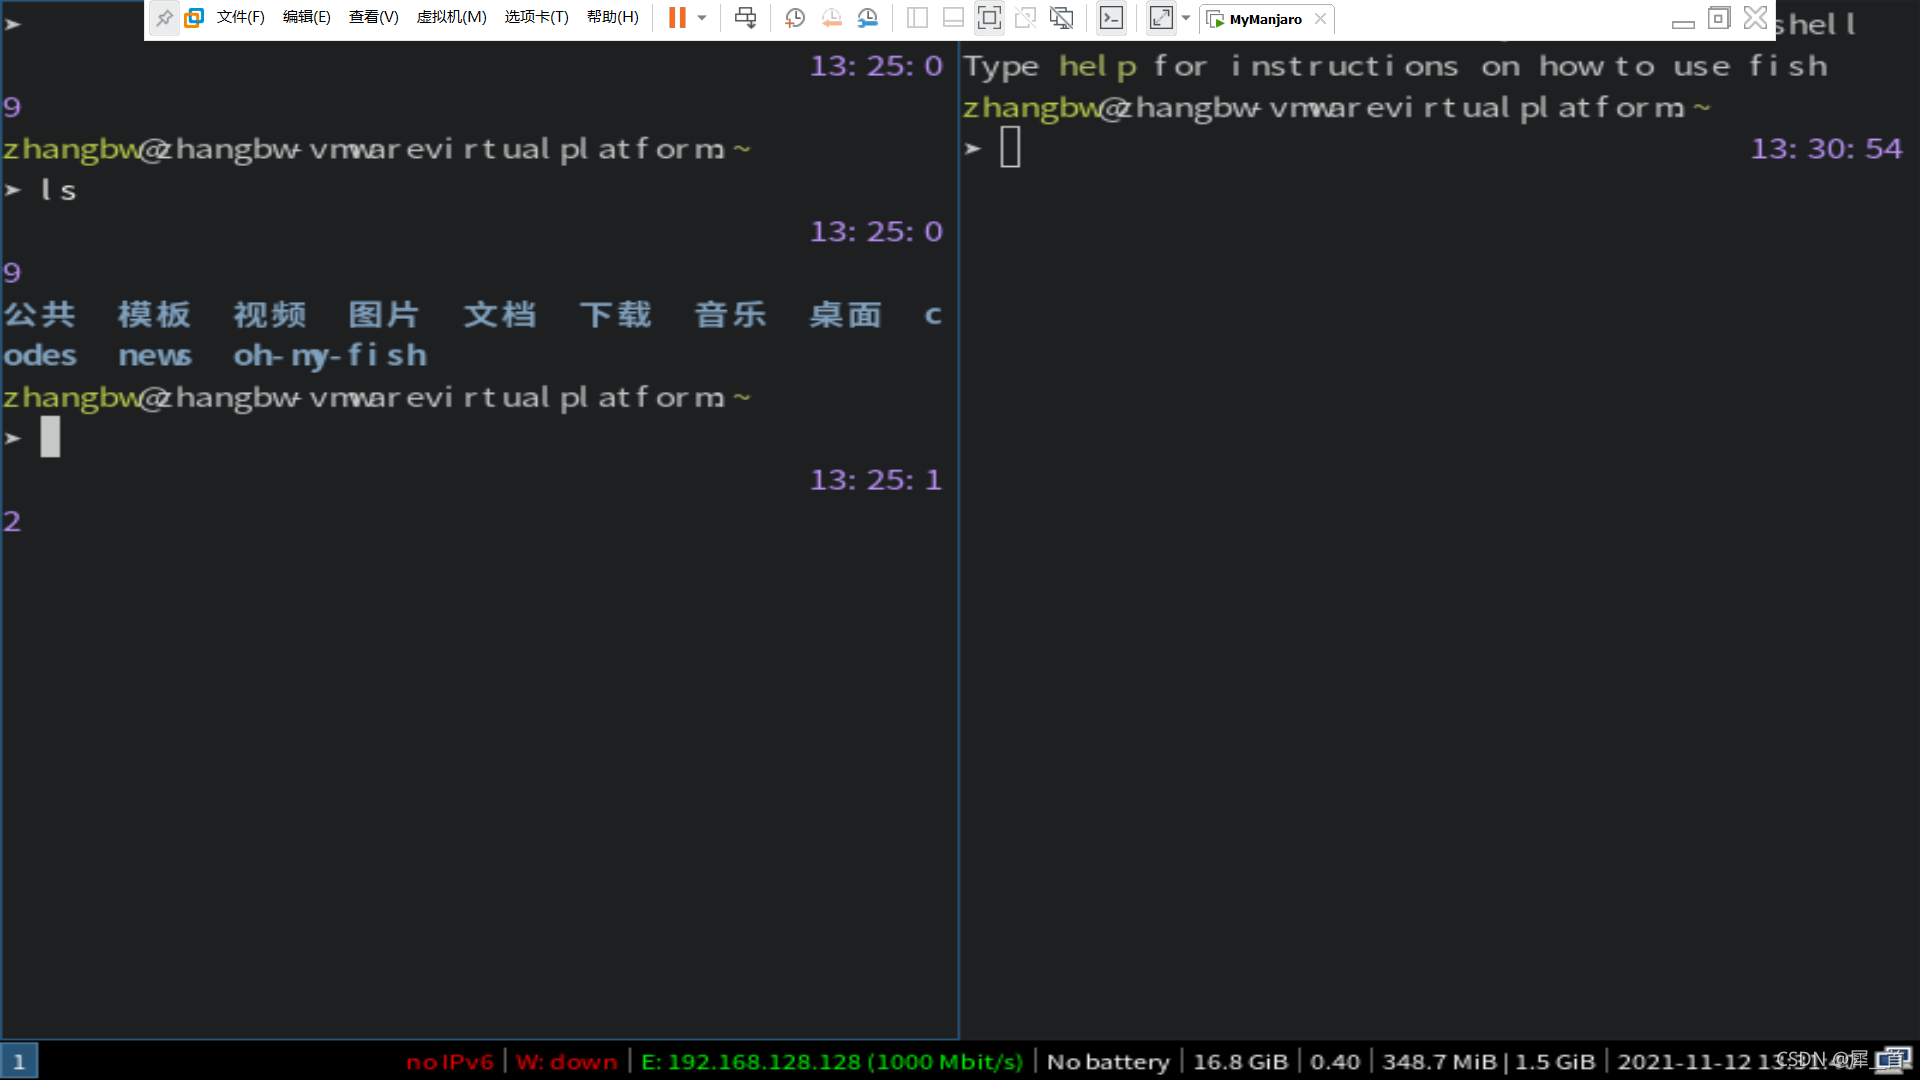
进入i3之后,按Windows+Enter键可以进入终端页面,如图所示:
3. 使i3更好看
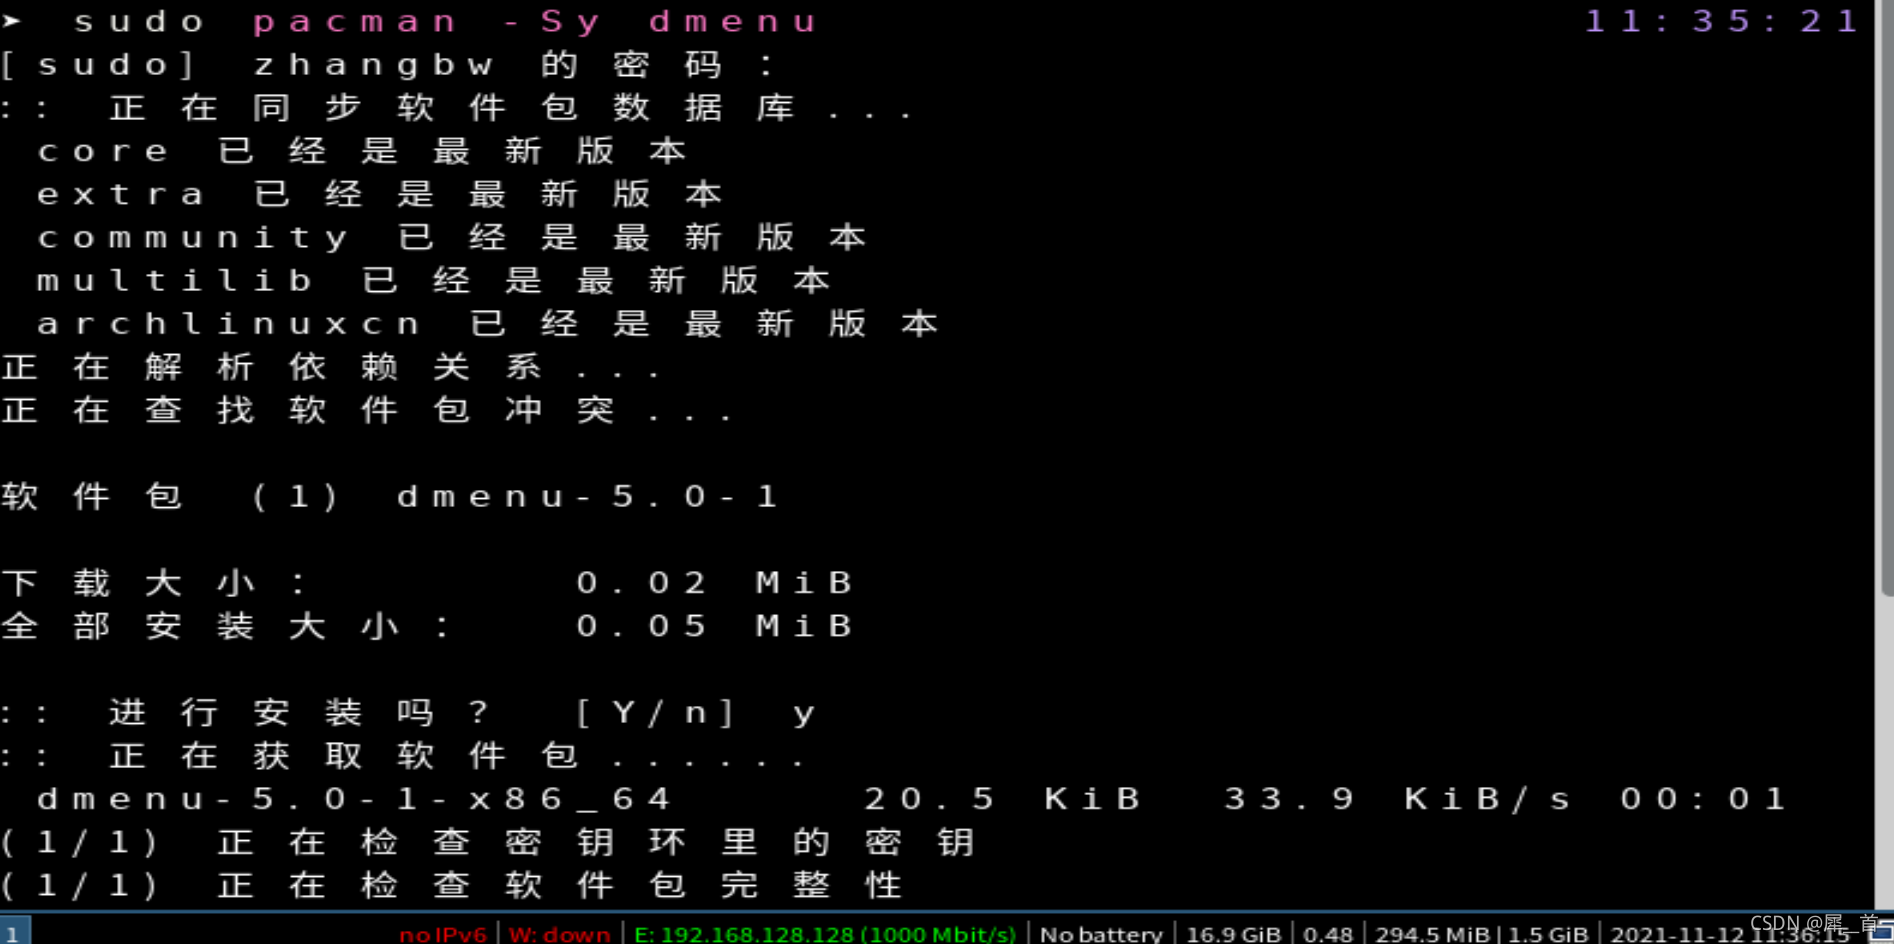
(1)安装alacritty,用显卡来渲染i3,并安装dmenu

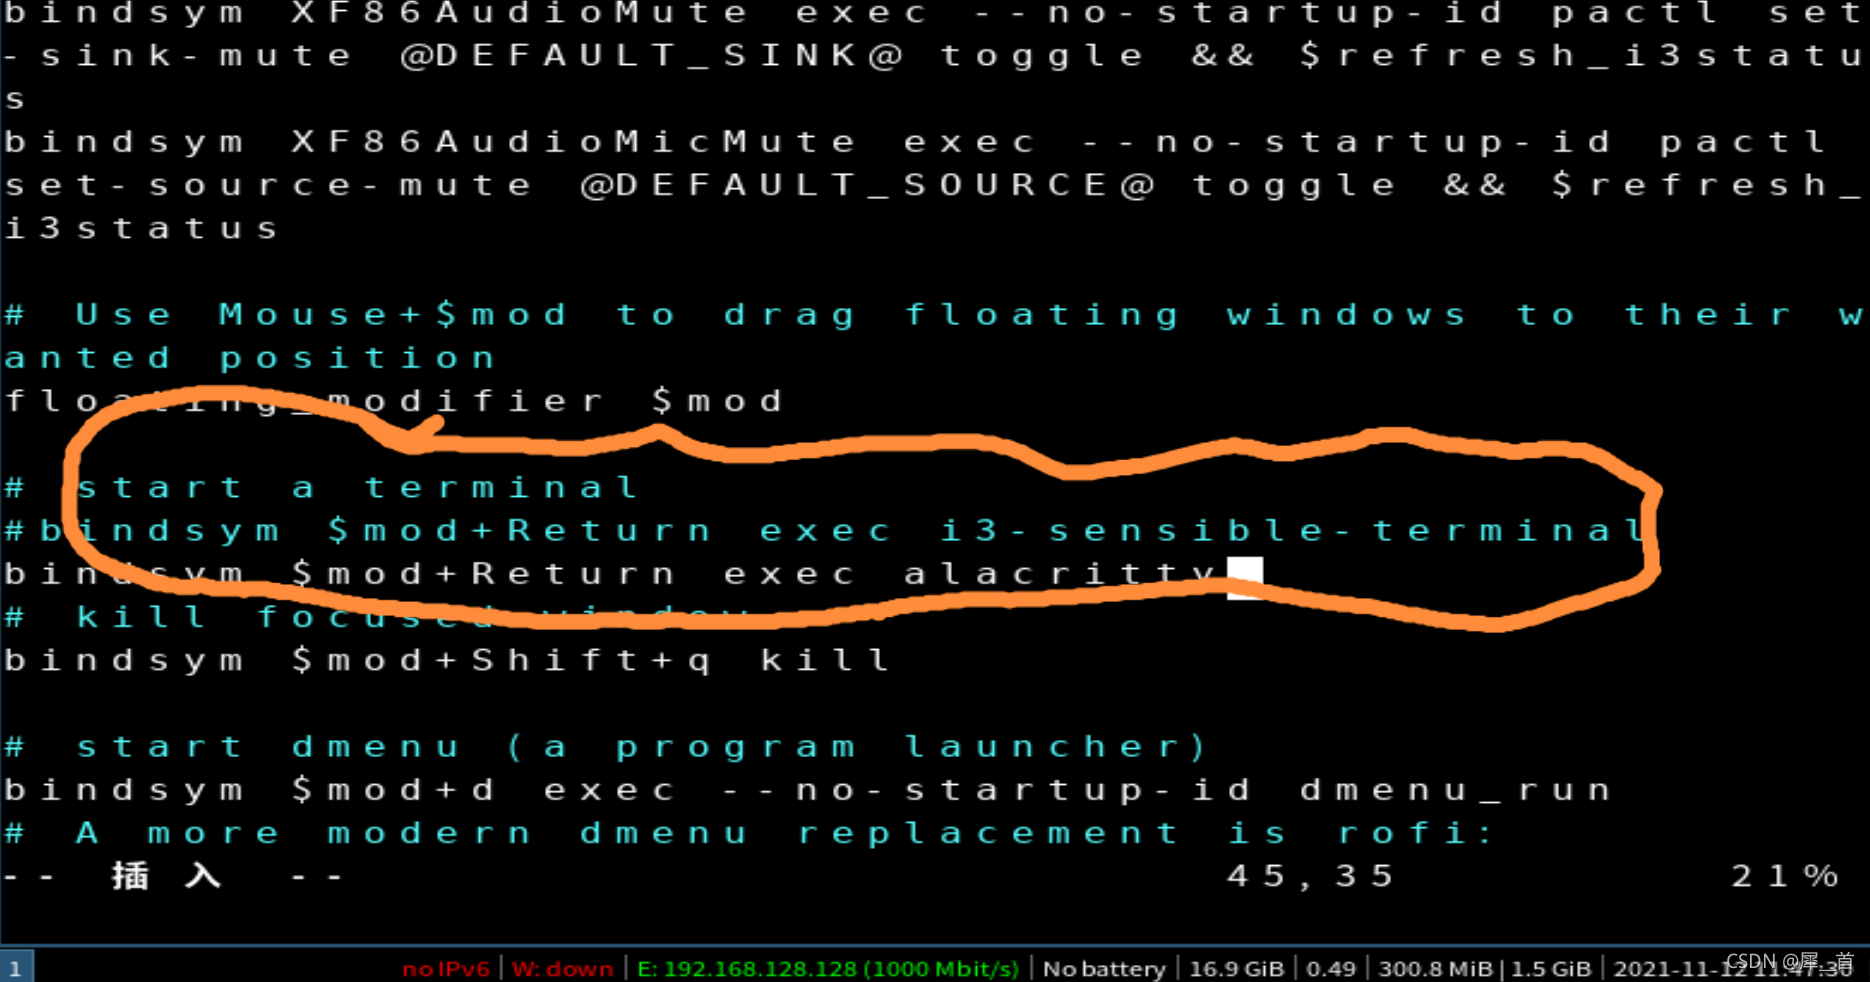
(2)将alacrity设为默认
- 编辑config文件

把原有的注释掉(最好别删,这样以后可以恢复),然后添加一行新的代码,如图所示。
七、改键位
笔者的键盘是五行排列式,control在中间,且windows键也在左边,此外还可以进行物理改建,所以不存在改键位的需求,这里暂且按下不表。
八、用快捷键打开浏览器
- 安装xorg

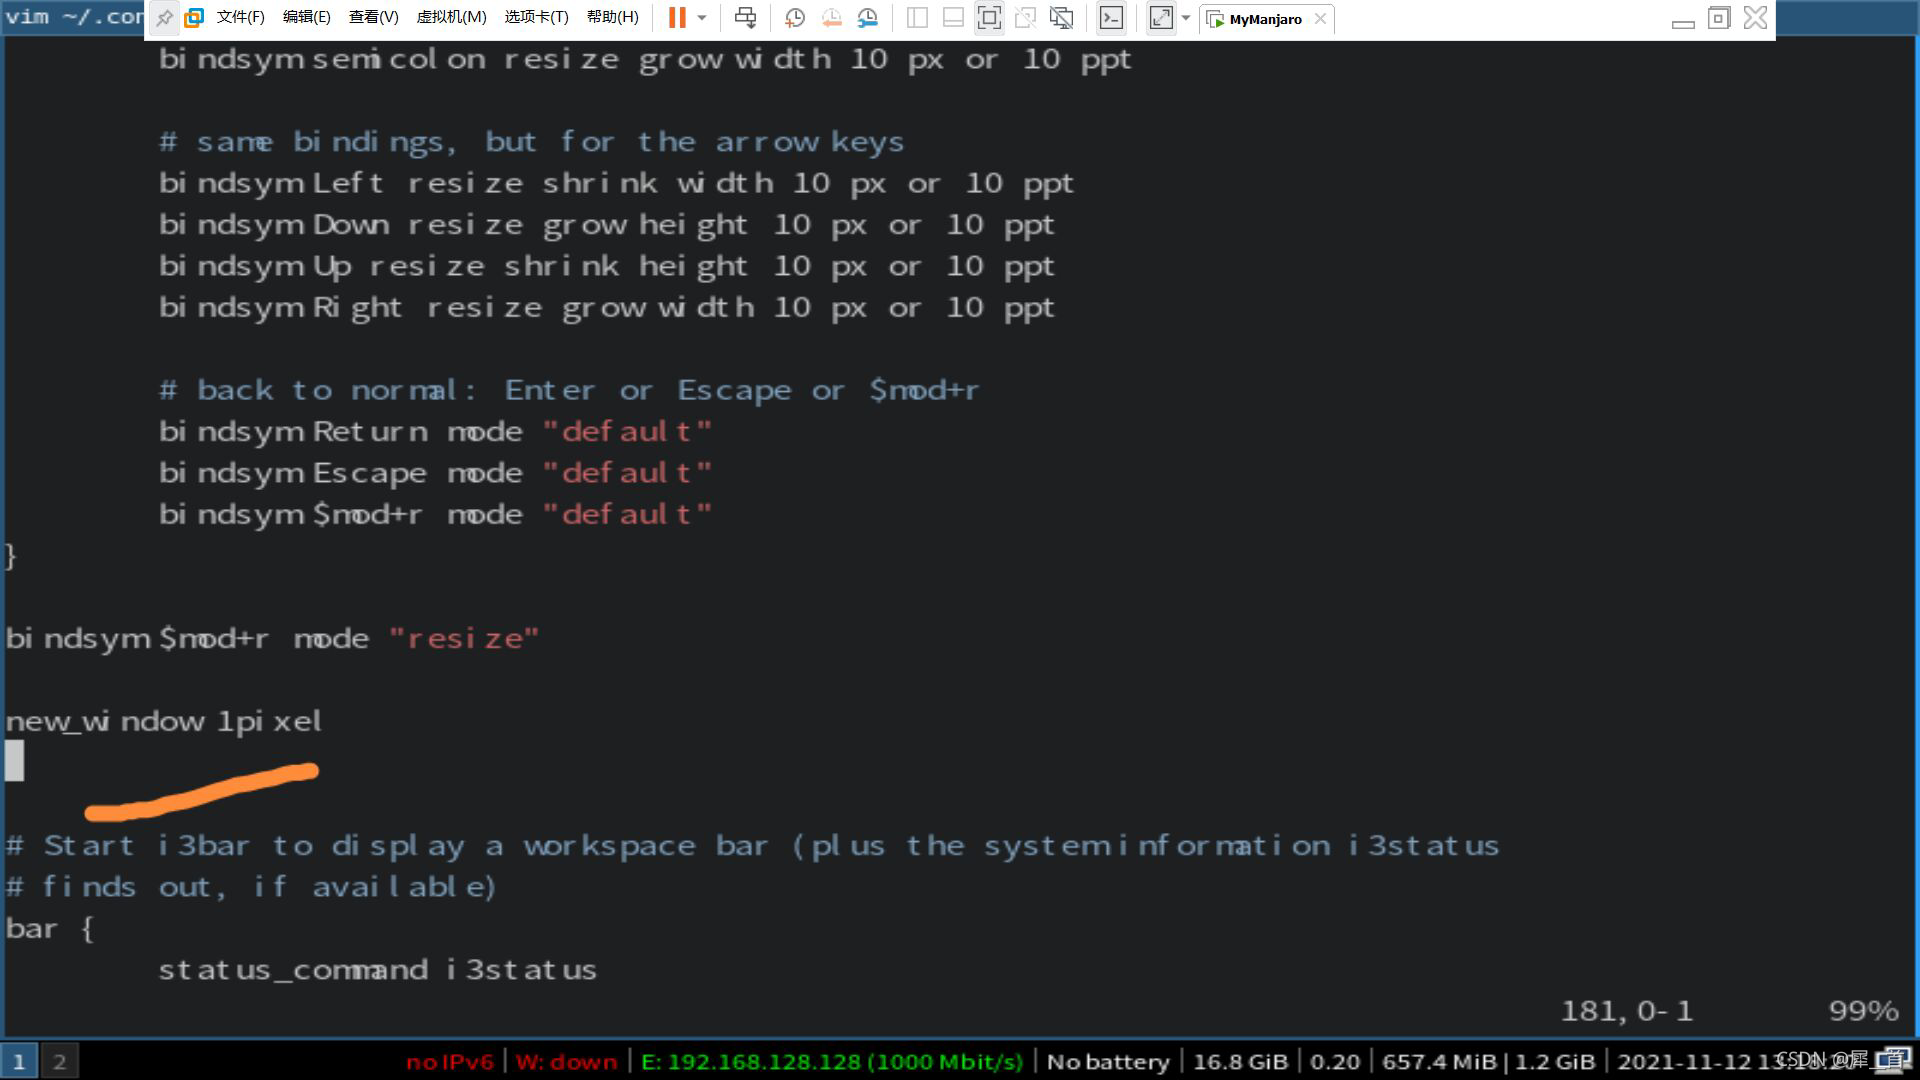
3. 启动快捷键
再次进入i3的配置文件,在前面修改过的位置下加一行即可

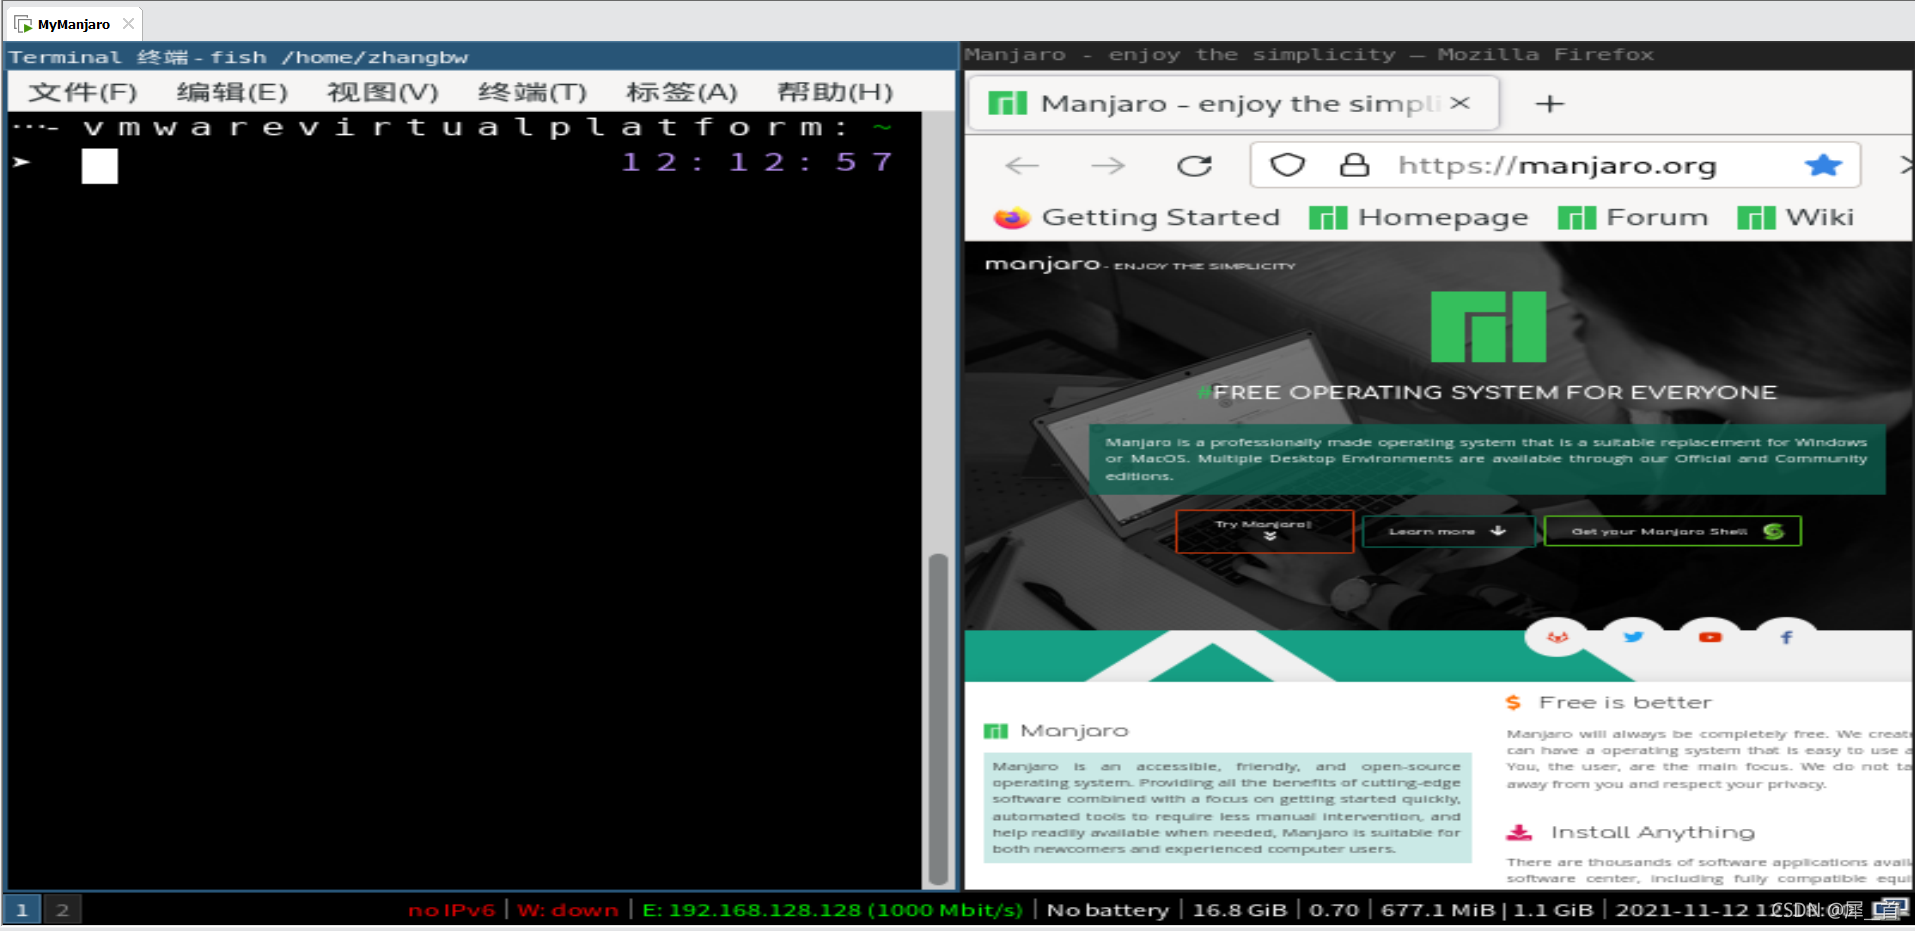
这样按windows+c就会启动浏览器了,如图所示:
九、窗口的快捷键
窗口的快捷键依然可以通过前面的config文件来自定义,下面对一些快捷键进行解释。
1. 打开(分割)窗口
第一个是水平分割,第二个是竖直分割。
2. 退出窗口
 默认是windows键(也就是mod功能键)+shift+q
3. 切换窗口

4. 窗口大小调整
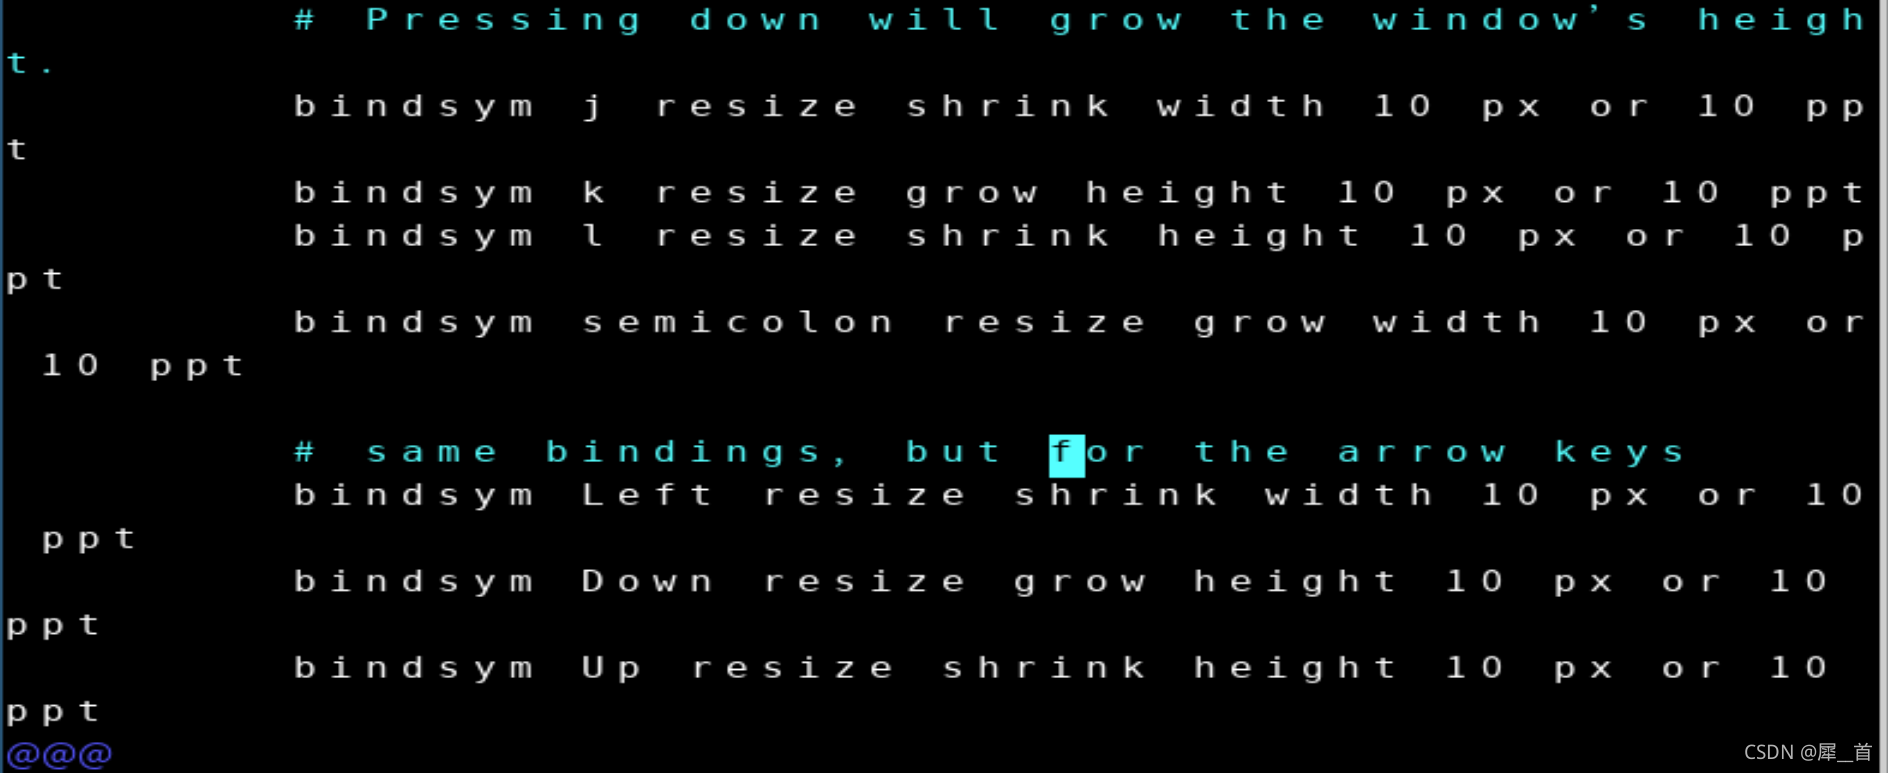 大意是先按windows+r键之后,会进入resize模式,然后按一些键可以调整窗口的大小,比如
j键压缩(shrink)窗口的宽度,k键增加(grow)窗口的高度等
十、i3的初步美化
渲染:因为i3是一个扩展性强的轻量级的框架,它需要优先满足更普遍情况的需求,所以它的界面比较简单。如果需要让它变得美观,就要用显卡对其进行渲染。
1. 边框的处理
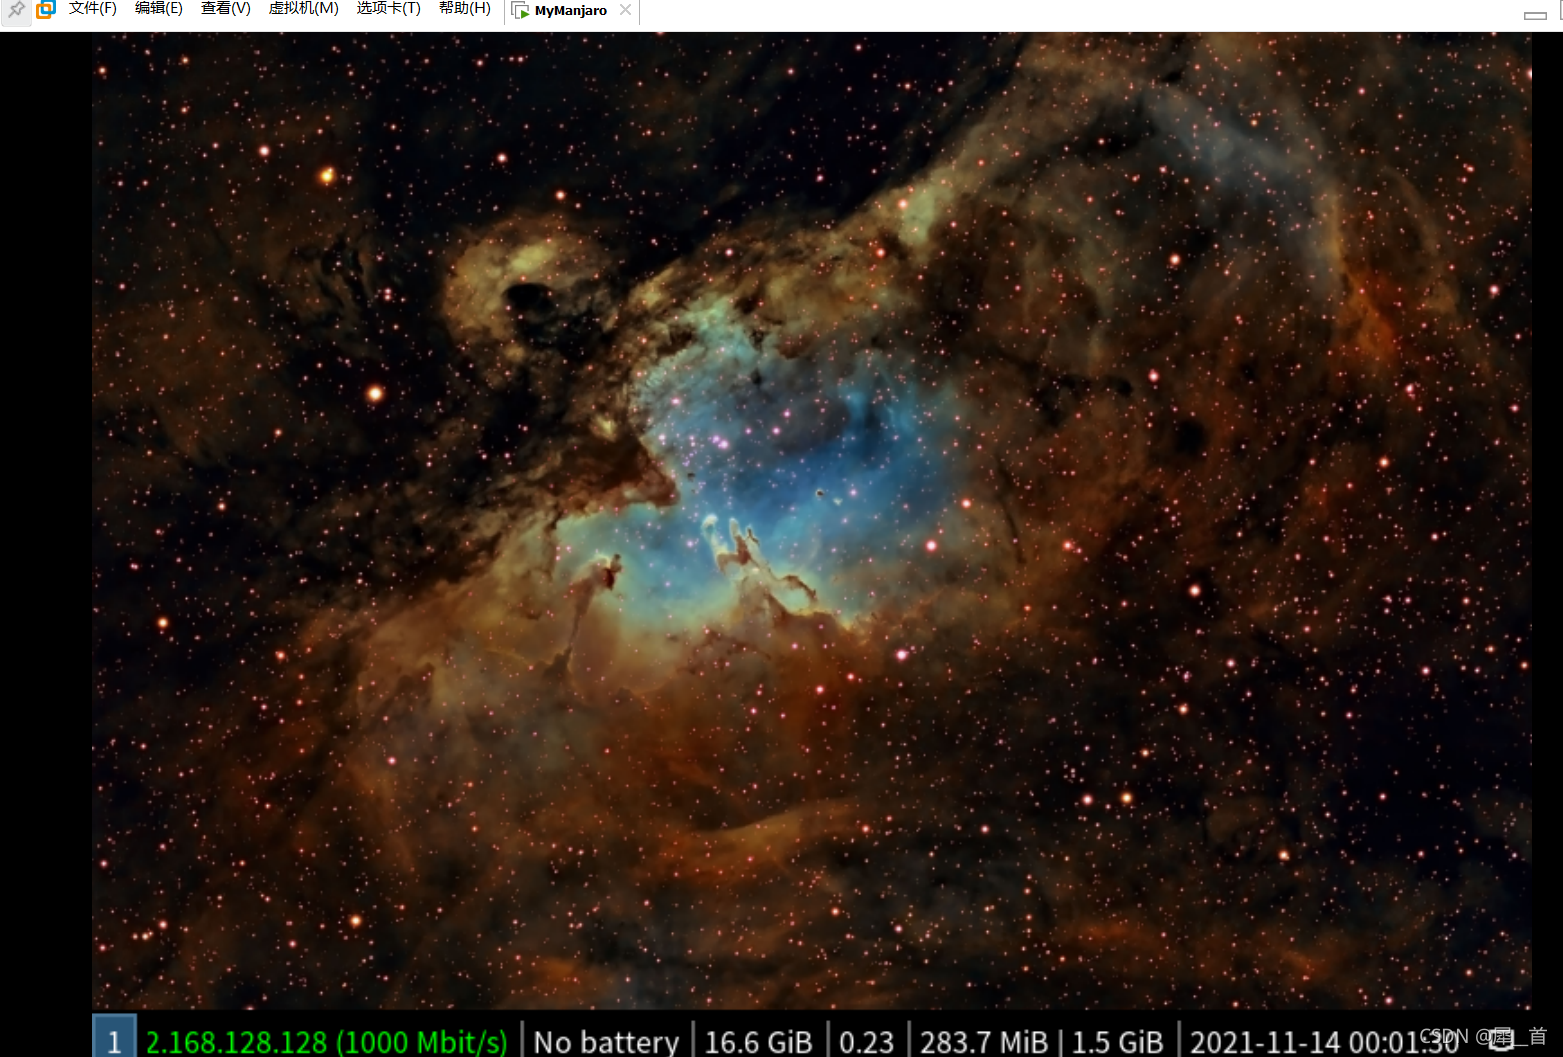
(1)虚拟机全屏和独占模式

在这里可以进行屏幕的设置,可以选择全屏。全屏后上面仍然仍有悬浮选项卡,可以在“查看”中进入独占模式从而将其关闭,但进入独占模式前一定要记得其退出方式为control+alt.

(2)改变终端外围的蓝色边框宽度
依然是在config里面加代码
然后可以明显地看到边框变细了很多,如图所示:
(3)边界收缩
首先下载i3-gaps,然后在i3的配置文件最下面加上gaps inner 15
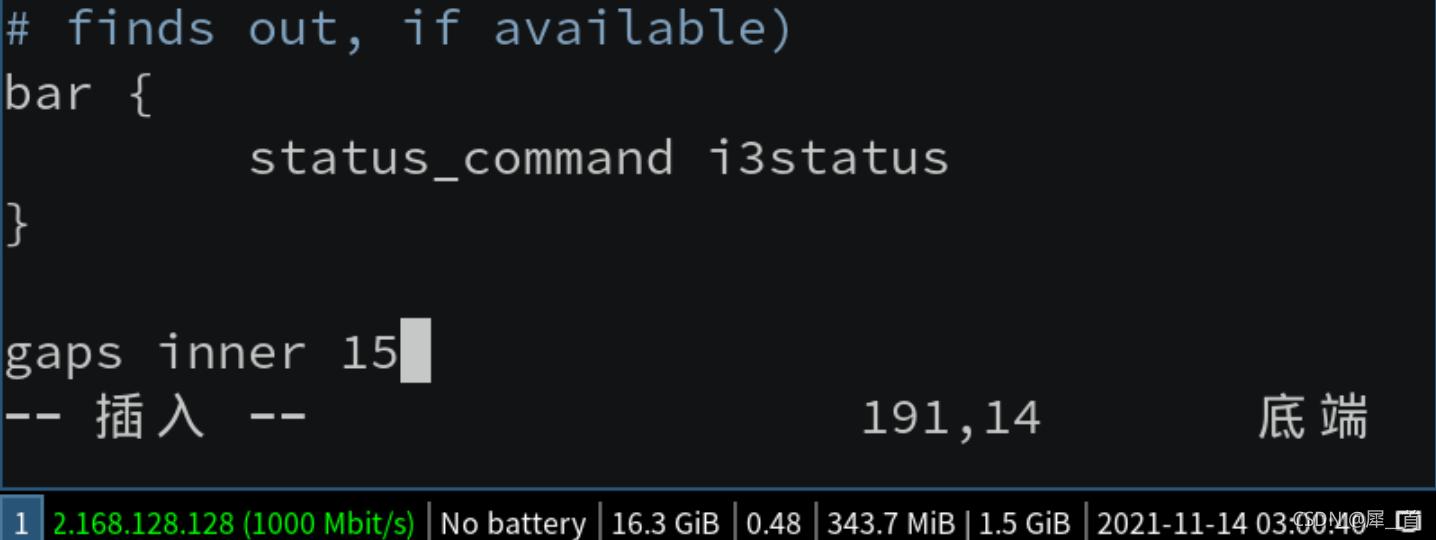 (后面觉得虚拟机屏幕较小的情况下,15有点太大了,)
2.主题切换
(1)下载lxappearance来管理主题
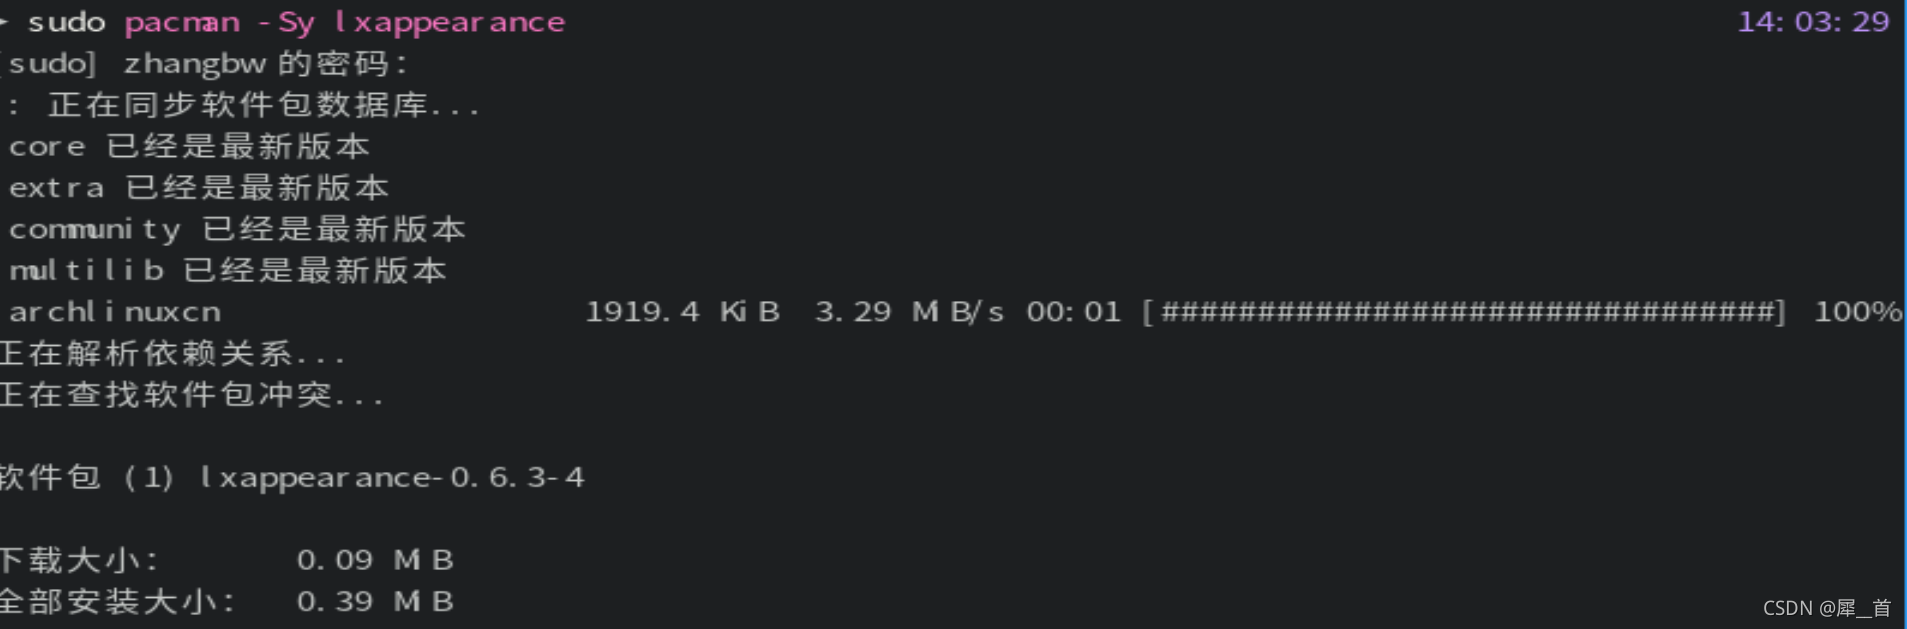 安装完成后直接启动即可
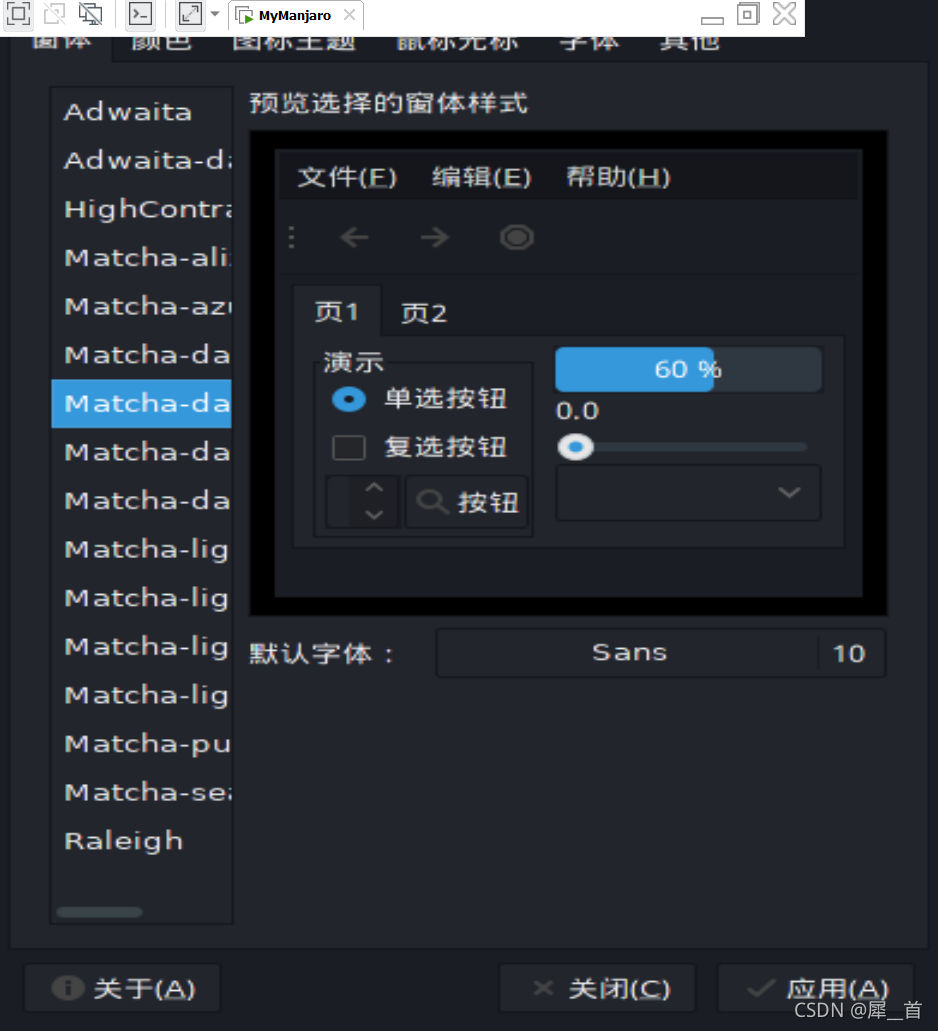
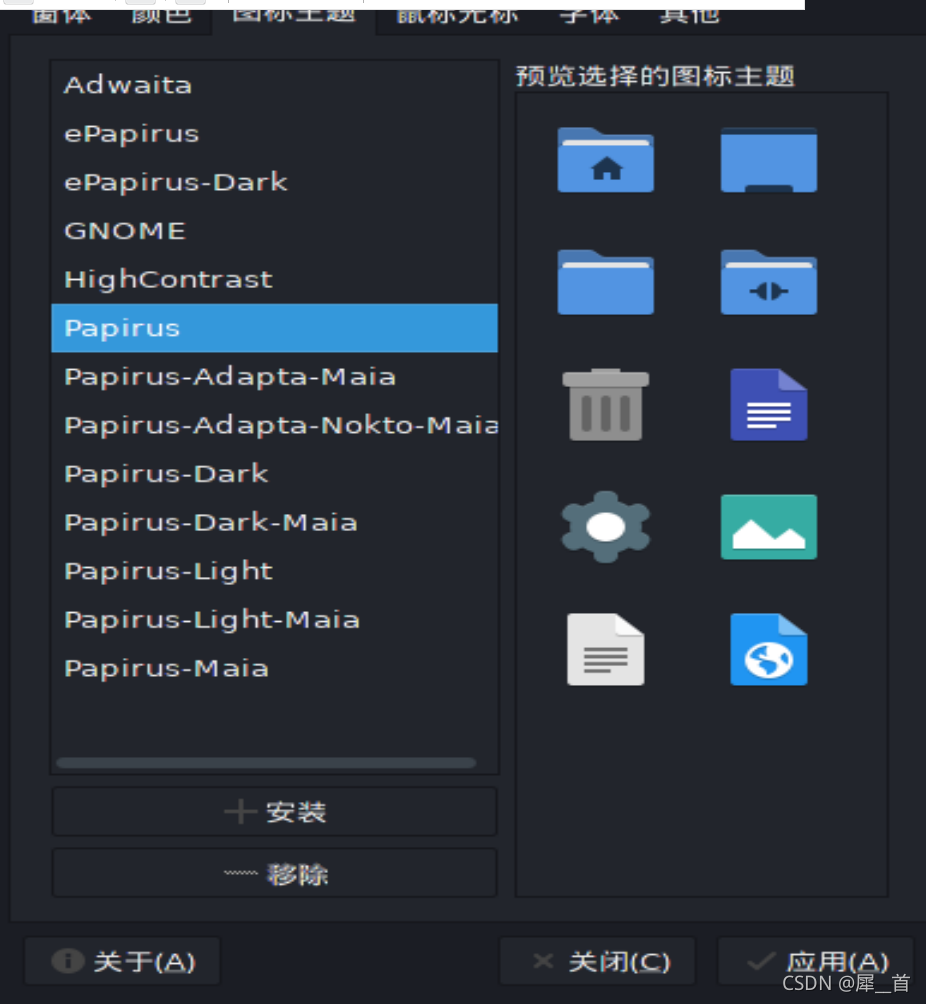
(2)主题配置
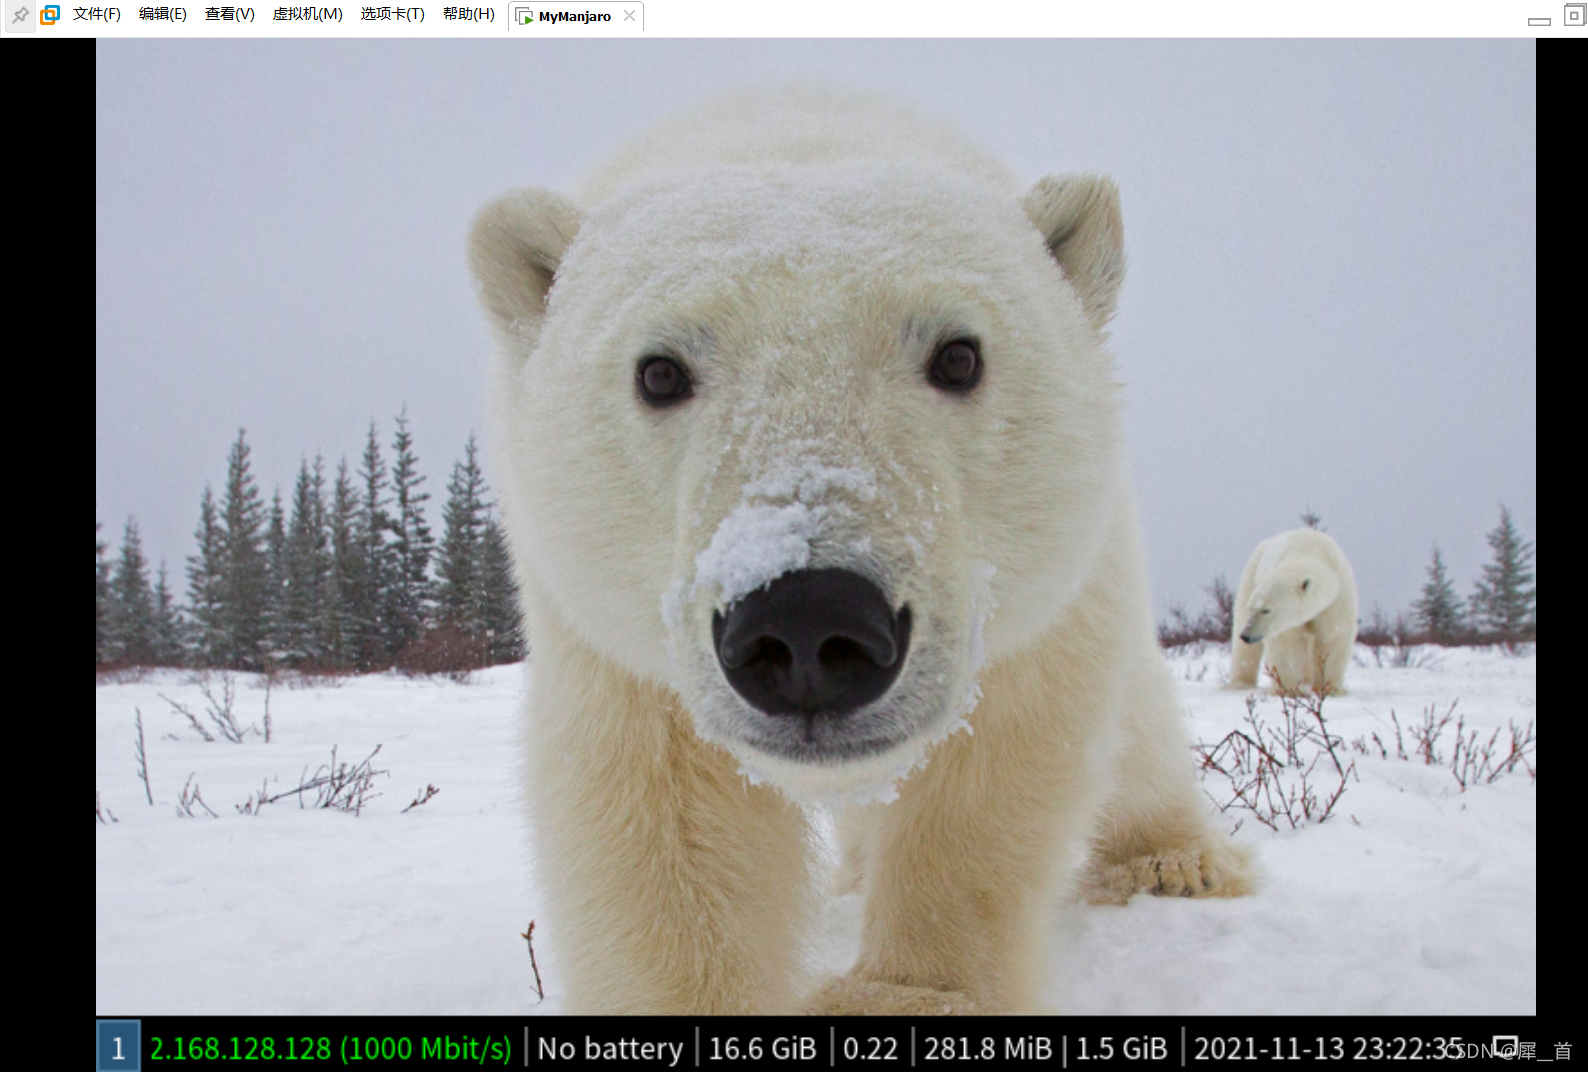
3.给界面加一个壁纸
(1)下载feh和variety
演示了很多次下载了,这里就不截图了
(2)壁纸演示
4.代码的大小和字体设置
可以从上图中看到,在进入alacrity之后,有些字母似乎粘在了一起,有些却离得很远,可以通过调整代码的大小来解决。
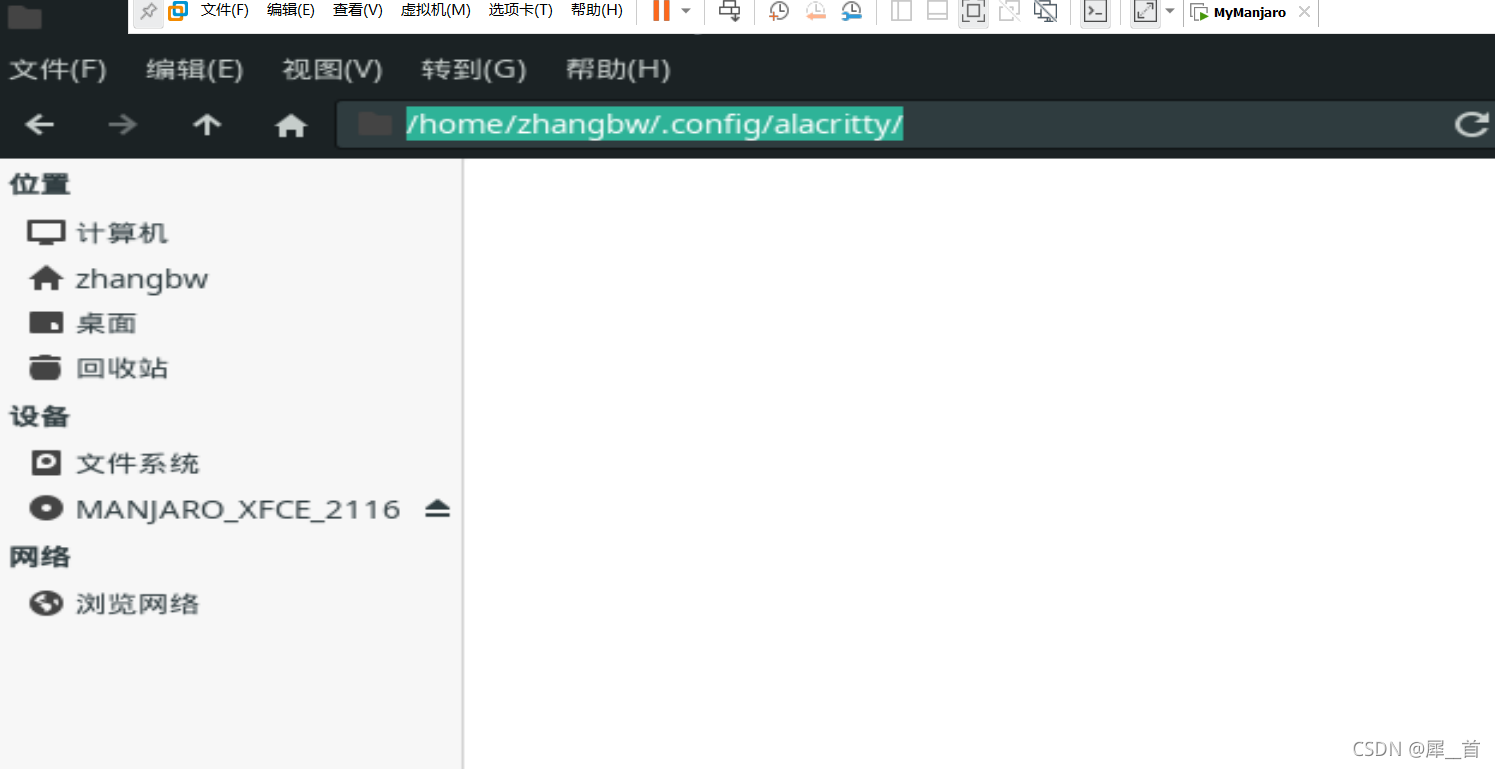
应该为其创建配置文件,配置文件的位置应为:
~/.config/alacritty/alacritty.yml
系统是没有自带这个文件的,需要自己创建,但是在以下位置有一个这个文件的备份(权限是只读),可以拷贝到上面的位置里
/usr/share/doc/alacrity/example/alacrity.yml
如图所示,先找到配置文件位置,直接在文件系统里找,注意.config 是隐藏文件,要按control+H,目标位置如图所示:
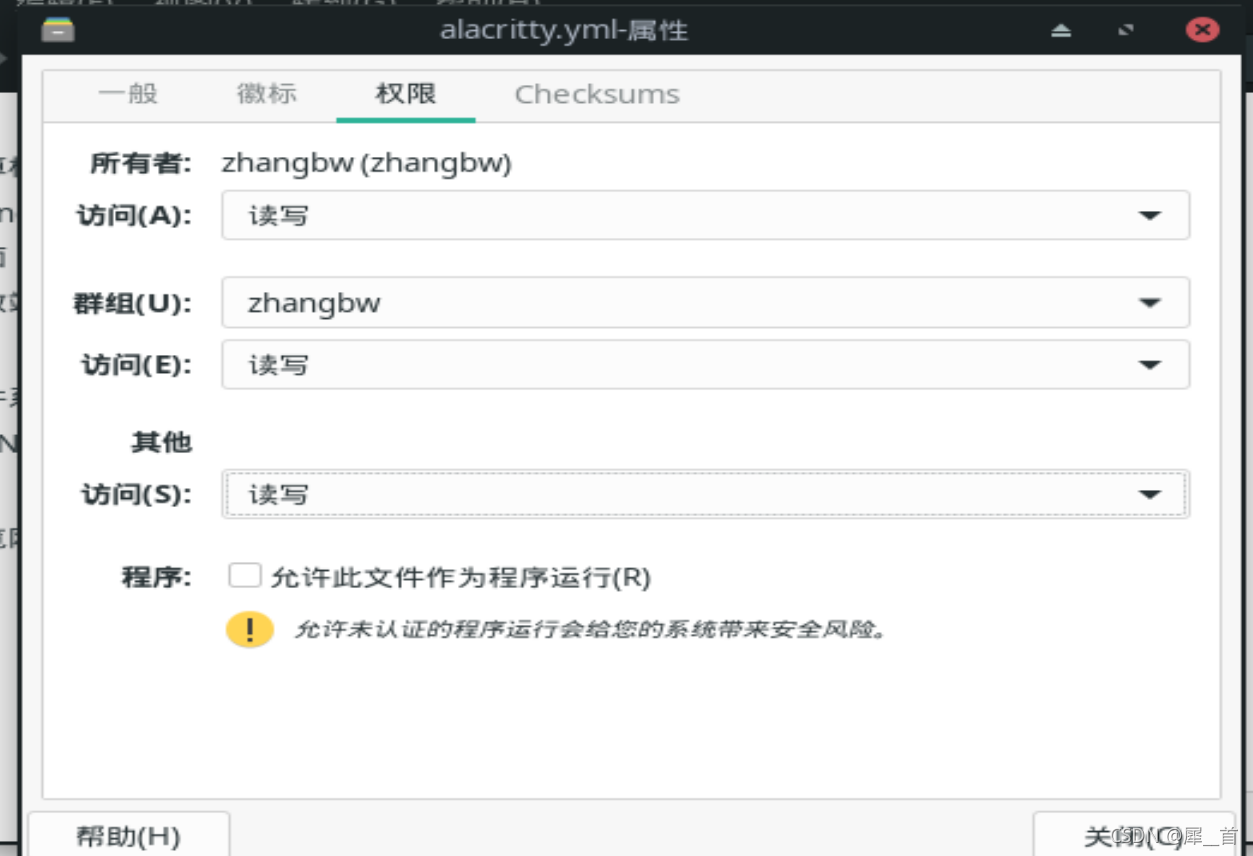
然后找到备份的位置,将其拷贝到目标位置之后,更改其权限,如图所示:
然后回到i3(如六.2)(可以通过reboot操作重启)
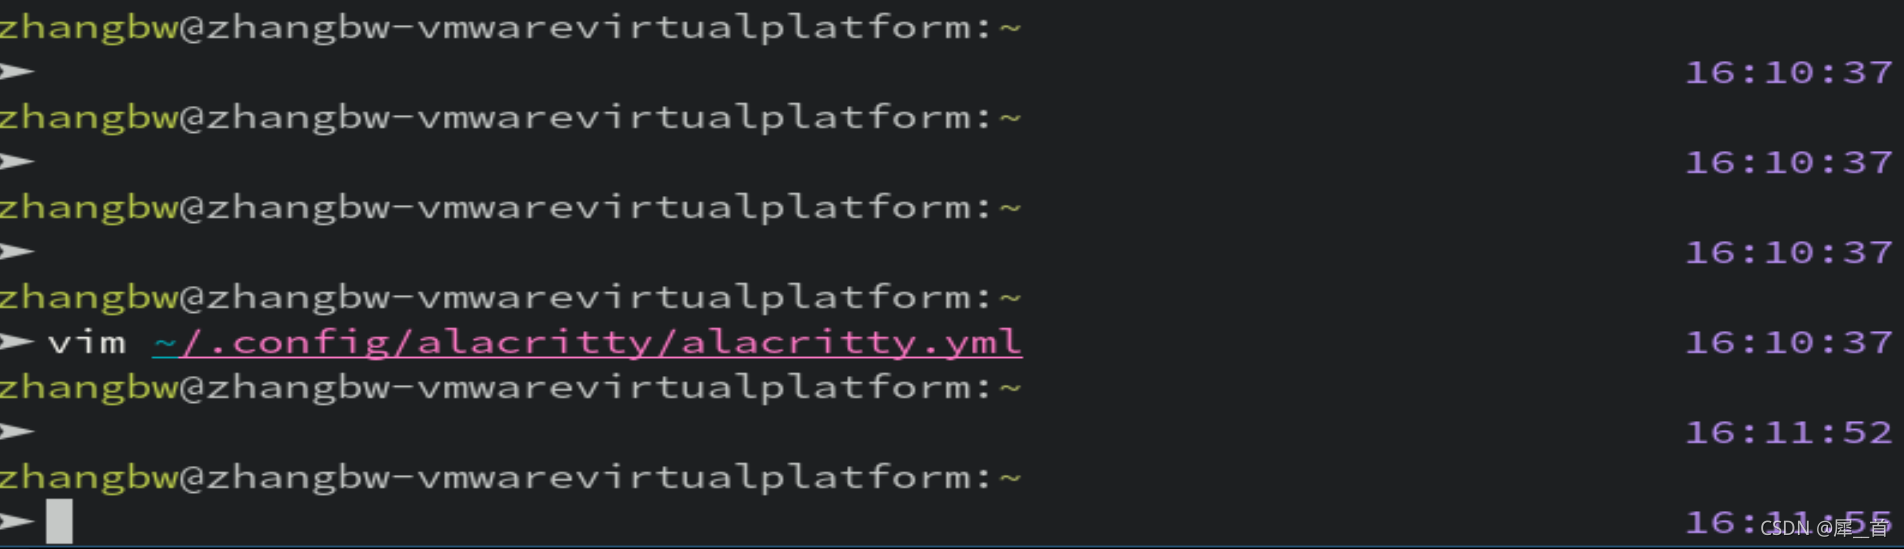
用vim进入配置文件
vim ~/.config/alacritty/alacritty.yml
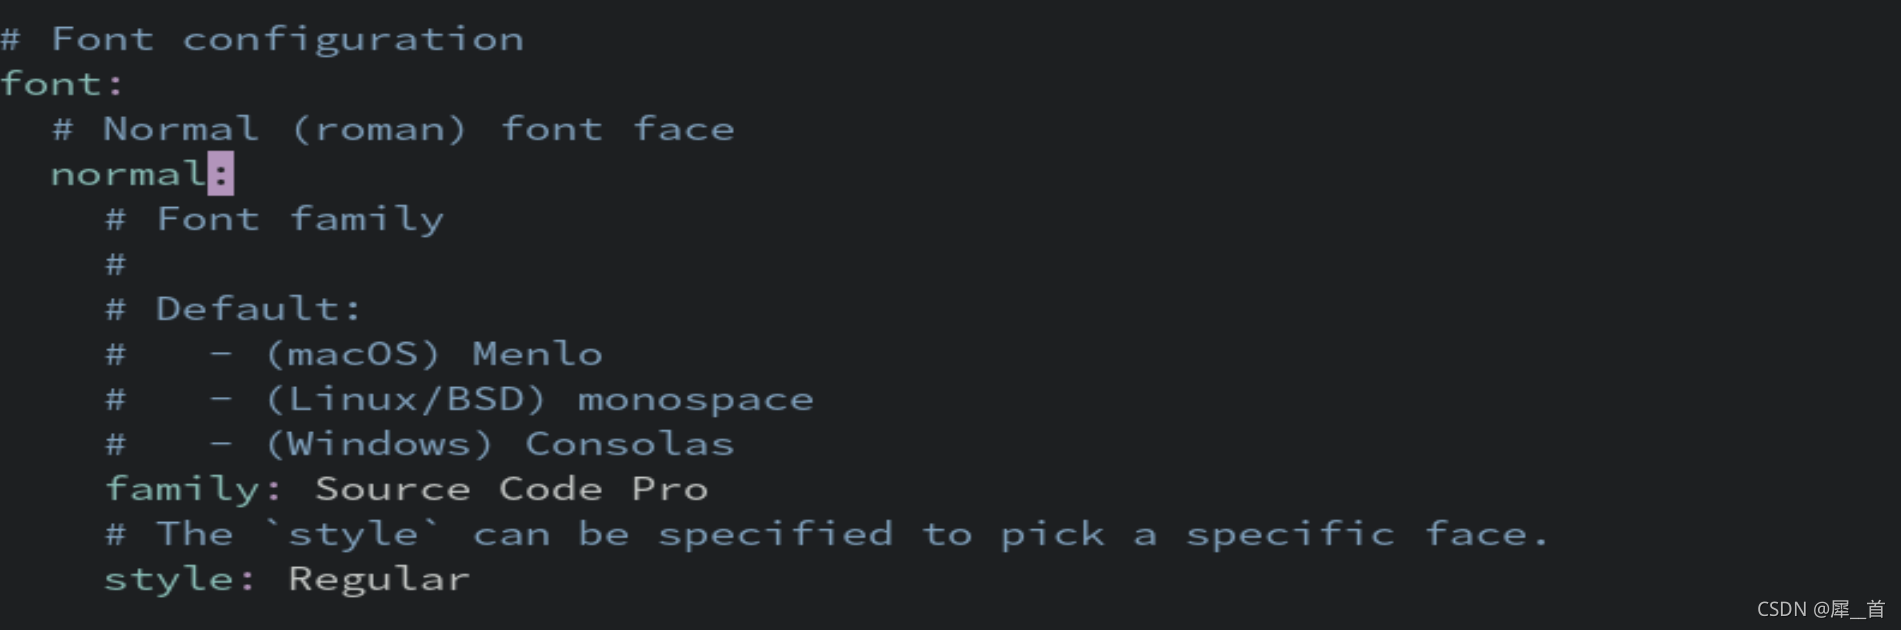
注意修改的时候,不能只修改size,要连带前面的font一起取消注释才有效。如图所示:
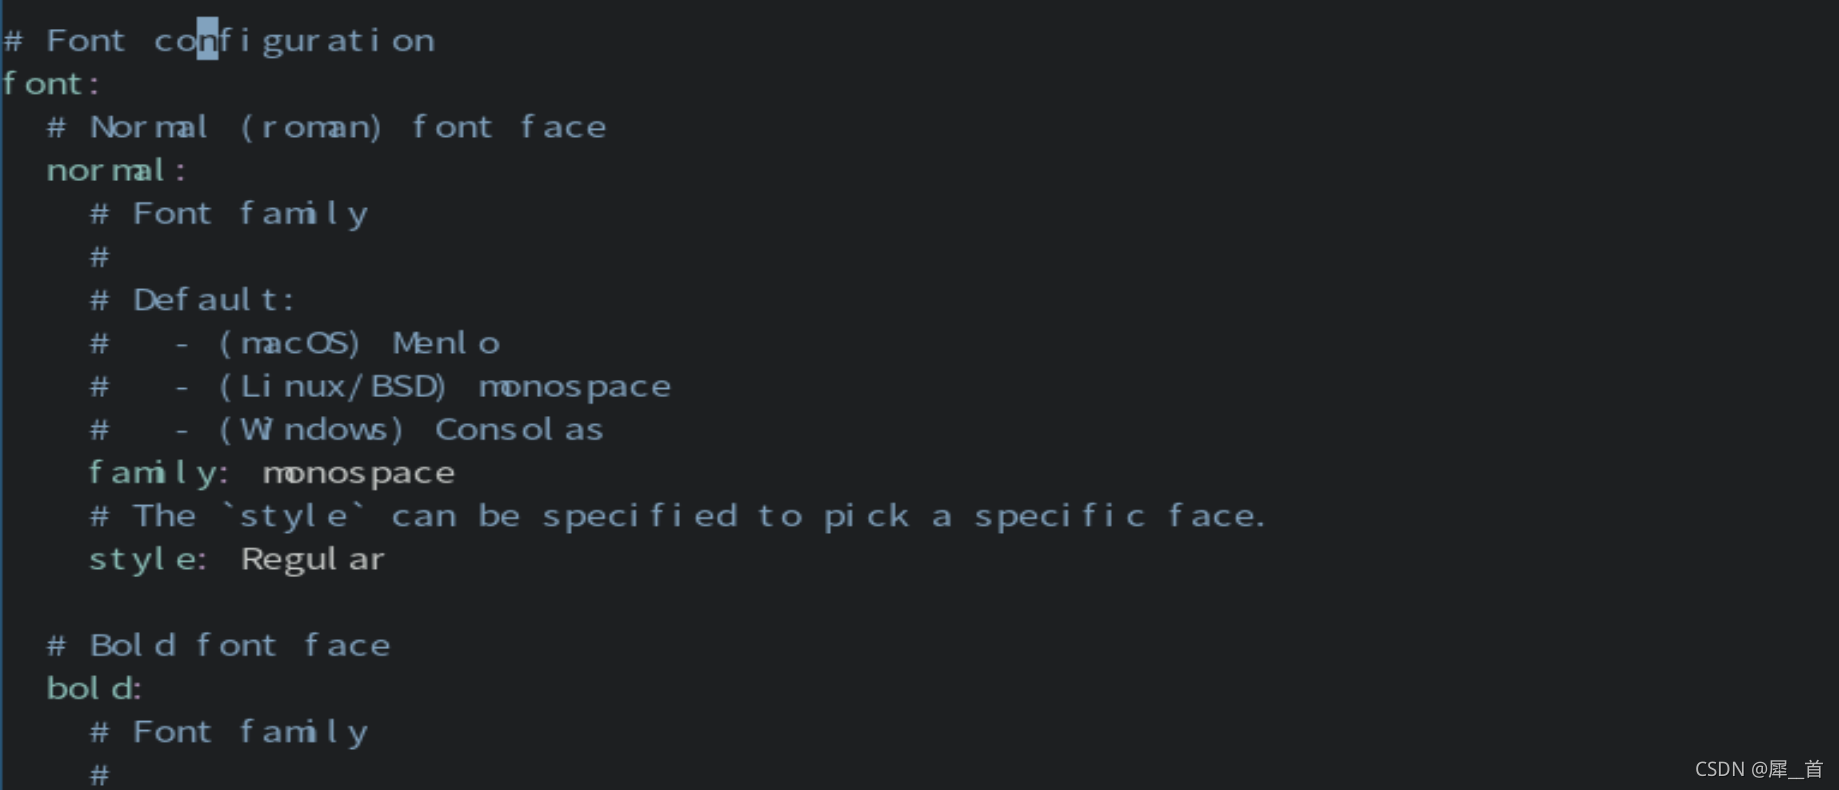
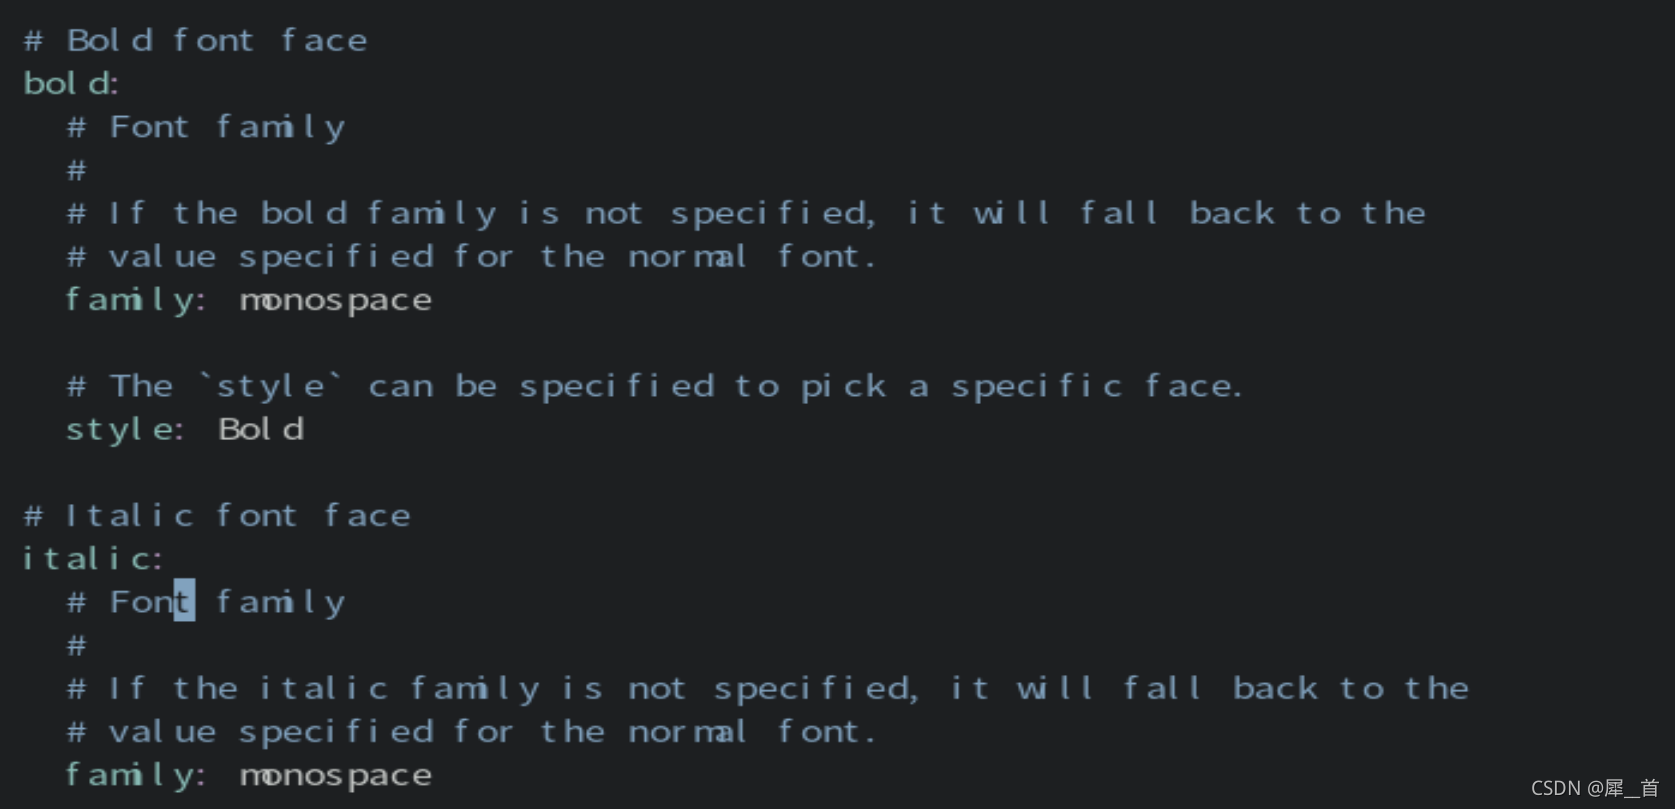
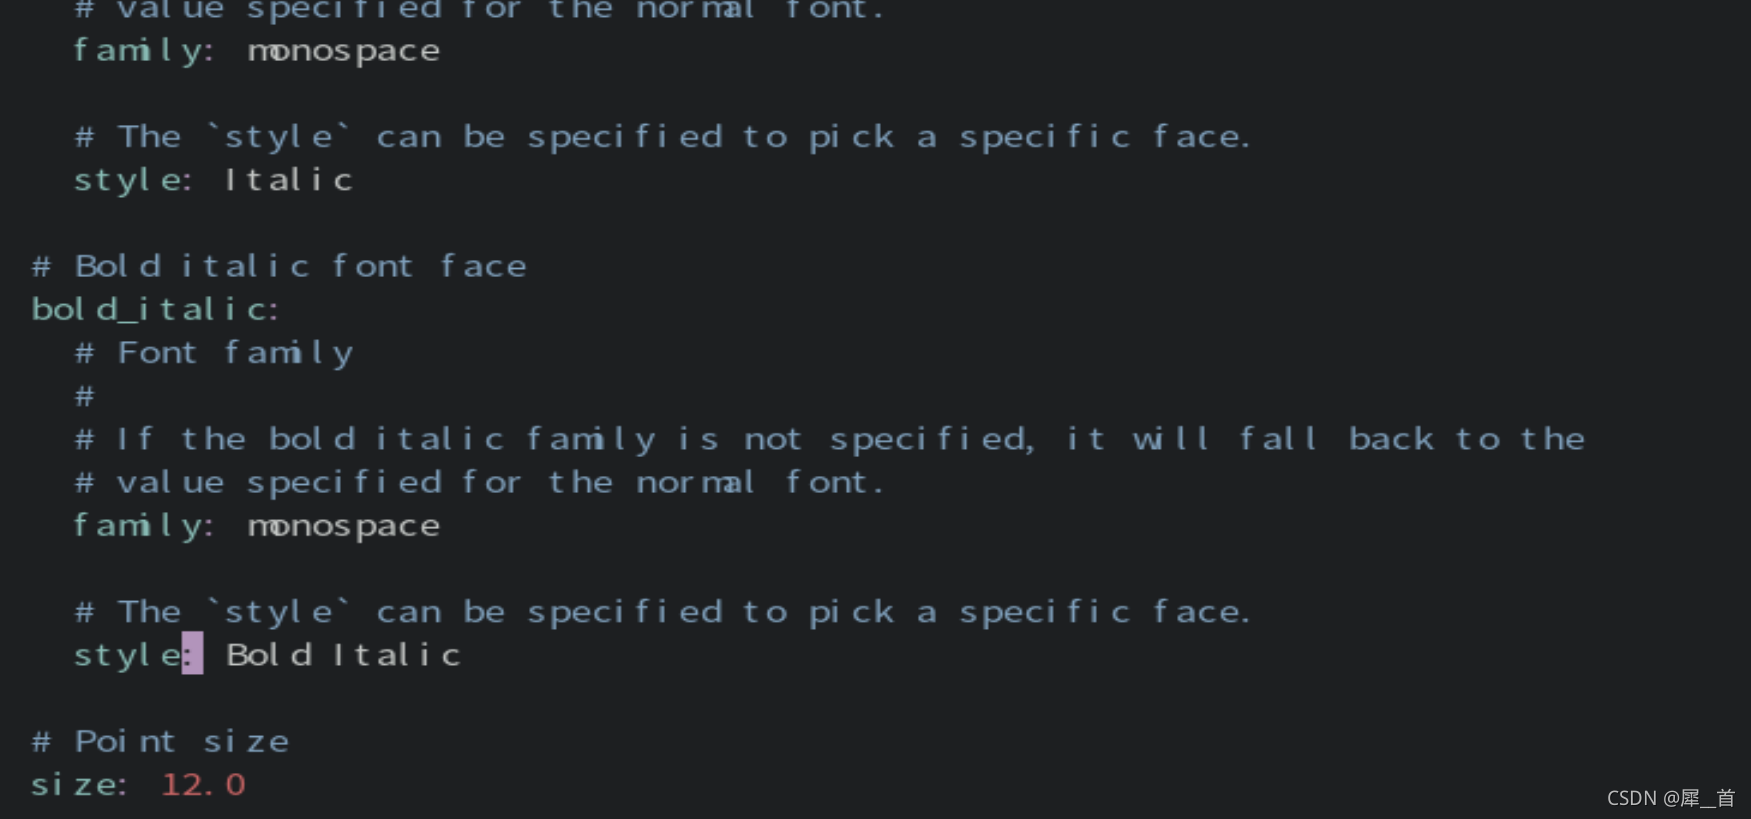
上图对应取消注释的地方取消了注释,具体设置可以根据读者自行需要进行设置,笔者的字体使用的是Source Code Pro,即把这几个的family后面的monospace改为Source Code Pro即可。
完成效果如下图所示,不再出现字母粘连的情况:
 alacrity.yml
# Configuration for Alacritty, the GPU enhanced terminal emulator.

# Import additional configuration files
#
# Imports are loaded in order, skipping all missing files, with the importing
# file being loaded last. If a field is already present in a previous import, it
# will be replaced.
#
# All imports must either be absolute paths starting with `/`, or paths relative
# to the user's home directory starting with `~/`.
#import:
#  - /path/to/alacritty.yml

# Any items in the `env` entry below will be added as
# environment variables. Some entries may override variables
# set by alacritty itself.
#env:
  # TERM variable
  #
  # This value is used to set the `$TERM` environment variable for
  # each instance of Alacritty. If it is not present, alacritty will
  # check the local terminfo database and use `alacritty` if it is
  # available, otherwise `xterm-256color` is used.
  #TERM: alacritty

#window:
  # Window dimensions (changes require restart)
  #
  # Number of lines/columns (not pixels) in the terminal. The number of columns
  # must be at least `2`, while using a value of `0` for columns and lines will
  # fall back to the window manager's recommended size.
  #dimensions:
  #  columns: 0
  #  lines: 0

  # Window position (changes require restart)
  #
  # Specified in number of pixels.
  # If the position is not set, the window manager will handle the placement.
  #position:
  #  x: 0
  #  y: 0

  # Window padding (changes require restart)
  #
  # Blank space added around the window in pixels. This padding is scaled
  # by DPI and the specified value is always added at both opposing sides.
  #padding:
  #  x: 0
  #  y: 0

  # Spread additional padding evenly around the terminal content.
  #dynamic_padding: false

  # Window decorations
  #
  # Values for `decorations`:
  #     - full: Borders and title bar
  #     - none: Neither borders nor title bar
  #
  # Values for `decorations` (macOS only):
  #     - transparent: Title bar, transparent background and title bar buttons
  #     - buttonless: Title bar, transparent background and no title bar buttons
  #decorations: full

  # Startup Mode (changes require restart)
  #
  # Values for `startup_mode`:
  #   - Windowed
  #   - Maximized
  #   - Fullscreen
  #
  # Values for `startup_mode` (macOS only):
  #   - SimpleFullscreen
  #startup_mode: Windowed

  # Window title
  #title: Alacritty

  # Allow terminal applications to change Alacritty's window title.
  #dynamic_title: true

  # Window class (Linux/BSD only):
  #class:
    # Application instance name
    #instance: Alacritty
    # General application class
    #general: Alacritty

  # GTK theme variant (Linux/BSD only)
  #
  # Override the variant of the GTK theme. Commonly supported values are `dark`
  # and `light`. Set this to `None` to use the default theme variant.
  #gtk_theme_variant: None

#scrolling:
  # Maximum number of lines in the scrollback buffer.
  # Specifying '0' will disable scrolling.
  #history: 10000

  # Scrolling distance multiplier.
  #multiplier: 3

# Font configuration
font:
  # Normal (roman) font face
  normal:
    # Font family
    #
    # Default:
    #   - (macOS) Menlo
    #   - (Linux/BSD) monospace
    #   - (Windows) Consolas
    family: Source Code Pro

    # The `style` can be specified to pick a specific face.
    style: Regular

  # Bold font face
  bold:
    # Font family
    #
    # If the bold family is not specified, it will fall back to the
    # value specified for the normal font.
    family: Source Code Pro

    # The `style` can be specified to pick a specific face.
    style: Bold

  # Italic font face
  italic:
    # Font family
    #
    # If the italic family is not specified, it will fall back to the
    # value specified for the normal font.
    family: Source Code Pro

    # The `style` can be specified to pick a specific face.
    style: Italic

  # Bold italic font face
  bold_italic:
    # Font family
    #
    # If the bold italic family is not specified, it will fall back to the
    # value specified for the normal font.
    family: Source Code Pro

    # The `style` can be specified to pick a specific face.
    style: Bold Italic

  # Point size
  size: 13.0

  # Offset is the extra space around each character. `offset.y` can be thought
  # of as modifying the line spacing, and `offset.x` as modifying the letter
  # spacing.
  #offset:
  #  x: 0
  #  y: 0

  # Glyph offset determines the locations of the glyphs within their cells with
  # the default being at the bottom. Increasing `x` moves the glyph to the
  # right, increasing `y` moves the glyph upward.
  #glyph_offset:
  #  x: 0
  #  y: 0

  # Thin stroke font rendering (macOS only)
  #
  # Thin strokes are suitable for retina displays, but for non-retina screens
  # it is recommended to set `use_thin_strokes` to `false`.
  #use_thin_strokes: true

# If `true`, bold text is drawn using the bright color variants.
#draw_bold_text_with_bright_colors: false

# Colors (Tomorrow Night)
#colors:
  # Default colors
  #primary:
  #  background: '#1d1f21'
  #  foreground: '#c5c8c6'

    # Bright and dim foreground colors
    #
    # The dimmed foreground color is calculated automatically if it is not
    # present. If the bright foreground color is not set, or
    # `draw_bold_text_with_bright_colors` is `false`, the normal foreground
    # color will be used.
    #dim_foreground: '#828482'
    #bright_foreground: '#eaeaea'

  # Cursor colors
  #
  # Colors which should be used to draw the terminal cursor.
  #
  # Allowed values are CellForeground/CellBackground, which reference the
  # affected cell, or hexadecimal colors like #ff00ff.
  #cursor:
  #  text: CellBackground
  #  cursor: CellForeground

  # Vi mode cursor colors
  #
  # Colors for the cursor when the vi mode is active.
  #
  # Allowed values are CellForeground/CellBackground, which reference the
  # affected cell, or hexadecimal colors like #ff00ff.
  #vi_mode_cursor:
  #  text: CellBackground
  #  cursor: CellForeground

  # Search colors
  #
  # Colors used for the search bar and match highlighting.
  #search:
    # Allowed values are CellForeground/CellBackground, which reference the
    # affected cell, or hexadecimal colors like #ff00ff.
    #matches:
    #  foreground: '#000000'
    #  background: '#ffffff'
    #focused_match:
    #  foreground: '#ffffff'
    #  background: '#000000'

    #bar:
    #  background: '#c5c8c6'
    #  foreground: '#1d1f21'

  # Keyboard regex hints
  #hints:
    # First character in the hint label
    #
    # Allowed values are CellForeground/CellBackground, which reference the
    # affected cell, or hexadecimal colors like #ff00ff.
    #start:
    #  foreground: '#1d1f21'
    #  background: '#e9ff5e'

    # All characters after the first one in the hint label
    #
    # Allowed values are CellForeground/CellBackground, which reference the
    # affected cell, or hexadecimal colors like #ff00ff.
    #end:
    #  foreground: '#e9ff5e'
    #  background: '#1d1f21'

  # Line indicator
  #
  # Color used for the indicator displaying the position in history during
  # search and vi mode.
  #
  # By default, these will use the opposing primary color.
  #line_indicator:
  #  foreground: None
  #  background: None

  # Selection colors
  #
  # Colors which should be used to draw the selection area.
  #
  # Allowed values are CellForeground/CellBackground, which reference the
  # affected cell, or hexadecimal colors like #ff00ff.
  #selection:
  #  text: CellBackground
  #  background: CellForeground

  # Normal colors
  #normal:
  #  black:   '#1d1f21'
  #  red:     '#cc6666'
  #  green:   '#b5bd68'
  #  yellow:  '#f0c674'
  #  blue:    '#81a2be'
  #  magenta: '#b294bb'
  #  cyan:    '#8abeb7'
  #  white:   '#c5c8c6'

  # Bright colors
  #bright:
  #  black:   '#666666'
  #  red:     '#d54e53'
  #  green:   '#b9ca4a'
  #  yellow:  '#e7c547'
  #  blue:    '#7aa6da'
  #  magenta: '#c397d8'
  #  cyan:    '#70c0b1'
  #  white:   '#eaeaea'

  # Dim colors
  #
  # If the dim colors are not set, they will be calculated automatically based
  # on the `normal` colors.
  #dim:
  #  black:   '#131415'
  #  red:     '#864343'
  #  green:   '#777c44'
  #  yellow:  '#9e824c'
  #  blue:    '#556a7d'
  #  magenta: '#75617b'
  #  cyan:    '#5b7d78'
  #  white:   '#828482'

  # Indexed Colors
  #
  # The indexed colors include all colors from 16 to 256.
  # When these are not set, they're filled with sensible defaults.
  #
  # Example:
  #   `- { index: 16, color: '#ff00ff' }`
  #
  #indexed_colors: []

# Bell
#
# The bell is rung every time the BEL control character is received.
#bell:
  # Visual Bell Animation
  #
  # Animation effect for flashing the screen when the visual bell is rung.
  #
  # Values for `animation`:
  #   - Ease
  #   - EaseOut
  #   - EaseOutSine
  #   - EaseOutQuad
  #   - EaseOutCubic
  #   - EaseOutQuart
  #   - EaseOutQuint
  #   - EaseOutExpo
  #   - EaseOutCirc
  #   - Linear
  #animation: EaseOutExpo

  # Duration of the visual bell flash in milliseconds. A `duration` of `0` will
  # disable the visual bell animation.
  #duration: 0

  # Visual bell animation color.
  #color: '#ffffff'

  # Bell Command
  #
  # This program is executed whenever the bell is rung.
  #
  # When set to `command: None`, no command will be executed.
  #
  # Example:
  #   command:
  #     program: notify-send
  #     args: ["Hello, World!"]
  #
  #command: None

# Background opacity
#
# Window opacity as a floating point number from `0.0` to `1.0`.
# The value `0.0` is completely transparent and `1.0` is opaque.
background_opacity: 0.6

#selection:
  # This string contains all characters that are used as separators for
  # "semantic words" in Alacritty.
  #semantic_escape_chars: ",│`|:\"' ()[]{}<>\t"

  # When set to `true`, selected text will be copied to the primary clipboard.
  #save_to_clipboard: false

#cursor:
  # Cursor style
  #style:
    # Cursor shape
    #
    # Values for `shape`:
    #   - ▇ Block
    #   - _ Underline
    #   - | Beam
    #shape: Block

    # Cursor blinking state
    #
    # Values for `blinking`:
    #   - Never: Prevent the cursor from ever blinking
    #   - Off: Disable blinking by default
    #   - On: Enable blinking by default
    #   - Always: Force the cursor to always blink
    #blinking: Off

  # Vi mode cursor style
  #
  # If the vi mode cursor style is `None` or not specified, it will fall back to
  # the style of the active value of the normal cursor.
  #
  # See `cursor.style` for available options.
  #vi_mode_style: None

  # Cursor blinking interval in milliseconds.
  #blink_interval: 750

  # If this is `true`, the cursor will be rendered as a hollow box when the
  # window is not focused.
  #unfocused_hollow: true

  # Thickness of the cursor relative to the cell width as floating point number
  # from `0.0` to `1.0`.
  #thickness: 0.15

# Live config reload (changes require restart)
#live_config_reload: true

# Shell
#
# You can set `shell.program` to the path of your favorite shell, e.g.
# `/bin/fish`. Entries in `shell.args` are passed unmodified as arguments to the
# shell.
#
# Default:
#   - (macOS) /bin/bash --login
#   - (Linux/BSD) user login shell
#   - (Windows) powershell
#shell:
#  program: /bin/bash
#  args:
#    - --login

# Startup directory
#
# Directory the shell is started in. If this is unset, or `None`, the working
# directory of the parent process will be used.
#working_directory: None

# Send ESC (\x1b) before characters when alt is pressed.
#alt_send_esc: true

#mouse:
  # Click settings
  #
  # The `double_click` and `triple_click` settings control the time
  # alacritty should wait for accepting multiple clicks as one double
  # or triple click.
  #double_click: { threshold: 300 }
  #triple_click: { threshold: 300 }

  # If this is `true`, the cursor is temporarily hidden when typing.
  #hide_when_typing: false

# Regex hints
#
# Terminal hints can be used to find text in the visible part of the terminal
# and pipe it to other applications.
#hints:
  # Keys used for the hint labels.
  #alphabet: "jfkdls;ahgurieowpq"

  # List with all available hints
  #
  # Each hint must have a `regex` and either an `action` or a `command` field.
  # The fields `mouse`, `binding` and `post_processing` are optional.
  #
  # The fields `command`, `binding.key`, `binding.mods`, `binding.mode` and
  # `mouse.mods` accept the same values as they do in the `key_bindings` section.
  #
  # The `mouse.enabled` field controls if the hint should be underlined while
  # the mouse with all `mouse.mods` keys held or the vi mode cursor is above it.
  #
  # If the `post_processing` field is set to `true`, heuristics will be used to
  # shorten the match if there are characters likely not to be part of the hint
  # (e.g. a trailing `.`). This is most useful for URIs.
  #
  # Values for `action`:
  #   - Copy
  #       Copy the hint's text to the clipboard.
  #   - Paste
  #       Paste the hint's text to the terminal or search.
  #   - Select
  #       Select the hint's text.
  #   - MoveViModeCursor
  #       Move the vi mode cursor to the beginning of the hint.
  #enabled:
  # - regex: "(ipfs:|ipns:|magnet:|mailto:|gemini:|gopher:|https:|http:|news:|file:|git:|ssh:|ftp:)\
  #           [^\u0000-\u001F\u007F-\u009F<>\"\\s{-}\\^⟨⟩`]+"
  #   command: xdg-open
  #   post_processing: true
  #   mouse:
  #     enabled: true
  #     mods: None
  #   binding:
  #     key: U
  #     mods: Control|Shift

# Mouse bindings
#
# Mouse bindings are specified as a list of objects, much like the key
# bindings further below.
#
# To trigger mouse bindings when an application running within Alacritty
# captures the mouse, the `Shift` modifier is automatically added as a
# requirement.
#
# Each mouse binding will specify a:
#
# - `mouse`:
#
#   - Middle
#   - Left
#   - Right
#   - Numeric identifier such as `5`
#
# - `action` (see key bindings)
#
# And optionally:
#
# - `mods` (see key bindings)
#mouse_bindings:
#  - { mouse: Middle, action: PasteSelection }

# Key bindings
#
# Key bindings are specified as a list of objects. For example, this is the
# default paste binding:
#
# `- { key: V, mods: Control|Shift, action: Paste }`
#
# Each key binding will specify a:
#
# - `key`: Identifier of the key pressed
#
#    - A-Z
#    - F1-F24
#    - Key0-Key9
#
#    A full list with available key codes can be found here:
#    https://docs.rs/glutin/*/glutin/event/enum.VirtualKeyCode.html#variants
#
#    Instead of using the name of the keys, the `key` field also supports using
#    the scancode of the desired key. Scancodes have to be specified as a
#    decimal number. This command will allow you to display the hex scancodes
#    for certain keys:
#
#       `showkey --scancodes`.
#
# Then exactly one of:
#
# - `chars`: Send a byte sequence to the running application
#
#    The `chars` field writes the specified string to the terminal. This makes
#    it possible to pass escape sequences. To find escape codes for bindings
#    like `PageUp` (`"\x1b[5~"`), you can run the command `showkey -a` outside
#    of tmux. Note that applications use terminfo to map escape sequences back
#    to keys. It is therefore required to update the terminfo when changing an
#    escape sequence.
#
# - `action`: Execute a predefined action
#
#   - ToggleViMode
#   - SearchForward
#       Start searching toward the right of the search origin.
#   - SearchBackward
#       Start searching toward the left of the search origin.
#   - Copy
#   - Paste
#   - IncreaseFontSize
#   - DecreaseFontSize
#   - ResetFontSize
#   - ScrollPageUp
#   - ScrollPageDown
#   - ScrollHalfPageUp
#   - ScrollHalfPageDown
#   - ScrollLineUp
#   - ScrollLineDown
#   - ScrollToTop
#   - ScrollToBottom
#   - ClearHistory
#       Remove the terminal's scrollback history.
#   - Hide
#       Hide the Alacritty window.
#   - Minimize
#       Minimize the Alacritty window.
#   - Quit
#       Quit Alacritty.
#   - ToggleFullscreen
#   - SpawnNewInstance
#       Spawn a new instance of Alacritty.
#   - ClearLogNotice
#       Clear Alacritty's UI warning and error notice.
#   - ClearSelection
#       Remove the active selection.
#   - ReceiveChar
#   - None
#
# - Vi mode exclusive actions:
#
#   - Open
#       Perform the action of the first matching hint under the vi mode cursor
#       with `mouse.enabled` set to `true`.
#   - ToggleNormalSelection
#   - ToggleLineSelection
#   - ToggleBlockSelection
#   - ToggleSemanticSelection
#       Toggle semantic selection based on `selection.semantic_escape_chars`.
#
# - Vi mode exclusive cursor motion actions:
#
#   - Up
#       One line up.
#   - Down
#       One line down.
#   - Left
#       One character left.
#   - Right
#       One character right.
#   - First
#       First column, or beginning of the line when already at the first column.
#   - Last
#       Last column, or beginning of the line when already at the last column.
#   - FirstOccupied
#       First non-empty cell in this terminal row, or first non-empty cell of
#       the line when already at the first cell of the row.
#   - High
#       Top of the screen.
#   - Middle
#       Center of the screen.
#   - Low
#       Bottom of the screen.
#   - SemanticLeft
#       Start of the previous semantically separated word.
#   - SemanticRight
#       Start of the next semantically separated word.
#   - SemanticLeftEnd
#       End of the previous semantically separated word.
#   - SemanticRightEnd
#       End of the next semantically separated word.
#   - WordLeft
#       Start of the previous whitespace separated word.
#   - WordRight
#       Start of the next whitespace separated word.
#   - WordLeftEnd
#       End of the previous whitespace separated word.
#   - WordRightEnd
#       End of the next whitespace separated word.
#   - Bracket
#       Character matching the bracket at the cursor's location.
#   - SearchNext
#       Beginning of the next match.
#   - SearchPrevious
#       Beginning of the previous match.
#   - SearchStart
#       Start of the match to the left of the vi mode cursor.
#   - SearchEnd
#       End of the match to the right of the vi mode cursor.
#
# - Search mode exclusive actions:
#   - SearchFocusNext
#       Move the focus to the next search match.
#   - SearchFocusPrevious
#       Move the focus to the previous search match.
#   - SearchConfirm
#   - SearchCancel
#   - SearchClear
#       Reset the search regex.
#   - SearchDeleteWord
#       Delete the last word in the search regex.
#   - SearchHistoryPrevious
#       Go to the previous regex in the search history.
#   - SearchHistoryNext
#       Go to the next regex in the search history.
#
# - macOS exclusive actions:
#   - ToggleSimpleFullscreen
#       Enter fullscreen without occupying another space.
#
# - Linux/BSD exclusive actions:
#
#   - CopySelection
#       Copy from the selection buffer.
#   - PasteSelection
#       Paste from the selection buffer.
#
# - `command`: Fork and execute a specified command plus arguments
#
#    The `command` field must be a map containing a `program` string and an
#    `args` array of command line parameter strings. For example:
#       `{ program: "alacritty", args: ["-e", "vttest"] }`
#
# And optionally:
#
# - `mods`: Key modifiers to filter binding actions
#
#    - Command
#    - Control
#    - Option
#    - Super
#    - Shift
#    - Alt
#
#    Multiple `mods` can be combined using `|` like this:
#       `mods: Control|Shift`.
#    Whitespace and capitalization are relevant and must match the example.
#
# - `mode`: Indicate a binding for only specific terminal reported modes
#
#    This is mainly used to send applications the correct escape sequences
#    when in different modes.
#
#    - AppCursor
#    - AppKeypad
#    - Search
#    - Alt
#    - Vi
#
#    A `~` operator can be used before a mode to apply the binding whenever
#    the mode is *not* active, e.g. `~Alt`.
#
# Bindings are always filled by default, but will be replaced when a new
# binding with the same triggers is defined. To unset a default binding, it can
# be mapped to the `ReceiveChar` action. Alternatively, you can use `None` for
# a no-op if you do not wish to receive input characters for that binding.
#
# If the same trigger is assigned to multiple actions, all of them are executed
# in the order they were defined in.
#key_bindings:
  #- { key: Paste,                                       action: Paste          }
  #- { key: Copy,                                        action: Copy           }
  #- { key: L,         mods: Control,                    action: ClearLogNotice }
  #- { key: L,         mods: Control, mode: ~Vi|~Search, chars: "\x0c"          }
  #- { key: PageUp,    mods: Shift,   mode: ~Alt,        action: ScrollPageUp,  }
  #- { key: PageDown,  mods: Shift,   mode: ~Alt,        action: ScrollPageDown }
  #- { key: Home,      mods: Shift,   mode: ~Alt,        action: ScrollToTop,   }
  #- { key: End,       mods: Shift,   mode: ~Alt,        action: ScrollToBottom }

  # Vi Mode
  #- { key: Space,  mods: Shift|Control, mode: ~Search,    action: ToggleViMode            }
  #- { key: Space,  mods: Shift|Control, mode: Vi|~Search, action: ScrollToBottom          }
  #- { key: Escape,                      mode: Vi|~Search, action: ClearSelection          }
  #- { key: I,                           mode: Vi|~Search, action: ToggleViMode            }
  #- { key: I,                           mode: Vi|~Search, action: ScrollToBottom          }
  #- { key: C,      mods: Control,       mode: Vi|~Search, action: ToggleViMode            }
  #- { key: Y,      mods: Control,       mode: Vi|~Search, action: ScrollLineUp            }
  #- { key: E,      mods: Control,       mode: Vi|~Search, action: ScrollLineDown          }
  #- { key: G,                           mode: Vi|~Search, action: ScrollToTop             }
  #- { key: G,      mods: Shift,         mode: Vi|~Search, action: ScrollToBottom          }
  #- { key: B,      mods: Control,       mode: Vi|~Search, action: ScrollPageUp            }
  #- { key: F,      mods: Control,       mode: Vi|~Search, action: ScrollPageDown          }
  #- { key: U,      mods: Control,       mode: Vi|~Search, action: ScrollHalfPageUp        }
  #- { key: D,      mods: Control,       mode: Vi|~Search, action: ScrollHalfPageDown      }
  #- { key: Y,                           mode: Vi|~Search, action: Copy                    }
  #- { key: Y,                           mode: Vi|~Search, action: ClearSelection          }
  #- { key: Copy,                        mode: Vi|~Search, action: ClearSelection          }
  #- { key: V,                           mode: Vi|~Search, action: ToggleNormalSelection   }
  #- { key: V,      mods: Shift,         mode: Vi|~Search, action: ToggleLineSelection     }
  #- { key: V,      mods: Control,       mode: Vi|~Search, action: ToggleBlockSelection    }
  #- { key: V,      mods: Alt,           mode: Vi|~Search, action: ToggleSemanticSelection }
  #- { key: Return,                      mode: Vi|~Search, action: Open                    }
  #- { key: K,                           mode: Vi|~Search, action: Up                      }
  #- { key: J,                           mode: Vi|~Search, action: Down                    }
  #- { key: H,                           mode: Vi|~Search, action: Left                    }
  #- { key: L,                           mode: Vi|~Search, action: Right                   }
  #- { key: Up,                          mode: Vi|~Search, action: Up                      }
  #- { key: Down,                        mode: Vi|~Search, action: Down                    }
  #- { key: Left,                        mode: Vi|~Search, action: Left                    }
  #- { key: Right,                       mode: Vi|~Search, action: Right                   }
  #- { key: Key0,                        mode: Vi|~Search, action: First                   }
  #- { key: Key4,   mods: Shift,         mode: Vi|~Search, action: Last                    }
  #- { key: Key6,   mods: Shift,         mode: Vi|~Search, action: FirstOccupied           }
  #- { key: H,      mods: Shift,         mode: Vi|~Search, action: High                    }
  #- { key: M,      mods: Shift,         mode: Vi|~Search, action: Middle                  }
  #- { key: L,      mods: Shift,         mode: Vi|~Search, action: Low                     }
  #- { key: B,                           mode: Vi|~Search, action: SemanticLeft            }
  #- { key: W,                           mode: Vi|~Search, action: SemanticRight           }
  #- { key: E,                           mode: Vi|~Search, action: SemanticRightEnd        }
  #- { key: B,      mods: Shift,         mode: Vi|~Search, action: WordLeft                }
  #- { key: W,      mods: Shift,         mode: Vi|~Search, action: WordRight               }
  #- { key: E,      mods: Shift,         mode: Vi|~Search, action: WordRightEnd            }
  #- { key: Key5,   mods: Shift,         mode: Vi|~Search, action: Bracket                 }
  #- { key: Slash,                       mode: Vi|~Search, action: SearchForward           }
  #- { key: Slash,  mods: Shift,         mode: Vi|~Search, action: SearchBackward          }
  #- { key: N,                           mode: Vi|~Search, action: SearchNext              }
  #- { key: N,      mods: Shift,         mode: Vi|~Search, action: SearchPrevious          }

  # Search Mode
  #- { key: Return,                mode: Search|Vi,  action: SearchConfirm         }
  #- { key: Escape,                mode: Search,     action: SearchCancel          }
  #- { key: C,      mods: Control, mode: Search,     action: SearchCancel          }
  #- { key: U,      mods: Control, mode: Search,     action: SearchClear           }
  #- { key: W,      mods: Control, mode: Search,     action: SearchDeleteWord      }
  #- { key: P,      mods: Control, mode: Search,     action: SearchHistoryPrevious }
  #- { key: N,      mods: Control, mode: Search,     action: SearchHistoryNext     }
  #- { key: Up,                    mode: Search,     action: SearchHistoryPrevious }
  #- { key: Down,                  mode: Search,     action: SearchHistoryNext     }
  #- { key: Return,                mode: Search|~Vi, action: SearchFocusNext       }
  #- { key: Return, mods: Shift,   mode: Search|~Vi, action: SearchFocusPrevious   }

  # (Windows, Linux, and BSD only)
  #- { key: V,              mods: Control|Shift, mode: ~Vi,        action: Paste            }
  #- { key: C,              mods: Control|Shift,                   action: Copy             }
  #- { key: F,              mods: Control|Shift, mode: ~Search,    action: SearchForward    }
  #- { key: B,              mods: Control|Shift, mode: ~Search,    action: SearchBackward   }
  #- { key: C,              mods: Control|Shift, mode: Vi|~Search, action: ClearSelection   }
  #- { key: Insert,         mods: Shift,                           action: PasteSelection   }
  #- { key: Key0,           mods: Control,                         action: ResetFontSize    }
  #- { key: Equals,         mods: Control,                         action: IncreaseFontSize }
  #- { key: Plus,           mods: Control,                         action: IncreaseFontSize }
  #- { key: NumpadAdd,      mods: Control,                         action: IncreaseFontSize }
  #- { key: Minus,          mods: Control,                         action: DecreaseFontSize }
  #- { key: NumpadSubtract, mods: Control,                         action: DecreaseFontSize }

  # (Windows only)
  #- { key: Return,   mods: Alt,           action: ToggleFullscreen }

  # (macOS only)
  #- { key: K,              mods: Command, mode: ~Vi|~Search, chars: "\x0c"                 }
  #- { key: K,              mods: Command, mode: ~Vi|~Search, action: ClearHistory          }
  #- { key: Key0,           mods: Command,                    action: ResetFontSize         }
  #- { key: Equals,         mods: Command,                    action: IncreaseFontSize      }
  #- { key: Plus,           mods: Command,                    action: IncreaseFontSize      }
  #- { key: NumpadAdd,      mods: Command,                    action: IncreaseFontSize      }
  #- { key: Minus,          mods: Command,                    action: DecreaseFontSize      }
  #- { key: NumpadSubtract, mods: Command,                    action: DecreaseFontSize      }
  #- { key: V,              mods: Command,                    action: Paste                 }
  #- { key: C,              mods: Command,                    action: Copy                  }
  #- { key: C,              mods: Command, mode: Vi|~Search,  action: ClearSelection        }
  #- { key: H,              mods: Command,                    action: Hide                  }
  #- { key: H,              mods: Command|Alt,                action: HideOtherApplications }
  #- { key: M,              mods: Command,                    action: Minimize              }
  #- { key: Q,              mods: Command,                    action: Quit                  }
  #- { key: W,              mods: Command,                    action: Quit                  }
  #- { key: N,              mods: Command,                    action: SpawnNewInstance      }
  #- { key: F,              mods: Command|Control,            action: ToggleFullscreen      }
  #- { key: F,              mods: Command, mode: ~Search,     action: SearchForward         }
  #- { key: B,              mods: Command, mode: ~Search,     action: SearchBackward        }

#debug:
  # Display the time it takes to redraw each frame.
  #render_timer: false

  # Keep the log file after quitting Alacritty.
  #persistent_logging: false

  # Log level
  #
  # Values for `log_level`:
  #   - Off
  #   - Error
  #   - Warn
  #   - Info
  #   - Debug
  #   - Trace
  #log_level: Warn

  # Print all received window events.
  #print_events: false
5.分辨率设置
在前面窗口调大之后,发现字稍微有些模糊,这是因为分辨率和屏幕分辨率不对应导致的,这时应调整manjaro的分辨率
笔者的电脑分辨率是1920*1080

 笔者的设置是144,设置完成后按windows+shift+r刷新一下即可
6.显卡驱动设置(暂时搁置)
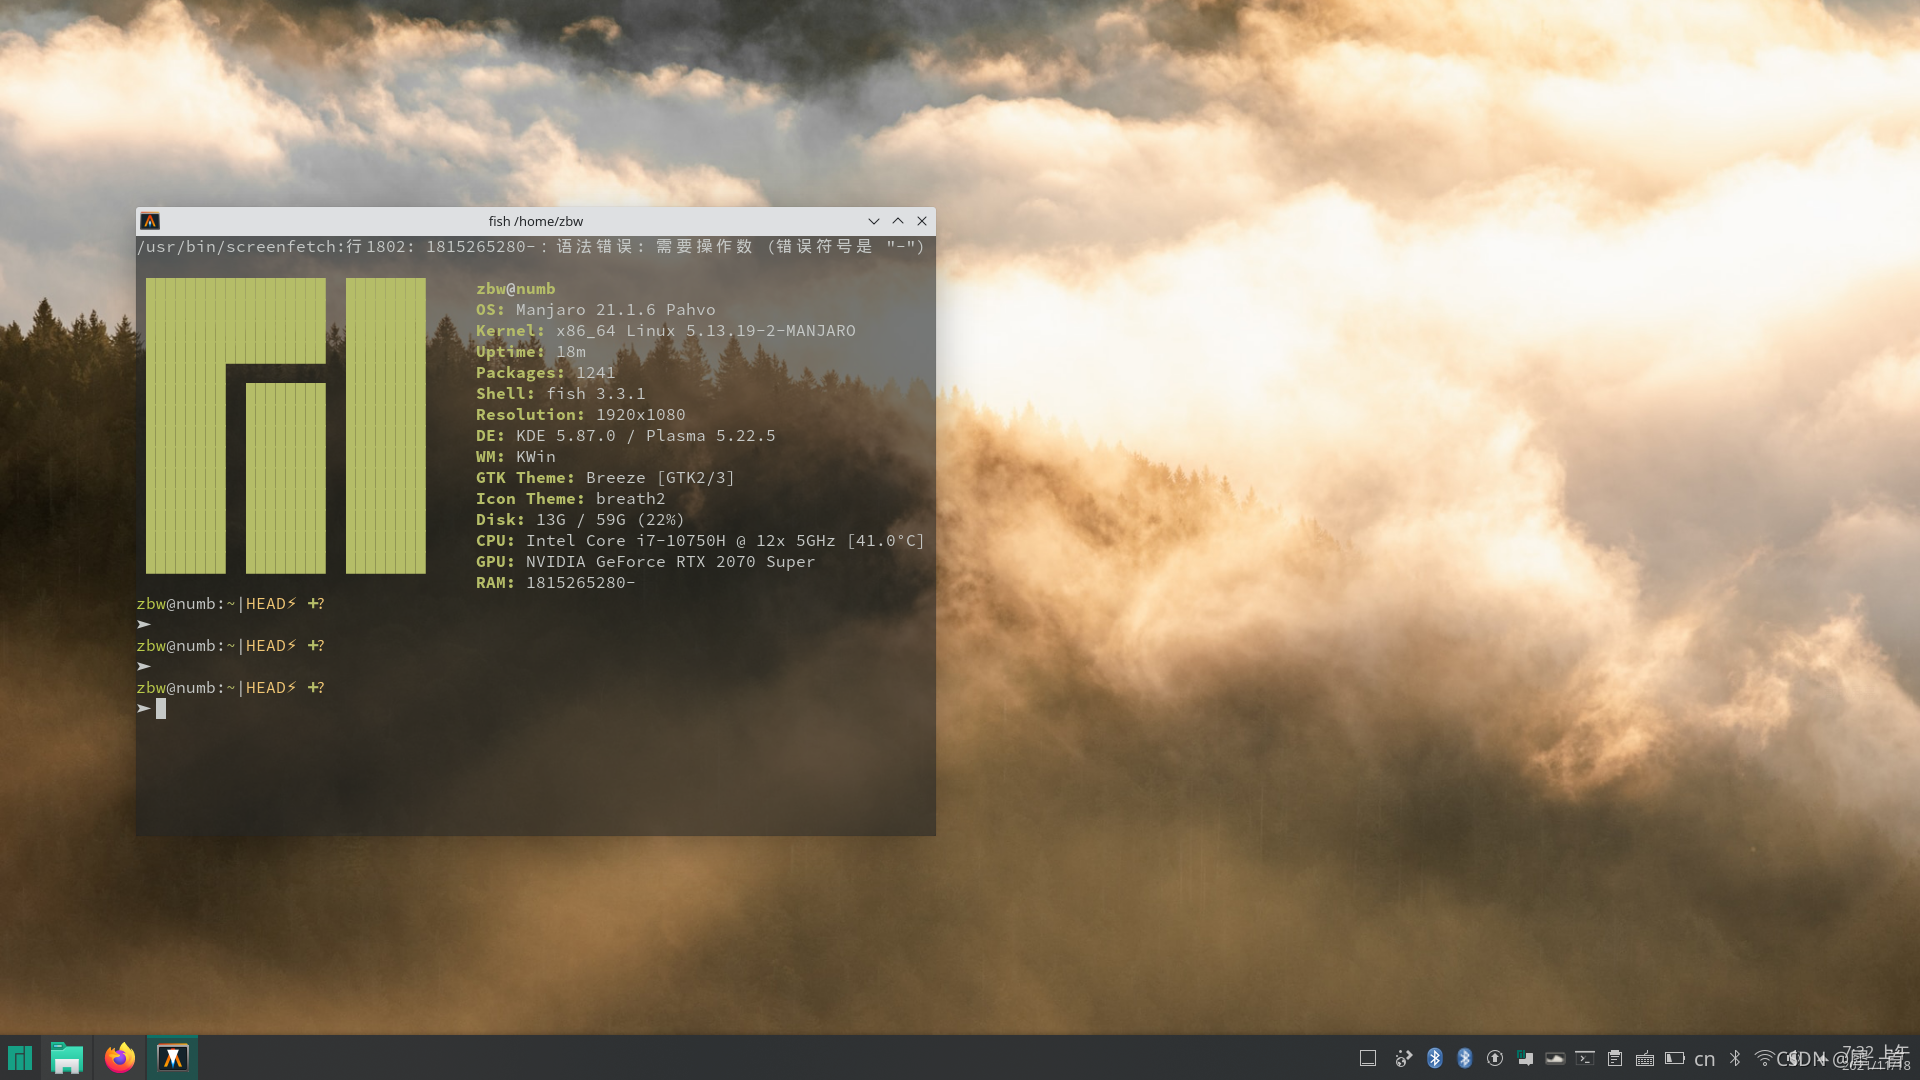
(1)输入screenfetch命令
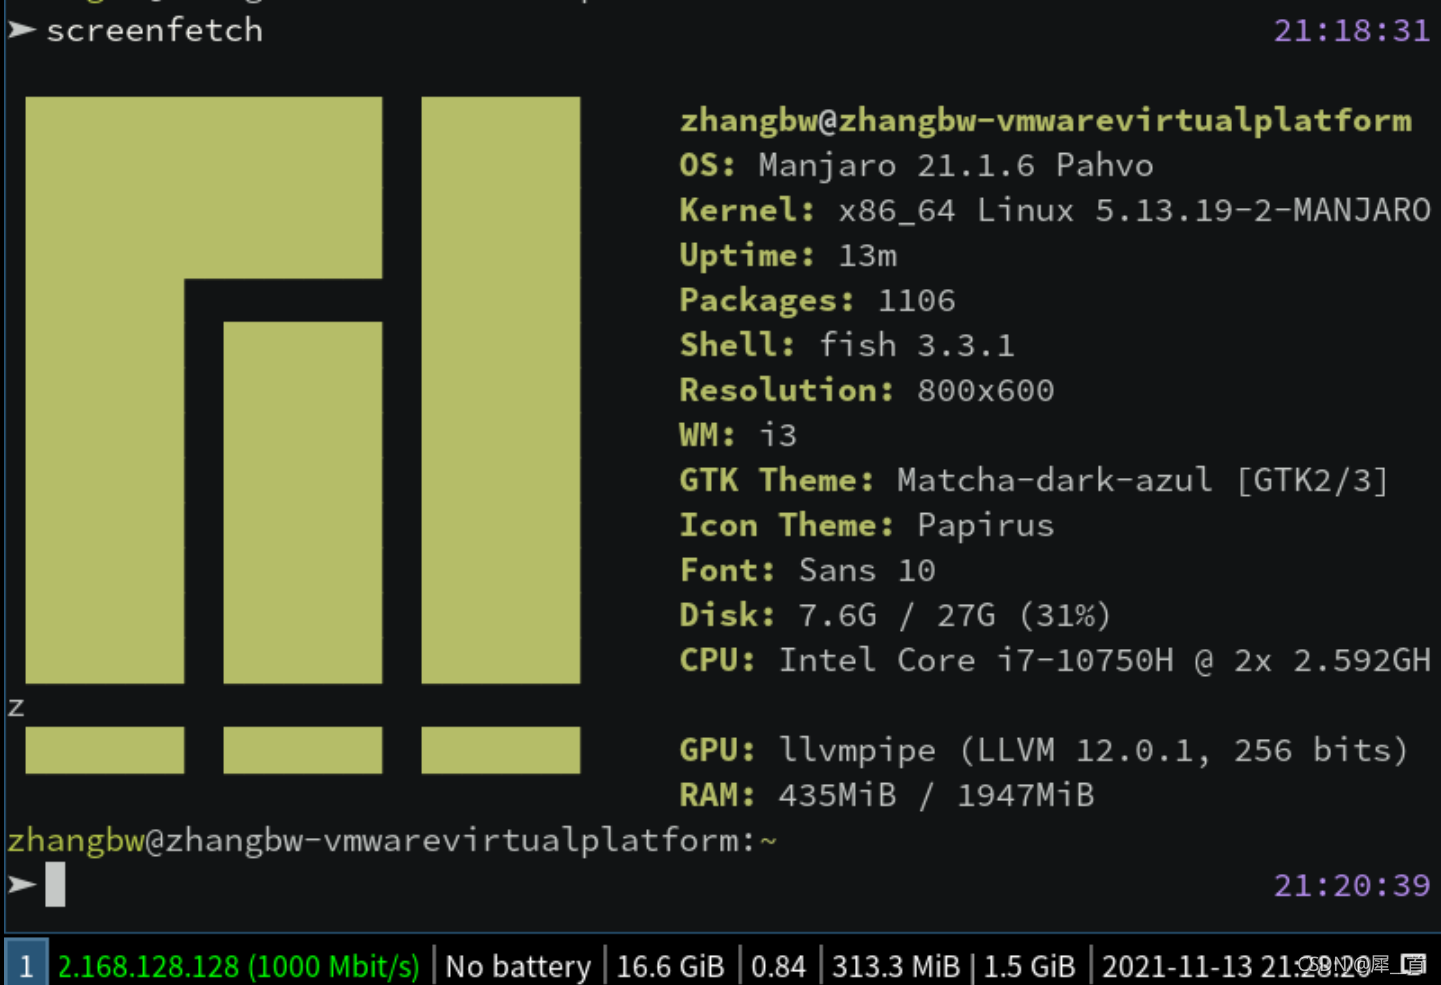 发现这里GPU出现异常,和笔者笔记本的GPU不配套,需要先解决驱动的问题。
7.用背景不透明度设置
(1)给alacritty加不透明度配置
和修改字体一样,进入alacritty配置文件,然后找到background_opacity,将其取消注释,然后设置为0.6
(ps:0.8也可以)
(2)picom渲染(参见第十二章-毛玻璃特效)
还是经典的下载方式,下载好之后依然要进行配置,同理配置文件需要拷贝和改权限。
备份文件还是在之前类似的位置,如图所示:

然后还是在.config下创建picom文件夹,然后粘贴过去,然后重命名去掉最后面的example,并把文件改为读写
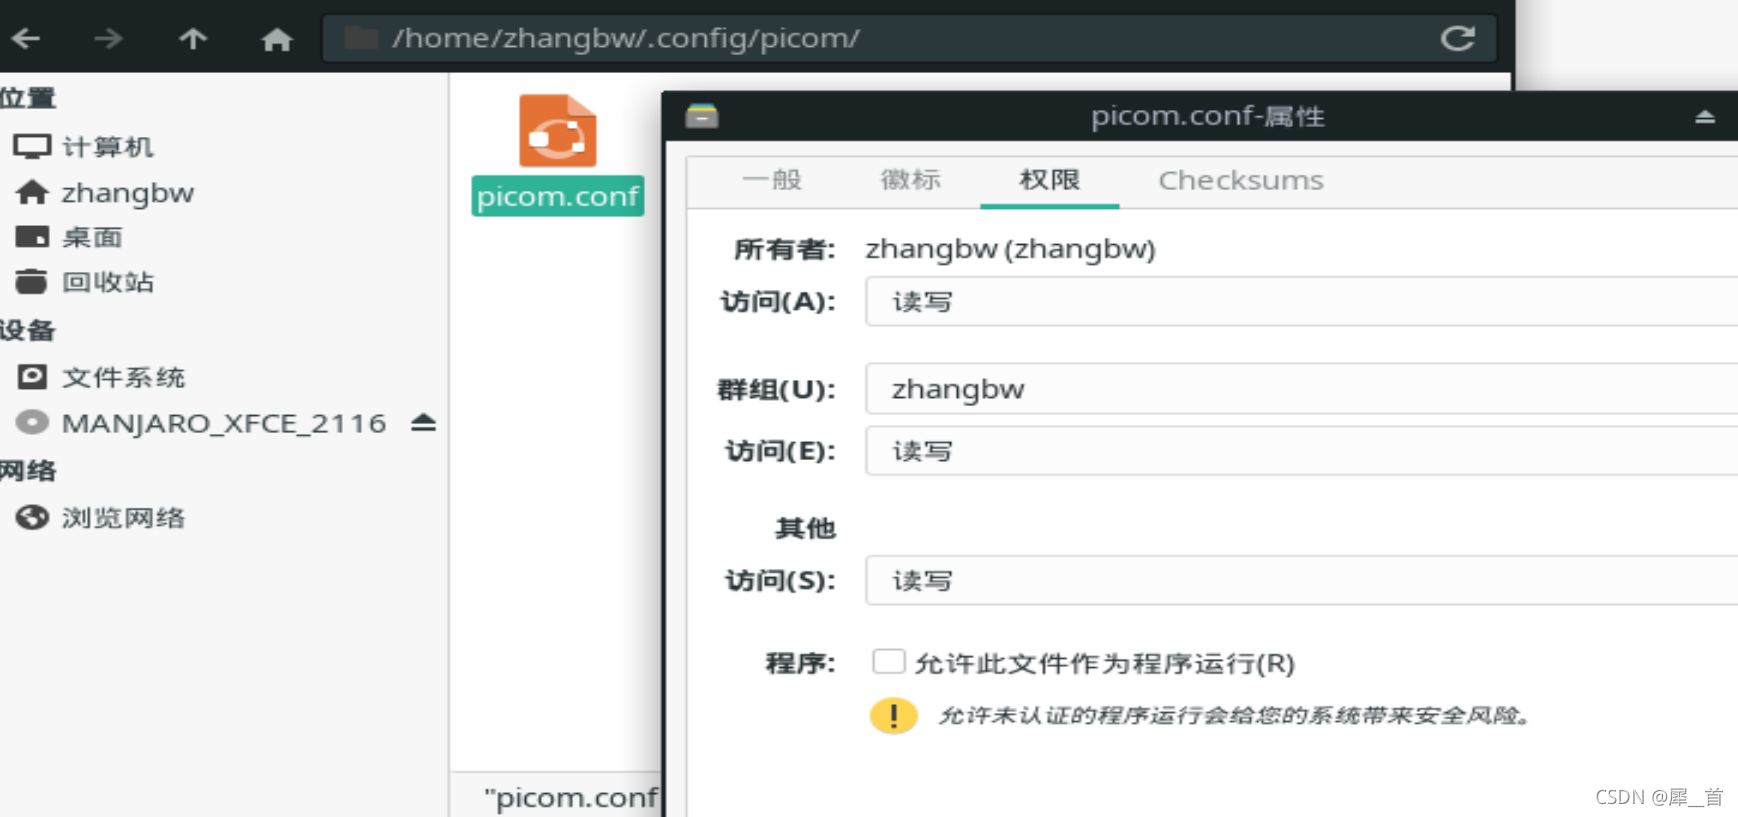 配置完成之后,目前是打开picom但没有任何反应,还在处理当中
8.配置壁纸,让壁纸能自动更新
笔者执行variety后报如下错误:
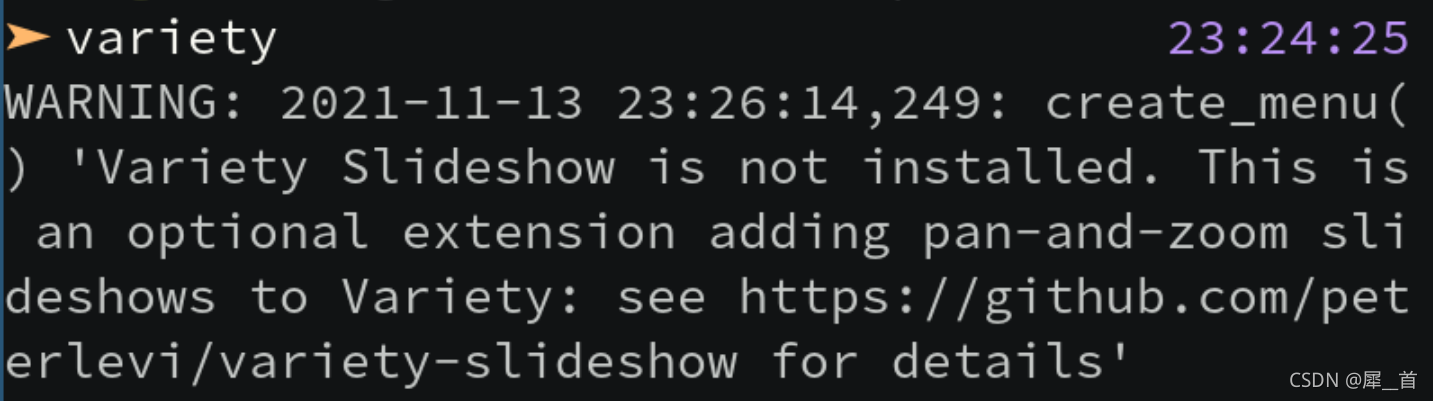 虽然主页上还是显示出了北极熊壁纸,但是无法自动更换。可以看到是没有装上slideshow
访问github查看作者给出的文档:
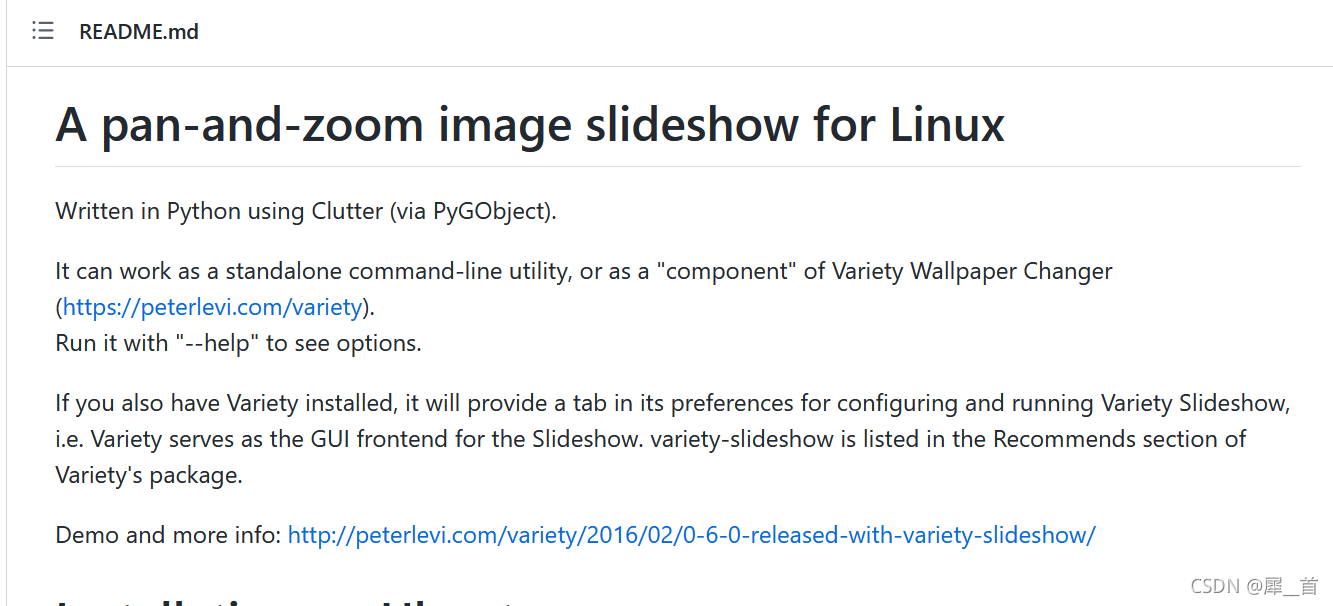
最后发现这应该是个有关版本问题的误报,直接退出i3在xfce模式下打开variety即可正常打开,如图所示:
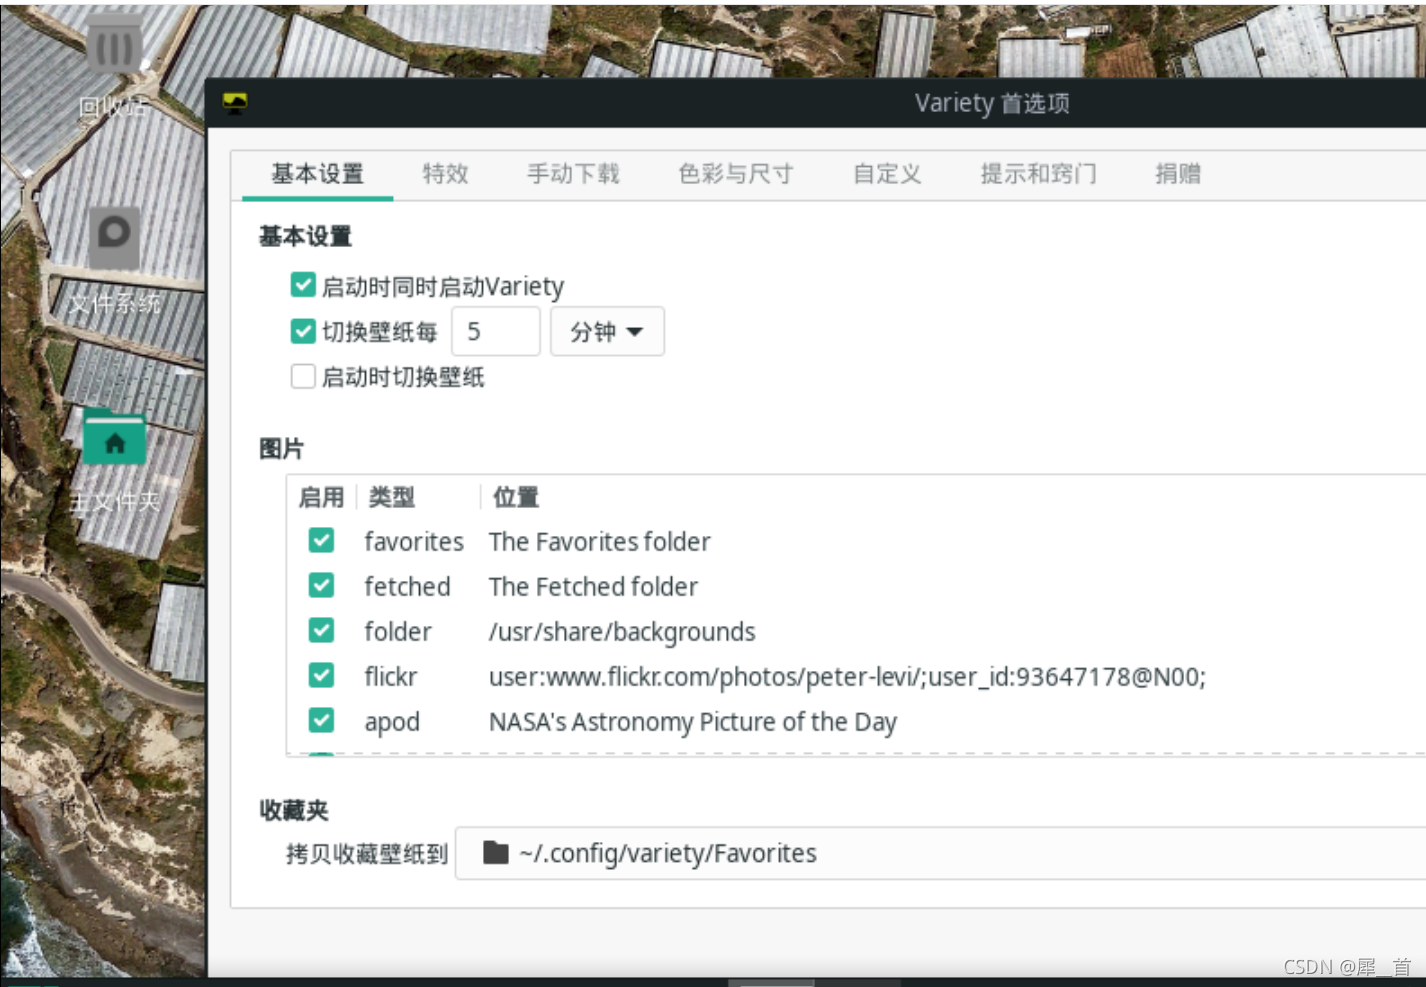
在下面的图片栏,可以选择从什么源获取图片,笔者只选择了NASA的每日一图。
设置后如下图所示:
在i3的配置问价中加入exec always variety即可每次打开i3就能使用了
十一、一些日常软件的下载和配置
1.中文输入法
需要安装fcitx 和fcitx-im,还要安装fcitx-configtool
然后本来打算直接在i3终端安装,结果显示找不到搜狗拼音,原来是和搜狗不兼容,下载别的就好了

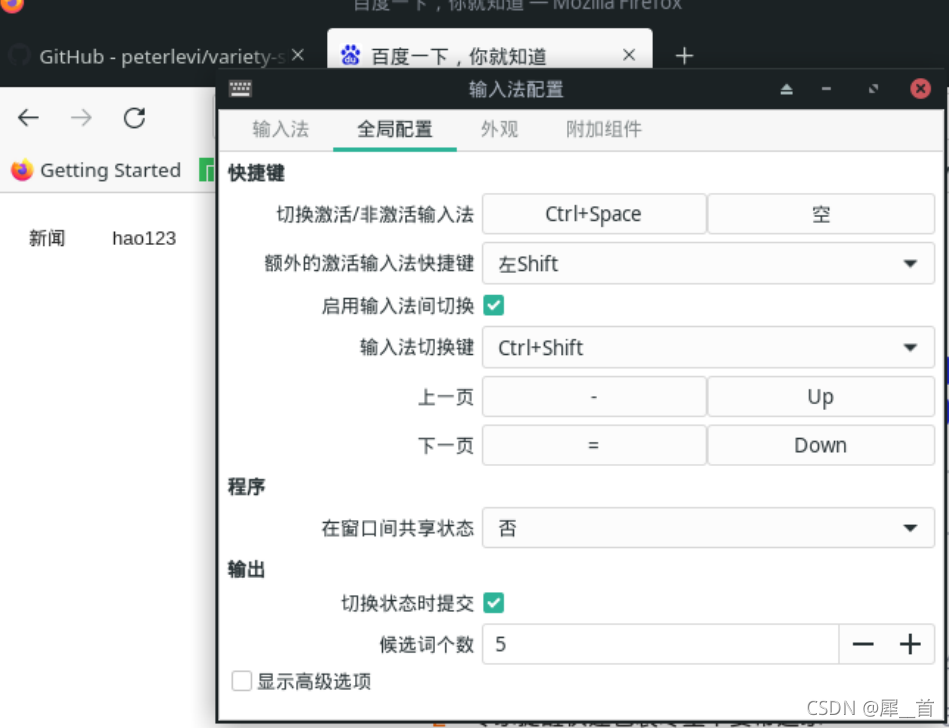
然后vim ~/.xprofile进行配置,如图所示:
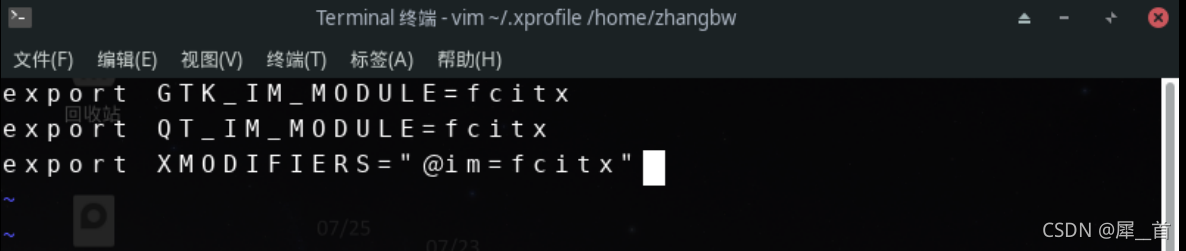
重启后进入xfce会话,在右下角有输入法配置可以在里面配置快捷键,如图所示:
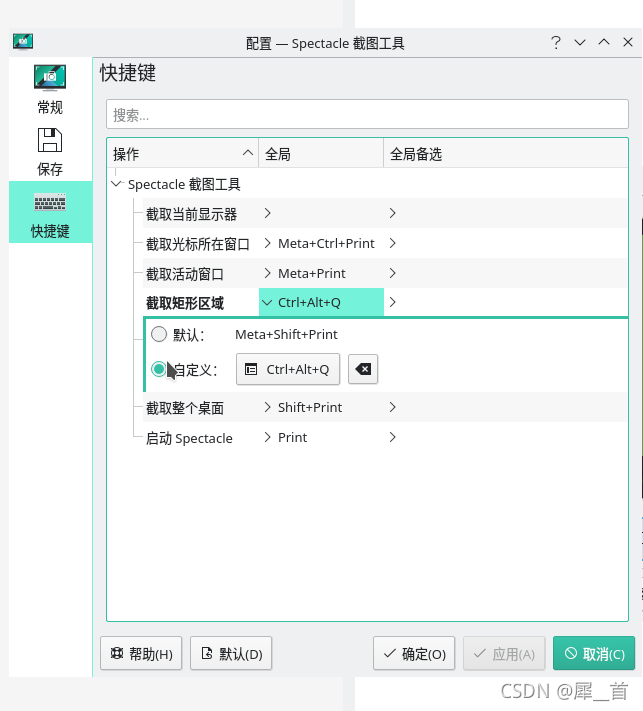
2.截屏软件
系统自带Spectacle工具,可以为其设置快捷键
十二、i3的进一步配置
1.用polybar美化状态栏
(1)去掉原有状态栏
i3会自带一个工具栏显示在最底部,如图所示:
 如果不喜欢这个工具栏的话,可以执行以下命令将其删掉
sudo pacman -R i3status
不过笔者执行完之后只是删掉了里面的文字。
 考虑开机自动隐藏i3status
在i3的config里面检索i3status,然后将其注释掉即可

(2)下载polybar并配置
接着我们下载polybar,然后对其进行配置
依然是从share里面拷贝一份它的配置文件放到我们用户的home下面
首先重新进入到xfce会话,在文件系统里面找到polybar提供的配置文件备份
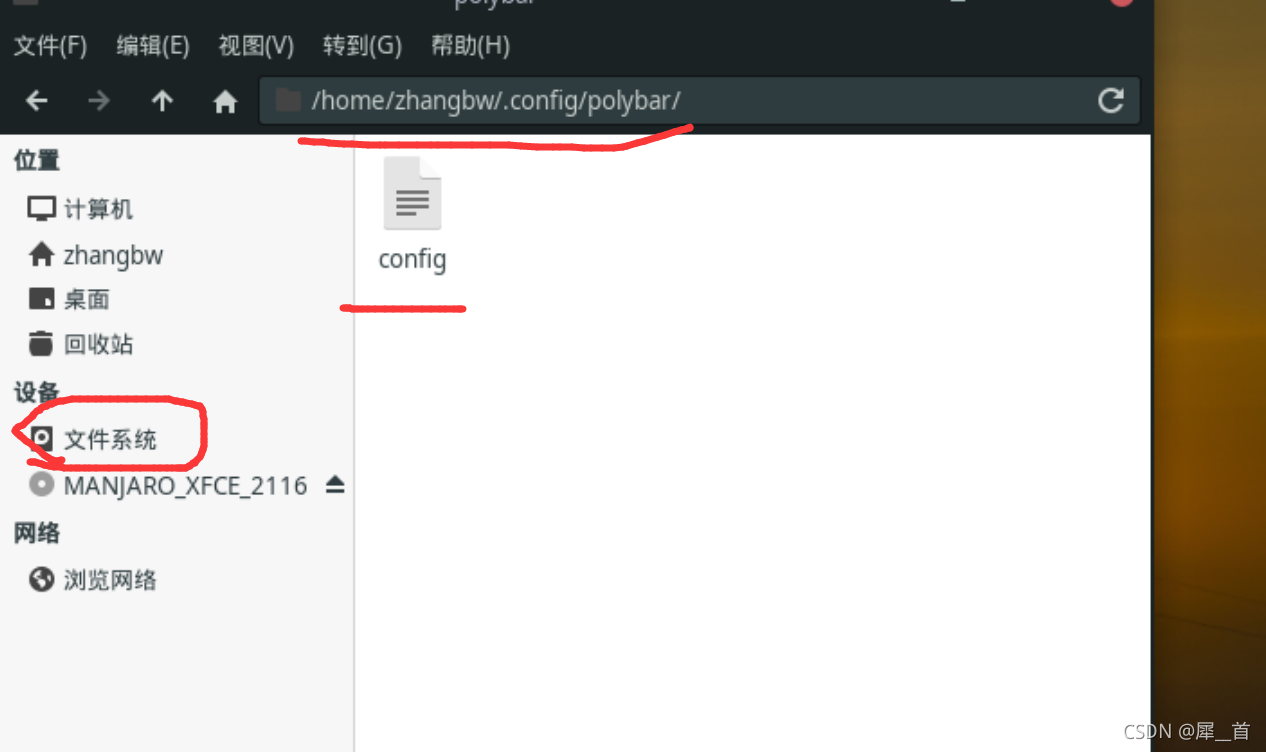
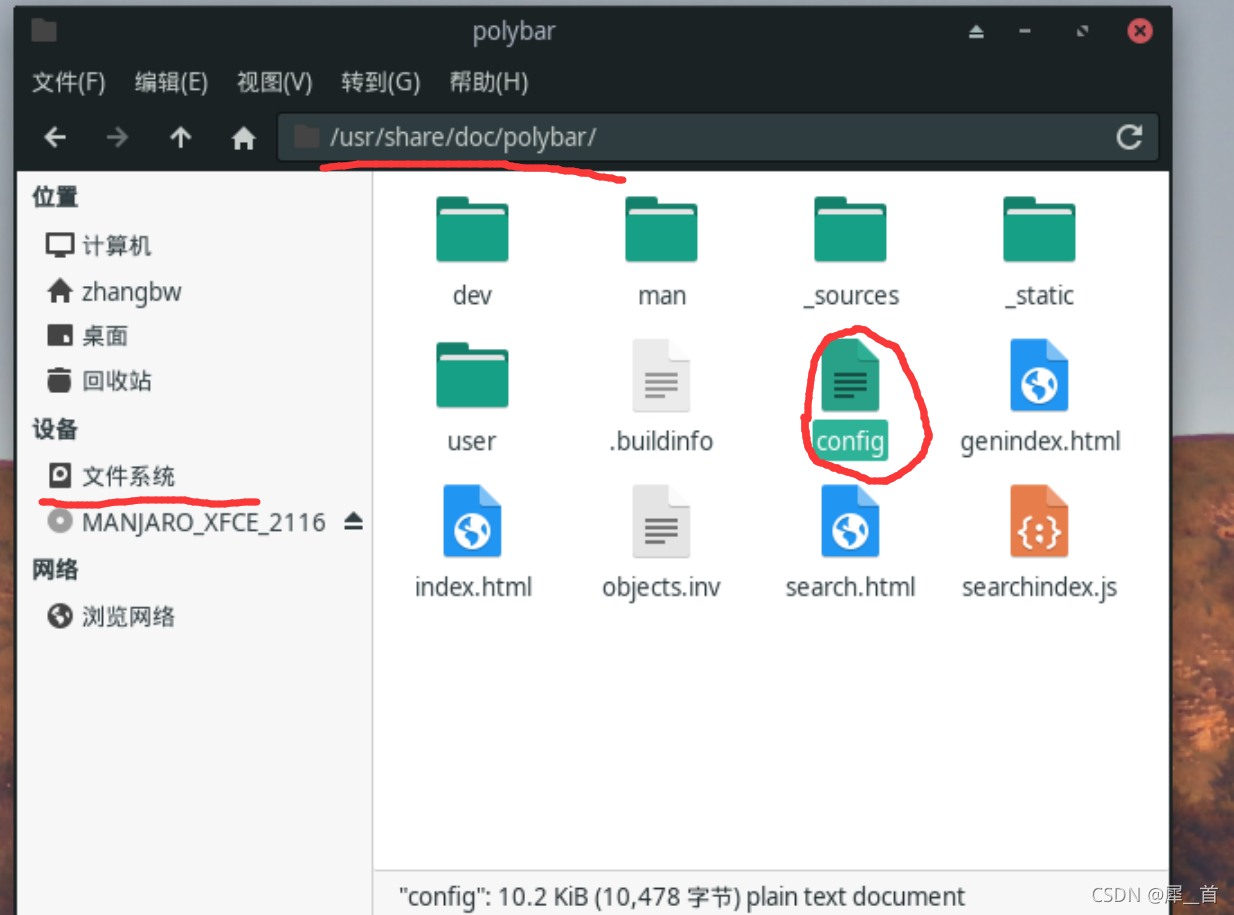 然后在home下的配置文件夹里面,新建一个polybar文件夹,将这个config文件粘贴进去,并改名和更改权限。
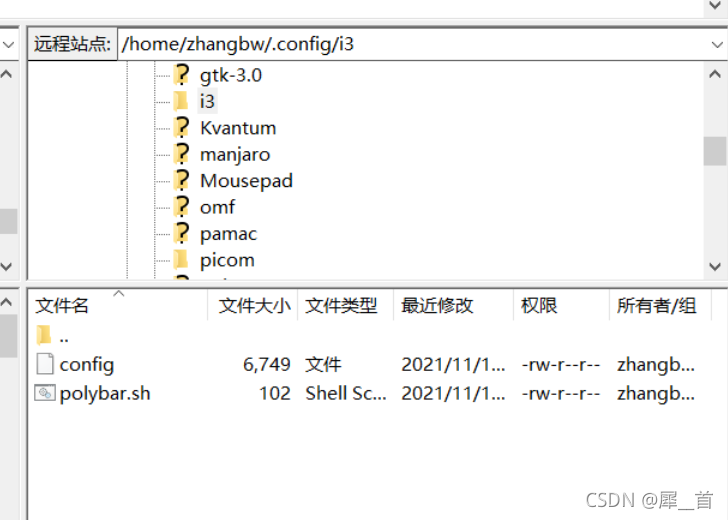
 然后要使用polybar还需要创建一个polybar.sh文件,笔者将其放在了i3目录下。
可以先在windows下新建一个txt文件,里面写入:
killall -q polybar

while pgrep -u $UID -x polybar >/dev/null; do sleep 1; done

polybar example
 这里默认的是配置文件自带的example主题,可以在配置文件中自己定义主题来用
然后将其扩展名改为sh,再用filezilla传到虚拟机里面。
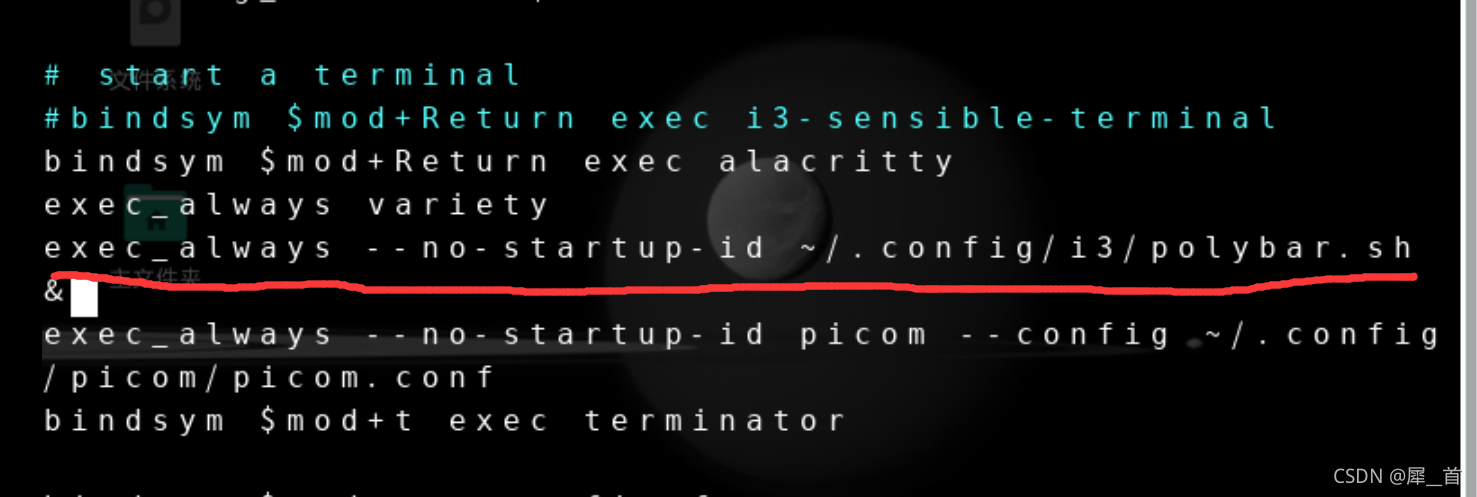
 然后修改i3的配置文件,将polybar设置为自启动。
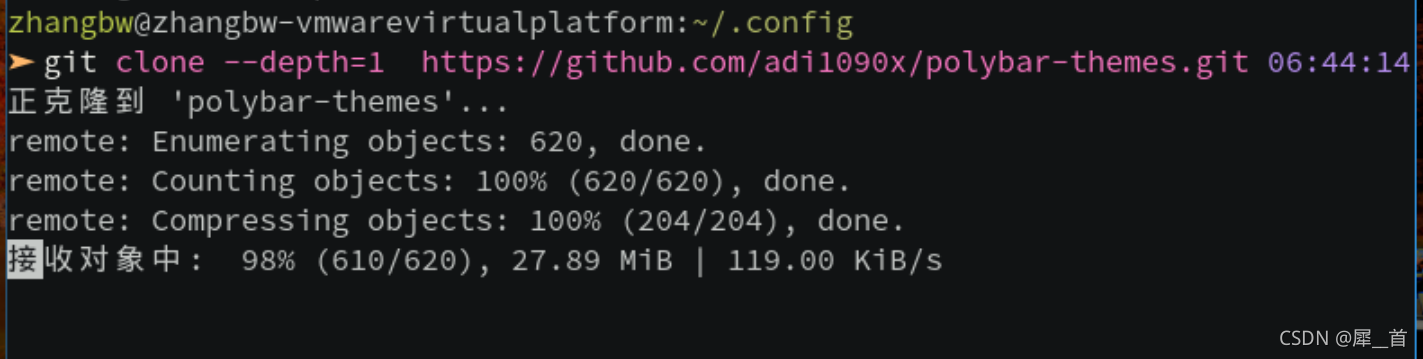
(3)下载并安装其它主题
如果觉得其自带的example不好看,还可以下载一些其它的主题,首先将主题克隆下来,如图所示
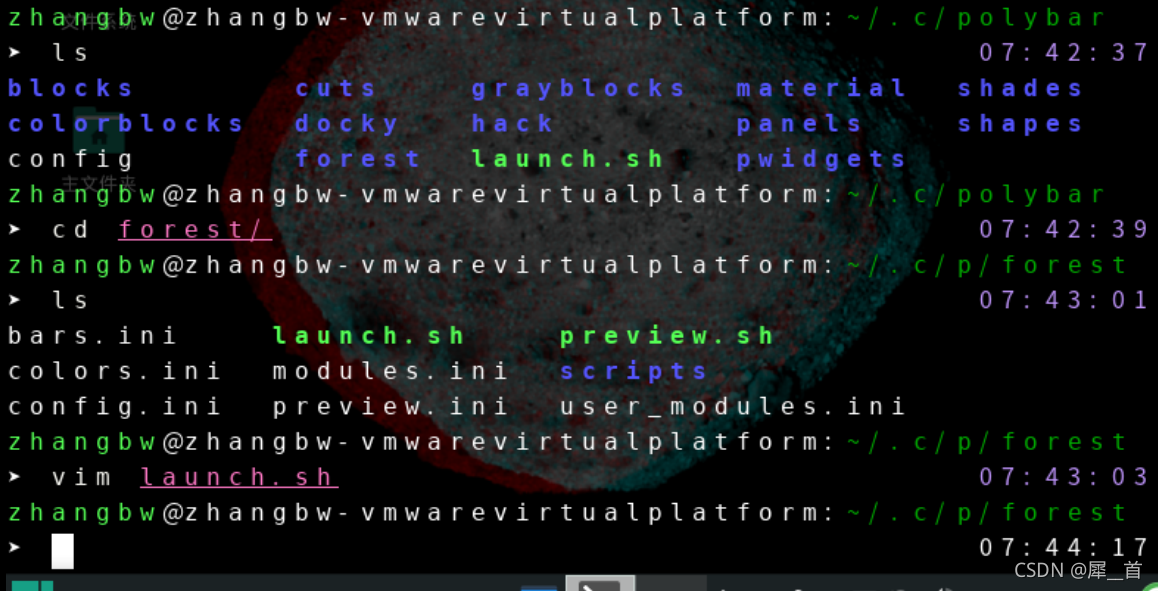
 进入polybar=themes文件,查看一下里面都有什么

进入里面自带的setup.sh,然后借助这个setup.sh脚本来加载主题,在home下执行以下代码
 cd polybar-themes
 chmod +x setup.sh
然后
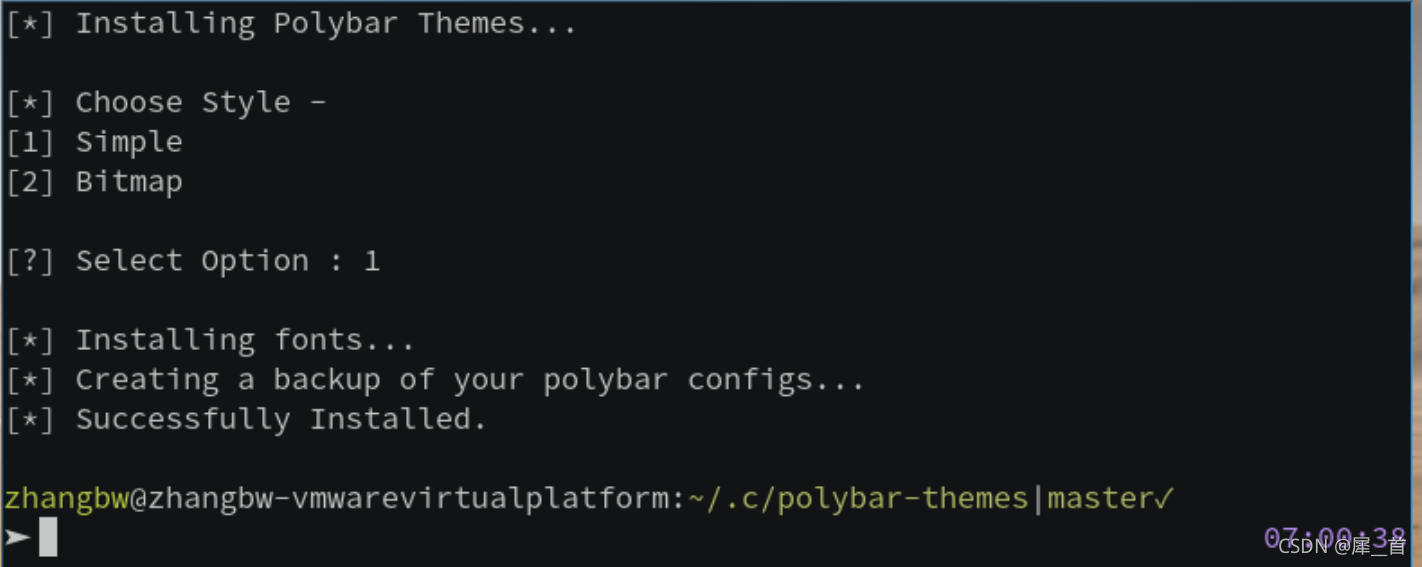
./setup.sh
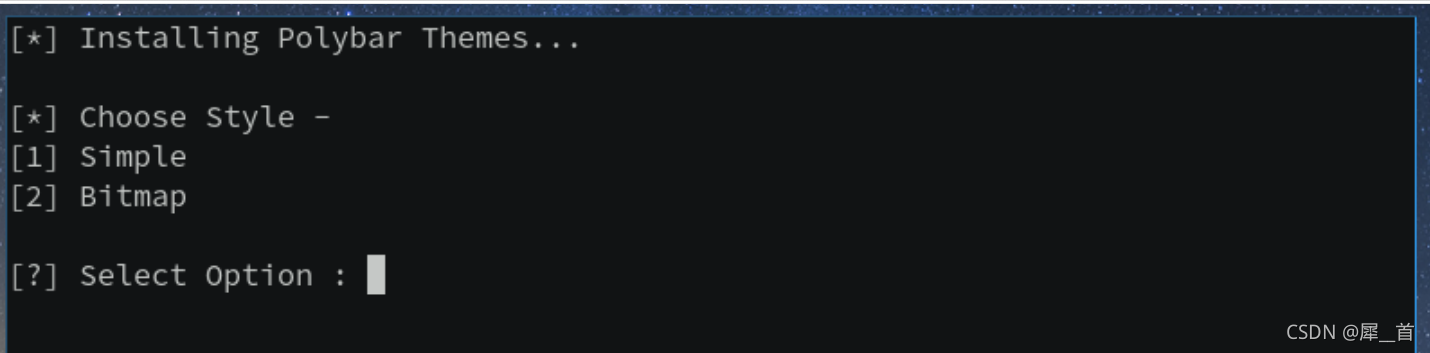 选择1
选择1
然后再返回到polybar文件夹下,输入
./launch.sh
会显示已经下载了的主题
 选择一个执行即可,比如:
launch.sh --cuts
以forest为例,效果如下:

(4)给新主题设置自启动
因为前面的git clone操作,导致前面转移好的配置文件丢失了,这是个很大的错误!(可能linux的开发者们预见到了可能会有人犯这样的错误,于是笔者的原有的polybar文件夹被自动重命名为polybar.old从而得以保存,先重新转移一遍配置文件。
然后在polybar文件夹下,每个主题里都自带有launch.sh,只需要将其放到i3的自启动里面即可
记住这个目录,然后在i3的配置文件里面加入这个launch
 这是设置完成后重启i3之后的状态
十三、picom(即原compton)从半透明特效到毛玻璃特效
(1)picom安装
直接用pacman安装即可,但是笔者用pacman安装
(2)picom的其他安装方式
一般来讲,我们使用linux时通常处于“窗口”状态或者“终端”状态,对于“窗口”状态的美化笔者会在“xfce会话的美化”章节进行介绍。窗口状态通常会自带渲染器,而终端状态需要自己下载渲染器。在第十章我们已经下载好了一个名叫"picom"的渲染器,现在我们会对其进行配置。
卸载掉前面下载的picom,从github上面下载picom
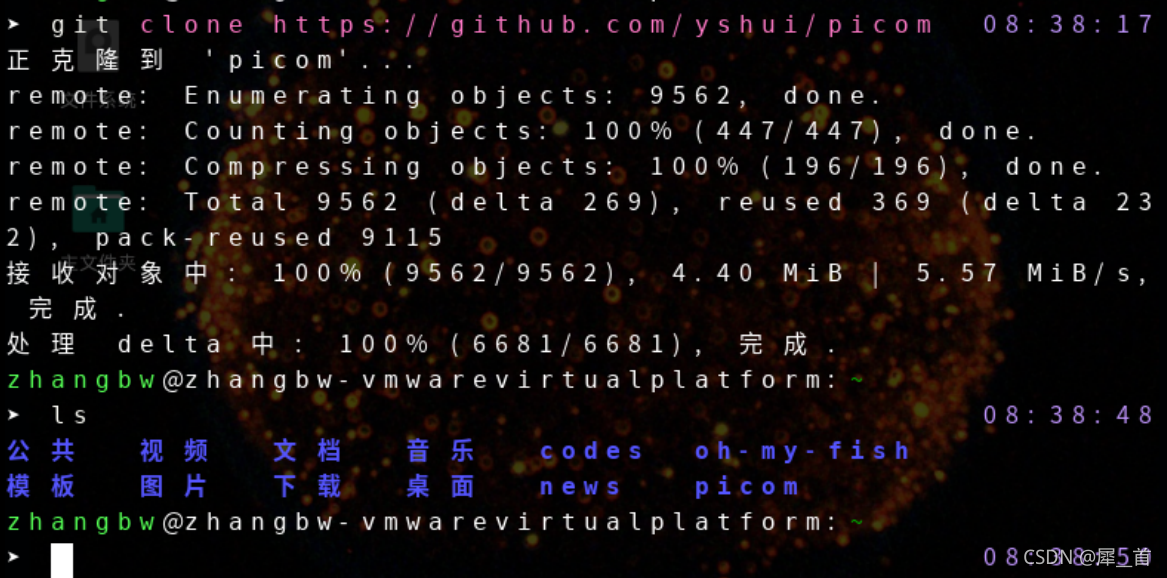 在github上看它都需要什么依赖库
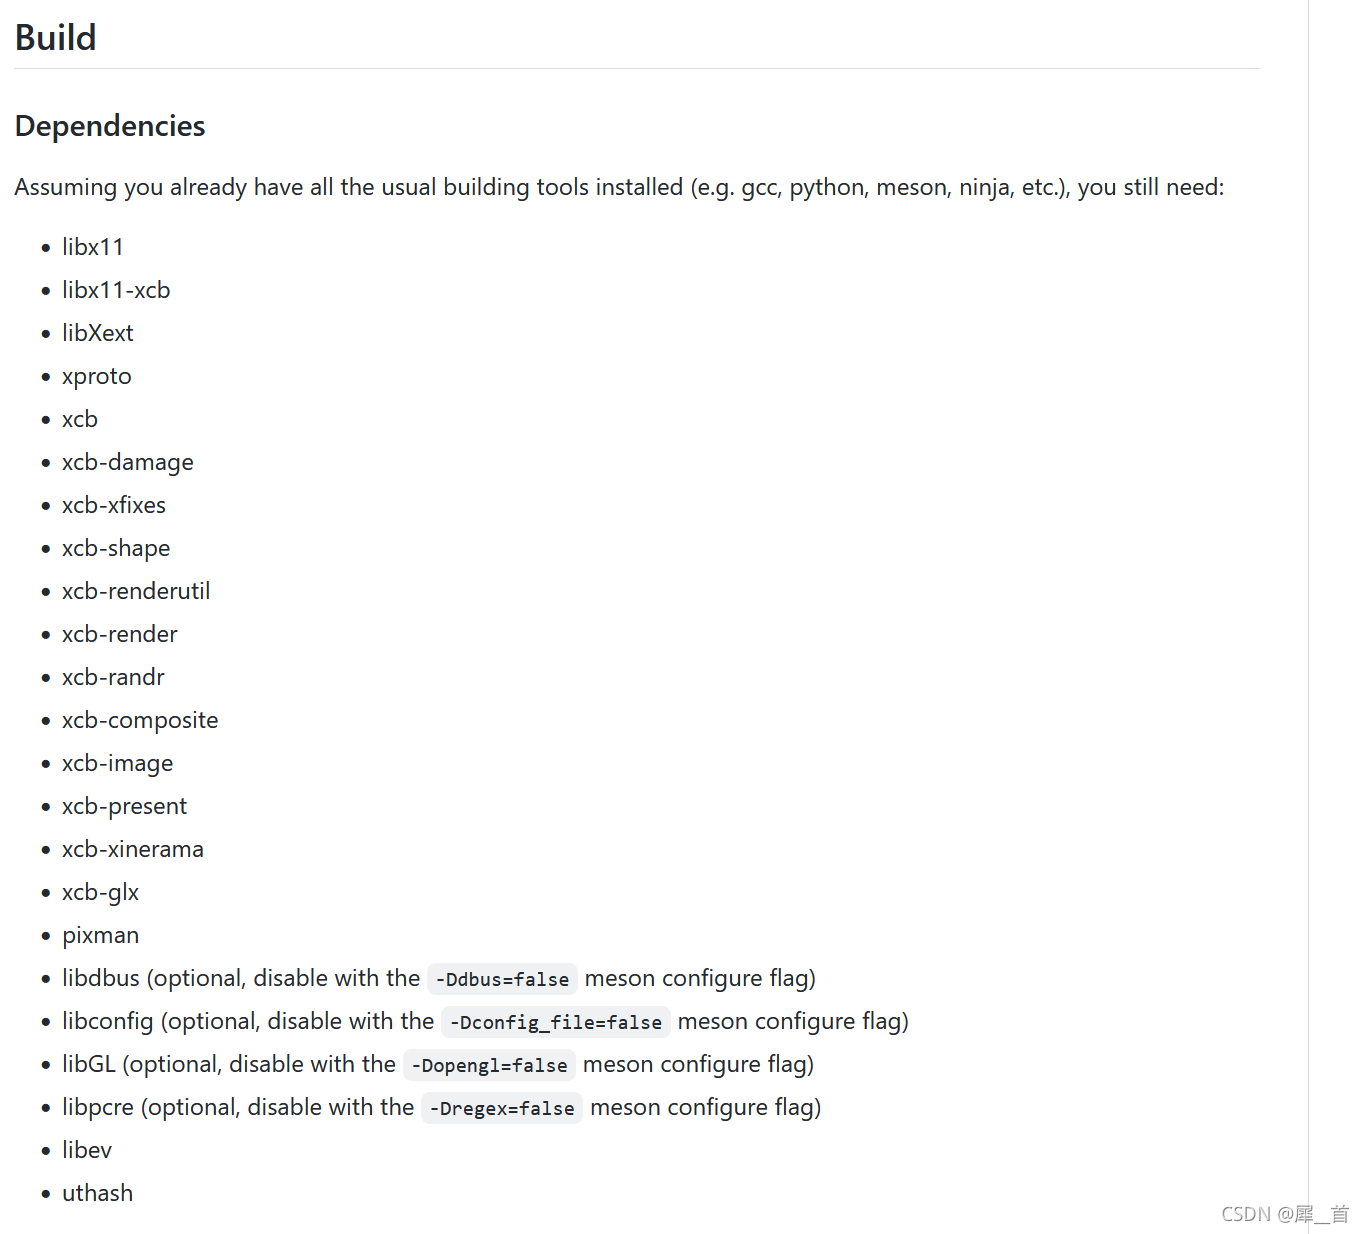
这些是需要提前装好的
然后查阅github文档,进行build

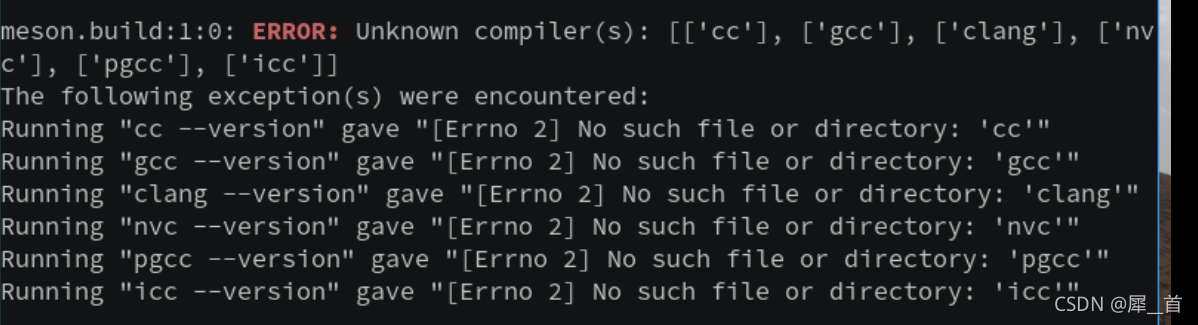
要先安装好meson,ninja,再编译
meson时报错,因为没有装C++和C的编译器,解决办法是安装GCC编译器,直接用pacman安装即可
装好编译器后,再次报错,没有安装uthash,安装之后重新编译
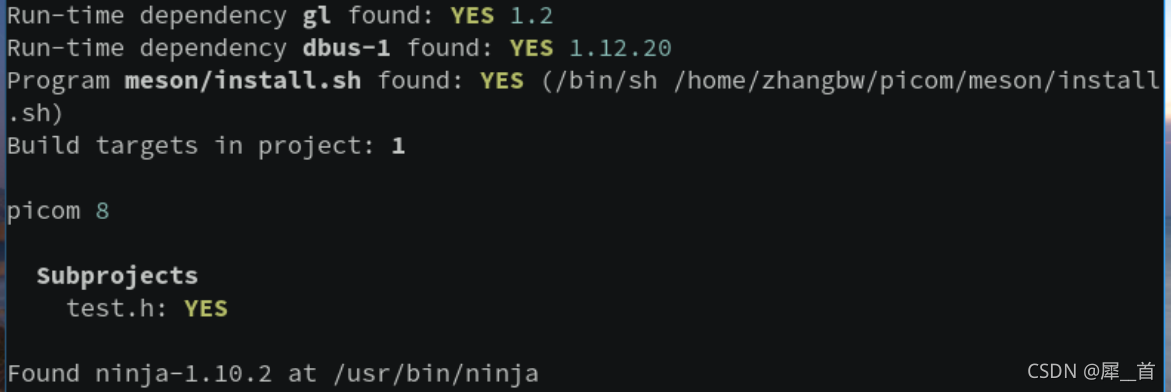
这样meson这一步就完成了,接下来调用ninja指令
 ninja执行成功
然后进行安装install
(3)虚拟机没有显卡驱动环境下picom无法运行
运行picom出现报错

这与显卡驱动有关,直接安装双系统就不会出现这个问题。
(4)双系统下的picom
直接在manjaro终端,执行screenfetch命令:
kde会话的状态
 可以看到显卡被显示出来,且终端有半透明效果。
i3的状态:
十四、xfce会话的美化
十五、kde版本
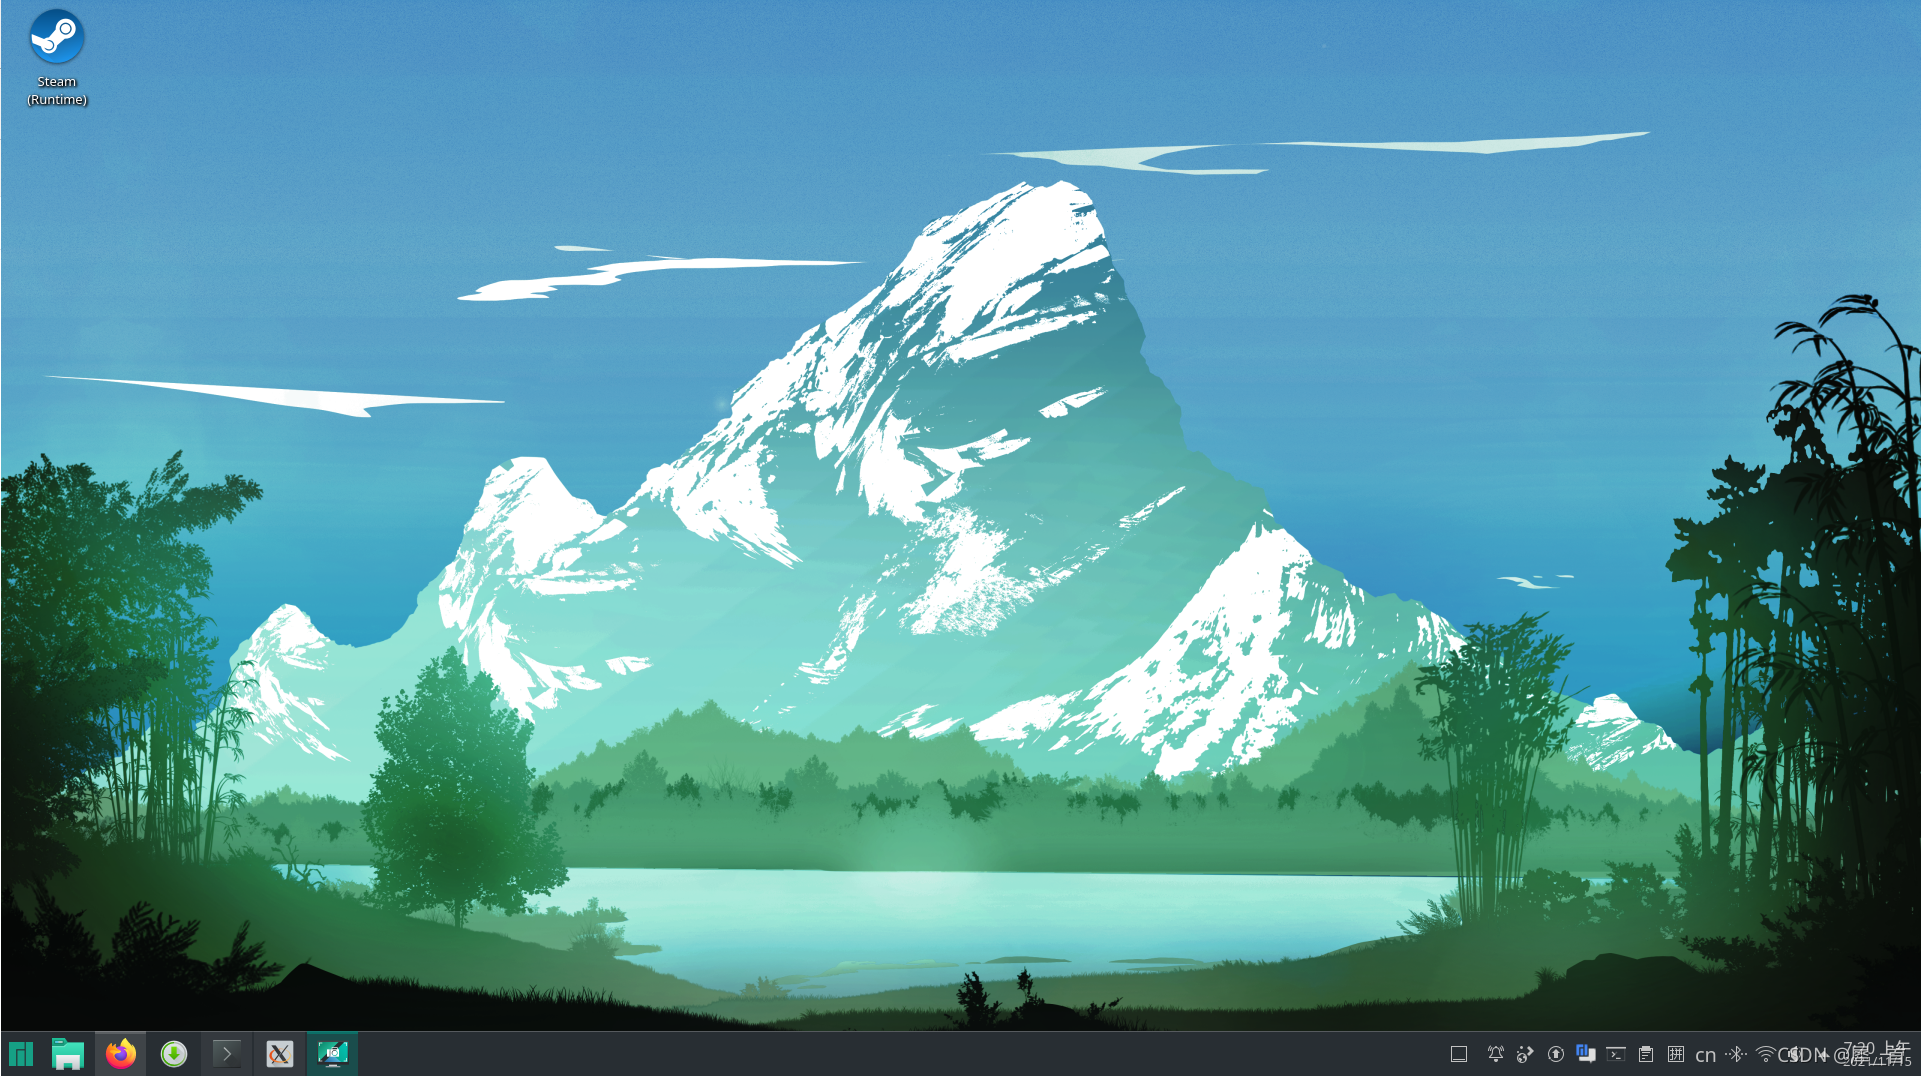
0.体验
笔者体验了一段时间的虚拟机之后,感觉虚拟机的功能还是有限,于是就之间将manjaro装在了笔记本里面,这次用的是kde版本,概览如下,非常优美:
十六、vim及其配置
0.笔者的vim配置文件
set number
set tabstop=4
set autoindent
set shiftwidth=4
set scrolloff=5
syntax on

let mapleader = ','
let &t_SI = "\<Esc>]50;CursorShape=1\x7"
let &t_SR = "\<Esc>]50;CursorShape=2\x7"
let &t_EI = "\<Esc>]50;CursorShape=0\x7"

inoremap<leader>w <Esc>:w<cr>

inoremap jj <Esc>

nnoremap <leader>v :NERDTreeFind<cr>
nnoremap <leader>g :NERDTreeToggle<cr>

" Specify a directory for plugins
" - For Neovim: stdpath('data') . '/plugged'
" - Avoid using standard Vim directory names like 'plugin'
call plug#begin('~/.vim/plugged')

Plug 'mhinz/vim-startify'
Plug 'vim-airline/vim-airline'
Plug 'vim-airline/vim-airline-themes'
Plug 'yggdroot/indentline'
Plug 'connorholyday/vim-snazzy'
Plug 'scrooloose/nerdtree'
Plug 'w0ng/vim-hybrid'
Plug 'SirVer/ultisnips'
"Plug 'godlygeek/tabular'
"Plug 'plasticboy/vim-markdown'
"Plug 'iamcco/markdown-preview.nvim'
Plug 'iamcco/markdown-preview.nvim', { 'do': { -> mkdp#util#install() }, 'for': ['markdown', 'vim-plug']}
" Initialize plugin system
call plug#end()

map r :call CompileRunGcc()<CR><CR>
func! CompileRunGcc()
	exec "w"
	silent exec "!vim ~/codes/in.txt"
	if &filetype == 'cpp'
		set splitbelow
		exec "!g++ --std=c++11 % -Wall -o %<"
		:term ./%<
	endif
	if &filetype == 'markdown'
		exec "MarkdownPreview"
	endif
endfunc


let g:mkdp_auto_start = 0
let g:mkdp_auto_close = 1
let g:mkdp_refresh_slow = 0
let g:mkdp_command_for_global = 0
let g:mkdp_open_to_the_world = 0
let g:mkdp_open_ip = ''
let g:mkdp_browser = ''
let g:mkdp_echo_preview_url = 0
let g:mkdp_browserfunc = ''
let g:mkdp_preview_options = {
     \ 'mkit': {},
        \ 'katex': {},
             \ 'uml': {},
                 \ 'maid': {},
                     \ 'disable_sync_scroll': 0,
                         \ 'sync_scroll_type': 'middle',
                             \ 'hide_yaml_meta': 1,
                                 \ 'sequence_diagrams': {},
                                     \ 'flowchart_diagrams': {},
                                         \ 'content_editable': v:false,
                                             \ 'disable_filename': 0
                                                 \ }

                                                 let g:mkdp_markdown_css = ''
                                                 let g:mkdp_highlight_css = ''
                                                 let g:mkdp_port = ''
                                                 let g:mkdp_page_title = '「${name}」'
                                                 let g:mkdp_filetypes = ['markdown']


 1万+
1万+

 被折叠的 条评论
为什么被折叠?
被折叠的 条评论
为什么被折叠?
 到【灌水乐园】发言


