


在项目中,将AI生成的应用存储在本地目录中,手动双击打开HTML来查看网站生成效果。我们想将其平台化,就要将应用部署到服务器上。
部署方案:
考虑到成本原因,我们这里选择把本地生成的文件同步到一个Web服务器的不同目录上。用户通过URL访问应用(如https://code-ai.cn/app1/)。
方案一:使用serve工具
这是最简单的方案,通过Node.js的serve包可以快速启动一个Web服务器,为指定目录提供Web访问服务。(前提是本地下载的有Node.js)
1.先安装serve工具:
npm i -g serve
2.在要部署的本地文件目录内运行serve或npx serve,就能查看到目录内的网站。
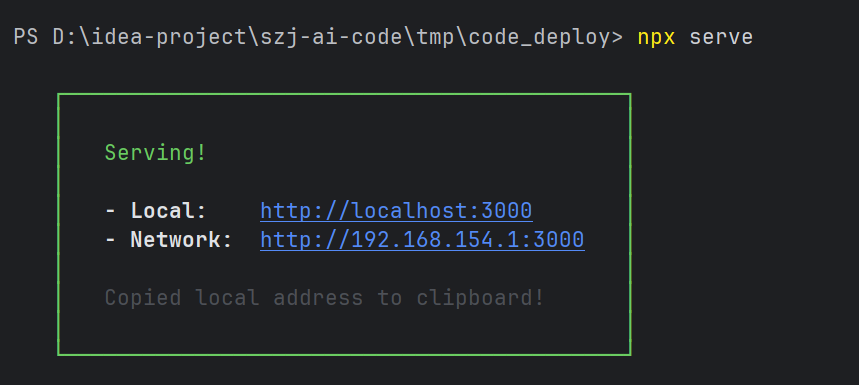
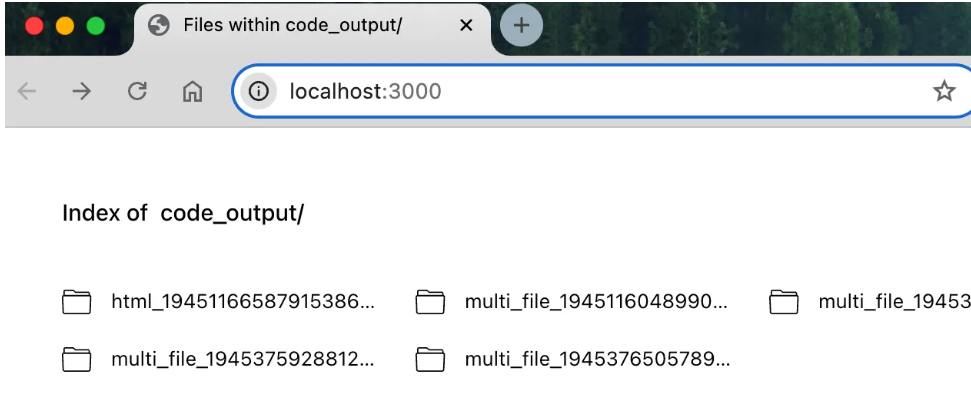
访问对应的路径,直接就能访问到对应的网站。
使用时,需要提前在服务器上启动serve服务器,就能为特定的部署目录提供web服务,然后部署时将代码文件移动到该目录下即可。
这种方式的优点是配置简单,缺点是依赖Node.js环境,且性能较低。
3.我们也可以让serve服务器跟随Spring Boot 项目启动或关闭:
3.1 使用命令行运行serve
@Service
public class ServeDeployService {

    private static final String CODE_BASE_DIR = "/tmp/deploy";
    private static final int SERVE_PORT = 3000;
    private static Process serveProcess;

    /**
     * 启动 Serve 服务
     */
    public void startServeService() {
        try {
            if (serveProcess == null || !serveProcess.isAlive()) {
                ProcessBuilder pb = new ProcessBuilder(
                    "npx", "serve", CODE_BASE_DIR, "-p", String.valueOf(SERVE_PORT)
                );
                pb.redirectErrorStream(true);
                serveProcess = pb.start();
                System.out.println("Serve service started on port " + SERVE_PORT);
            }
        } catch (Exception e) {
            throw new RuntimeException("Failed to start serve service", e);
        }
    }

    /**
     * 关闭 Serve 服务
     */
    public void stopServeService() {
        if (serveProcess != null && serveProcess.isAlive()) {
            serveProcess.destroy();
            try {
                serveProcess.waitFor(5, TimeUnit.SECONDS);
                System.out.println("Serve service stopped");
            } catch (InterruptedException e) {
                serveProcess.destroyForcibly();
                System.out.println("Serve service force stopped");
            }
        }
    }
}
3.2 控制serve进程的生命周期:
@Component
public class ServeLifecycleManager {

    @Autowired
    private ServeDeployService serveDeployService;

    /**
     * Spring Boot 启动完成后启动 Serve 服务
     */
    @EventListener(ApplicationReadyEvent.class)
    public void onApplicationReady() {
        serveDeployService.startServeService();
    }

    /**
     * Spring Boot 关闭时停止 Serve 服务
     */
    @PreDestroy
    public void onApplicationShutdown() {
        System.out.println("Shutting down Serve service...");
        serveDeployService.stopServeService();
    }
}
方案二:通过Spring Boot 接口
在后端中实现一个静态资源服务接口,输入部署路径,返回相应的文件。
@RestController
@RequestMapping("/static")
public class StaticResourceController {

    // 应用生成根目录(用于浏览)
    private static final String PREVIEW_ROOT_DIR = System.getProperty("user.dir") + "/tmp/code_output";

    /**
     * 提供静态资源访问,支持目录重定向
     * 访问格式:http://localhost:8081/api/static/{deployKey}[/{fileName}]
     */
    @GetMapping("/{deployKey}/**")
    public ResponseEntity<Resource> serveStaticResource(
            @PathVariable String deployKey,
            HttpServletRequest request) {
        try {
            // 获取资源路径
            String resourcePath = (String) request.getAttribute(HandlerMapping.PATH_WITHIN_HANDLER_MAPPING_ATTRIBUTE);
            resourcePath = resourcePath.substring(("/static/" + deployKey).length());
            // 如果是目录访问(不带斜杠),重定向到带斜杠的URL
            if (resourcePath.isEmpty()) {
                HttpHeaders headers = new HttpHeaders();
                headers.add("Location", request.getRequestURI() + "/");
                return new ResponseEntity<>(headers, HttpStatus.MOVED_PERMANENTLY);
            }
            // 默认返回 index.html
            if (resourcePath.equals("/")) {
                resourcePath = "/index.html";
            }
            // 构建文件路径
            String filePath = PREVIEW_ROOT_DIR + "/" + deployKey + resourcePath;
            File file = new File(filePath);
            // 检查文件是否存在
            if (!file.exists()) {
                return ResponseEntity.notFound().build();
            }
            // 返回文件资源
            Resource resource = new FileSystemResource(file);
            return ResponseEntity.ok()
                    .header("Content-Type", getContentTypeWithCharset(filePath))
                    .body(resource);
        } catch (Exception e) {
            return ResponseEntity.status(HttpStatus.INTERNAL_SERVER_ERROR).build();
        }
    }

    /**
     * 根据文件扩展名返回带字符编码的 Content-Type
     */
    private String getContentTypeWithCharset(String filePath) {
        if (filePath.endsWith(".html")) return "text/html; charset=UTF-8";
        if (filePath.endsWith(".css")) return "text/css; charset=UTF-8";
        if (filePath.endsWith(".js")) return "application/javascript; charset=UTF-8";
        if (filePath.endsWith(".png")) return "image/png";
        if (filePath.endsWith(".jpg")) return "image/jpeg";
        return "application/octet-stream";
    }
}
这种方案的优点是无需额外进程,非常方便;缺点是功能相对简单,性能也不如专业的Web服务器。
方案三:使用 Nginx 映射
Nginx是专业的Web服务器,性能优异,功能丰富,因此这是最推荐的生产环境方案。
Nginx 映射的核心目标是:让用户无需记忆 “端口 + 复杂路径”,仅通过 “域名 + 简短路径”(如https://你的域名/my-app/),即可同时访问前端页面和调用后端接口,且隐藏后端服务细节。
1. 到nginx官网下载Nginx:nginx: download
下载好以后,找到Nginx配置文件nginx.conf,Windows系统直接到安装目录下找。
2. 修改Nginx配置,http块中添加serve块,配置root为项目部署根目录
# 静态资源服务器 - 80 端口
server {
    listen       80;
    server_name  localhost;
    charset      utf-8;
    charset_types text/css application/javascript text/plain text/xml application/json;
    # 项目部署根目录
    root         /Users/yupi/Code/ai-code/tmp/code_deploy;

    # 处理所有请求
    location ~ ^/([^/]+)/(.*)$ {
        try_files /$1/$2 /$1/index.html =404;
    }
}
3. 重载配置
启动Nginx,或者输入命令来重载配置:
nginx -s reload
然后访问80端口,就能看到网站了。
这种方案最佳,最适合生产环境,缺点是需要额外引入Nginx组件。
方案四:COS对象存储
还可以通过COS对象存储的静态网站访问能力,同时实现存储和访问;缺点是需要自定义域名。


 3555
3555

 被折叠的 条评论
为什么被折叠?
被折叠的 条评论
为什么被折叠?
 到【灌水乐园】发言


