


这里以Ubuntu12.04为例讲诉如何搭建Android源码的编译环境
1.更改ubuntu12.04的更新源
工欲善其事,必先利其器。由于ubuntu的软件更新源地址默认设国外,下载软件的速度相当较慢,这里将
ubuntu的软件更新源设为网易的服务站点。
sudo gedit /etc/apt/sources.list,删除全部内容,并添加以下内容。
deb http://mirrors.163.com/ubuntu/ precise main restricted
deb-src http://mirrors.163.com/ubuntu/ precise main restricted
deb http://mirrors.163.com/ubuntu/ precise-updates main restricted
deb-src http://mirrors.163.com/ubuntu/ precise-updates main restricted
deb http://mirrors.163.com/ubuntu/ precise universe
deb-src http://mirrors.163.com/ubuntu/ precise universe
deb http://mirrors.163.com/ubuntu/ precise-updates universe
deb-src http://mirrors.163.com/ubuntu/ precise-updates universe
deb http://mirrors.163.com/ubuntu/ precise multiverse
deb-src http://mirrors.163.com/ubuntu/ precise multiverse
deb http://mirrors.163.com/ubuntu/ precise-updates multiverse
deb-src http://mirrors.163.com/ubuntu/ precise-updates multiverse
deb http://mirrors.163.com/ubuntu/ precise-backports main restricted universe multiverse
deb-src http://mirrors.163.com/ubuntu/ precise-backports main restricted universe multiverse
deb http://mirrors.163.com/ubuntu/ precise-security main restricted
deb-src http://mirrors.163.com/ubuntu/ precise-security main restricted
deb http://mirrors.163.com/ubuntu/ precise-security universe
deb-src http://mirrors.163.com/ubuntu/ precise-security universe
deb http://mirrors.163.com/ubuntu/ precise-security multiverse
deb-src http://mirrors.163.com/ubuntu/ precise-security multiverse
deb http://extras.ubuntu.com/ubuntu precise main
deb-src http://extras.ubuntu.com/ubuntu precise main
然后运行apt-get update更新一下软件源当然还可以使用其他更新源,百度一下ubuntu12.04更新源。
如http://www.oschina.net/code/snippet_105637_34442。
2.安装依赖库
sudo apt-get install git-core gnupg flex bison gperf build-essential zip curl
zlib1g-dev gcc-multilib g++-multilib libc6-dev-i386 lib32ncurses5-dev ia32-libs
x11proto-core-dev libx11-dev lib32readline-gplv2-dev lib32z1-dev libxml-simple-perl
确保每个库都安装成功,否则编译出错又要回来装库。有些库安装不成功可能是库名字换了,要注意屏幕上的打印信息。
3.安装JDK
(如果Android版本是4.4之前的,要使用jdk1.6。如果Android版本是5.0或者6.0,要使用open-jdk1.7,如果是Android7.0,需要安装openjdk1.8,下载openjdk路径http://openjdk.java.net/install/index.html)如果下载不了,可以到网上下载安装包,解压安装包后,设置jdk的路径,如
sudo vim /etc/profile,添加如下内容
export JAVA_HOME=/opt/JDK/java-7-openjdk-amd64
export JRE_HOME=$JAVA_HOME/jre
export CLASSPATH=$JAVA_HOME/lib:$JRE_HOME/lib:$CLASSPATH
export PATH=$JAVA_HOME/bin:$JRE_HOME/bin:$PATH
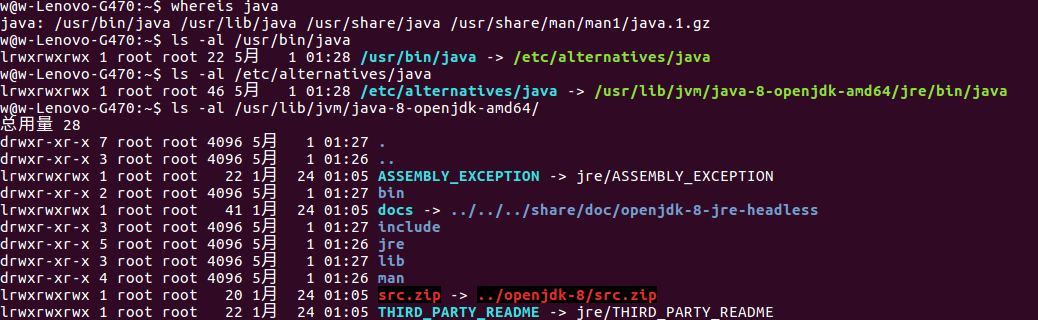
其中,将/opt/JDK/java-7-openjdk-amd64换成你JDK包的路径,source /etc/profile,终端输入java -version可使用判断JDK是否安装成功。其实,这种安装包可以从已经安装好(apt-get)的jdk提取出来,如
4.编译Android源码
4.1 使能编译脚本 在Android源码目录下运行source build/envsetup.sh,相当于输出一些临时变量,shell终端退出后无效
4.2 选择具体机型 在终端运行lunch,随后会打印机型列表,通过输入数字选择具体的机型
或者
root@root:~/msm8909$ choosecombo
Build type choices are:
     1. release
     2. debug
Which would you like? [1] 1
Which product would you like? [full] msm8974
Variant choices are:
     1. user
     2. userdebug
     3. eng
Which would you like? [eng] 2
4.3 正式编译 在终端运行make,如果之前没有编译过Android源码,该过程相当久,记得make -jn,n是线程的意思,不大于cpu核数2倍即可。在终端上运行printenv可查看我们的配置情况
此外,对应查找Android源码的位置,有以下几个好工具
tapas:     	tapas [<App1> <App2> ...] [arm|x86|mips|arm64|x86_64|mips64] [eng|userdebug|user]
croot:     	Changes directory to the top of the tree.
m:         	Makes from the top of the tree.
mm:        	Builds all of the modules in the current directory, but not their dependencies.
mmm:       	Builds all of the modules in the supplied directories, but not their dependencies.
            	To limit the modules being built use the syntax: mmm dir/:target1,target2.
mma:       	Builds all of the modules in the current directory, and their dependencies.
mma:      	Builds all of the modules in the supplied directories, and their dependencies.
		provision: Flash device with all required partitions. Options will be passed on to fastboot.
cgrep:     Greps on all local C/C++ files.
ggrep:     Greps on all local Gradle files.
jgrep:     Greps on all local Java files.
resgrep:   Greps on all local res/*.xml files.
mangrep:   Greps on all local AndroidManifest.xml files.
mgrep:     Greps on all local Makefiles files.
sepgrep:   Greps on all local sepolicy files.
sgrep:     Greps on all local source files.
godir:     Go to the directory containing a file.
如在所有的.mk文件中搜索字符www,只需mgrep www即可找到结果,比直接使用grep的效率要高。
对于m,mm,mmm后面可有加线程数,如mmm -j128;
5.fastboot的安装
sudo add-apt-repository ppa:nilarimogard/webupd8
sudo apt-get update
sudo apt-get install android-tools-adb android-tools-fastboot
fastoot的使用方法
烧写镜像 fastboot flash+分区+镜像
如fastboot flash boot boot.img
擦除分区 fastboot erase 分区
如fastboot erase boot
6.adb的安装
sudo add-apt-repository ppa:nilarimogard/webupd8
sudo apt-get update
sudo apt-get install android-tools-adb
通过lsusb查看设备为
Bus 001 Device 001: ID 1d6b:0002 Linux Foundation 2.0 root hub
Bus 002 Device 001: ID 1d6b:0002 Linux Foundation 2.0 root hub
Bus 001 Device 002: ID 8087:0024 Intel Corp. Integrated Rate Matching Hub
Bus 002 Device 002: ID 8087:0024 Intel Corp. Integrated Rate Matching Hub
Bus 002 Device 003: ID 046d:c077 Logitech, Inc.
将android设备连接至电脑,通过lsusb查看usb设备,多出来的就是接入的usb设备(usb adb devices)。
Bus 001 Device 001: ID 1d6b:0002 Linux Foundation 2.0 root hub
Bus 002 Device 001: ID 1d6b:0002 Linux Foundation 2.0 root hub
Bus 001 Device 002: ID 8087:0024 Intel Corp. Integrated Rate Matching Hub
Bus 002 Device 002: ID 8087:0024 Intel Corp. Integrated Rate Matching Hub
Bus 001 Device 027: ID 1f3a:1002
Bus 002 Device 003: ID 046d:c077 Logitech, Inc.
这里可以发现android设备就是
Bus 001 Device 027: ID 1f3a:1002
sudo vim /etc/udev/rules.d/70-android.rules
加入以下内容,注意红色部分对应的就是lsusb得到的id
SUBSYSTEM=="usb",ATTRS{idVendor}=="1f3a",ATTRS{idProduct}=="1002",MODE="0666"
添加权限
sudo chmod a+rx /etc/udev/rules.d/70-android.rules
echo 0x1f3a> ~/.android/adb_usb.ini(
运行脚本usb.sh,该脚本的内容为
sudo service udev restart
adb kill-server
sudo adb start-server
adb devices
该脚本无非就是重启一下udev和adb服务,有时lsusb发现设备了,但adb devices没找到设备,可以运行一下该
脚本,就可以使用adb了。当然,如果你不怕麻烦,可以单独将这些命令在终端上敲一遍。
参考http://blog.youkuaiyun.com/koozxcv/article/details/49430119
另外Android源码编译完成后,在out/host/linux-x86/bin下有fastboot和adb的可执行文件,在上面的工具无法使用时,可使用Android源码编译出来的工具。
不同版本的Ubuntu编译环境的搭建,请参考https://source.android.com/source/initializing.html


 2446
2446

 被折叠的 条评论
为什么被折叠?
被折叠的 条评论
为什么被折叠?
 到【灌水乐园】发言


