


 本文详细介绍如何在SpringBoot项目中集成Swagger2,包括添加依赖、配置Swagger、控制器注解及实体类注解,最后通过访问Swagger-UI页面查看API文档。
1、添加依赖。
<dependency>
    <groupId>io.springfox</groupId>
    <artifactId>springfox-swagger2</artifactId>
    <version>2.9.2</version>
</dependency>
<dependency>
    <groupId>io.springfox</groupId>
    <artifactId>springfox-swagger-ui</artifactId>
    <version>2.9.2</version>
</dependency>
2、添加 Swagger 配置。
@Configuration
@EnableSwagger2
@Profile({"dev", "test"})
public class Swagger2Config {
@Bean
public Docket createRestApi() {
return new Docket(DocumentationType.SWAGGER_2)
.apiInfo(apiInfo())
.directModelSubstitute(Date.class, Long.class) // 日期使用时间戳
.globalOperationParameters(setSession())
.select()
.apis(RequestHandlerSelectors.basePackage("com.test.aggregate.server.controller"))
.paths(PathSelectors.any())
.build();
}
private ApiInfo apiInfo() {
return new ApiInfoBuilder()
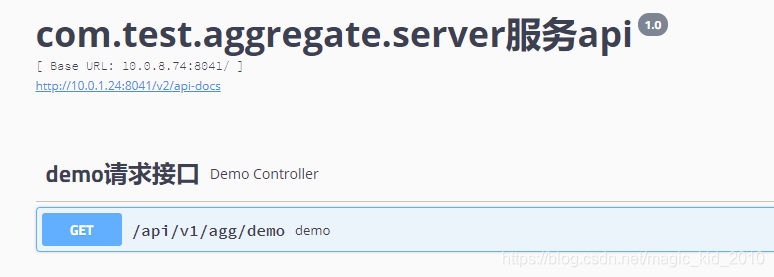
.title("com.test.aggregate.server服务api")
.version("1.0")
.build();
}
/**
* 设置header和session
* */
private List<Parameter> setSession() {
List<Parameter> parameters = new ArrayList<>();
ParameterBuilder builder = new ParameterBuilder();
builder.name(RequestInfo.USER_ID_NAME)
.description("用户id")
.modelRef(new ModelRef("string"))
.parameterType("session")
.required(false)
.build();
parameters.add(builder.build());
return parameters;
}
}说明:
(1).apis() 设置需要扫描的 controller 包路径。
(2).paths() 可以设置筛选 API 的 url 进行过滤。
(3)setSession() 方法用于设置通过 swagger 请求时,携带的cookie/session。主要为了鉴权方便用。
3、controller 类, 添加注解。
@Api(value = "demo请求接口", tags = "demo请求接口")
public interface DemoApi {
    @ApiOperation(value = "demo", notes = "demo")
    @GetMapping(value = "/v1/agg/demo")
    DeferredResult<Result<DemoOVO>> queryDemo(@ApiParam(name = "userId", value = "用户id", required = true) @RequestParam(name = "userId") Long userId,
                                              @ApiParam(name = "roleIds", value = "归属的角色id列表", required = true) @RequestParam(name = "roleIds") List<Long> roleIds);
}
说明:
(1)如果想在 swagger 文档中,屏蔽掉某个接口,可以在接口上添加 @ApiIgnore 注解。
4、请求/应答实体,添加注解。
/**
 * demo应答
 */
@Data
@ApiModel(value = "demo应答")
public class DemoOVO {
    /**
     * 用户id
     */
    @ApiModelProperty(value = "用户id")
    private Long userId;
    /**
     * 用户名
     */
    @ApiModelProperty(value = "用户名")
    private String userName;
    /**
     * 性别
     */
    @ApiModelProperty(value = "性别")
    private String sex;
    /**
     * 年龄
     */
    @ApiModelProperty(value = "年龄")
    private int age;

}
5、启动项目,访问
http://ip:port/swagger-ui.html
【一起学习】


 1886
1886

 被折叠的 条评论
为什么被折叠?
被折叠的 条评论
为什么被折叠?
 到【灌水乐园】发言


