


目录
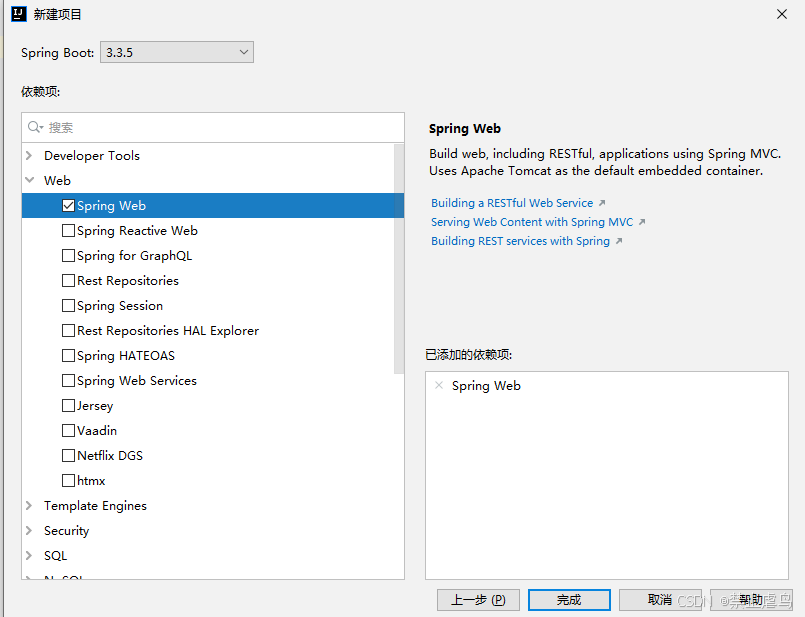
1.打开 IntelliJ IDEA,左上角选择文件——新建——项目
2.左侧面板选择Spring Initializr(新版是spring boot)
4.在项目SDK中选择你想要使用的 JDK 版本,下面的java一定要和JDK版本一致,然后点击下一步。
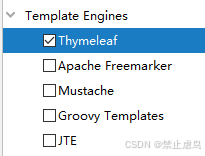
5. 依赖项选择web——SpringWeb和Templat Engines——Thymeleaf,点击完成成功创建项目
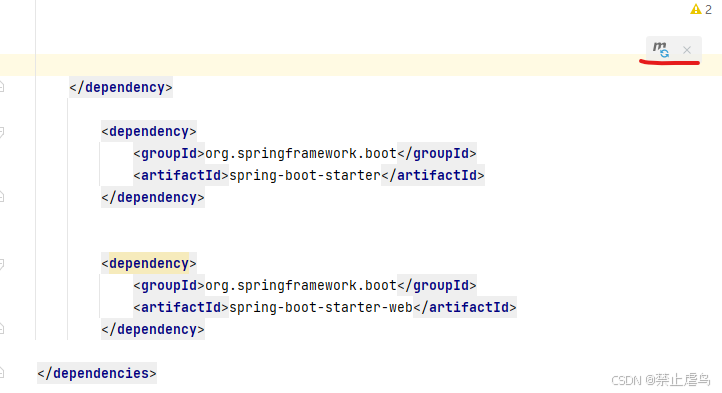
1、如果没有依赖的,可以编辑项目pom.xml文件,在dependencies里加入依赖
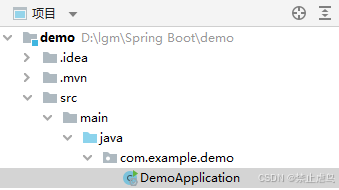
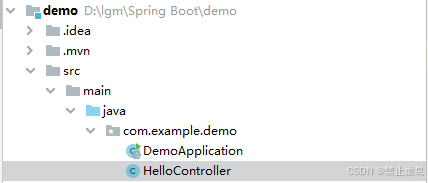
1.打开src/main/java/com.exampl.demo下的主程序类
2.com.example.demo可以自行替换成自己的文件名,DemoApplication也可以自行替换成自己的类名。
1.在同一包下创建一个名为HelloController.java的控制器类。
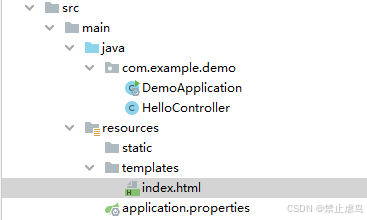
1.在src/main/resources/templates目录下创建一个名为index.html的文件
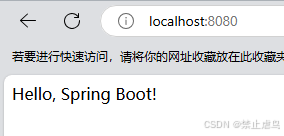
2.在浏览器中输入http://localhost:8080(默认端口为8080,如果配置其他端口,请修改)。
一、创建Maven项目
1.打开 IntelliJ IDEA,左上角选择文件——新建——项目
2.左侧面板选择Spring Initializr(新版是spring boot)
3.在面板中语言选择java,类型选择Maven
4.在项目SDK中选择你想要使用的 JDK 版本,下面的java一定要和JDK版本一致,然后点击下一步。

5. 依赖项选择web——SpringWeb和Templat Engines——Thymeleaf,点击完成成功创建项目
二、添加Spring Boot依赖
1、如果没有依赖的,可以编辑项目pom.xml文件,在dependencies里加入依赖
    <dependency>
        <groupId>org.springframework.boot</groupId>
        <artifactId>spring-boot-starter</artifactId>
    </dependency>

    <dependency>
        <groupId>org.springframework.boot</groupId>
        <artifactId>spring-boot-starter-web</artifactId>
    </dependency>
2、点击右上角加入依赖
三、编写主程序启动类
1.打开src/main/java/com.exampl.demo下的主程序类
2.com.example.demo可以自行替换成自己的文件名,DemoApplication也可以自行替换成自己的类名。
package com.example.demo;

import org.springframework.boot.SpringApplication;
import org.springframework.boot.autoconfigure.SpringBootApplication;

@SpringBootApplication
public class DemoApplication {
    public static void main(String[] args) {
        SpringApplication.run(DemoApplication.class, args);
    }
}
四、创建用于Web请求的处理控制类
1.在同一包下创建一个名为HelloController.java的控制器类。
2.加入代码
package com.example.demo;

import org.springframework.stereotype.Controller;
import org.springframework.web.bind.annotation.GetMapping;

@Controller
public class HelloController {
    @GetMapping("/")
    public String home() {
        return "index";
    }
}
五、创建显示网页
1.在src/main/resources/templates目录下创建一个名为index.html的文件
2.编写自己想要的网页代码效果,以下是演示代码
<!DOCTYPE html>
<html>
<head>
    <title>Welcome to Spring Boot</title>
</head>
<body>
    Hello, Spring Boot!
</body>
</html>
六、配置
1.在src/main/resources目录下,有一个application.properties或application.yml文件,用于配置Spring Boot应用的各种属性。例如,可以配置服务器端口、数据库连接等。我们在这里不做修改使用默认端口8080。
七、启动程序显示网页
1.运行主程序启动类DemoApplication
2.在浏览器中输入http://localhost:8080(默认端口为8080,如果配置其他端口,请修改)。


 891
891

 被折叠的 条评论
为什么被折叠?
被折叠的 条评论
为什么被折叠?
 到【灌水乐园】发言


