


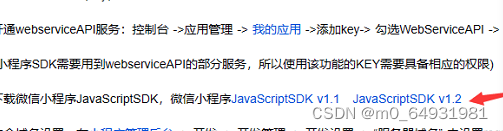
第一步,获取并配置腾讯地图key,流程如图所示
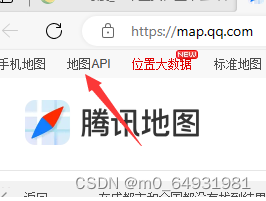
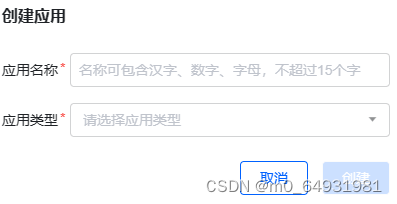
进入开放平台后,先注册登录过后,点击控制台,在应用管理里面创建一个应用

![]()
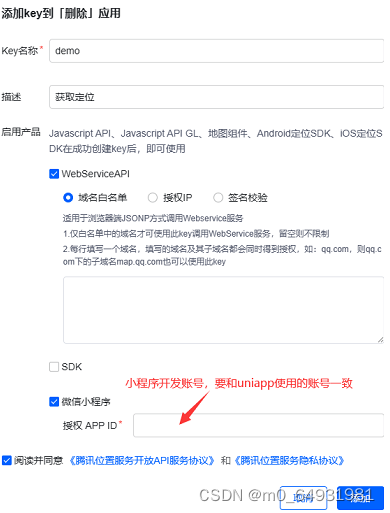

经过以上步骤就获取了key
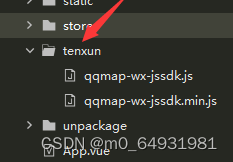
然后就是包的下载
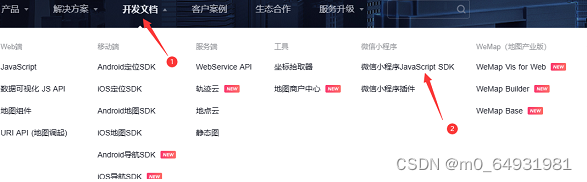
下载好了过后解压存放到项目根目录下
做完以上步骤就到配置环节,先配置manifest.json文件
"permission": {
	"scope.userLocation": {
		"desc": "你的位置信息将用于小程序定位"
	}
},
"requiredPrivateInfos": ["getLocation", "chooseLocation", "chooseAddress"]
将以上代码放到这儿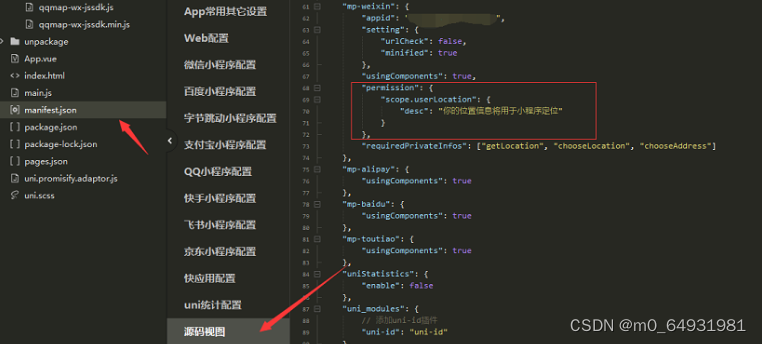
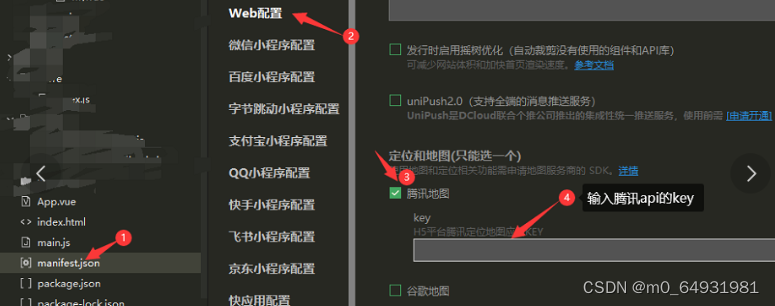
再配置腾讯地图的key
修改qqmap-wx-jssdk.js文件
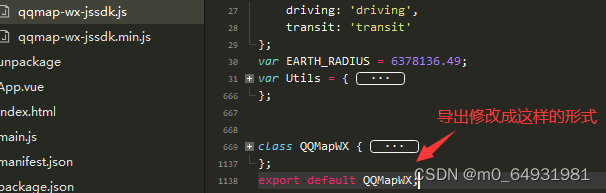
引入文件
import QQMapWX from '../../tenxun/qqmap-wx-jssdk.js'然后就完成了。就可以开始编写代码了,
成功了:

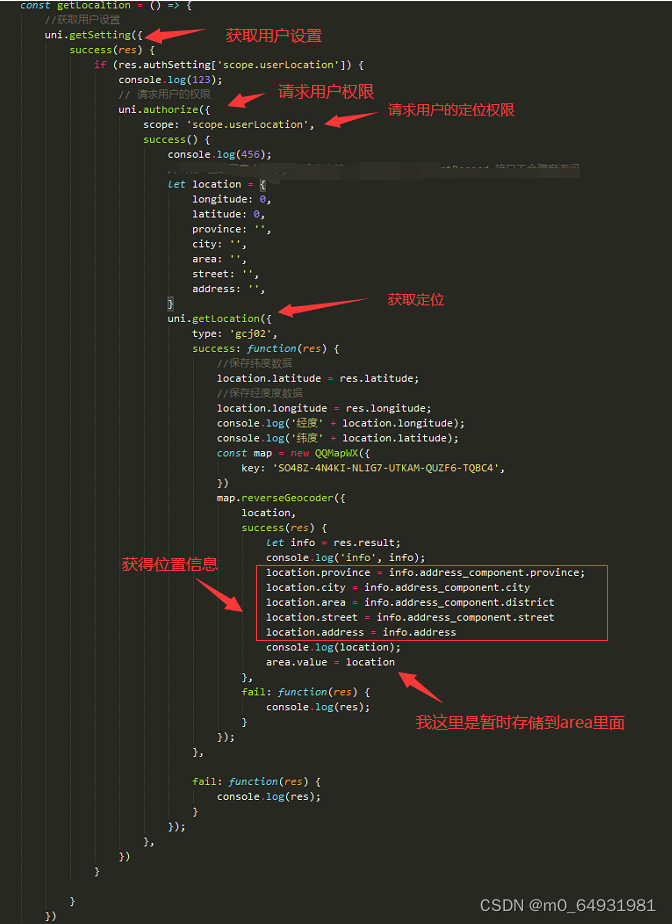
附上以上代码
uni.getSetting({
			success(res) {
				if (res.authSetting['scope.userLocation']) {
					console.log(123);
					// 请求用户的权限
					uni.authorize({
						scope: 'scope.userLocation',
						success() {
							console.log(456);
							// 用户已经同意小程序使用定位功能,后续调用 uni.getLocation接口不会弹窗询问
							let location = {
								longitude: 0,
								latitude: 0,
								province: '',
								city: '',
								area: '',
								street: '',
								address: '',
							}
							uni.getLocation({
								type: 'gcj02',
								success: function(res) {
									//保存纬度数据
									location.latitude = res.latitude;
									//保存经度度数据
									location.longitude = res.longitude;
									console.log('经度' + location.longitude);
									console.log('纬度' + location.latitude);
									const map = new QQMapWX({
										key: 'SO4BZ-4N4KI-NLIG7-UTKAM-QUZF6-TQBC4',
									})
									map.reverseGeocoder({
										location,
										success(res) {
											let info = res.result;
											console.log('info', info);
											location.province = info.address_component.province;
											location.city = info.address_component.city
											location.area = info.address_component.district
											location.street = info.address_component.street
											location.address = info.address
											console.log(location);
											area.value = location
										},
										fail: function(res) {
											console.log(res);
										}
									});
								},

								fail: function(res) {
									console.log(res);
								}
							});
						},
					})
				}

			}
		})
*注:写完代码后在电脑端的位置有偏差很正常,要运行到真机上,并且关闭wifi,使用流量,就能获得准确的位置
希望可以帮助大家


 7022
7022

 被折叠的 条评论
为什么被折叠?
被折叠的 条评论
为什么被折叠?
 到【灌水乐园】发言


