


 本文介绍了一种基于SpringBoot的责任链模式权限认证实现方案。通过自定义注解和拦截器完成对不同接口的动态权限配置和验证。
一.前言
本文是笔者实现权限认证流程的思路,由于本人技术水平有限,在文章中难免出现错误,如有发现,感谢各位指正。
笔者在刚开始工作时,接到的一个任务就是实现权限认证流程,我们采用SpringBoot框架外加责任链模式,大致实现思路如下.
二.权限认证
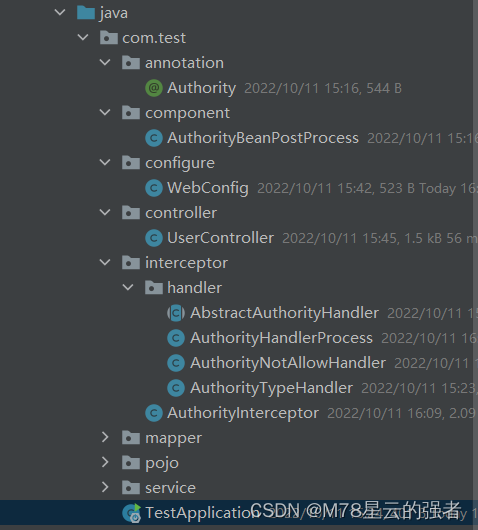
笔者认为权限认证就是一个拦截的过程,所以在实现的时候理论上可以做到任意的配置,对任意接口设置任意规则.下面讲一下笔者在SpringBoot中的实现,并把想到的实现/扩展思路讲解一下.简单实现类如下:
笔者是使用注解的方式实现权限的设置, ps:权限的设置可以使用各种实现方式,比如把接口的名字存入数据库/redis,这样就能实现动态的配置各个接口的权限:
/**
 * @author M78星云的强者
 */
@Target(ElementType.METHOD)
@Retention(RetentionPolicy.RUNTIME)
public @interface Authority {
    //方法描述
	String description();
    //权限名称
    String permissionName() default "";
    //权限类型,1读,2读写
    int type() default 1;
    //不允许访问的用户id
    int notAllow() default 0;
}
在UserController笔者在getUser()与deleteUser()方法上加了@Authority注解并给了不同的读写类型,另外deleteUser()方法上的注解配置了不允许访问的用户id(这里可以随便设置条件不仅限于用户id).
@RestController
@RequestMapping("user")
public class UserController {
    @Autowired
    private UserService userService;

    @PostMapping("add")
    Result addUser(@RequestBody User user) {
        return userService.addUser(user);
    }

    @GetMapping("/getUser/{id}")
    @Authority(description = "获得用户信息",permissionName = "user:getUser",type = 1)
    Result getUser(@PathVariable("id") Integer id) {
        return userService.queryUser(id);
    }

    @DeleteMapping("deleteUser/{id}")
    @Authority(description = "删除用户信息",permissionName = "user:deleteUser",type = 2,notAllow = 2)
    Result deleteUser(@PathVariable("id") Integer id) {
        return userService.deleteUser(id);
    }

    @PutMapping("update")
    Result updateUser(@RequestBody User user) {
        return userService.updateUser(user);
    }

    @GetMapping("getAll")
    Result getAllUser() {
        return userService.getAllUser();
    }

    @GetMapping("getAll/{page}/{size}")
    Result getUserByPage(@PathVariable("page") Integer page,
                         @PathVariable("size") Integer size) {
        return userService.getByPage(page, size);
    }

}
我们都知道spring在启动的时候会调用各种BPP(BeanPostProcessor)的方法,我们在这里实现了一个BPP类:
@Component
public class AuthorityBeanPostProcess implements BeanPostProcessor {
    public static Map<String,Authority> map = new HashMap();
    @Override
    public Object postProcessAfterInitialization(Object bean, String beanName) throws BeansException {
        Class<?> aClass = bean.getClass();
        Method[] declaredMethods = aClass.getDeclaredMethods();
        for (Method method : declaredMethods) {
            if (method.isAnnotationPresent(Authority.class)) {
                String name = method.getName();
                Authority annotation = method.getAnnotation(Authority.class);
                map.put(name,annotation);
            }
        }
        return bean;
    }
}
在springBoot项目启动时,把所有被@Authority注解注释的方法筛选出来,并且放入缓存中(这里直接放到了map中)备用.这里也可以将方法存入数据库中,字段就是权限的各种拦截方式,可以根据需要自己调整,并且配合责任链模式,扩展、调整都很方便。
下面来看下我们的拦截器:
/**
 * @author M78星云的强者
 */
public class AuthorityInterceptor implements HandlerInterceptor {
    @Override
    public boolean preHandle(HttpServletRequest request, HttpServletResponse response, Object handler) throws Exception {
        if (handler instanceof HandlerMethod) {
            HandlerMethod handlerMethod = (HandlerMethod) handler;
            String name = handlerMethod.getMethod().getName();
            //拦截器想要获取容器中bean需要拿到bean工厂进行getBean()
            BeanFactory factory = WebApplicationContextUtils.getRequiredWebApplicationContext(request.getServletContext());
            AuthorityHandlerProcess authorityProcess = factory.getBean("authorityProcess", AuthorityHandlerProcess.class);
            //从redis或者缓存中取得方法与权限关系
            Authority authority = AuthorityBeanPostProcess.map.get(name);
            if (authority != null) {
                //对当前用户进行权限校验
                //获取用户信息。因为用户已经登录了,那么user的信息是保存在我们的缓存里的,token获取,这里写一个假数据。
                User user = new User();
                //模拟一个用户
                user.setAuthority(2);
                user.setUuid(1);
                try {
                    //责任链调用,可以动态配置调用规则,即权限校验规则,
                    authorityProcess.process(user, authority);
                } catch (Exception e) {
                    //或者统一捕捉异常,返回错误信息
                    System.out.println(e.getMessage());
                    return false;
                }
            }
        }
        return true;
    }
}
其中的关键就是authorityProcess.procee(user,authority)方法,我们来看下实现:
public abstract class AbstractAuthorityHandler {
    abstract void processHandler(User user, Authority authority) throws Exception;
}
该抽象类的具体实现就是咱们要进行权限拦截的各种条件,笔者在这里作了两个实现:
public class AuthorityNotAllowHandler extends AbstractAuthorityHandler{
    @Override
    void processHandler(User user, Authority authority) throws Exception {
        if (authority.notAllow() == user.getUuid()){
            throw new RuntimeException("不允许的访问id");
        }
    }
}

public class AuthorityTypeHandler extends AbstractAuthorityHandler{
    @Override
    void processHandler(User user, Authority authority)throws Exception {
         if (authority.type() > user.getAuthority()){
             throw new RuntimeException("不允许的操作类型");
         }
    }
}
一个为不允许访问的id校验,另一个为读写权限的校验。 然后将这些权限校验的类组装成一个责任链,如下图:
@Component("authorityProcess")
public class AuthorityHandlerProcess {

    @Value("#{'${suggest.requirement.handler}'.split(',')}")
    private List<String> handlers;

    public void process(User user, Authority authority) throws Exception{
        // 如果想要实时的进行顺序的调整或者是增减。那必须要使用配置中心进行配置。
        // 比如springcloud里边自带的 git 的这种配置中心; applo 配置中心。
            for(String handler : handlers) {
                AbstractAuthorityHandler handle =
                        (AbstractAuthorityHandler) Class.forName(handler).newInstance();
                handle.processHandler(user, authority);
            }
    }
}
这里的责任链可以由用户自身配置,也可以初始化的时候把所有用于权限拦截的类实例化放入map中,在配置的时候直接从map中取得实例,就不需要每次调用都去反射实例化了。
现在来看下效果:
访问路径localhost:8080/user/deleteUser/1:

因为模拟用户仅仅拥有读权限,所以不能进行deleteUser的访问。将其权限修改为读写,再次访问该接口:
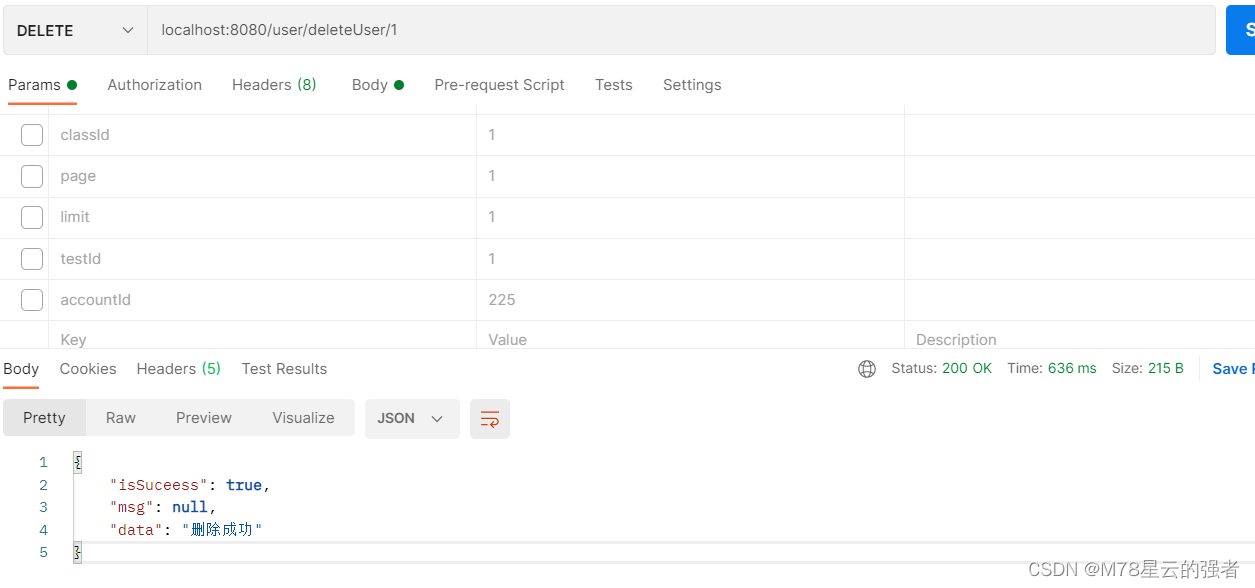
下面将我们的用户id修改为接口不允许的用户id:

权限认证也可以正常工作。


 1612
1612

 被折叠的 条评论
为什么被折叠?
被折叠的 条评论
为什么被折叠?
 到【灌水乐园】发言


