


 本文档详细介绍了如何配置Docker Swarm环境,包括准备三台虚拟机节点,设置master节点,加入worker节点,以及在Swarm模式下创建service。通过`docker swarm init`、`docker swarm join`命令进行集群初始化和节点加入,并展示了`docker node ls`和`docker network ls`命令用于检查节点和网络状态。最后,创建了名为test1的alpine服务以及一个运行Nginx的service,以实现服务部署。
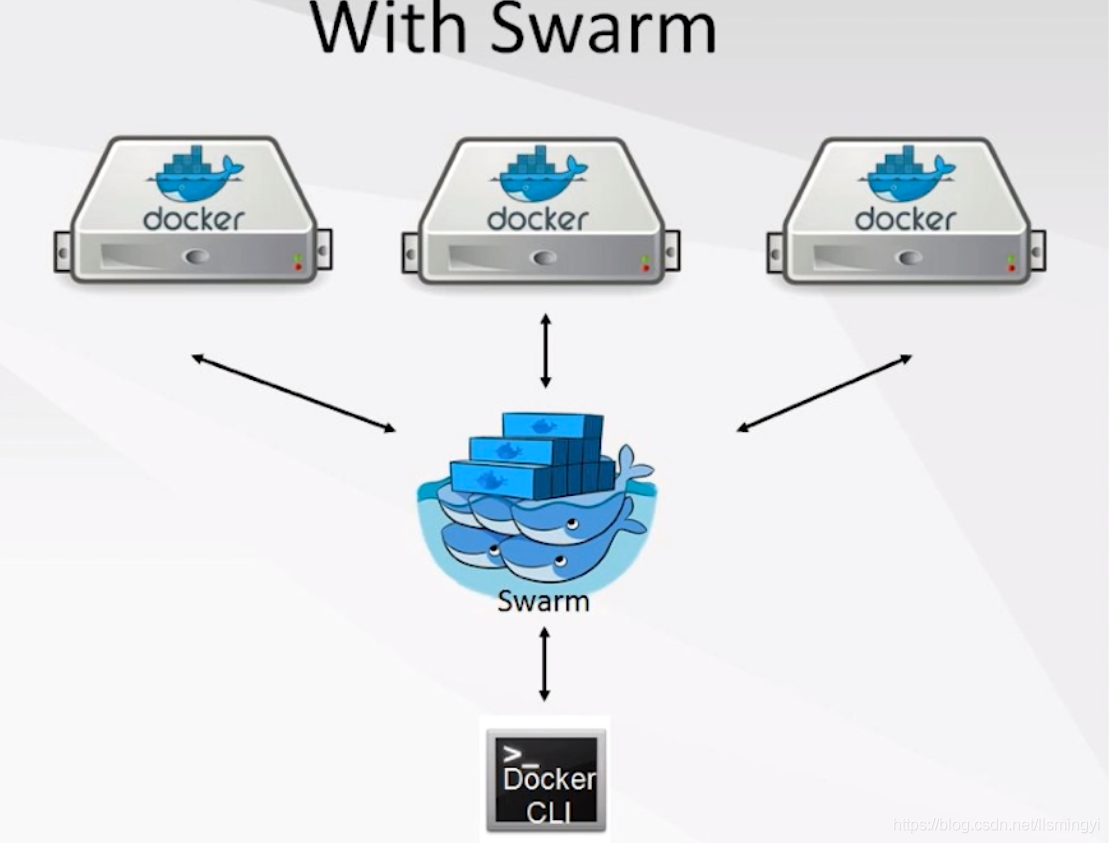
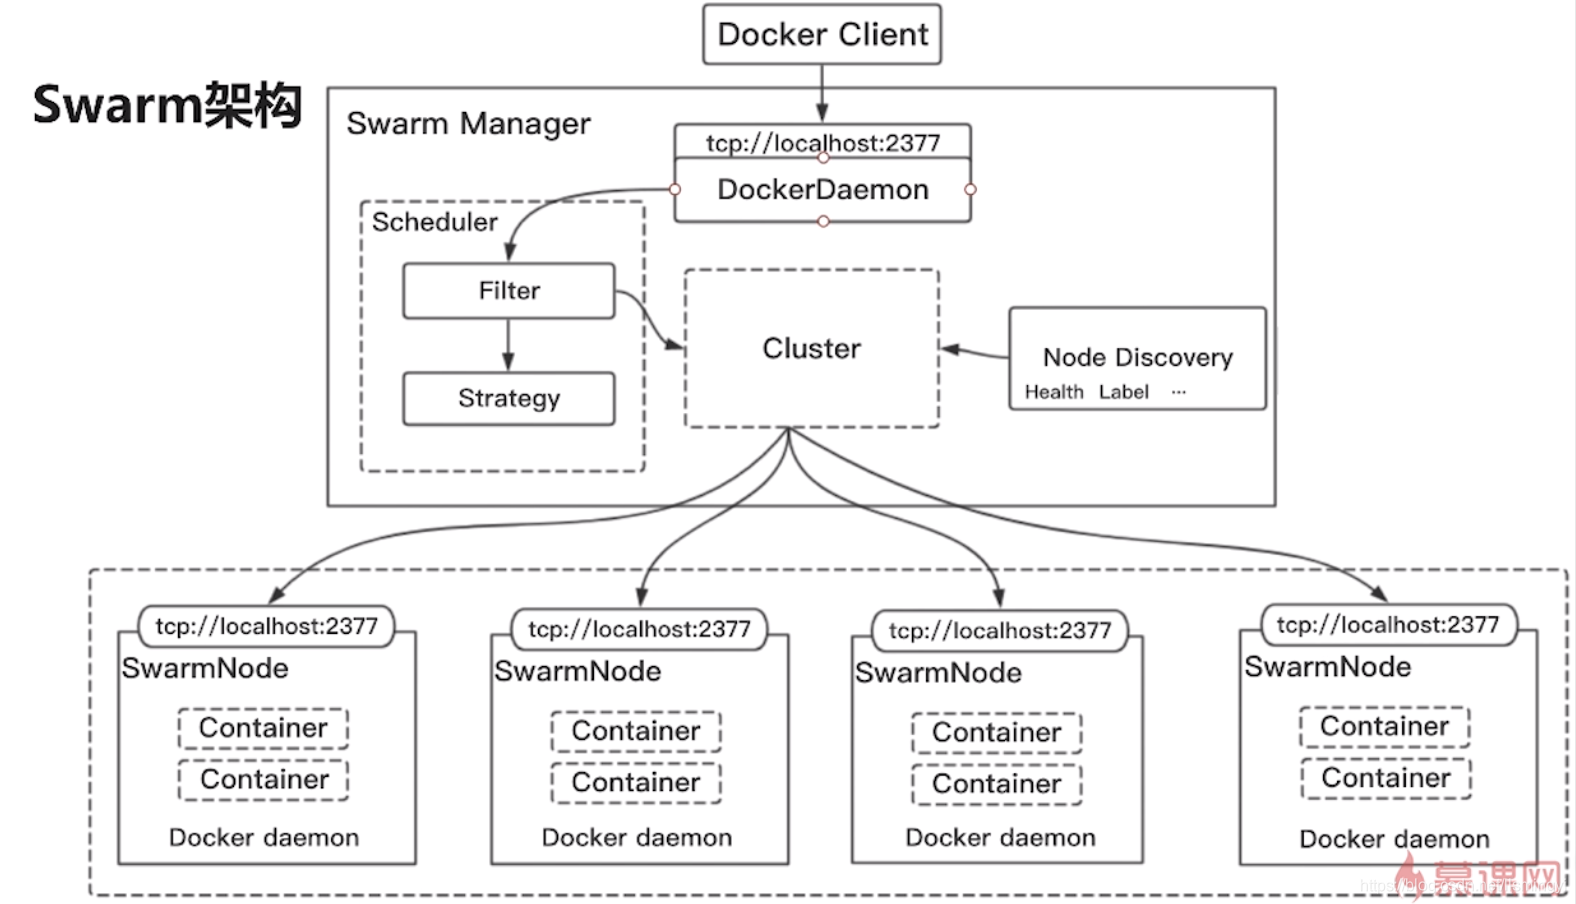
Docker swarm 基于docker api设计出来,不需要额外的安装
环境准备
三台虚拟机
192.168.1.19 swarm1
192.168.1.6 swarm2
192.168.1.7 swarm3
选择master 节点
docker swarm init --advertise-addr 192.168.1.19
加入swarm cluster
docker swarm join --token SWMTKN-1-46uwk99r3z3toqznatpu1kphrl4d0ut6t5cpv5ipts7bcjfopi-bw0roqkyq5pir4dr1l465l469 192.168.1.19:2377
[root@slave2 ~]# docker swarm join --token SWMTKN-1-46uwk99r3z3toqznatpu1kphrl4d0ut6t5cpv5ipts7bcjfopi-bw0roqkyq5pir4dr1l465l469 192.168.1.19:2377
This node joined a swarm as a worker.
master上查看
[root@slave1 ~]# docker network ls
NETWORK ID NAME DRIVER SCOPE
48abc9b488ff bridge bridge local
3677ccc8add2 docker_gwbridge bridge local
f0cc6cb394a7 host host local
tc5zi3s5sy8f ingress overlay swarm
b11d743337ed none null local
查看角色
[root@slave1 ~]# docker node ls
ID HOSTNAME STATUS AVAILABILITY MANAGER STATUS ENGINE VERSION
w5c5xhybt202zvrqtzts6mrfb * slave1 Ready Active Leader 18.09.4
vfwl8ny249uf5ox2dxzc9zlhx slave2 Ready Active 18.09.4
g5yagqmhha0xki9qwk67ruwy5 slave3 Ready Active 18.09.4
提升slave2 manager
[root@slave1 ~]# docker node promote slave2
Node slave2 promoted to a manager in the swarm.
尝试创建一个service
docker service create --name test1 alpine ping www.baidu.com
docker service create --name nginx --detach=false nginx
暴露 映射Nginx的默认端口到宿主机的8080端口
|
|
|
|
|
|
| docker service update --publish-add 8080:80 --detach=false nginx
三台节点都可以
扩容 nginx, swarm将会部署成负载均衡 docker service scale nginx=3 --detatch=false
[root@slave1 ~]# docker service ls ID NAME MODE REPLICAS IMAGE PORTS 9iv6vilrha3p nginx replicated 3/3 nginx:latest *:8080->80/tcp, *:8087->80/tcp lcuojb81tc0c nginx1 replicated 1/1 nginx:latest yb6jivpmol4z test1 replicated 1/1 alpine:latest
使用自定义网络部署应用
首先删除 services [root@slave1 ~]# docker service rm nginx nginx1 test1 nginx nginx1 test1
docker network create -d overlay imooc-overlay
--detach指定后台运行
docker service create --network imooc-overlay -p 8080:80 --detach=false nginx
docker service create --network imooc-overlay --name alpine --detach=false alpine ping www.baidu.com
上alpine所在的机器进入容器内部ping 刚启动的nginx服务(刚才没有给nginx service name, 所以分配了一个随机名称 infallible_brattain) root@slave1 ~]# docker service ps alpine ID NAME IMAGE NODE DESIRED STATE CURRENT STATE ERROR PORTS 36g8ok640n6t alpine.1 alpine:latest slave2 Running Running 8 minutes ago
docker exec -it d04 sh
/ # ping infallible_brattain PING infallible_brattain (10.0.0.2): 56 data bytes 64 bytes from 10.0.0.2: seq=0 ttl=64 time=0.064 ms 64 bytes from 10.0.0.2: seq=1 ttl=64 time=0.065 ms 64 bytes from 10.0.0.2: seq=2 ttl=64 time=0.066 ms ^C --- infallible_brattain ping statistics --- 3 packets transmitted, 3 packets received, 0% packet loss round-trip min/avg/max = 0.064/0.065/0.066 ms
Docker stack 管理一组服务 Service.yml version: "3.4" services: alpine: image: alpine command: - "ping" - "www.baidu.com" networks: - "imooc-overlay" deploy: replicas: 2 restart_policy: condition: on-failure resources: limits: cpus: "0.1" memory: 50M depends_on: - nginx nginx: image: nginx networks: - "imooc-overlay" ports: - "8080:80" networks: imooc-overlay: external: true
docker stack deploy -c service.yml test [root@slave1 ~]# docker stack ls NAME SERVICES ORCHESTRATOR test 2 Swarm
[root@slave1 ~]# docker stack services test ID NAME MODE REPLICAS IMAGE PORTS 1n137ttzosyg test_nginx replicated 1/1 nginx:latest *:8080->80/tcp yggli8y0e3tg test_alpine replicated 2/2 alpine:latest
Docker swarm 负载均衡两种模式,负载均衡有两种模式:VIP、DNSRR
其他资料参考 https://www.cnblogs.com/xiangsikai/p/9938862.html
|
|
|
|
|
|
| |
|
|
|
|


 1207
1207

 被折叠的 条评论
为什么被折叠?
被折叠的 条评论
为什么被折叠?
 到【灌水乐园】发言


