目标
在本教程中,你将学习如何:
- 使用提供的高级拼接 API 进行拼接
- 了解如何使用预配置的 Stitcher 配置来拼接使用不同相机型号的图像。
代码
C++Python
本教程的代码如下所示。您可以从此处下载。
注意:C++ 版本包含附加选项,例如图像除法(-d3)和更详细的错误处理,而这些选项在 Python 示例中并不存在。
#include "opencv2/imgcodecs.hpp"
#include "opencv2/highgui.hpp"
#include "opencv2/stitching.hpp"

#include <iostream>

using namespace std;
using namespace cv;

bool divide_images = false;
Stitcher::Mode mode = Stitcher::PANORAMA;
vector<Mat> imgs;
string result_name = "result.jpg";

void printUsage(char** argv);
int parseCmdArgs(int argc, char** argv);

int main(int argc, char* argv[])
{
    int retval = parseCmdArgs(argc, argv);
    if (retval) return EXIT_FAILURE;

    Mat pano;
    Ptr<Stitcher> stitcher = Stitcher::create(mode);
    Stitcher::Status status = stitcher->stitch(imgs, pano);

    if (status != Stitcher::OK)
    {
        cout << "Can't stitch images, error code = " << int(status) << endl;
        return EXIT_FAILURE;
    }

    imwrite(result_name, pano);
    cout << "stitching completed successfully\n" << result_name << " saved!";
    return EXIT_SUCCESS;
}

void printUsage(char** argv)
{
    cout <<
         "Images stitcher.\n\n" << "Usage :\n" << argv[0] <<" [Flags] img1 img2 [...imgN]\n\n"
         "Flags:\n"
         "  --d3\n"
         "      internally creates three chunks of each image to increase stitching success\n"
         "  --mode (panorama|scans)\n"
         "      Determines configuration of stitcher. The default is 'panorama',\n"
         "      mode suitable for creating photo panoramas. Option 'scans' is suitable\n"
         "      for stitching materials under affine transformation, such as scans.\n"
         "  --output <result_img>\n"
         "      The default is 'result.jpg'.\n\n"
         "Example usage :\n" << argv[0] << " --d3 --mode scans img1.jpg img2.jpg\n";
}

int parseCmdArgs(int argc, char** argv)
{
    if (argc == 1)
    {
        printUsage(argv);
        return EXIT_FAILURE;
    }

    for (int i = 1; i < argc; ++i)
    {
        if (string(argv[i]) == "--help" || string(argv[i]) == "/?")
        {
            printUsage(argv);
            return EXIT_FAILURE;
        }
        else if (string(argv[i]) == "--d3")
        {
            divide_images = true;
        }
        else if (string(argv[i]) == "--output")
        {
            result_name = argv[i + 1];
            i++;
        }
        else if (string(argv[i]) == "--mode")
        {
            if (string(argv[i + 1]) == "panorama")
                mode = Stitcher::PANORAMA;
            else if (string(argv[i + 1]) == "scans")
                mode = Stitcher::SCANS;
            else
            {
                cout << "Bad --mode flag value\n";
                return EXIT_FAILURE;
            }
            i++;
        }
        else
        {
            Mat img = imread(samples::findFile(argv[i]));
            if (img.empty())
            {
                cout << "Can't read image '" << argv[i] << "'\n";
                return EXIT_FAILURE;
            }

            if (divide_images)
            {
                Rect rect(0, 0, img.cols / 2, img.rows);
                imgs.push_back(img(rect).clone());
                rect.x = img.cols / 3;
                imgs.push_back(img(rect).clone());
                rect.x = img.cols / 2;
                imgs.push_back(img(rect).clone());
            }
            else
                imgs.push_back(img);
        }
    }
    return EXIT_SUCCESS;
}
解释
C++
最重要的代码部分是:
    Mat pano;
    Ptr<Stitcher> stitcher = Stitcher::create(mode);
    Stitcher::Status status = stitcher->stitch(imgs, pano);

    if (status != Stitcher::OK)
    {
        cout << "Can't stitch images, error code = " << int(status) << endl;
        return EXIT_FAILURE;
    }
创建了 stitcher 的新实例,并且cv::Stitcher::stitch将完成所有艰苦的工作。
cv::Stitcher::create可以在预定义配置之一(参数mode)中创建拼接器。有关详细信息,请参阅cv::Stitcher::Mode。这些配置将设置多个拼接器属性以在预定义场景之一中运行。在预定义配置之一中创建拼接器后,您可以通过设置任何拼接器属性来调整拼接。
如果您有 cuda 设备,则可以将cv::Stitcher配置为将某些操作卸载到 GPU。如果您希望将此配置设置try_use_gpu为 true。无论此标志如何,OpenCL 加速都将基于全局 OpenCV 设置透明地使用。
拼接可能会因多种原因而失败,您应始终检查一切是否顺利,并且生成的全景图是否存储在 中pano。请参阅cv::Stitcher::Status文档以了解可能的错误代码。
相机型号
目前,拼接管道中实现了 2 个相机模型。
- 单应性模型期望在cv::detail::BestOf2NearestMatcher cv::detail::HomographyBasedEstimator cv::detail::BundleAdjusterReproj cv::detail::BundleAdjusterRay中实现图像之间的透视变换
- 期望在cv::detail::AffineBestOf2NearestMatcher cv::detail::AffineBasedEstimator cv::detail::BundleAdjusterAffine cv::detail::BundleAdjusterAffinePartial cv:: AffineWarper中实现具有 6 DOF 或 4 DOF 的仿射变换的仿射模型
单应性模型可用于创建相机捕获的照片全景图,而基于仿射的模型可用于拼接专用设备捕获的扫描和物体。
笔记
cv::Stitcher的某些详细设置可能没有意义。特别是,您不应该混合实现仿射模型的类和实现同形异义模型的类,因为它们适用于不同的变换。
尝试一下
如果您启用了构建示例,则可以在下找到二进制文件build/bin/cpp-example-stitching。此示例是一个控制台应用程序,运行它时不带参数即可查看帮助。opencv_extra提供了一些示例数据来测试所有可用的配置。
尝试全景模式运行:

尝试运行扫描模式(来自家用扫描仪的数据集):
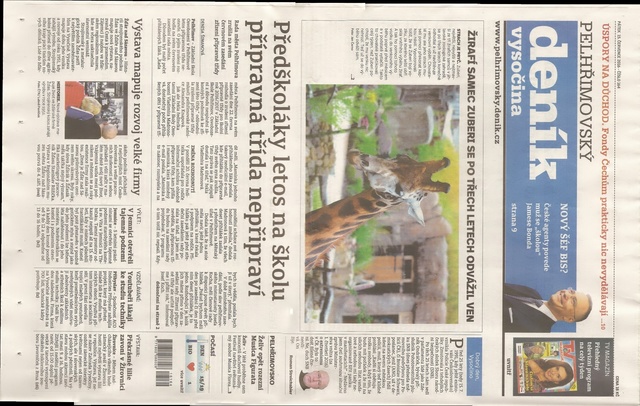
或(来自专业图书扫描仪的数据集):
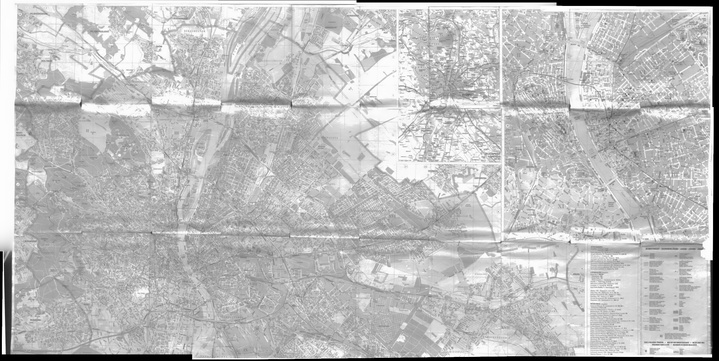
笔记
上面的例子预期的是 POSIX 平台,在 Windows 上你必须明确提供所有文件的名称(例如boat1.jpg boat2.jpg...),因为 Windows 命令行不支持*扩展。
拼接详解(python opencv >4.0.1)
C++Python
如果你想研究拼接管道的内部结构,或者想要尝试详细的配置,你可以使用 C++ 或 Python 中的 stitching_detailed 源代码
缝合细节
stitching_detailed 程序使用命令行获取拼接参数。存在许多参数。上面的示例显示了一些可能的命令行参数:
boat5.jpg boat2.jpg boat3.jpg boat4.jpg boat1.jpg boat6.jpg –work_megapix 0.6 –features orb –matcher hography –estimator hography –match_conf 0.3 –conf_thresh 0.3 –ba ray –ba_refine_mask xxxxx –save_graph test.txt –wave_correct no –warp fisheye –blend multiband –expos_comp no –seam gc_colorgrad
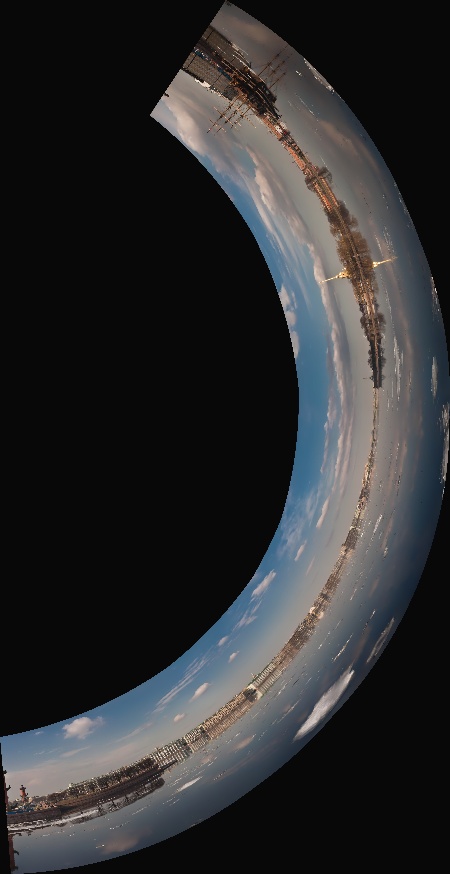
成对图像使用单应性匹配器进行匹配,并且也用于变换估计的估计器——估计器单应性
特征匹配步骤的置信度为 0.3:–match_conf 0.3。如果匹配图像时遇到一些困难,可以降低此值
两幅图像来自同一全景图的阈值置信度为 0。:–conf_thresh 0.3 如果匹配图像时遇到一些困难,可以减小此值
捆绑调整成本函数是 ray –ba ray
光束调整的细化蒙版是 xxxxx ( –ba_refine_mask xxxxx),其中 'x' 表示细化相应参数,'_' 表示不细化。细化一个,格式如下:fx、skew、ppx、aspect、ppy
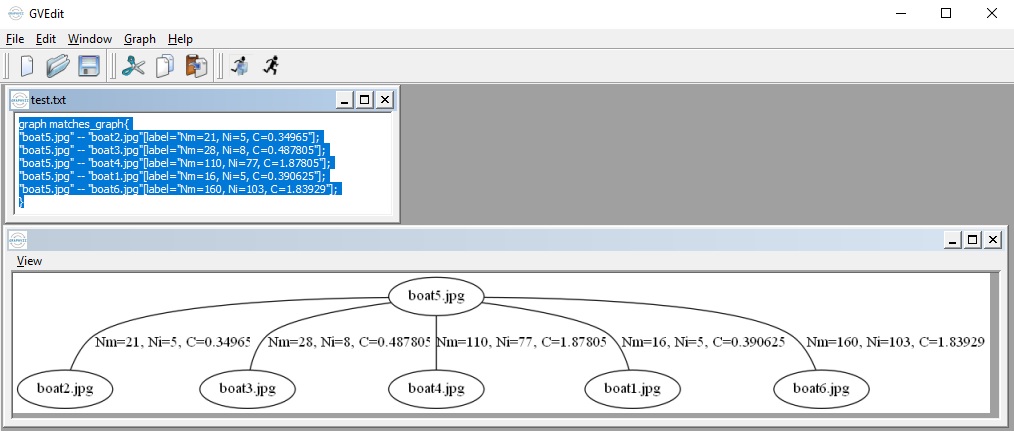
将用 DOT 语言表示的匹配图保存到 test.txt ( –save_graph test.txt) :标签描述:Nm 为匹配数,Ni 为内点数,C 为置信度
执行波浪效果校正为否(–wave_correct no)
扭曲表面类型为鱼眼(-warp fisheye)
混合方法是多波段(-blend multiband)
未使用曝光补偿方法(–expos_comp no)
接缝估计器是基于最小图切割的接缝(-seam gc_colorgrad)
您也可以在命令行上使用这些参数:
boat5.jpg boat2.jpg boat3.jpg boat4.jpg boat1.jpg boat6.jpg –work_megapix 0.6 –features orb –matcher hography –estimator hography –match_conf 0.3 –conf_thresh 0.3 –ba ray –ba_refine_mask xxxxx –wave_correct horiz –warp compressedPlaneA2B1 –blend multiband –expos_comp channels_blocks –seam gc_colorgrad
您将获得:
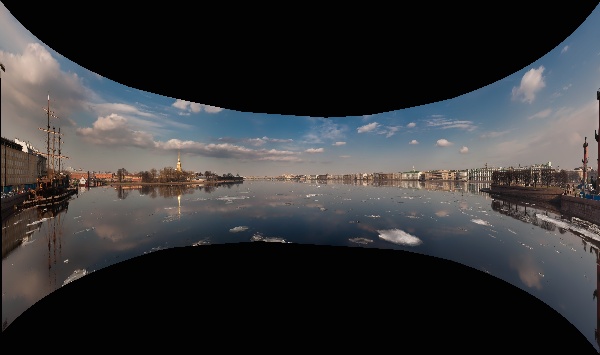
对于使用扫描仪或无人机(仿射运动)捕获的图像,您可以在命令行上使用这些参数:
报纸1.jpg 报纸2.jpg –work_megapix 0.6 –features surf –matcher affine –estimator affine –match_conf 0.3 –conf_thresh 0.3 –ba affine –ba_refine_mask xxxxx –wave_correct no –warp affine
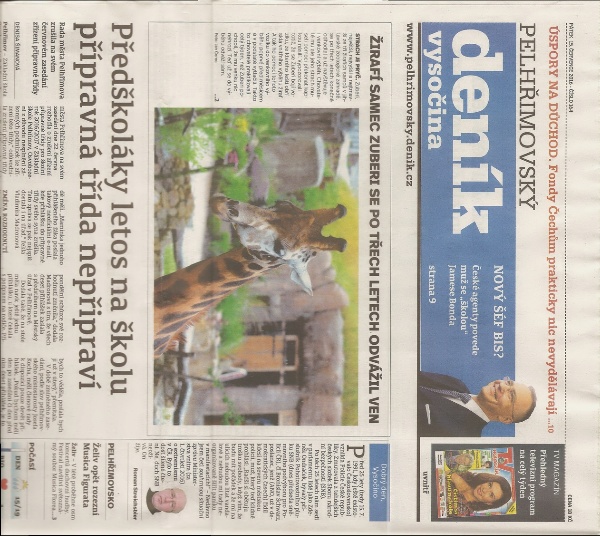
您可以在https://github.com/opencv/opencv_extra/tree/4.x/testdata/stitching中找到所有图像


 808
808

 被折叠的 条评论
为什么被折叠?


