


 本文详细介绍了PySpark库的框架与类库,以及如何在Window系统下搭建本机PySpark开发环境,包括配置PySpark、Pycharm的本地与远程解释器。深入探讨了Spark的分布式代码执行分析,讲解了SparkContext在程序中的重要性,以及Wordcount代码实战。重点解析了PySpark在分布式环境中的执行原理,强调了Driver和Executor的角色分工。
文章目录
传送门:
- 视频地址:黑马程序员Spark全套视频教程
- 1.PySpark基础入门(一)
- 2.PySpark基础入门(二)
- 3.PySpark核心编程(一)
- 4.PySpark核心编程(二)
- 5.PySaprk——SparkSQL学习(一)
- 6.PySaprk——SparkSQL学习(二)
- 7.Spark综合案例——零售业务统计分析
- 8. Spark3新特性及核心概念(背)
一、PySpark库
1.框架与类库
- 类库:—堆别人写好的代码,你可以导入进行使用。PySpark就是一个类库。
- 框架:可以独立运行,并提供编程结构的—种软件产品。Spark就是一个独立的框架。
2.什么是PySpark
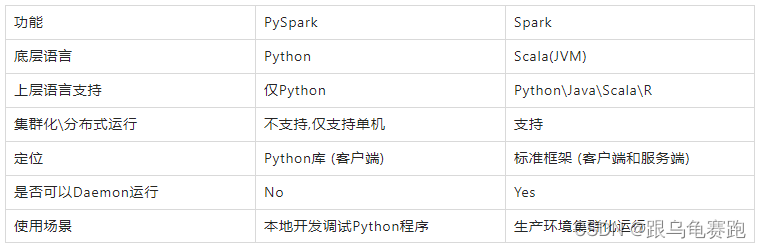
PySpark是可以在Python代码中:import pyspark来进行调用的。PySpark 是Spark官方提供的一个Python类库,内置了完全的Spark API,可以通过PySpark类库来编写Spark应用程序,并将其提交到Spark集群中运行。
PySpark类库和标准Spark框架对比:
3. PySpark安装
在合适虚拟环境下,执行如下命令即可安装:
(shayun)C:\Users\admin>pip install pyspark -i https://pypi.tuna.tsinghua.edu.cn/simple
二、本机开发环境搭建
1.本机PySpark环境配置(Window系统下)
- 将课程资料中提供的: hadoop-3.3.0 文件, 复制到一个地方, 比如E:\softs\hadoop-3.0.0
- 将文件夹内bin内的hadoop.dll复制到: C:\Windows\System32里面去
- 配置HADOOP_HOME环境变量指向 hadoop-3.3.0文件夹的路径, 如下图

配置这些的原因是:
hadoop设计用于linux运行, 我们写spark的时候,在windows上开发不可避免的会用到部分hadoop功能。为了避免在windows上报错, 我们给windows打补丁。
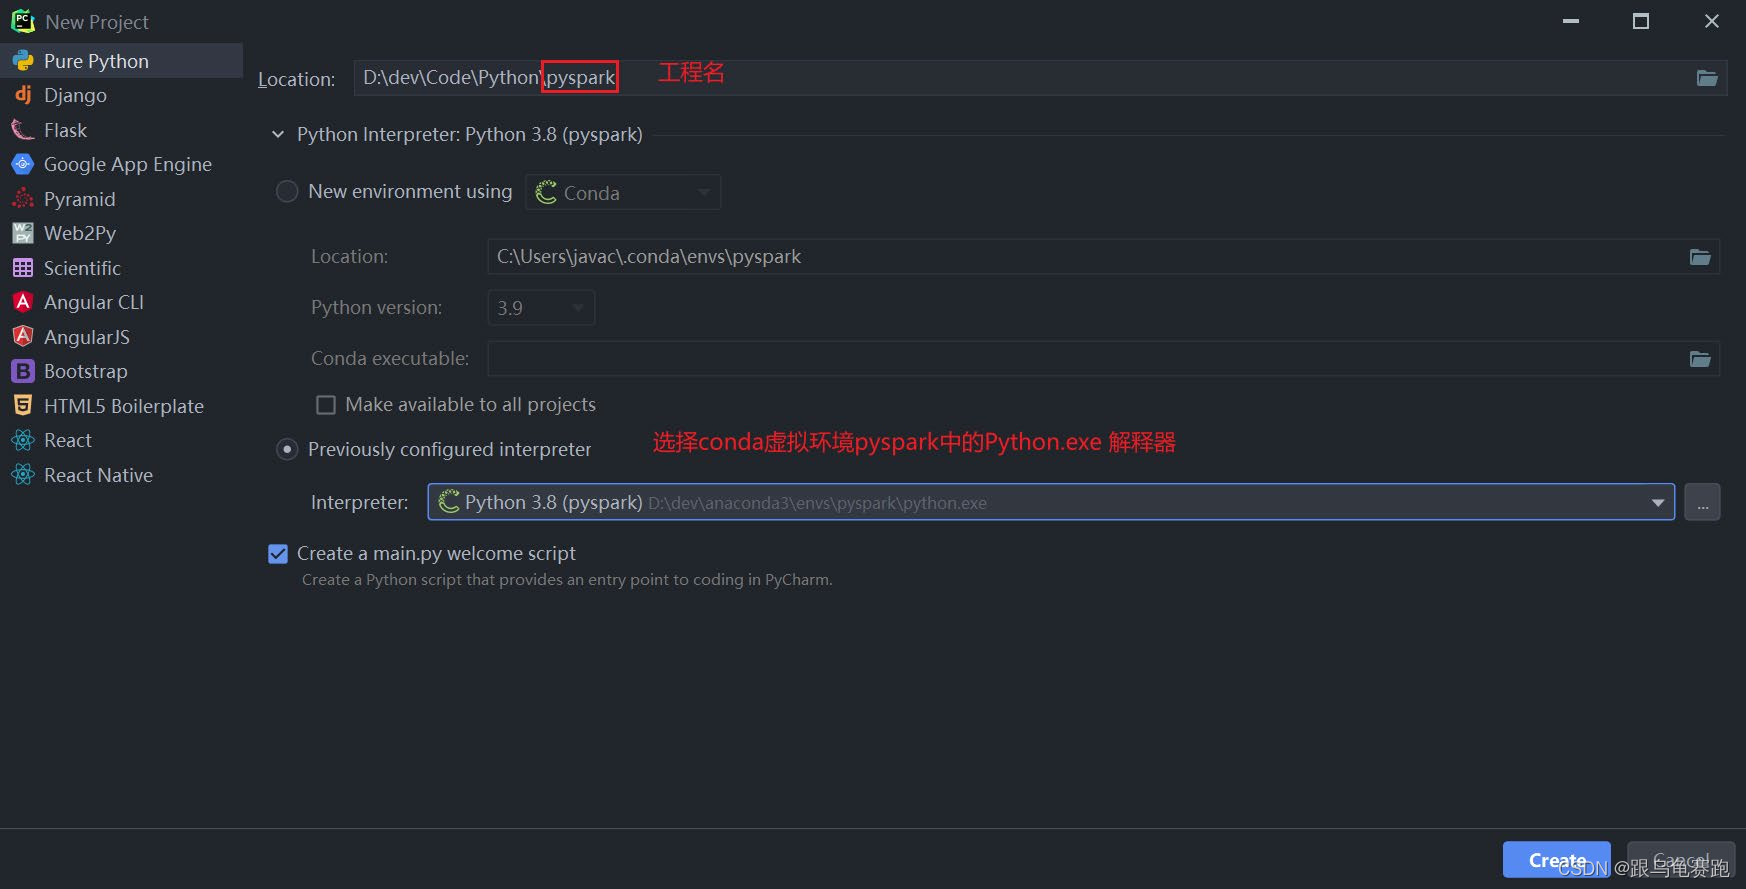
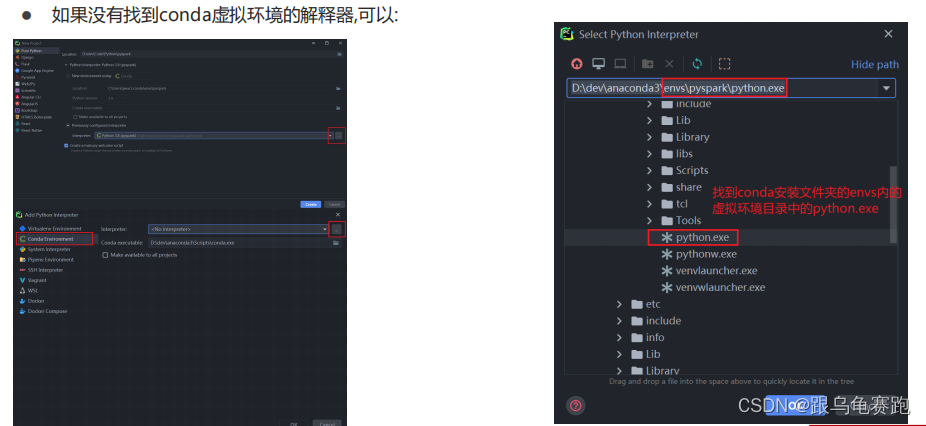
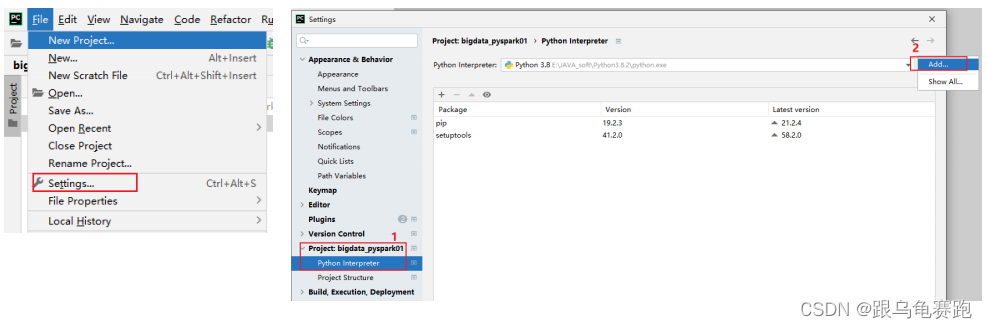
2.Pycharm本地与远程解释器配置
配置本地解释器:
配置远程SSH Linux解释器:
- 设置远程SSH python pySpark 环境
- 添加新的远程连接
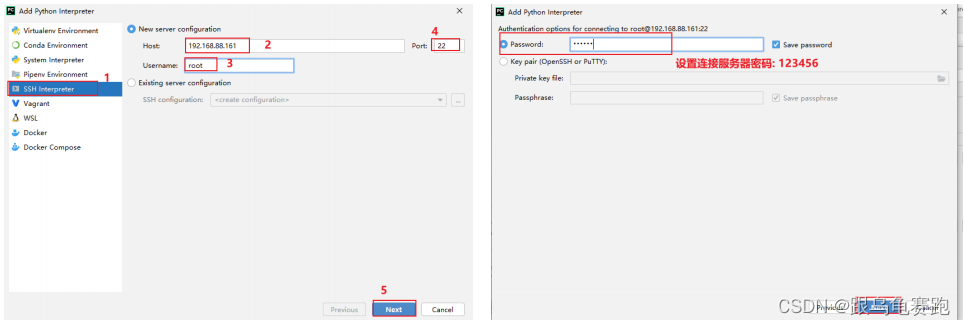
- 设置虚拟机Python环境路径
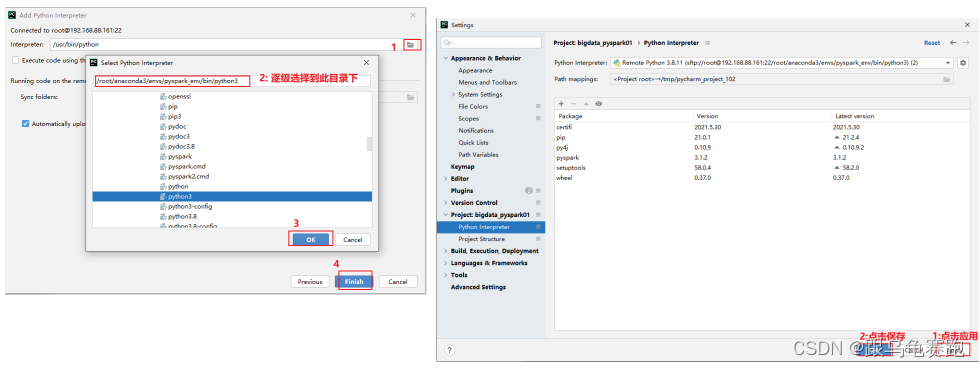
- 将Windows文件夹与Linux文件夹进行同步
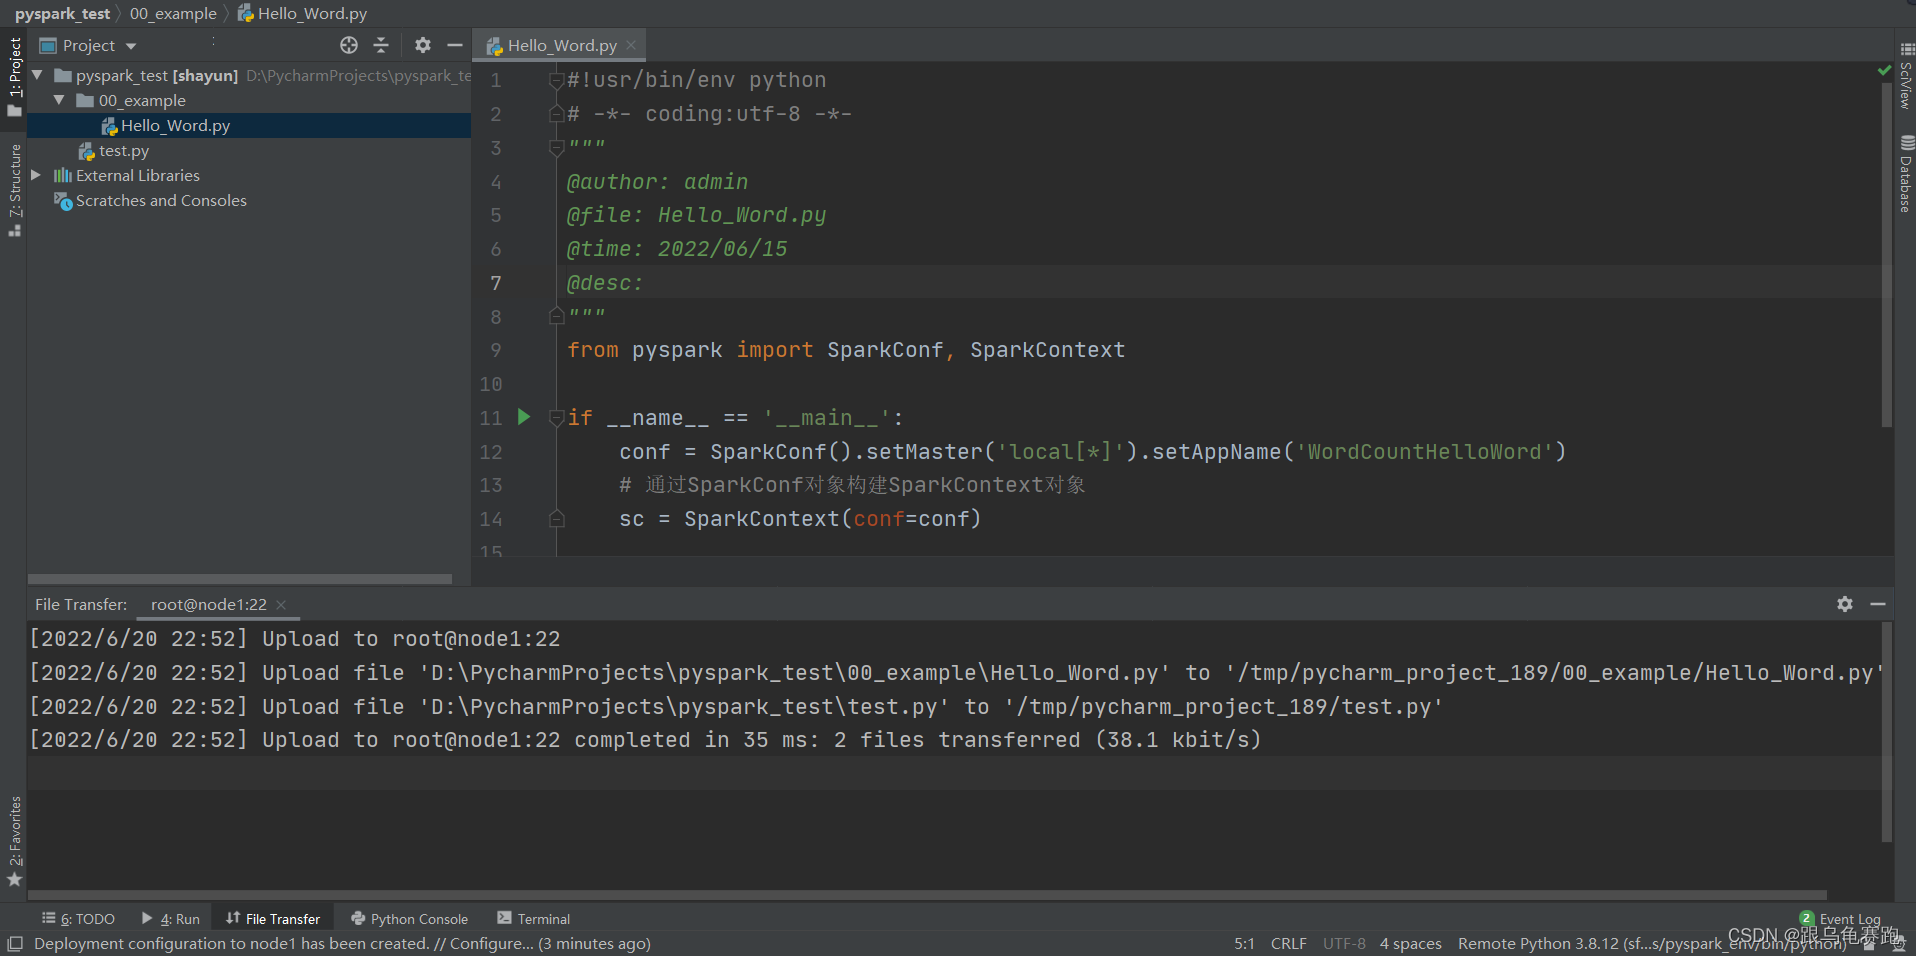
3.应用入口:SparkContext
Spark Application程序入口为:SparkContext,任何一个应用首先需要构建SparkCo
 最低0.47元/天 解锁文章


 4925
4925

 被折叠的 条评论
为什么被折叠?
被折叠的 条评论
为什么被折叠?
 到【灌水乐园】发言


