


 本文介绍了Android应用开发中常见的UI布局类型,包括线性布局、相对布局、帧布局、绝对布局和表格布局。通过实例展示了线性布局和相对布局的具体实现方式。
如何排列你的控件,也是个学问-----箴言-----
内容简介:
Android 为用户提供了Layout布局这个概念,来组织各个view(控件)的UI布局,可以认为它是一个放控件的容器。布局文件是一个xml文件,之所用xml,是因为xml容易理解,而且是业内标准文档解析格式,非常成熟。用xml布局,使得UI与业务逻辑完全分离,而且可以直接查看布局展示效果,极大提高开发效率,易于维护。
常见布局类型:
(1)线性布局(LinearLayout):控件排列成一行多列或者一列多行的形式,可以设定水平或者垂直排列。是最常用的布局方式。
(2)相对布局(RelativeLayout): 顾名思义,控件之间的位置是相对的,即一个控件的位置会依赖于另外一个控件,既可以是子控件,也可以是父控件。
(3)帧布局(FrameLayout):控件按照从左到右,从上到下的顺序进行排列,每一个添加的子控件都放在布局的左上角,并覆盖在前一子控件的上层。
(4)绝对布局(AbsoluteLayout) :控件的x,y的位置是绝对坐标。
(5)表格布局(TableLayout):在表格布局中可以设置TableRow, 可以设置表格中每一行显示的内容 以及位置 ,可以设置显示的缩进,对齐的方式等。
举例:
(1)线性布局:
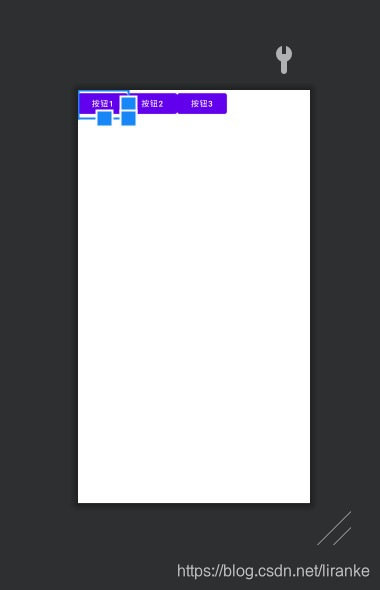
xml文件内容:
<?xml version="1.0" encoding="utf-8"?>
<LinearLayout xmlns:android="http://schemas.android.com/apk/res/android"
    android:layout_width="match_parent"
    android:layout_height="match_parent"
    >


    <Button
        android:layout_width="wrap_content"
        android:layout_height="wrap_content"
        android:text="按钮1"></Button>

    <Button
        android:layout_width="wrap_content"
        android:layout_height="wrap_content"
        android:text="按钮2"></Button>

    <Button
        android:layout_width="wrap_content"
        android:layout_height="wrap_content"
        android:text="按钮3"></Button>


</LinearLayout>
(2)相对布局(RelativeLayout):
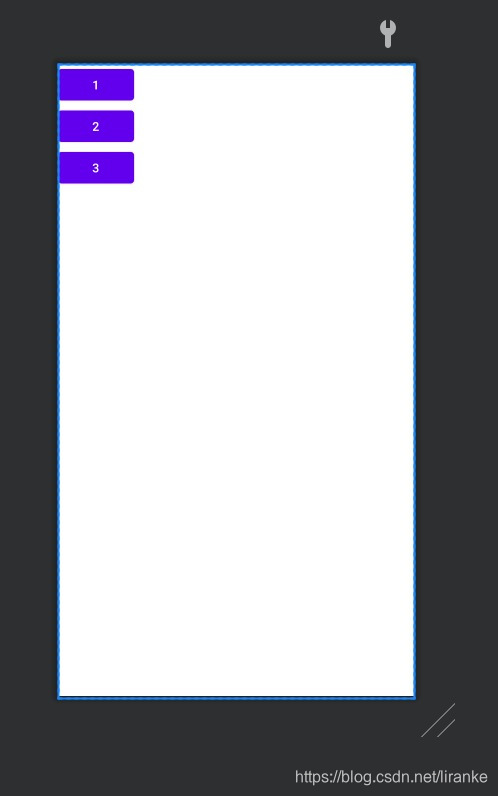
对应的xml文件代码如下:
<?xml version="1.0" encoding="utf-8"?>
<RelativeLayout xmlns:android="http://schemas.android.com/apk/res/android"
    android:layout_width="match_parent"
    android:layout_height="match_parent"
    android:orientation="horizontal"
    >
    <Button
        android:id="@+id/btn_1"
        android:layout_width="wrap_content"
        android:layout_height="wrap_content"
        android:text="1"
        >
    </Button>
    <Button
        android:id="@+id/btn_2"
        android:layout_below="@+id/btn_1"
        android:layout_width="wrap_content"
        android:layout_height="wrap_content"
        android:text="2"
        >
    </Button>
    <Button
        android:id="@+id/btn_3"
        android:layout_below="@+id/btn_2"
        android:layout_width="wrap_content"
        android:layout_height="wrap_content"
        android:text="3"

        >
    </Button>


</RelativeLayout>
说明:
android:layout_below的作用:放在某个控件的下面。
后记:
其它类型的layout,在后续用到的时候再进行说明。


 1561
1561

 被折叠的 条评论
为什么被折叠?
被折叠的 条评论
为什么被折叠?
 到【灌水乐园】发言


