


 本文介绍在Android Studio中创建首个Android应用的过程,通过实例演示如何实现Fragment间的跳转,并详细解析了开发环境配置、代码结构及关键文件。
Hello World! 为什么第一个程序总是它。 -----箴言-----
我们的第一个Android 应用程序,仍然从显示诸如hello字符串开始。与直接显示一个Hello字符串不同,本例子展示了最流行的fragment的跳转。
本文展示了如何在Android Studio中进行Android应用程序的开发步骤,以及Android Studio中的代码的目录结构。
1. 开发环境:
我用的开发环境是最新的Android Studio 4.1.2, gradle版本是6.5,如图:

2. 运行环境和运行结果:
运行环境:
我用的是网易MUMU模拟器,运行结果如下:
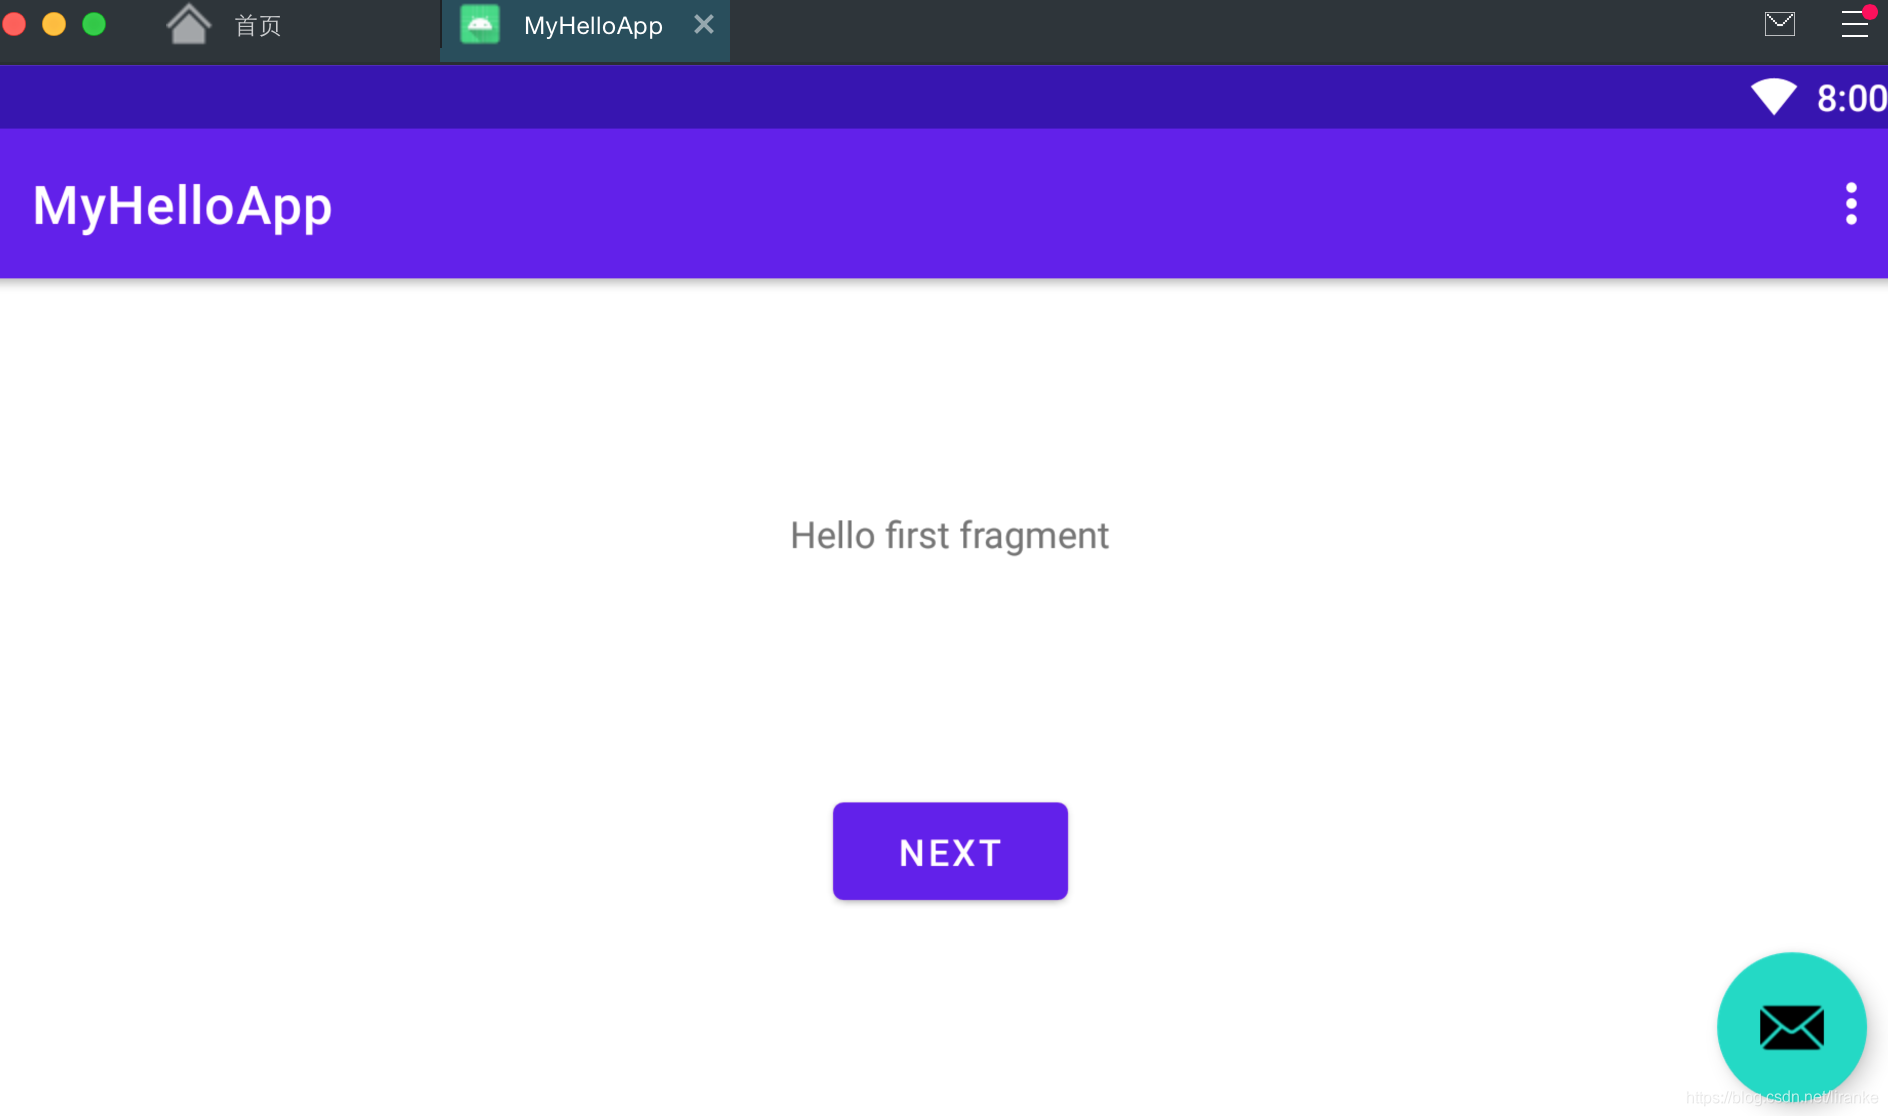
点击NEXT,跳转到下一个Fragment:
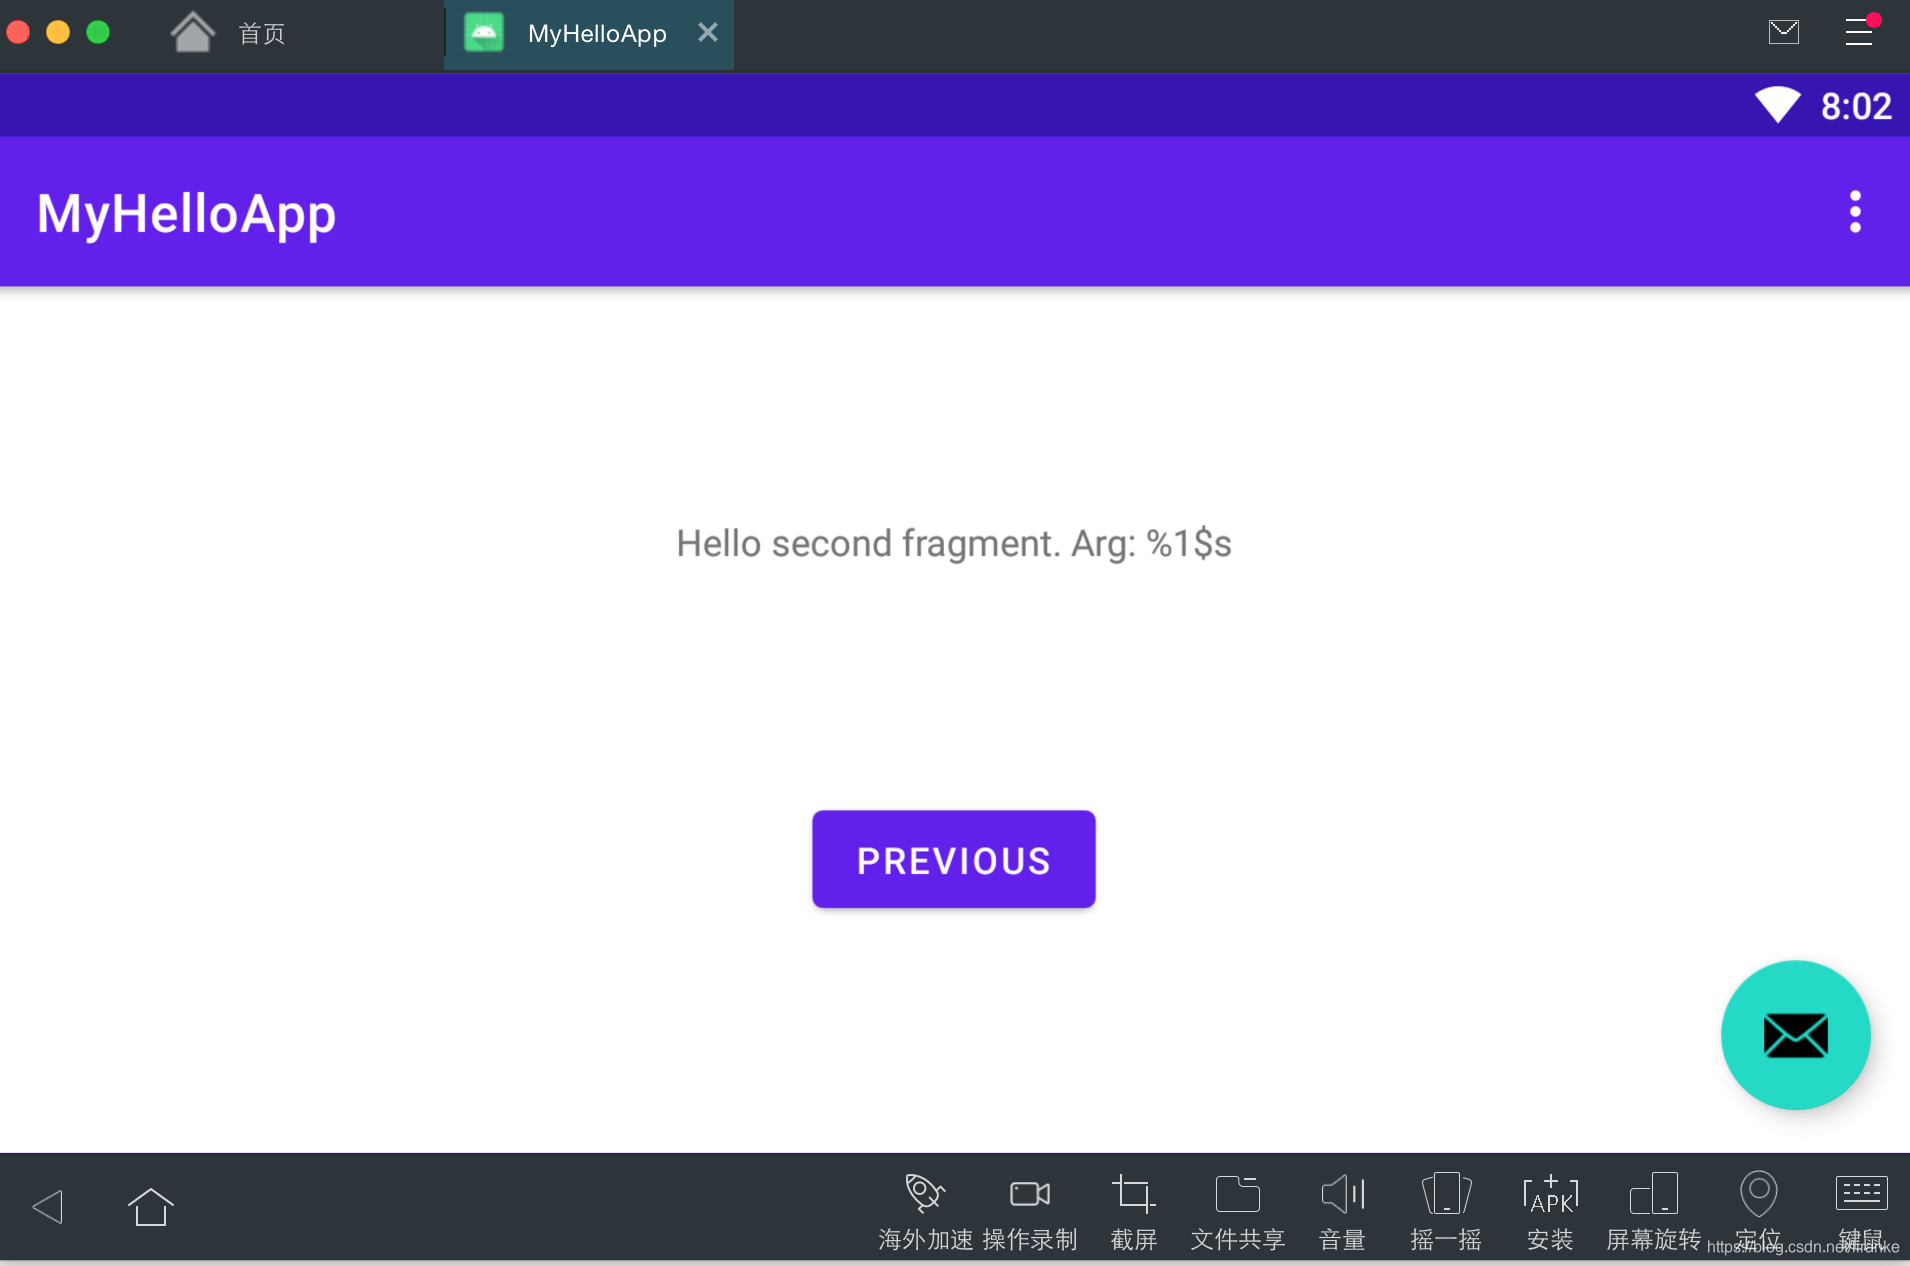
可以看出,默认使用Basic Activity,会创建两个fragment,这和以前的版本还是有些区别的。
2. 开发步骤:
在AndroidStudio中,点击File->New->New Project...,出现如图所示:
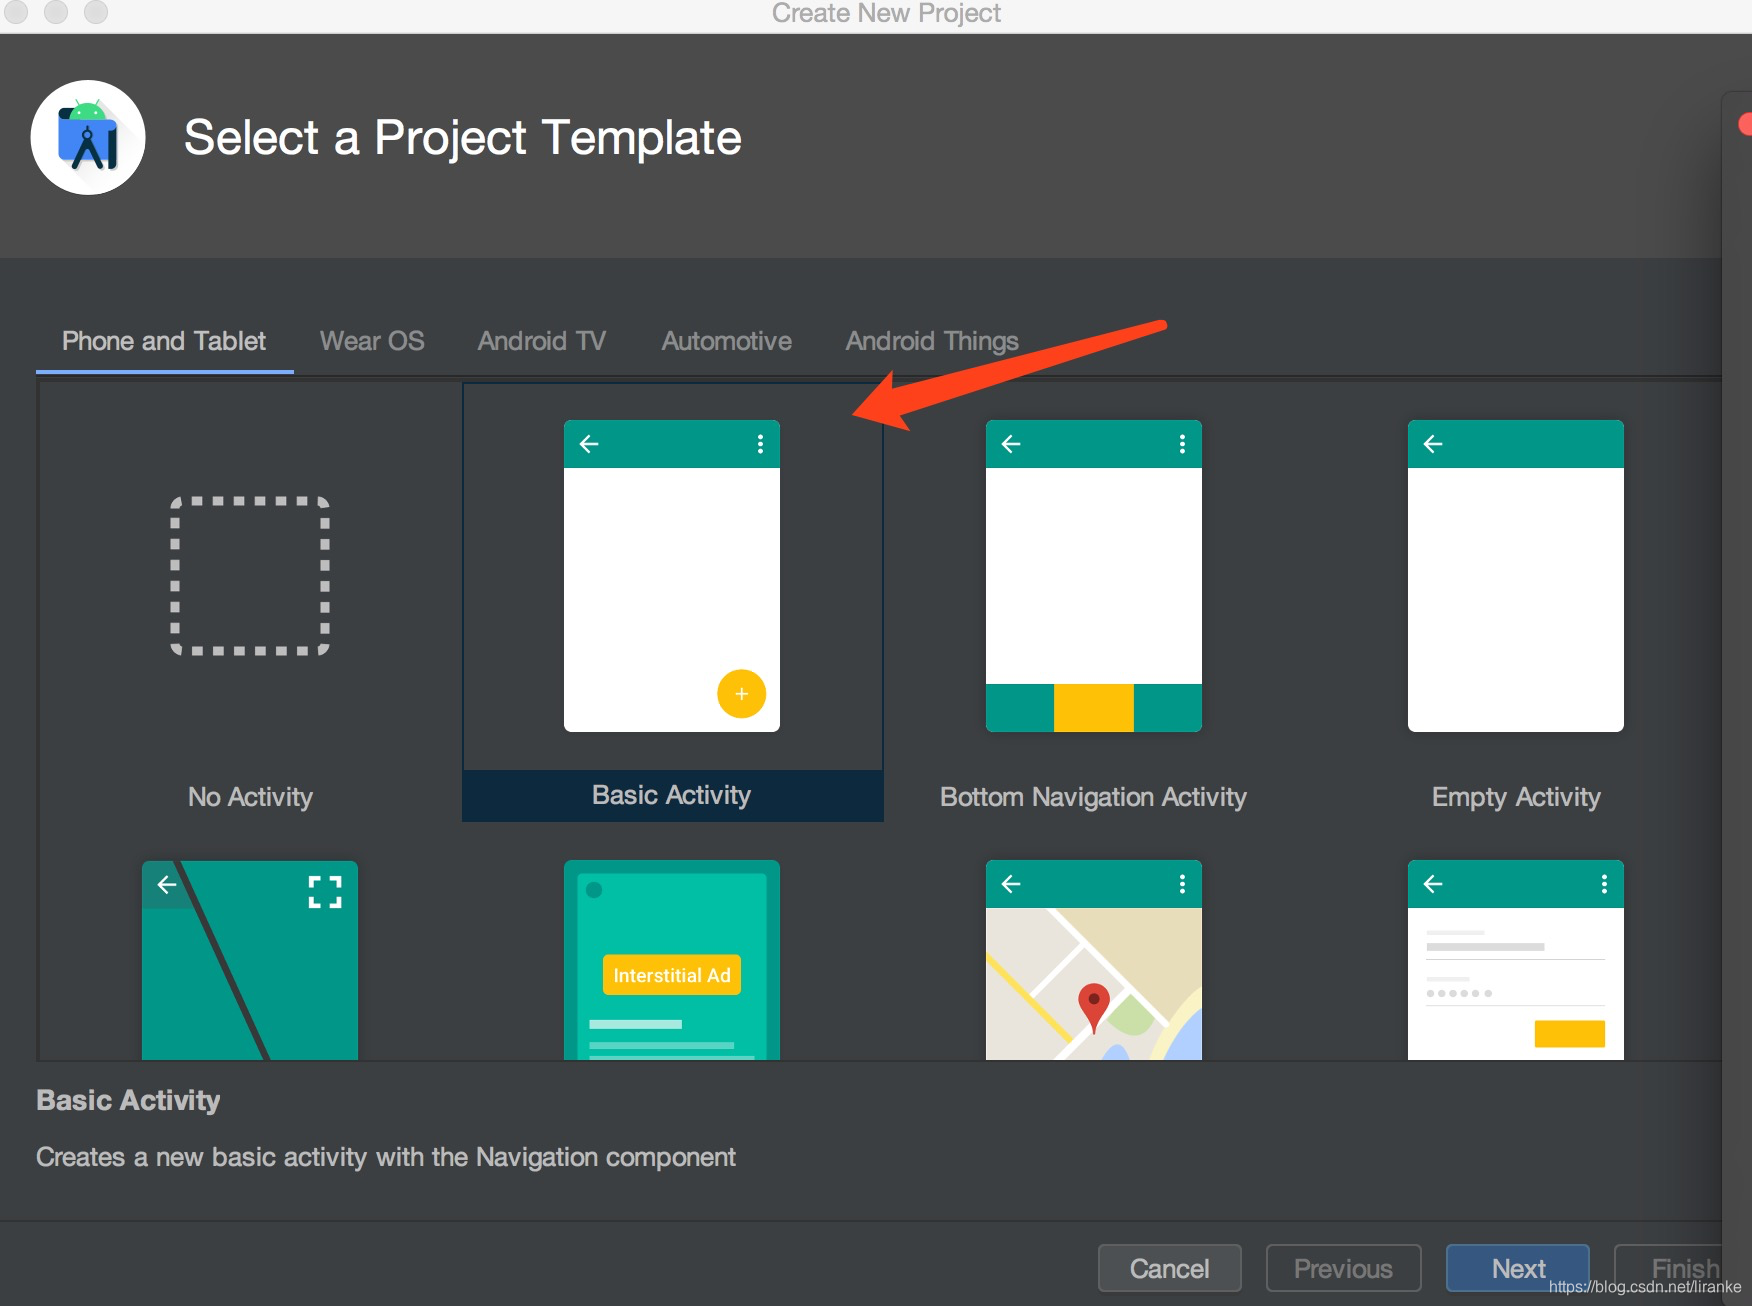
选择Basic Activity,Next:
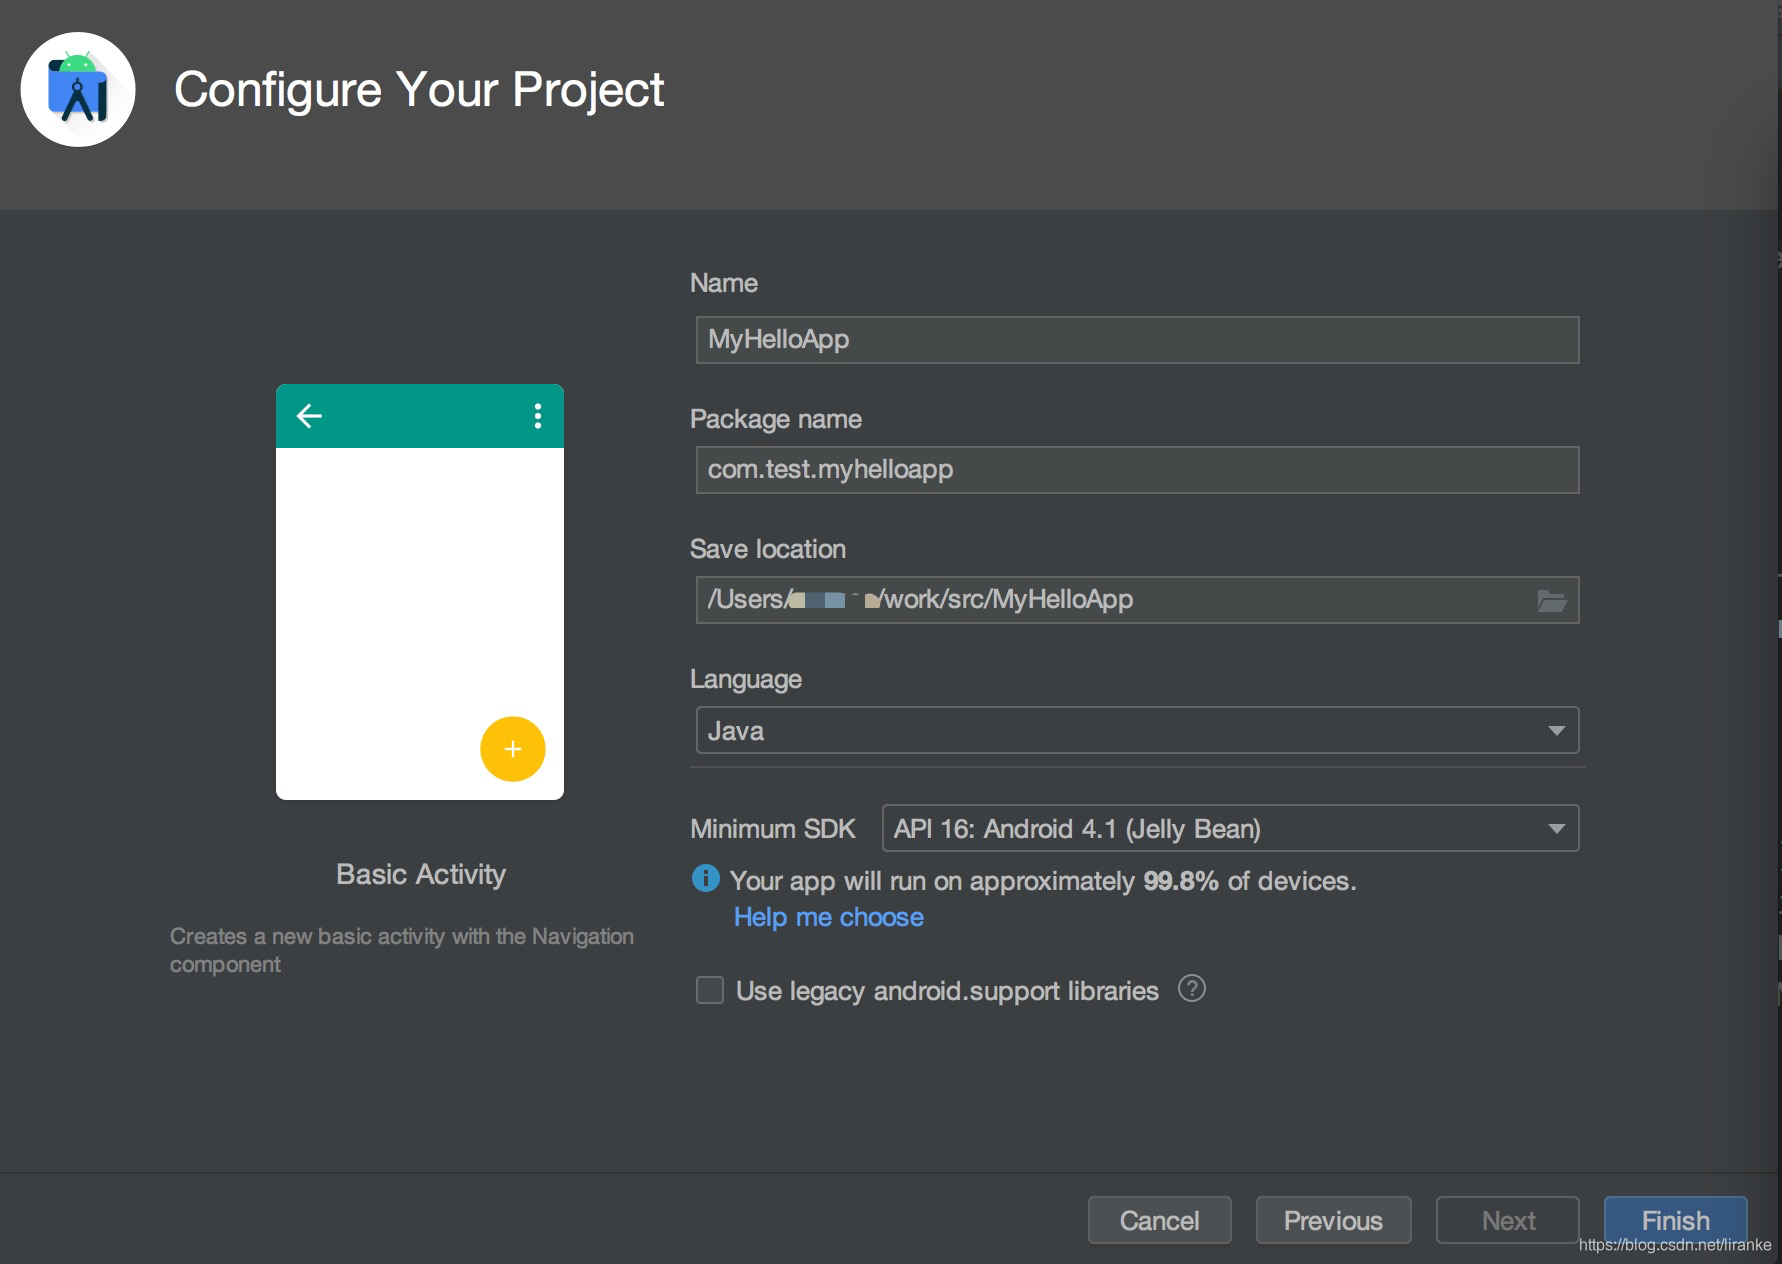
然后Finish即可,创建好的代码结构如图:
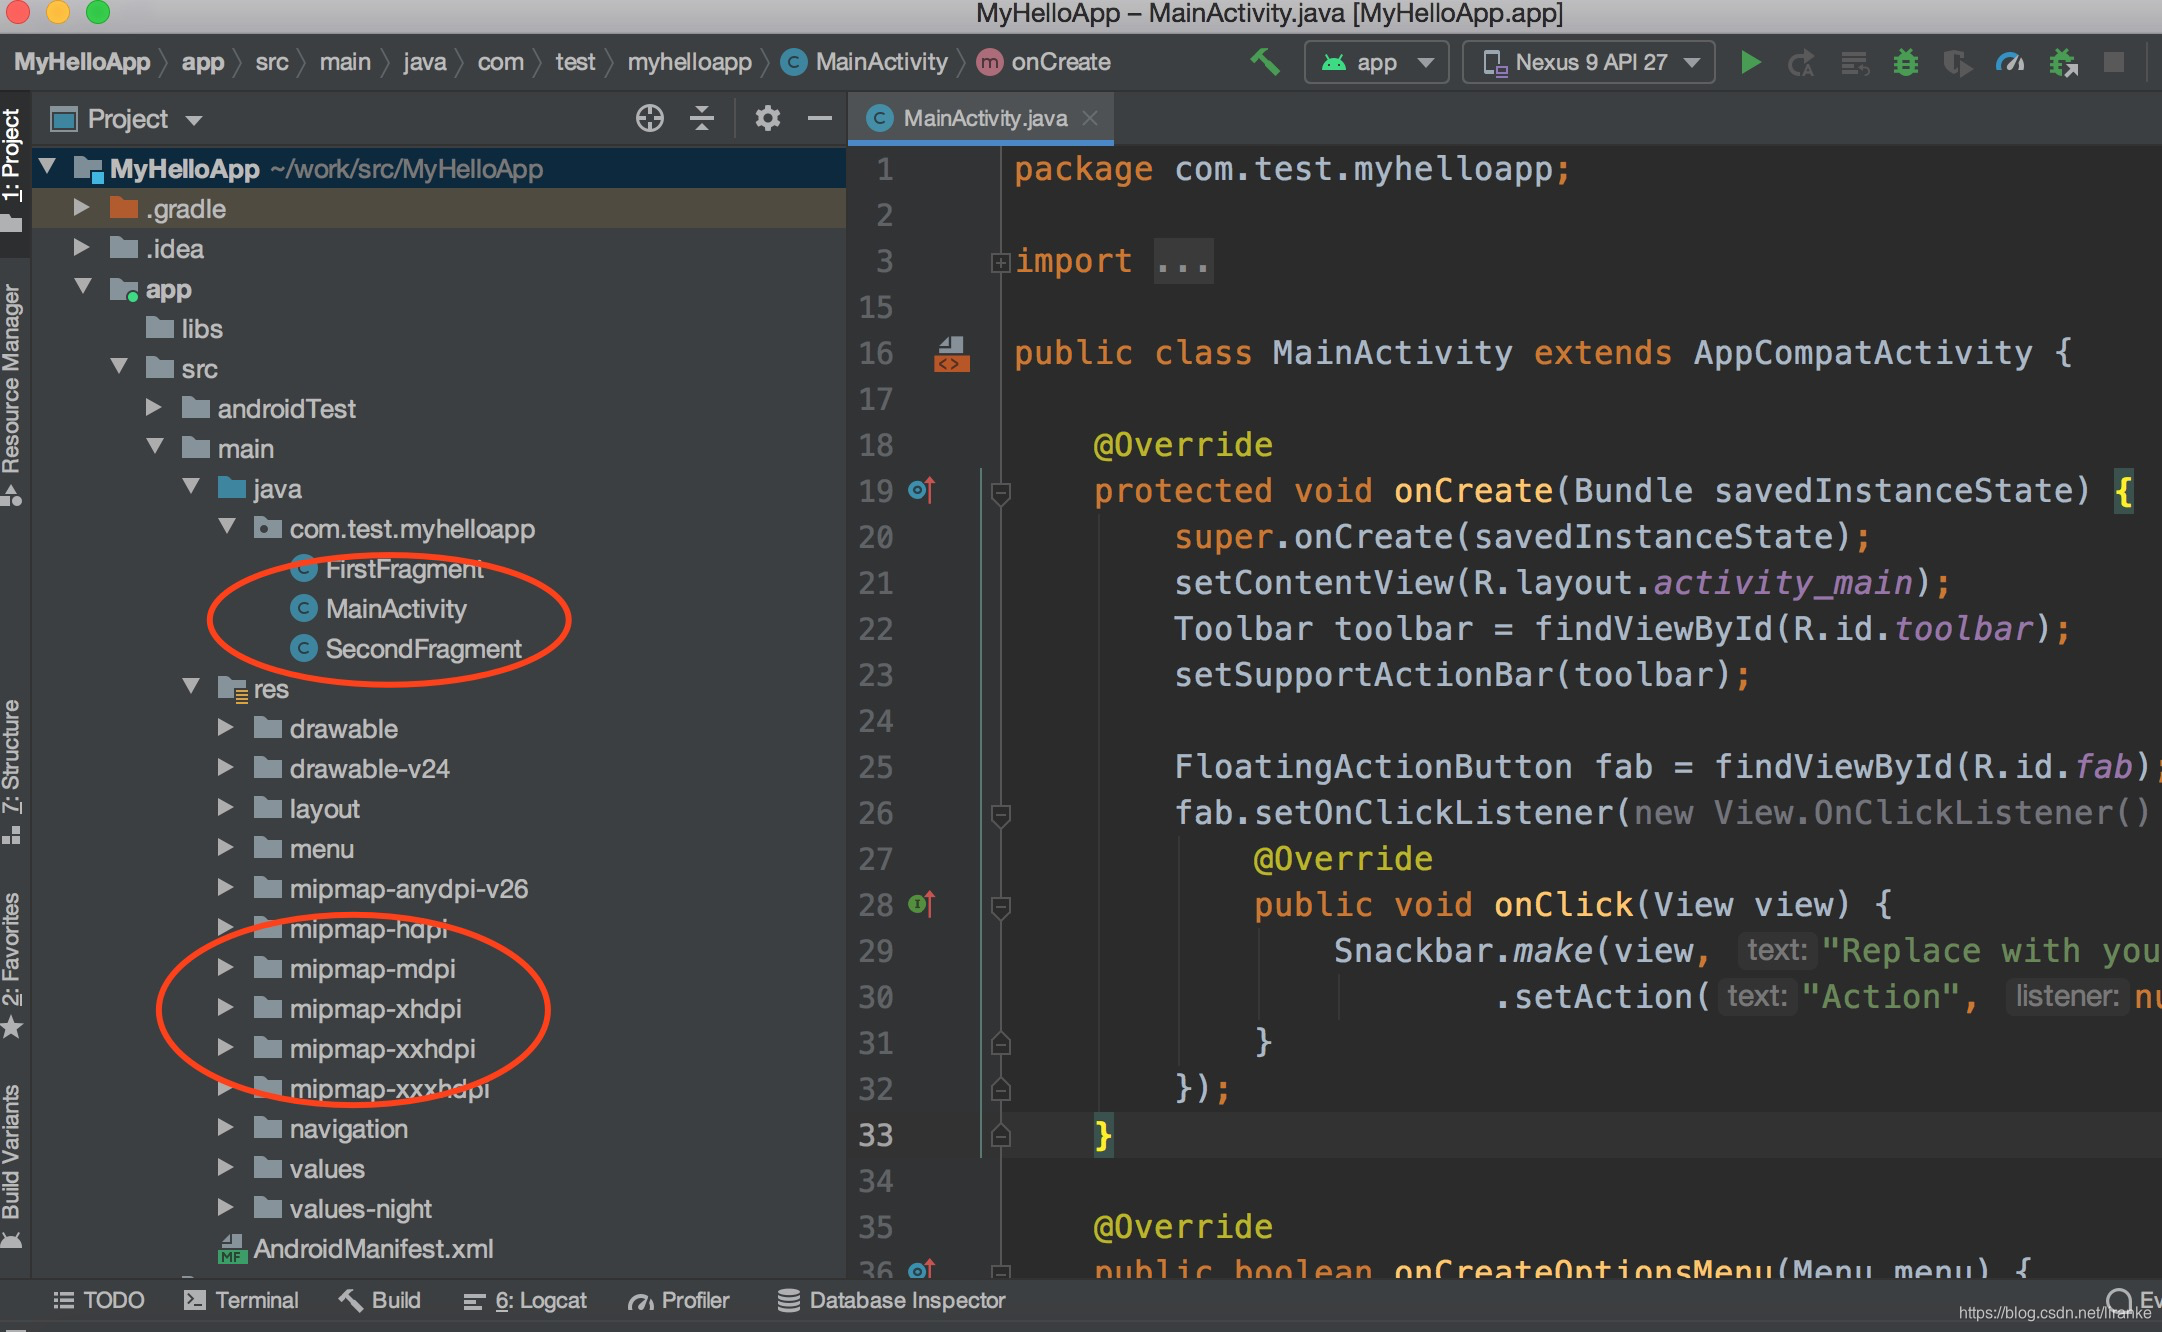
再来看一下MainActivity的代码:
package com.test.myhelloapp;

import android.os.Bundle;

import com.google.android.material.floatingactionbutton.FloatingActionButton;
import com.google.android.material.snackbar.Snackbar;

import androidx.appcompat.app.AppCompatActivity;
import androidx.appcompat.widget.Toolbar;

import android.view.View;

import android.view.Menu;
import android.view.MenuItem;

public class MainActivity extends AppCompatActivity {

    @Override
    protected void onCreate(Bundle savedInstanceState) {
        super.onCreate(savedInstanceState);
        setContentView(R.layout.activity_main);
        Toolbar toolbar = findViewById(R.id.toolbar);
        setSupportActionBar(toolbar);

        FloatingActionButton fab = findViewById(R.id.fab);
        fab.setOnClickListener(new View.OnClickListener() {
            @Override
            public void onClick(View view) {
                Snackbar.make(view, "Replace with your own action", Snackbar.LENGTH_LONG)
                        .setAction("Action", null).show();
            }
        });
    }

    @Override
    public boolean onCreateOptionsMenu(Menu menu) {
        // Inflate the menu; this adds items to the action bar if it is present.
        getMenuInflater().inflate(R.menu.menu_main, menu);
        return true;
    }

    @Override
    public boolean onOptionsItemSelected(MenuItem item) {
        // Handle action bar item clicks here. The action bar will
        // automatically handle clicks on the Home/Up button, so long
        // as you specify a parent activity in AndroidManifest.xml.
        int id = item.getItemId();

        //noinspection SimplifiableIfStatement
        if (id == R.id.action_settings) {
            return true;
        }

        return super.onOptionsItemSelected(item);
    }
}
可以看出,默认的MainActivity是继承自AppCompatActivity的。
第一个应该程序就这样诞生了。
3. 代码结构:
Android代码结构:

├── app                                 //模块,Android Studio每一个项目都包含多个模块,主模块默认的是app
│   ├── build                          //项目编译生成的文件,包括各种中间文件,.class,资源文件等等。
│   │   ├── generated
│   │   ├── intermediates             //编译生成的中间文件
│   │   ├── outputs
│   │   │   ├── apk
│   │   │   │   └── debug
│   │   │   │       ├── app-debug.apk            //最终生成的安装文件apk
│   │   │   │       └── output-metadata.json
│   │   │   └── logs
│   │   │       └── manifest-merger-debug-report.txt
│   │   └── tmp
│   │       └── compileDebugJavaWithJavac
│   │           └── source-classes-mapping.txt
│   ├── build.gradle                            //1. 模块的build文件,注意要和项目的build.grad区分开
│   ├── libs                                    //lib库
│   ├── proguard-rules.pro
│   └── src                          //代码目录
│       ├── androidTest
│       │   └── java
│       │       └── com
│       │           └── test
│       │               └── myhelloapp
│       │                   └── ExampleInstrumentedTest.java
│       ├── main                           //主要代码目录
│       │   ├── AndroidManifest.xml        //2. AndroidManifest文件
│       │   ├── java
│       │   │   └── com
│       │   │       └── test
│       │   │           └── myhelloapp
│       │   │               ├── FirstFragment.java
│       │   │               ├── MainActivity.java
│       │   │               └── SecondFragment.java
│       │   └── res                          //资源文件
│       │       ├── drawable
│       │       │   └── ic_launcher_background.xml
│       │       ├── drawable-v24
│       │       │   └── ic_launcher_foreground.xml
│       │       ├── layout
│       │       │   ├── activity_main.xml
│       │       │   ├── content_main.xml
│       │       │   ├── fragment_first.xml
│       │       │   └── fragment_second.xml
│       │       ├── menu
│       │       │   └── menu_main.xml
│       │       ├── mipmap-anydpi-v26
│       │       ├── navigation
│       │       │   └── nav_graph.xml
│       │       ├── values
│       │       │   ├── colors.xml
│       │       │   ├── dimens.xml
│       │       │   ├── strings.xml
│       │       │   └── themes.xml
│       │       └── values-night
│       │           └── themes.xml
│       └── test
│           └── ...
├── build.gradle              //3. 项目build文件
├── gradle
│   └── wrapper
│       ├── gradle-wrapper.jar
│       └── gradle-wrapper.properties
├── gradle.properties
├── gradlew
├── gradlew.bat
├── local.properties    //4. 环境配置文件
└── settings.gradle     //5. 需要编译的模块都在这里指定

//其中,后面标数字的文件,下面会展示。
其中,后面标数字的文件,下面会展示。
关键代码文件:
(1)模块的build文件,注意要和项目的build.grad区分开:
plugins {
    id 'com.android.application'
}

android {
    compileSdkVersion 29
    buildToolsVersion "29.0.3"

    defaultConfig {
        applicationId "com.test.myhelloapp"
        minSdkVersion 16
        targetSdkVersion 29
        versionCode 1
        versionName "1.0"

        testInstrumentationRunner "androidx.test.runner.AndroidJUnitRunner"
    }

    buildTypes {
        release {
            minifyEnabled false
            proguardFiles getDefaultProguardFile('proguard-android-optimize.txt'), 'proguard-rules.pro'
        }
    }
    compileOptions {
        sourceCompatibility JavaVersion.VERSION_1_8
        targetCompatibility JavaVersion.VERSION_1_8
    }
}

dependencies {

    implementation 'androidx.appcompat:appcompat:1.1.0'
    implementation 'com.google.android.material:material:1.1.0'
    implementation 'androidx.constraintlayout:constraintlayout:1.1.3'
    implementation 'androidx.navigation:navigation-fragment:2.2.2'
    implementation 'androidx.navigation:navigation-ui:2.2.2'
    testImplementation 'junit:junit:4.+'
    androidTestImplementation 'androidx.test.ext:junit:1.1.1'
    androidTestImplementation 'androidx.test.espresso:espresso-core:3.2.0'
}
(2)AndroidManifest文件:
<?xml version="1.0" encoding="utf-8"?>
<manifest xmlns:android="http://schemas.android.com/apk/res/android"
    package="com.test.myhelloapp">

    <application
        android:allowBackup="true"
        android:icon="@mipmap/ic_launcher"
        android:label="@string/app_name"
        android:roundIcon="@mipmap/ic_launcher_round"
        android:supportsRtl="true"
        android:theme="@style/Theme.MyHelloApp">
        <activity
            android:name=".MainActivity"
            android:label="@string/app_name"
            android:theme="@style/Theme.MyHelloApp.NoActionBar">
            <intent-filter>
                <action android:name="android.intent.action.MAIN" />

                <category android:name="android.intent.category.LAUNCHER" />
            </intent-filter>
        </activity>
    </application>

</manifest>
(3). 项目build文件:
// Top-level build file where you can add configuration options common to all sub-projects/modules.
buildscript {
    repositories {
        google()
        jcenter()
    }
    dependencies {
        classpath "com.android.tools.build:gradle:4.1.2"

        // NOTE: Do not place your application dependencies here; they belong
        // in the individual module build.gradle files
    }
}

allprojects {
    repositories {
        google()
        jcenter()
    }
}

task clean(type: Delete) {
    delete rootProject.buildDir
}
(4). 环境配置文件:
例如,指定Android SDK的版本,指定NDK的版本。
## This file is automatically generated by Android Studio.
# Do not modify this file -- YOUR CHANGES WILL BE ERASED!
#
# This file should *NOT* be checked into Version Control Systems,
# as it contains information specific to your local configuration.
#
# Location of the SDK. This is only used by Gradle.
# For customization when using a Version Control System, please read the
# header note.
sdk.dir=/Users/user1/Library/Android/sdk
(5). settings.gradle:需要编译的模块都在这里指定:
include ':app'
rootProject.name = "MyHelloApp"
可见,要编译的是app这个模块。
后记:本文是在原有基础上(Eclipse环境)进行的修改,以便适应最新的Android Studio环境。
欢迎点赞,评论,转发:)


 539
539

 被折叠的 条评论
为什么被折叠?
被折叠的 条评论
为什么被折叠?
 到【灌水乐园】发言


