


前言
(X_train,y_train),(X_test,y_test) = mnist.load_data() 经常看到开源代码使用这个数据集,有需求将自己的数据集转成这种形式。
一、图片文件切分
import os
from shutil import copy, rmtree
import random
from tqdm import tqdm

def main():
    '''
    split_rate  : 测试集划分比例
    init_dataset: 未划分前的数据集路径
    new_dataset : 划分后的数据集路径

    '''
    def makedir(path):
        if os.path.exists(path):
            rmtree(path)
        os.makedirs(path)

    split_rate = 0.2
    init_dataset = r'datas\BAT'
    new_dataset = r'datasets'
    random.seed(0)

    classes_name = [name for name in os.listdir(init_dataset)]

    makedir(new_dataset)
    training_set = os.path.join(new_dataset, "train")
    test_set = os.path.join(new_dataset, "test")
    makedir(training_set)
    makedir(test_set)

    for cla in classes_name:
        makedir(os.path.join(training_set, cla))
        makedir(os.path.join(test_set, cla))


    for cla in classes_name:
        class_path = os.path.join(init_dataset, cla)
        img_set = os.listdir(class_path)
        num = len(img_set)
        test_set_index = random.sample(img_set, k=int(num*split_rate))
        with tqdm(total=num,desc=f'Class : ' + cla, mininterval=0.3) as pbar:
            for _, img in enumerate(img_set):
                if img in test_set_index:
                    init_img = os.path.join(class_path, img)
                    new_img = os.path.join(test_set, cla)
                    copy(init_img, new_img)
                else:
                    init_img = os.path.join(class_path, img)
                    new_img = os.path.join(training_set, cla)
                    copy(init_img, new_img)
                pbar.update(1)
        print()

if __name__ == '__main__':
    main()
二、测试集训练集txt生成
import os
import sys
sys.path.insert(0,os.getcwd())
from utils.train_utils import get_info

def main():
    classes_path    = 'datas/annotations.txt'
    datasets_path   = 'datasets'
    datasets        = ["train", "test"]
    classes, indexs = get_info(classes_path)

    for dataset in datasets:
        txt_file = open('datas/' + dataset + '.txt', 'w')
        datasets_path_ = os.path.join(datasets_path, dataset)
        classes_name      = os.listdir(datasets_path_)

        for name in classes_name:
            if name not in classes:
                continue
            cls_id = indexs[classes.index(name)]
            images_path = os.path.join(datasets_path_, name)
            images_name = os.listdir(images_path)
            for photo_name in images_name:
                _, postfix = os.path.splitext(photo_name)
                if postfix not in ['.jpg', '.png', '.jpeg','.JPG', '.PNG', '.JPEG']:
                    continue
                txt_file.write('%s'%(os.path.join(images_path, photo_name)) + ' ' + str(cls_id))
                txt_file.write('\n')
        txt_file.close()
if __name__ == "__main__":
    main()
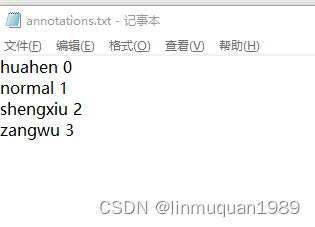
当然,需要一个annotations.txt文件,内容如下所示:
三、生成npy文件
from PIL import Image
import numpy as np
import os


train_path = r'F:\Awesome-Backbones-main/'
train_txt = r'F:\Awesome-Backbones-main\datas/train.txt'
x_train_savepath = 'x_train.npy'
y_train_savepath = 'y_train.npy'

test_path = r'F:\Awesome-Backbones-main/'
test_txt = r'F:\Awesome-Backbones-main\datas/test.txt'
x_test_savepath = 'x_test.npy'
y_test_savepath = 'y_test.npy'


def generateds(path, txt):
    f = open(txt, 'r')  # 以只读形式打开txt文件
    contents = f.readlines()  # 读取文件中所有行
    f.close()  # 关闭txt文件
    x, y_ = [], []  # 建立空列表
    for content in contents:  # 逐行取出
        value = content.split()  # 以空格分开,图片路径为value[0] , 标签为value[1] , 存入列表
        img_path = path + value[0]  # 拼出图片路径和文件名
        img = Image.open(img_path)  # 读入图片
        img = img.resize((64,64))
        img = np.array(img.convert('L'))  # 图片变为8位宽灰度值的np.array格式
        img = img / 255.  # 数据归一化 (实现预处理)
        x.append(img)  # 归一化后的数据,贴到列表x
        y_.append(value[1])  # 标签贴到列表y_
       # print('loading : ' + content)  # 打印状态提示

    x = np.array(x)  # 变为np.array格式
    y_ = np.array(y_)  # 变为np.array格式
    y_ = y_.astype(np.int64)  # 变为64位整型
    return x, y_  # 返回输入特征x,返回标签y_


if os.path.exists(x_train_savepath) and os.path.exists(y_train_savepath) and os.path.exists(
        x_test_savepath) and os.path.exists(y_test_savepath):
    print('-------------Load Datasets-----------------')
    x_train_save = np.load(x_train_savepath,allow_pickle=True)
    y_train = np.load(y_train_savepath,allow_pickle=True)
    x_test_save = np.load(x_test_savepath,allow_pickle=True)
    y_test = np.load(y_test_savepath,allow_pickle=True)
    x_train = np.reshape(x_train_save, (len(x_train_save), 64, 64))
    x_test = np.reshape(x_test_save, (len(x_test_save), 64, 64))
else:
    print('-------------Generate Datasets-----------------')
    x_train, y_train = generateds(train_path, train_txt)
    x_test, y_test = generateds(test_path, test_txt)

    print('-------------Save Datasets-----------------')
    x_train_save = np.reshape(x_train, (len(x_train), -1))
    x_test_save = np.reshape(x_test, (len(x_test), -1))
    np.save(x_train_savepath, x_train_save)
    np.save(y_train_savepath, y_train)
    np.save(x_test_savepath, x_test_save)
    np.save(y_test_savepath, y_test)
四、调整形状
load data
loaddataMode=2
if (loaddataMode==1):
(X_train,y_train),(X_test,y_test) = mnist.load_data()
#normalize data
X_train = normalize(X_train,axis=-1)
X_test = normalize(X_test,axis=-1)
if (loaddataMode==2):
X_train = np.load('x_train.npy',allow_pickle=True)
y_train= np.load('y_train.npy',allow_pickle=True)
X_test= np.load('x_test.npy',allow_pickle=True)
y_test= np.load('y_test.npy',allow_pickle=True)
X_train=X_train.reshape(-1, 64, 64)
X_test=X_test.reshape(-1,64,64)
# print size of data
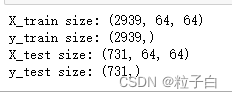
print("X_train size:",X_train.shape)
print("y_train size:",y_train.shape)
print("X_test size:",X_test.shape)
print("y_test size:",y_test.shape)
通过切换loaddataMode的值看下 (X_train,y_train),(X_test,y_test) 的形状是不是一致的。
最终形状是这样的:
总结
要注意,第三步代码中已经把图片统一缩放为64X64,这个根据个人需求修改分辨率。
还需要注意数据是否需要归一化的问题。


 被折叠的 条评论
为什么被折叠?
被折叠的 条评论
为什么被折叠?
 到【灌水乐园】发言


