


 本文介绍 Sharding-JDBC 的基本概念与应用场景,并通过一个具体案例演示如何实现分库分表,包括配置依赖、创建表结构、定义分片策略及数据源配置。
1. 概述
定位为轻量级 Java 框架,在 Java 的 JDBC 层提供的额外服务。 它使用客户端直连数据库,以 jar 包形式提供服务,无需额外部署和依赖,可理解为增强版的 JDBC 驱动,完全兼容 JDBC 和各种 ORM 框架。
- 适用于任何基于 JDBC 的 ORM 框架,如:JPA, Hibernate, Mybatis, Spring JDBC Template 或直接使用 JDBC。
- 支持任何第三方的数据库连接池,如:DBCP, C3P0, BoneCP, Druid, HikariCP 等。
- 支持任意实现 JDBC 规范的数据库,目前支持 MySQL,Oracle,SQLServer,PostgreSQL 以及任何遵循 SQL92 标准的数据库。

广播表
指所有的分片数据源中都存在的表,表结构和表中的数据在每个数据库中均完全一致。适用于数据量不大且需要与海量数据的表进行关联查询的场景,例如:字典表。
分布式ID生成器
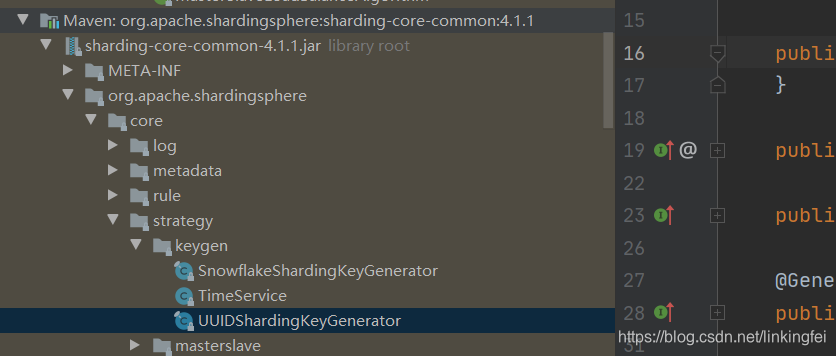
Sharding-JDBC提供了UUID、SNOWFLAKE生成器,还支持用户实现自定义id生成器。比如可以实现了type为SEQ的分布式id生成器,调用统一的分布式id服务获取id。
由于扩展ShardingKeyGenerator是通过JDK的serviceloader的SPI机制实现的,因此还需要在resources/META-INF/services目录下配置org.apache.shardingsphere.spi.keygen.ShardingKeyGenerator文件。
文件内容就是SeqShardingKeyGenerator类的全路径名。这样使用的时候,指定分布式主键生成器的type为SEQ就好了。
参考实现Snowflake算法:
package com.lonk.util;

import java.util.Calendar;

/**
 * @author lonk
 * @create 2021/2/1 16:44
 */
public class SnowFlake {

    static {
        Calendar calendar = Calendar.getInstance();
        calendar.set(2016, 10, 1);
        calendar.set(11, 0);
        calendar.set(12, 0);
        calendar.set(13, 0);
        calendar.set(14, 0);
        EPOCH = calendar.getTimeInMillis();
    }

    /**
     * 起始的时间戳
     */
    private final static long EPOCH;

    /** 机器id所占的位数 */
    private final long workerIdBits = 5L;

    /** 数据标识id所占的位数 */
    private final long datacenterIdBits = 5L;

    /** 支持的最大机器id,结果是31 (这个移位算法可以很快的计算出几位二进制数所能表示的最大十进制数) */
    private final long maxWorkerId = -1L ^ (-1L << workerIdBits);

    /** 支持的最大数据标识id,结果是31 */
    private final long maxDatacenterId = -1L ^ (-1L << datacenterIdBits);

    /** 序列在id中占的位数 */
    private final long sequenceBits = 12L;

    /** 机器ID向左移12位 */
    private final long workerIdShift = sequenceBits;

    /** 数据标识id向左移17位(12+5) */
    private final long datacenterIdShift = sequenceBits + workerIdBits;

    /** 时间截向左移22位(5+5+12) */
    private final long timestampLeftShift = sequenceBits + workerIdBits + datacenterIdBits;

    /** 生成序列的掩码,这里为4095 (0b111111111111=0xfff=4095) */
    private final long sequenceMask = -1L ^ (-1L << sequenceBits);

    /** 工作机器ID(0~31) */
    private long workerId;

    /** 数据中心ID(0~31) */
    private long datacenterId;

    /** 毫秒内序列(0~4095) */
    private long sequence = 0L;

    /** 上次生成ID的时间截 */
    private long lastTimestamp = -1L;

    //==============================Constructors=====================================
    /**
     * 构造函数
     * @param workerId 工作ID (0~31)
     * @param datacenterId 数据中心ID (0~31)
     */
    public SnowFlake(long workerId, long datacenterId) {
        if (workerId > maxWorkerId || workerId < 0) {
            throw new IllegalArgumentException(String.format("worker Id can't be greater than %d or less than 0", maxWorkerId));
        }
        if (datacenterId > maxDatacenterId || datacenterId < 0) {
            throw new IllegalArgumentException(String.format("datacenter Id can't be greater than %d or less than 0", maxDatacenterId));
        }
        this.workerId = workerId;
        this.datacenterId = datacenterId;
    }

    // ==============================Methods==========================================
    /**
     * 获得下一个ID (该方法是线程安全的)
     * @return SnowflakeId
     */
    public synchronized long nextId() {
        long timestamp = timeGen();

        //如果当前时间小于上一次ID生成的时间戳,说明系统时钟回退过这个时候应当抛出异常
        if (timestamp < lastTimestamp) {
            throw new RuntimeException(
                    String.format("Clock moved backwards.  Refusing to generate id for %d milliseconds", lastTimestamp - timestamp));
        }

        //如果是同一时间生成的,则进行毫秒内序列
        if (lastTimestamp == timestamp) {
            sequence = (sequence + 1) & sequenceMask;
            //毫秒内序列溢出
            if (sequence == 0) {
                //阻塞到下一个毫秒,获得新的时间戳
                timestamp = tilNextMillis(lastTimestamp);
            }
        }
        //时间戳改变,毫秒内序列重置
        else {
            sequence = 0L;
        }

        //上次生成ID的时间截
        lastTimestamp = timestamp;

        //移位并通过或运算拼到一起组成64位的ID
        return ((timestamp - EPOCH) << timestampLeftShift) //
                | (datacenterId << datacenterIdShift) //
                | (workerId << workerIdShift) //
                | sequence;
    }

    /**
     * 阻塞到下一个毫秒,直到获得新的时间戳
     * @param lastTimestamp 上次生成ID的时间截
     * @return 当前时间戳
     */
    protected long tilNextMillis(long lastTimestamp) {
        long timestamp = timeGen();
        while (timestamp <= lastTimestamp) {
            timestamp = timeGen();
        }
        return timestamp;
    }
    /**
     * 返回以毫秒为单位的当前时间
     * @return 当前时间(毫秒)
     */
    protected long timeGen() {
        return System.currentTimeMillis();
    }
}
功能与概念这里不做过多介绍,详细可参考官网,下来通过一个例子说明。
2、实现分库分表案例
pom依赖
  <dependency>
            <groupId>org.apache.shardingsphere</groupId>
            <artifactId>sharding-jdbc-core</artifactId>
            <version>4.1.1</version>
        </dependency>
        <dependency>
            <groupId>mysql</groupId>
            <artifactId>mysql-connector-java</artifactId>
            <version>5.1.44</version>
        </dependency>
        <dependency>
            <groupId>commons-dbcp</groupId>
            <artifactId>commons-dbcp</artifactId>
            <version>1.4</version>
        </dependency>
创建三个库:
- 用户库:db_user
创建用户表
CREATE TABLE `t_user`  (
  `id` int NOT NULL,
  `name` varchar(255)NULL DEFAULT NULL,
  `age` int NOT NULL DEFAULT 0 COMMENT '年龄',
  PRIMARY KEY (`id`),
  INDEX `c_index`(`name`)
) ENGINE = InnoDB CHARACTER SET = utf8mb4;
- 订单库: db_order_0\db_order_1
每个库创建两张表:
CREATE TABLE `t_order_0`  (
  `id` bigint NOT NULL,
  `order_id` bigint NULL DEFAULT NULL,
  `user_id` bigint NULL DEFAULT NULL,
  `username` varchar(20) CHARACTER SET utf8 COLLATE utf8_general_ci NULL DEFAULT NULL,
  PRIMARY KEY (`id`) USING BTREE
) ENGINE = InnoDB CHARACTER SET = utf8 COLLATE = utf8_general_ci ROW_FORMAT = DYNAMIC;

CREATE TABLE `t_order_1`  (
  `id` bigint NOT NULL,
  `order_id` bigint NULL DEFAULT NULL,
  `user_id` bigint NULL DEFAULT NULL,
  `username` varchar(20) CHARACTER SET utf8 COLLATE utf8_general_ci NULL DEFAULT NULL,
  PRIMARY KEY (`id`) USING BTREE
) ENGINE = InnoDB CHARACTER SET = utf8 COLLATE = utf8_general_ci ROW_FORMAT = DYNAMIC;
2.1 db_user不分库测试
这里先配置db_user不走分库数据源测试一下:
@Configuration
@MapperScan(basePackages = "com.lonk.mapper.nosharding", sqlSessionTemplateRef = "sqlSessionTemplate")
public class DataSourceConfig {

    @Bean(name = "dataSource")
    public DataSource testDataSource() {
        BasicDataSource result = new BasicDataSource();
        result.setDriverClassName(com.mysql.jdbc.Driver.class.getName());
        result.setUrl(String.format("jdbc:mysql://%s:%s/%s?serverTimezone=UTC&useSSL=false&useUnicode=true&characterEncoding=UTF-8", "localhost", "3306", "db_user"));
        result.setUsername("***");
        result.setPassword("***");
        return result;
    }

    /**
     * 获取sqlSessionFactory实例
     *
     * @param shardingDataSource
     * @return
     * @throws Exception
     */
    @Bean(name = "sqlSessionFactory")
    public SqlSessionFactory sqlSessionFactory(@Qualifier("dataSource") DataSource shardingDataSource) throws Exception {
        SqlSessionFactoryBean bean = new SqlSessionFactoryBean();
        bean.setDataSource(shardingDataSource);
        bean.setMapperLocations(new PathMatchingResourcePatternResolver().getResources("classpath:mapper/nosharding/*.xml"));
        return bean.getObject();
    }


    @Bean(name = "sqlSessionTemplate")
    public SqlSessionTemplate testSqlSessionTemplate(@Qualifier("sqlSessionFactory") SqlSessionFactory sqlSessionFactory) throws Exception {
        return new SqlSessionTemplate(sqlSessionFactory);
    }

}
2.2 订单分库分表配置
2.2.1 分片配置
Sharding提供了5种分片策略
-
StandardShardingStrategyConfiguration:
标准分片策略, 提供对SQL语句中的=, IN和BETWEEN AND的分片操作支持;StandardShardingStrategy 只支持单分片键,PreciseShardingAlgorithm 和RangeShardingAlgorithm 两个分片算法 -
ComplexShardingStrategyConfiguration:
复合分片策略, 提供对SQL语句中的=, IN和BETWEEN AND的分片操作支持。
ComplexShardingStrategy 支持多分片键; -
InlineShardingStrategyConfiguration:
Inline表达式分片策略, 使用Groovy的Inline表达式,提供对SQL语句中的=和IN的分片操作支持 -
HintShardingStrategyConfiguration:
通过Hint而非SQL解析的方式分片的策略;
用于处理使用Hint行分片的场景;
主要是为了应对分片字段不存在SQL中、数据库表结构中,而存在于外部业务逻辑, -
NoneShardingStrategyConfiguration:
不分片的策略
Sharding提供了以下4种算法接口
- PreciseShardingAlgorithm
- RangeShardingAlgorithm
- HintShardingAlgorithm
- ComplexKeysShardingAlgorithm
例子中采用标准分片配置策略的PreciseShardingAlgorithm分别配置分库与分表规则:
分库规则:
@Slf4j
@Service("databaseShardingAlgorithm")
public class DatabaseShardingAlgorithm implements PreciseShardingAlgorithm<Long>{

    @Override
    public String doSharding(Collection<String> collection, PreciseShardingValue<Long> preciseShardingValue) {
        // 定义分库算法
        // physicDatabase = getShardConfig(physicDatabase, subValue);
        int index = (int) (preciseShardingValue.getValue() % collection.size());

        log.info("----->db 分库:{}", collection);
        String physicDatabase = null;
        if (StringUtils.isBlank(physicDatabase)) {
            int tmp = 0;
            for (String value : collection) {
                if (tmp == index) {
                    physicDatabase = value;
                    break;
                }
                tmp++;
            }
        }
        log.info("----->分片键是={},逻辑表是={},分片值是={}",preciseShardingValue.getColumnName(),preciseShardingValue.getLogicTableName(),preciseShardingValue.getValue());
        return physicDatabase;
    }
}
分表规则:
@Slf4j
@Service("commonTableShardingAlgorithm")
public class CommonTableShardingAlgorithm implements PreciseShardingAlgorithm<Long> {

    @Override
    public String doSharding(Collection<String> collection, PreciseShardingValue<Long> preciseShardingValue) {
        // physicsTable= setValue(preciseShardingValue);
        log.info("----->db 分表:{}", collection);
        String physicsTable = null;

        int index = (int) (preciseShardingValue.getValue() % collection.size());
        if (StringUtils.isBlank(physicsTable)) {
            int tmp = 0;
            for (String value : collection) {
                if (tmp == index) {
                    physicsTable = value;
                    break;
                }
                tmp++;
            }
        }
        log.info("----->分片键是={},逻辑表是={},分片值是={}",preciseShardingValue.getColumnName(), preciseShardingValue.getLogicTableName(), preciseShardingValue.getValue());
        return physicsTable;
    }

}
2.2.2 数据源配置
@Configuration
@MapperScan(basePackages = "com.lonk.mapper.sharding", sqlSessionTemplateRef = "sqlSessionTemplate")
public class SharedDataSourceConfig {

	// 两个库名
    private String shardOrder0DataSource="db_order_0";
    private String shardOrder1DataSource="db_order_1";

	// 订单逻辑表,在map.xml的sql中的表名
    private String ordersLogicTable="t_order";
    // 数据节点
    private String ordersActualDataNodes = "db_order_$->{0..1}.t_order_$->{0..1}";

    // 分库字段:这个采用用户ID
    private String databaseShardingColumn = "user_id";
    // 分表字段:使用订单ID
    private String ordersShardingColumn = "order_id";


    private TableRuleConfiguration getOrderTableRuleConfiguration() {
        // 逻辑表、实际节点
        TableRuleConfiguration orderTableRuleConfig=new TableRuleConfiguration(ordersLogicTable, ordersActualDataNodes);

        // 采用标准分片策略
        orderTableRuleConfig.setDatabaseShardingStrategyConfig(new StandardShardingStrategyConfiguration(databaseShardingColumn, new DatabaseShardingAlgorithm()));
        orderTableRuleConfig.setTableShardingStrategyConfig(new StandardShardingStrategyConfiguration(ordersShardingColumn,new CommonTableShardingAlgorithm()));

        // 也可通过表达式分片
        // orderTableRuleConfig.setDatabaseShardingStrategyConfig(new InlineShardingStrategyConfiguration(databaseShardingColumn,"ds${user_id % 2}"));
        // orderTableRuleConfig.setTableShardingStrategyConfig(new InlineShardingStrategyConfiguration(ordersShardingColumn, "t_order_${order_id % 2}"));

        return orderTableRuleConfig;
    }


    @Bean(name = "shardingDataSource")
    DataSource getShardingDataSource() throws SQLException {
        ShardingRuleConfiguration shardingRuleConfig = new ShardingRuleConfiguration();
        // 订单逻辑表
        shardingRuleConfig.getBindingTableGroups().add(ordersLogicTable);
        // 订单配置表规则
        shardingRuleConfig.getTableRuleConfigs().add(getOrderTableRuleConfiguration());

        // 默认自增主键生成器
        // 指定自增字段以及key的生成方式
        // new UUIDShardingKeyGenerator();
        // new SnowflakeShardingKeyGenerator();
        // orderTableRuleConfig.setKeyGeneratorConfig(new KeyGeneratorConfiguration("SNOWFLAKE", "id"));
        // shardingRuleConfig.setDefaultKeyGeneratorConfig(new KeyGeneratorConfiguration("SNOWFLAKE", "id"));
        //  配置广播表规则列表
        // shardingRuleConfig.getBroadcastTables().add("t_config");


        // 通用匹配规则 TableRuleConfiguration
        // shardingRuleConfig.setDefaultDatabaseShardingStrategyConfig(new StandardShardingStrategyConfiguration(databaseShardingColumn,  databaseShardingAlgorithm));
        // shardingRuleConfig.setDefaultTableShardingStrategyConfig(new StandardShardingStrategyConfiguration(ordersShardingColumn, commonTableShardingAlgorithm));
        // 配置默认分库规则(不配置分库规则,则只采用分表规则)
        shardingRuleConfig.setDefaultTableShardingStrategyConfig(new NoneShardingStrategyConfiguration());
        shardingRuleConfig.setDefaultDatabaseShardingStrategyConfig(new NoneShardingStrategyConfiguration());
        // 默认库
        shardingRuleConfig.setDefaultDataSourceName(shardOrder0DataSource);

        Properties properties = new Properties();
        properties.setProperty("sql.show",Boolean.TRUE.toString());


        // 读写分离配置
        // MasterSlaveRuleConfiguration masterSlaveRuleConfig = new MasterSlaveRuleConfiguration(
        //        "ms_ds",
        //        shardOrder0DataSource,
        //        Arrays.asList(shardOrder1DataSource),
        //        new LoadBalanceStrategyConfiguration(new RoundRobinMasterSlaveLoadBalanceAlgorithm ().getType())
        //        );
        // shardingRuleConfig.getMasterSlaveRuleConfigs().add(masterSlaveRuleConfig);

        return ShardingDataSourceFactory.createDataSource(createDataSourceMap(), shardingRuleConfig, properties);
    }

    @Bean
    @Primary
    public SqlSessionFactory sqlSessionFactory(@Qualifier("shardingDataSource") DataSource shardingDataSource) throws Exception {
        SqlSessionFactoryBean bean = new SqlSessionFactoryBean();
        bean.setDataSource(shardingDataSource);
        // bean.setConfigLocation(new PathMatchingResourcePatternResolver().getResource("classpath:mybatis/mybatis-config.xml"));
        bean.setMapperLocations(new PathMatchingResourcePatternResolver().getResources("classpath:mapper/sharding/*.xml"));
        return bean.getObject();
    }

    @Bean
    public DataSourceTransactionManager transactionManager(@Qualifier("shardingDataSource") DataSource shardingDataSource) {
        return new DataSourceTransactionManager(shardingDataSource);
    }

    @Bean("sqlSessionTemplate")
    @Primary
    public SqlSessionTemplate sqlSessionTemplate(SqlSessionFactory sqlSessionFactory)  {
        return new SqlSessionTemplate(sqlSessionFactory);
    }


	   private Map<String, DataSource> createDataSourceMap() {
        Map<String, DataSource> result = new HashMap<>(2);
        result.put(shardOrder0DataSource, createDataSource(shardOrder0DataSource));
        result.put(shardOrder1DataSource, createDataSource(shardOrder1DataSource));
        return result;
    }
    private DataSource createDataSource(String dataSourceName) {
        BasicDataSource result = new BasicDataSource();
        result.setDriverClassName(com.mysql.jdbc.Driver.class.getName());
        result.setUrl(String.format("jdbc:mysql://%s:%s/%s?serverTimezone=UTC&useSSL=false&useUnicode=true&characterEncoding=UTF-8", "localhost", "3306", dataSourceName));
        result.setUsername("***");
        result.setPassword("***");
        return result;
    }
}
ShardingSphere还支持分片事务与分布式事务与治理,后续再做补充。
参考:
Apache ShardingSphere 2.x 官方中文文档
扩展:


 2694
2694

 被折叠的 条评论
为什么被折叠?
被折叠的 条评论
为什么被折叠?
 到【灌水乐园】发言


