


文章目录
推荐阅读:
【01】Netty从0到1系列之I/O模型
【02】Netty从0到1系列之NIO
【03】Netty从0到1系列之Selector
【04】Netty从0到1系列之Channel
【05】Netty从0到1系列之Buffer(上)
【06】Netty从0到1系列之Buffer(下)
【07】Netty从0到1系列之零拷贝技术
【08】Netty从0到1系列之整体架构、入门程序
【09】Netty从0到1系列之EventLoop
【10】Netty从0到1系列之EventLoopGroup
【11】Netty从0到1系列之Future
【12】Netty从0到1系列之Promise
【13】Netty从0到1系列之Netty Channel
一、ChannelFuture
1.1 ChannelFuture是啥?
ChannelFuture 是 Netty 框架中异步编程模型的核心组件,它代表了一个尚未完成的 I/O 操作的结果承诺(Promise)。你可以将其理解为一封“未来信使”——当你发起一个网络操作(如连接、写数据),Netty 立即返回一个 ChannelFuture,它承诺在未来某个时刻告诉你操作是否成功, 而不是阻塞等待操作完成。
ChannelFuture 的核心特性:
- 异步结果表示:代表一个尚未完成的异步操作结果
- 状态查询:可以检查操作是否完成、成功或失败
- 完成通知:支持添加监听器在操作完成时接收回调
- 链式操作:支持将多个异步操作组合成链式调用
核心职责
在 Netty 中,所有 I/O 操作都是异步的,不会立即返回结果,而是通过 ChannelFuture 来跟踪:
1.2 ChannelFuture的继承体系与核心方法
Future<V>
    -> ChannelFuture
        -> DefaultChannelFuture (主要实现)
        -> SucceededChannelFuture (表示已成功的操作)
        -> FailedChannelFuture (表示已失败的操作)
public interface ChannelFuture extends Future<Void> {
    // 获取关联的 Channel
    Channel channel();

    // 是否操作成功
    boolean isSuccess();

    // 是否可取消
    boolean isCancellable();

    // 获取失败原因
    Throwable cause();

    // 添加监听器(核心!)
    ChannelFuture addListener(GenericFutureListener<? extends Future<? super Void>> listener);

    // 阻塞等待操作完成(不推荐)
    ChannelFuture sync() throws InterruptedException;
    ChannelFuture await() throws InterruptedException;
}
继承关系图:
✅ 关键实现:
- DefaultChannelPromise:最常用的可写 ChannelFuture
- SucceededChannelFuture:立即成功的 Future
- FailedChannelFuture:立即失败的 Future
状态图:
🌟 核心职责:
- 表示一个未完成的 I/O 操作
- 提供异步结果通知机制
- 支持添加多个监听器(Listener)
- 可阻塞等待结果(不推荐)
- 实现“无回调地狱”的异步编程
1.3 ChannelFuture的核心API语法
1.3.1 基础ChannelFuture使用
package cn.tcmeta.demo05;

import io.netty.bootstrap.Bootstrap;
import io.netty.bootstrap.ServerBootstrap;
import io.netty.channel.Channel;
import io.netty.channel.ChannelFuture;
import io.netty.channel.ChannelInitializer;
import io.netty.channel.EventLoopGroup;
import io.netty.channel.nio.NioEventLoopGroup;
import io.netty.channel.socket.nio.NioSocketChannel;

import java.util.concurrent.TimeUnit;

/**
 * @author: laoren
 * @description: ChannelFuture 的基本用法
 * @version: 1.0.0
 */
public class BasicChannelFutureExample {
    public static void main(String[] args) {
        EventLoopGroup group = new NioEventLoopGroup();
        try {
            Bootstrap bootstrap = new Bootstrap();
            bootstrap.group(group)
                    .channel(NioSocketChannel.class)
                    .handler(new ChannelInitializer<Channel>() {
                        @Override
                        protected void initChannel(Channel ch) throws Exception {
                            // 简单的处理器
                        }
                    });

            // 1. 异步连接操作, 返回ChannelFuture
            ChannelFuture connectFuture = bootstrap.connect("127.0.0.1", 8888);
            System.out.println("连接操作已经发起,但是尚未完成连接~~~");

            // 2. 检查状态操作
            System.out.println("连接是否完成: " + connectFuture.isDone());
            System.out.println("连接是否成功: " + connectFuture.isSuccess());
            System.out.println("连接是否取消: " + connectFuture.isCancelled());

            // 3. 同步等待完成, 会阻塞当前线程
            connectFuture.sync();
            System.out.println("连接已经完成 ~~~ ");

            // 4. 获取结果
            Channel channel = connectFuture.channel();
            System.out.println("获取连接通道: " + channel);

            // 5. 异步写入操作
            ChannelFuture writeFuture = channel.writeAndFlush("Hello Netty Server!");

            // 6. 等待写入操作完成,这里设置了最多的等待时间周期, 最多等待2秒
            writeFuture.await(2, TimeUnit.SECONDS);
            if(writeFuture.isDone() && !writeFuture.isSuccess()){
                System.out.println("写入操作失败: " + writeFuture.cause());
            }
        } catch (Exception e) {
            e.printStackTrace();
        } finally {
            group.shutdownGracefully();
        }
    }
}
1.3.2 使用监听器处理异步结果
import io.netty.bootstrap.Bootstrap;
import io.netty.channel.*;
import io.netty.channel.nio.NioEventLoopGroup;
import io.netty.channel.socket.nio.NioSocketChannel;
import io.netty.util.concurrent.Future;
import io.netty.util.concurrent.GenericFutureListener;

public class ChannelFutureListenerExample {
    public static void main(String[] args) throws InterruptedException {
        EventLoopGroup group = new NioEventLoopGroup();

        try {
            Bootstrap bootstrap = new Bootstrap();
            bootstrap.group(group)
                     .channel(NioSocketChannel.class)
                     .handler(new SimpleChannelInboundHandler<Object>() {
                         @Override
                         protected void channelRead0(ChannelHandlerContext ctx, Object msg) {
                             // 处理读取到的消息
                         }
                     });

            // 1. 发起连接并添加监听器
            ChannelFuture connectFuture = bootstrap.connect("localhost", 8080);

            // 2. 使用匿名类添加监听器
            connectFuture.addListener(new GenericFutureListener<ChannelFuture>() {
                @Override
                public void operationComplete(ChannelFuture future) throws Exception {
                    if (future.isSuccess()) {
                        System.out.println("连接成功!");
                        Channel channel = future.channel();
                        channel.writeAndFlush("Hello");
                    } else {
                        System.err.println("连接失败: " + future.cause().getMessage());
                    }
                }
            });

            // 3. 使用lambda表达式添加监听器(Java 8+)
            connectFuture.addListener((ChannelFuture future) -> {
                if (future.isSuccess()) {
                    System.out.println("Lambda: 连接成功!");
                } else {
                    System.err.println("Lambda: 连接失败 - " + future.cause().getMessage());
                }
            });

            // 4. 添加多个监听器
            connectFuture.addListener(future -> {
                System.out.println("第一个监听器完成");
            }).addListener(future -> {
                System.out.println("第二个监听器完成");
            });

            // 等待连接操作完成
            connectFuture.sync();

            // 5. 添加操作完成后的监听器(如果操作已完成会立即通知)
            Channel channel = connectFuture.channel();
            ChannelFuture writeFuture = channel.writeAndFlush("Test Message");

            writeFuture.addListener(future -> {
                if (future.isSuccess()) {
                    System.out.println("消息发送成功");
                } else {
                    System.err.println("消息发送失败: " + future.cause().getMessage());
                    // 可以在这里进行重试等错误处理
                }
            });

            // 等待一会儿让异步操作完成
            Thread.sleep(1000);

        } finally {
            group.shutdownGracefully();
        }
    }
}
1.3.3 ChannelFuture 的链式操作和组合
import io.netty.bootstrap.Bootstrap;
import io.netty.channel.*;
import io.netty.channel.nio.NioEventLoopGroup;
import io.netty.channel.socket.nio.NioSocketChannel;
import io.netty.util.concurrent.Future;
import io.netty.util.concurrent.GenericFutureListener;

public class ChainedChannelFutureExample {
    public static void main(String[] args) {
        EventLoopGroup group = new NioEventLoopGroup();

        try {
            Bootstrap bootstrap = new Bootstrap();
            bootstrap.group(group)
                     .channel(NioSocketChannel.class)
                     .handler(new ChannelInitializer<Channel>() {
                         @Override
                         protected void initChannel(Channel ch) throws Exception {
                             // 添加处理器
                         }
                     });

            // 1. 链式异步操作
            bootstrap.connect("localhost", 8080).addListener((ChannelFuture connectFuture) -> {
                if (connectFuture.isSuccess()) {
                    System.out.println("连接成功,开始发送数据");
                    Channel channel = connectFuture.channel();

                    // 在连接成功后发送第一条消息
                    ChannelFuture firstWriteFuture = channel.writeAndFlush("First Message");

                    firstWriteFuture.addListener((Future<Void> future) -> {
                        if (future.isSuccess()) {
                            System.out.println("第一条消息发送成功,发送第二条");

                            // 在第一条消息发送成功后发送第二条消息
                            ChannelFuture secondWriteFuture = channel.writeAndFlush("Second Message");

                            secondWriteFuture.addListener((Future<Void> f) -> {
                                if (f.isSuccess()) {
                                    System.out.println("第二条消息发送成功,关闭连接");

                                    // 在所有操作完成后关闭连接
                                    channel.close();
                                }
                            });
                        }
                    });
                }
            });

            // 等待一段时间让异步操作完成
            Thread.sleep(3000);

        } catch (InterruptedException e) {
            e.printStackTrace();
        } finally {
            group.shutdownGracefully();
        }
    }
}
1.4 ChannelFuture的底层实现原理
1.4.1 ChannelFuture 与 Promise 模式
ChannelFuture 基于 Promise 模式实现,分离了操作的执行和结果的消费:
// 简化的实现原理
public interface ChannelFuture extends Future<Void> {
    // 获取关联的Channel
    Channel channel();

    // 添加监听器,操作完成时回调
    ChannelFuture addListener(GenericFutureListener<? extends Future<? super Void>> listener);

    // 同步等待操作完成
    ChannelFuture sync() throws InterruptedException;

    // 异步等待操作完成(不抛出异常)
    ChannelFuture await() throws InterruptedException;
}

// 默认实现的核心逻辑
public class DefaultChannelFuture implements ChannelFuture {
    private final Channel channel;
    private volatile boolean done; // 操作是否完成
    private volatile boolean success; // 操作是否成功
    private Throwable cause; // 失败原因
    private Object listeners; // 监听器列表

    // 标记操作成功完成
    public boolean setSuccess() {
        // 设置状态字段
        // 通知所有监听器
        notifyListeners();
        return true;
    }

    // 标记操作失败
    public boolean setFailure(Throwable cause) {
        // 设置状态字段和失败原因
        // 通知所有监听器
        notifyListeners();
        return true;
    }

    // 监听器模式
    private void notifyListeners() {
        // 遍历所有监听器并调用operationComplete方法
        for (GenericFutureListener listener : listeners) {
            try {
                listener.operationComplete(this);
            } catch (Exception e) {
                // 处理监听器异常
            }
        }
    }
}
✅ 1. 重点内容:
ChannelFuture内部维护一个GenericFutureListener列表- 当 I/O 操作完成时,遍历并通知所有监听器
- 线程安全:监听器在
EventLoop线程中执行
// 伪代码:操作完成时通知监听器
void operationComplete() {
    this.isSuccess = true;
    for (GenericFutureListener l : listeners) {
        l.operationComplete(this); // 回调
    }
}
✅ 2. 不可变性设计
ChannelFuture本身是不可变的(Immutable)- 一旦操作完成,结果不可更改
- 符合“承诺”语义
✅ 3. 与 EventLoop 的协同
- 所有
ChannelFuture的监听器在 绑定的 EventLoop 线程 中执行- 保证无锁串行化,避免竞态条件
// 示例:监听器在 EventLoop 线程中执行
future.addListener(f -> {
    System.out.println("回调执行线程: " + Thread.currentThread().getName());
    // 此处代码由 Channel 的 EventLoop 线程执行
});
1.4.2 ChannelFuture 的线程安全模型
ChannelFuture 是线程安全的,可以在任何线程中添加监听器或检查状态:
public class ChannelFutureThreadSafetyExample {
    public static void demonstrateThreadSafety(Channel channel) {
        // 在不同线程中操作同一个ChannelFuture是安全的
        ChannelFuture writeFuture = channel.writeAndFlush("Test Message");

        // 线程1添加监听器
        new Thread(() -> {
            writeFuture.addListener(future -> {
                System.out.println("线程1: 操作完成 - " + Thread.currentThread().getName());
            });
        }).start();

        // 线程2添加另一个监听器
        new Thread(() -> {
            writeFuture.addListener(future -> {
                System.out.println("线程2: 操作完成 - " + Thread.currentThread().getName());
            });
        }).start();

        // 线程3检查状态
        new Thread(() -> {
            while (!writeFuture.isDone()) {
                try {
                    Thread.sleep(100);
                } catch (InterruptedException e) {
                    Thread.currentThread().interrupt();
                    break;
                }
            }
            System.out.println("线程3: 操作已完成");
        }).start();

        // Netty确保所有监听器都在正确的EventLoop线程中执行
        // 即使从外部线程添加监听器,回调也会在Channel所属的EventLoop线程中执行
    }
}
1.5 ChannelFuture使用示例
1.5.1 基础 ChannelFuture 使用(连接操作)
package cn.tcmeta.demo05;

import io.netty.bootstrap.Bootstrap;
import io.netty.channel.*;
import io.netty.channel.nio.NioEventLoopGroup;
import io.netty.channel.socket.nio.NioSocketChannel;
import io.netty.handler.logging.LogLevel;
import io.netty.handler.logging.LoggingHandler;

/**
 * 演示 ChannelFuture 在 connect 操作中的使用
 */
public class ChannelFutureConnectExample {

    public static void main(String[] args) throws Exception {
        EventLoopGroup group = new NioEventLoopGroup();

        try {
            Bootstrap bootstrap = new Bootstrap();
            bootstrap.group(group)
                    .channel(NioSocketChannel.class)
                    .handler(new LoggingHandler(LogLevel.INFO));

            // connect() 立即返回 ChannelFuture
            ChannelFuture future = bootstrap.connect("www.baidu.com", 80);

            // 方式1:添加监听器(推荐!)
            future.addListener((ChannelFutureListener) f -> {
                if (f.isSuccess()) {
                    System.out.println("✅ 连接成功!远程地址: " + f.channel().remoteAddress());

                    // 发送 HTTP 请求
                    f.channel().writeAndFlush("GET / HTTP/1.1\r\nHost: www.baidu.com\r\n\r\n");

                    // 关闭连接
                    f.channel().close();
                } else {
                    System.err.println("❌ 连接失败: " + f.cause().getMessage());
                }
            });

            // 方式2:阻塞等待(不推荐,仅用于演示)
            // future.sync(); // 等待连接完成
            // if (future.isSuccess()) {
            //     System.out.println("✅ 连接成功");
            // } else {
            //     System.err.println("❌ 连接失败");
            // }

            // 等待连接关闭
            future.channel().closeFuture().sync();

        } finally {
            group.shutdownGracefully();
        }
    }
}

1.5.2 写操作的 ChannelFuture(数据发送确认)
package cn.tcmeta.demo05;

import io.netty.bootstrap.ServerBootstrap;
import io.netty.buffer.Unpooled;
import io.netty.channel.*;
import io.netty.channel.nio.NioEventLoopGroup;
import io.netty.channel.socket.SocketChannel;
import io.netty.channel.socket.nio.NioServerSocketChannel;

/**
 * 演示 write 操作的 ChannelFuture —— 发送确认
 */
public class ChannelFutureWriteExample {

    public static void main(String[] args) throws Exception {
        EventLoopGroup bossGroup = new NioEventLoopGroup(1);
        EventLoopGroup workerGroup = new NioEventLoopGroup();

        try {
            ServerBootstrap bootstrap = new ServerBootstrap();
            bootstrap.group(bossGroup, workerGroup)
                    .channel(NioServerSocketChannel.class)
                    .childHandler(new ChannelInitializer<SocketChannel>() {
                        @Override
                        protected void initChannel(SocketChannel ch) {
                            ch.pipeline().addLast(new SimpleChannelInboundHandler<Object>() {
                                @Override
                                protected void channelRead0(ChannelHandlerContext ctx, Object msg) {
                                    System.out.println("📩 收到消息: " + msg);

                                    // 发送响应
                                    String response = "Echo: " + msg.toString();
                                    ChannelFuture writeFuture = ctx.writeAndFlush(
                                            Unpooled.copiedBuffer(response, java.nio.charset.StandardCharsets.UTF_8)
                                    );

                                    // 监听发送结果
                                    writeFuture.addListener((ChannelFutureListener) f -> {
                                        if (f.isSuccess()) {
                                            System.out.println("✅ 响应已成功发送到客户端");
                                        } else {
                                            System.err.println("❌ 发送失败: " + f.cause().getMessage());
                                            // 可在此处重试或关闭连接
                                            f.channel().close();
                                        }
                                    });
                                }
                            });
                        }
                    });

            ChannelFuture bindFuture = bootstrap.bind(8080).sync();
            System.out.println("🚀 服务器启动,监听 8080 端口");

            bindFuture.channel().closeFuture().sync();

        } finally {
            bossGroup.shutdownGracefully();
            workerGroup.shutdownGracefully();
        }
    }
}
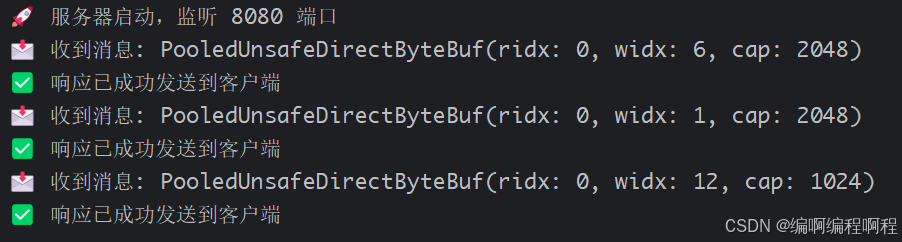
客户端发送消息

1.5.3 组合多个 ChannelFuture(并发操作)
package cn.tcmeta.demo05;

import io.netty.channel.nio.NioEventLoopGroup;
import io.netty.util.concurrent.Future;
import io.netty.util.concurrent.GenericFutureListener;

import java.util.concurrent.TimeUnit;

/**
 * 演示如何组合多个 ChannelFuture
 */
public class ChannelFutureCompositeExample {

    public static void main(String[] args) throws Exception {
        // 模拟多个异步操作(如连接多个服务)
        Future<?> future1 = asyncOperation("Service-A", 1000);
        Future<?> future2 = asyncOperation("Service-B", 500);
        Future<?> future3 = asyncOperation("Service-C", 1500);

        // 监听所有操作完成
        Future<?> allFuture = future1.addListener(future -> {
            if (future1.isSuccess() && future2.isSuccess() && future3.isSuccess()) {
                System.out.println("✅ 所有服务初始化成功!");
            } else {
                System.err.println("❌ 有服务初始化失败");
            }
        });

        // 阻塞等待(仅演示)
        allFuture.await(3000, TimeUnit.MILLISECONDS);
        System.out.println("🔚 组合操作完成");

        // 模拟异步操作
        Thread.sleep(2000);
    }

    private static Future<?> asyncOperation(String name, long delay) {
        System.out.println("🔧 开始初始化: " + name);

        // 模拟异步操作
        io.netty.util.concurrent.DefaultPromise<Object> promise =
            new io.netty.util.concurrent.DefaultPromise<>(new NioEventLoopGroup().next());

        new Thread(() -> {
            try {
                Thread.sleep(delay);
                if (Math.random() > 0.3) {
                    promise.setSuccess(null);
                    System.out.println("✅ " + name + " 初始化成功");
                } else {
                    promise.setFailure(new RuntimeException("初始化失败"));
                    System.err.println("❌ " + name + " 初始化失败");
                }
            } catch (Exception e) {
                promise.setFailure(e);
            }
        }).start();

        return promise;
    }
}
🔧 开始初始化: Service-A
🔧 开始初始化: Service-B
🔧 开始初始化: Service-C
❌ Service-B 初始化失败
🔚 组合操作完成
❌ Service-A 初始化失败
❌ 有服务初始化失败
✅ Service-C 初始化成功
1.6 ChannelFuture的最佳实践
1.6.1 推荐实践操作
✅ 推荐实践
| 实践 | 说明 |
|---|---|
始终使用 addListener() | 避免阻塞,实现真正的异步 |
避免 sync() 和 await() | 除非在启动/关闭阶段 |
| 处理失败情况 | 在 Listener 中检查 isSuccess() |
| 及时关闭资源 | 失败时关闭 Channel |
使用 ChannelFuture 组合 | 实现复杂异步流程 |
1.6.2 常见错误
⚠️ 常见错误
// ❌ 错误:阻塞 EventLoop 线程
ctx.writeAndFlush(msg).sync(); // 会阻塞整个 EventLoop!

// ✅ 正确:异步监听
ctx.writeAndFlush(msg).addListener(f -> {
    if (!f.isSuccess()) {
        System.err.println("发送失败: " + f.cause());
    }
});
1.6.3 最佳实践示例代码
ChannelFuture处理最佳实践
package cn.tcmeta.demo05;

import io.netty.buffer.ByteBuf;
import io.netty.buffer.Unpooled;
import io.netty.channel.Channel;
import io.netty.channel.ChannelFuture;
import io.netty.channel.ChannelFutureListener;
import io.netty.util.CharsetUtil;
import io.netty.util.concurrent.SucceededFuture;

import java.net.InetSocketAddress;
import java.util.concurrent.TimeUnit;

public class ChannelFutureBestPractices {

    // 1. 使用监听器而不是同步等待(避免阻塞EventLoop线程)
    public static void writeWithListener(Channel channel, String message) {
        ByteBuf buffer = Unpooled.copiedBuffer(message, CharsetUtil.UTF_8);
        ChannelFuture writeFuture = channel.writeAndFlush(buffer);

        writeFuture.addListener(new ChannelFutureListener() {
            @Override
            public void operationComplete(ChannelFuture future) throws Exception {
                // 这个回调会在Channel所属的EventLoop线程中执行
                if (future.isSuccess()) {
                    System.out.println("消息发送成功: " + message);
                    // 可以在这里进行下一步操作
                } else {
                    System.err.println("消息发送失败: " + future.cause().getMessage());
                    // 错误处理:重试、记录日志等
                    handleWriteFailure(future, message);
                }

                // 无论成功失败,都要释放资源
                buffer.release();
            }
        });
    }

    // 2. 带重试机制的写入操作
    public static void writeWithRetry(Channel channel, String message, int maxRetries) {
        writeWithRetryInternal(channel, message, maxRetries, 0);
    }

    private static void writeWithRetryInternal(Channel channel, String message,
                                             int maxRetries, int attempt) {
        ByteBuf buffer = Unpooled.copiedBuffer(message, CharsetUtil.UTF_8);
        ChannelFuture writeFuture = channel.writeAndFlush(buffer);

        writeFuture.addListener(future -> {
            if (future.isSuccess()) {
                System.out.println("消息发送成功(尝试 " + (attempt + 1) + "): " + message);
                buffer.release();
            } else if (attempt < maxRetries) {
                System.err.println("发送失败,准备重试 (" + (attempt + 1) + "/" + maxRetries + ")");
                buffer.release();

                // 延迟后重试
                channel.eventLoop().schedule(() -> {
                    writeWithRetryInternal(channel, message, maxRetries, attempt + 1);
                }, 1, TimeUnit.SECONDS); // 1秒后重试
            } else {
                System.err.println("消息发送失败,已达最大重试次数: " + message);
                buffer.release();
                handleWriteFailure((ChannelFuture) future, message);
            }
        });
    }

    // 3. 组合多个异步操作
    public static void executeSequentialOperations(Channel channel) {
        // 第一步:连接操作(如果是已连接的Channel,这步可以跳过)
        ChannelFuture connectFuture = channel.connect(new InetSocketAddress("127.0.0.1", 8888));

        connectFuture.addListener(connectResult -> {
            if (connectResult.isSuccess()) {
                // 第二步:连接成功后发送认证消息
                ChannelFuture authFuture = channel.writeAndFlush("AUTH token");

                authFuture.addListener(authResult -> {
                    if (authResult.isSuccess()) {
                        // 第三步:认证成功后发送实际数据
                        channel.writeAndFlush("Real data").addListener(dataResult -> {
                            if (dataResult.isSuccess()) {
                                System.out.println("所有操作完成成功");
                            } else {
                                System.err.println("数据发送失败: " + dataResult.cause().getMessage());
                            }
                        });
                    } else {
                        System.err.println("认证失败: " + authResult.cause().getMessage());
                    }
                });
            } else {
                System.err.println("连接失败: " + connectResult.cause().getMessage());
            }
        });
    }

    private static void handleWriteFailure(ChannelFuture future, String message) {
        // 记录日志、通知监控系统等
        System.err.println("处理发送失败的消息: " + message);
        System.err.println("失败原因: " + future.cause().getMessage());
    }
}
1.6.4 超时处理和错误恢复
package cn.tcmeta.demo05;

import io.netty.channel.Channel;
import io.netty.channel.ChannelFuture;
import io.netty.channel.ChannelFutureListener;
import io.netty.util.concurrent.Future;
import io.netty.util.concurrent.GenericFutureListener;
import java.util.concurrent.TimeUnit;
import java.util.concurrent.TimeoutException;

public class TimeoutAndRecoveryExample {

    // 1. ✅✅✅ 带超时控制的异步操作
    public static void executeWithTimeout(Channel channel, String message, long timeout, TimeUnit unit) {
        ChannelFuture writeFuture = channel.writeAndFlush(message);

        // 添加超时监听器
        channel.eventLoop().schedule(() -> {
            if (!writeFuture.isDone()) {
                System.err.println("操作超时,取消操作");
                // 取消操作(如果支持取消)
                writeFuture.cancel(false);

                // 执行超时恢复逻辑
                handleTimeout(channel, message);
            }
        }, timeout, unit);

        // ✅✅✅ 添加完成监听器
        writeFuture.addListener(future -> {
            if (future.isCancelled()) {
                System.out.println("操作已被取消");
            } else if (future.isSuccess()) {
                System.out.println("操作成功完成");
            } else {
                System.err.println("操作失败: " + future.cause().getMessage());
                handleFailure(channel, message, future.cause());
            }
        });
    }

    // 2. ✅✅✅ 复杂的错误恢复策略
    public static void executeWithResilience(Channel channel, String message) {
        ChannelFuture operationFuture = channel.writeAndFlush(message);

        operationFuture.addListener((GenericFutureListener<ChannelFuture>) future -> {
            if (future.isSuccess()) {
                handleSuccess(message);
            } else {
                Throwable cause = future.cause();

                if (cause instanceof TimeoutException) {
                    // 超时错误:重试
                    System.err.println("超时,准备重试: " + message);
                    retryOperation(channel, message);
                } else if (isNetworkError(cause)) {
                    // 网络错误:重新连接后重试
                    System.err.println("网络错误,重新连接: " + message);
                    reconnectAndRetry(channel, message);
                } else if (isProtocolError(cause)) {
                    // 协议错误:无法恢复,记录日志
                    System.err.println("协议错误,无法恢复: " + message);
                    logError(message, cause);
                } else {
                    // 其他错误:使用备用方案
                    System.err.println("使用备用方案: " + message);
                    useFallbackStrategy(message);
                }
            }
        });
    }

    private static boolean isNetworkError(Throwable cause) {
        // 判断是否为网络错误
        return cause instanceof java.net.ConnectException ||
               cause instanceof java.net.UnknownHostException;
    }

    private static boolean isProtocolError(Throwable cause) {
        // 判断是否为协议错误
        return cause instanceof io.netty.handler.codec.DecoderException;
    }

    private static void handleTimeout(Channel channel, String message) {
        // 超时处理逻辑
    }

    private static void handleFailure(Channel channel, String message, Throwable cause) {
        // 失败处理逻辑
    }

    private static void handleSuccess(String message) {
        // 成功处理逻辑
    }

    private static void retryOperation(Channel channel, String message) {
        // 重试逻辑
    }

    private static void reconnectAndRetry(Channel channel, String message) {
        // 重新连接并重试逻辑
    }

    private static void logError(String message, Throwable cause) {
        // 记录错误日志
    }

    private static void useFallbackStrategy(String message) {
        // 使用备用方案
    }
}
1.7 ChannelFuture优缺点总结
✅ 优点
| 优点 | 说明 |
|---|---|
| 真正的异步非阻塞 | 提高性能和吞吐量 |
| 避免回调地狱 | 通过 Promise 模式链式调用 |
| 线程安全 | 监听器在正确线程执行 |
| 资源友好 | 不阻塞线程,支持高并发 |
| 易于测试 | 可模拟成功/失败场景 |
❌ 缺点
| 缺点 | 说明 |
|---|---|
| 学习曲线陡峭 | 需理解异步编程模型 |
| 调试困难 | 堆栈不连续,日志分散 |
| 错误处理复杂 | 需在每个 Listener 中处理异常 |
过度使用 sync() | 易导致死锁或性能下降 |
1.8 总结:ChannelFuture 的核心价值
| 维度 | 说明 |
|---|---|
| 核心思想 | 异步操作的结果承诺 + 非阻塞通知 |
| 关键技术 | 监听器模式、事件循环协同、不可变性 |
| 性能优势 | 高并发、低延迟、资源高效 |
| 设计精髓 | “不要调用我们,我们会调用你” —— 回调驱动 |
| 适用场景 | 所有异步 I/O 操作(connect, write, bind, close) |
1.9 一句话总结
💡 一句话总结:
ChannelFuture 是 Netty 的“异步信使” —— 它通过 监听器模式 和 事件驱动,将复杂的异步操作转化为清晰的回调逻辑,是实现高性能网络应用的关键设计。


 391
391

 被折叠的 条评论
为什么被折叠?
被折叠的 条评论
为什么被折叠?
 到【灌水乐园】发言


