


 本文将介绍如何在一小时内使用ThinkPHP实现后台管理的基础功能,包括管理员的增、删、改、查操作。首先,创建add.html视图文件,接着实现保存管理员信息的提交功能,然后在admin.php中编写相关逻辑。接着,逐步讲解删除和编辑管理员的方法。详细步骤可参考链接。
之前我们已经写好管理员页面,现在对功能继续实现
基础功能1:对管理进行增删改查
增加
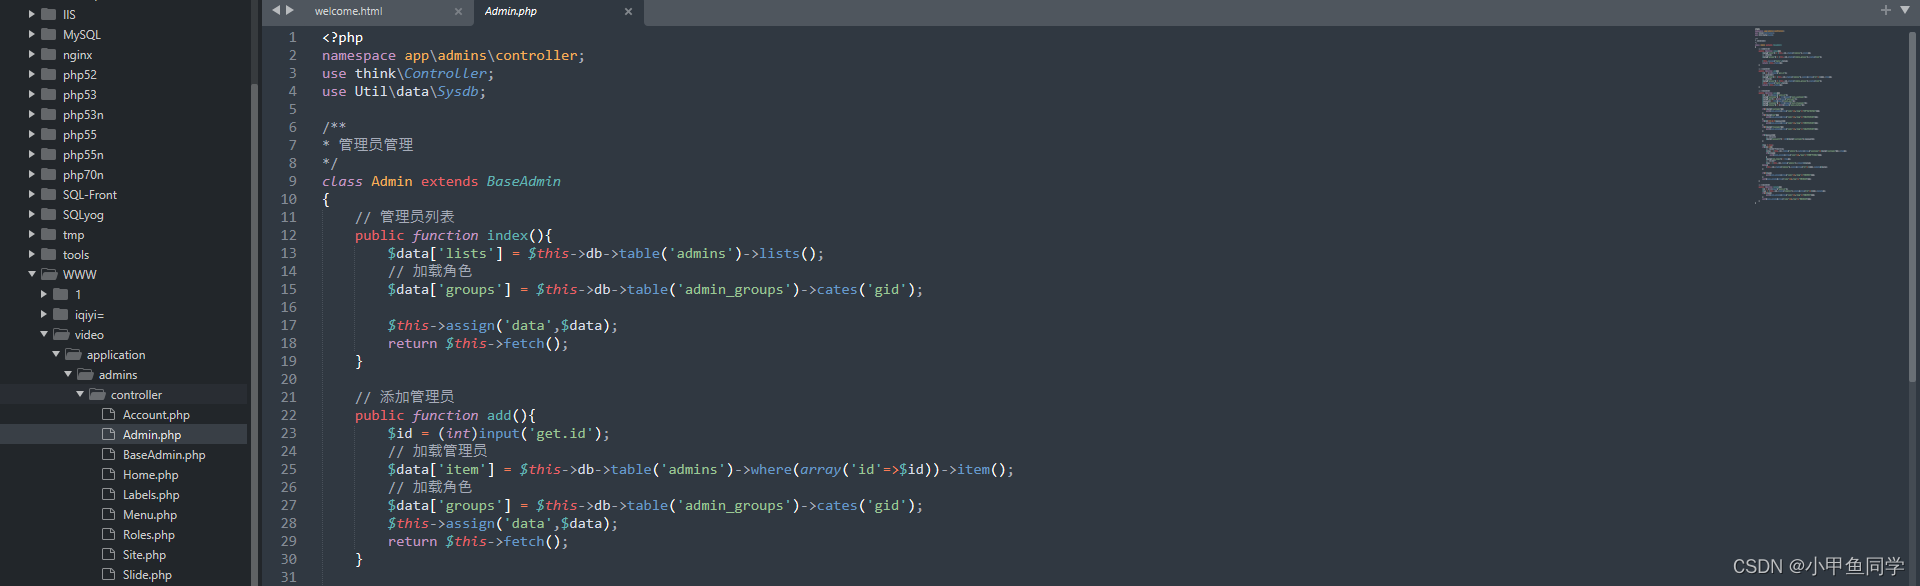
需要在view中新建一个add.html
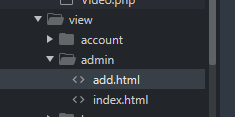
add.html
<!DOCTYPE html>
<html>
<head>
	<title></title>
	<link rel="stylesheet" type="text/css" href="__STATIC__/plugins/layui/css/layui.css">
	<script type="text/javascript" src="__STATIC__/plugins/layui/layui.js"></script>
</head>
<body style="padding: 10px;">
	<form class="layui-form">
		<input type="hidden" name="id" value="{$data.item.id}">
		<div class="layui-form-item">
			<label class="layui-form-label">用户名</label>
			<div class="layui-input-inline">
				<input type="text" class="layui-input" name="usern
最低0.47元/天 解锁文章


 1684
1684

 被折叠的 条评论
为什么被折叠?
被折叠的 条评论
为什么被折叠?
 到【灌水乐园】发言


