


更新时间:2019-08-16
symfony4 配置数据库配置文件
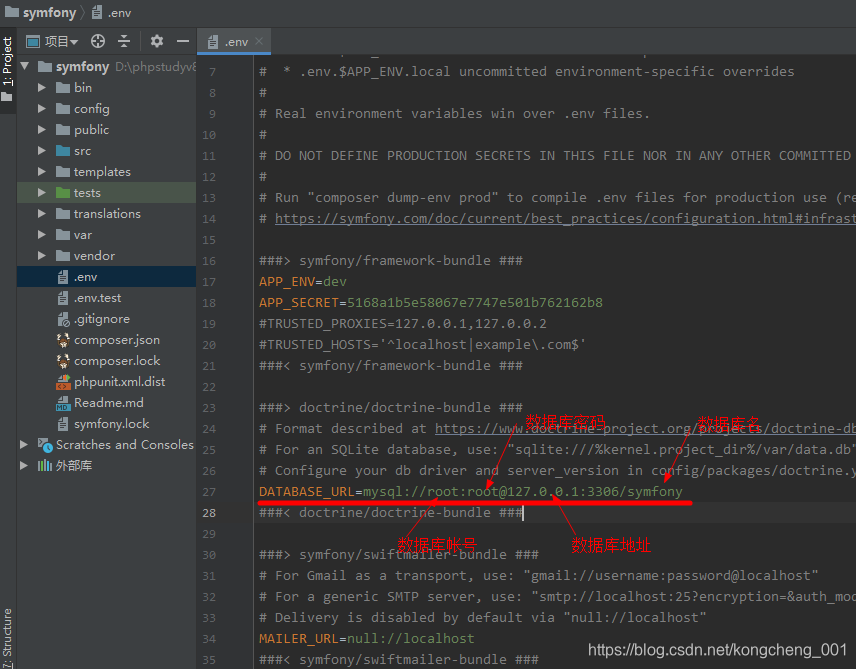
在项目的根目录下的 .env 文件中配置好关键的数据库连接信息. 找到 DATABASE_URL 这行, 和普通的数据库连接配置一样.
# 修改mysql连接信息.
DATABASE_URL="mysql://db_user:db_password@127.0.0.1:3306/db_name"

# 如果使用Sqlite数据库,可以按下面的配置.
# DATABASE_URL="sqlite:///%kernel.project_dir%/var/app.db"
如果数据库连接信息中包含特殊字符, 比如(+, @, $, #, /, :, *, !), 需要进行urlencode编码.
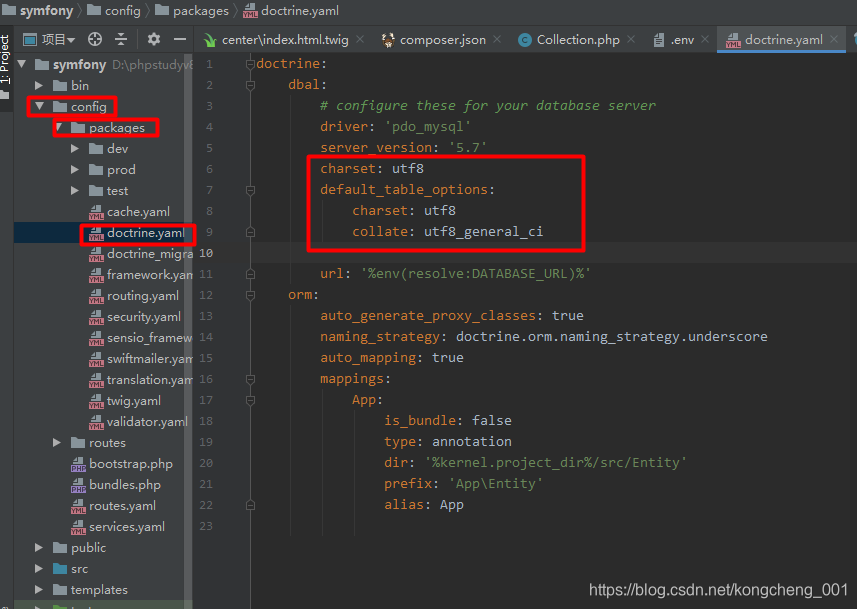
在config/packages/doctrine.yaml 文件中配置数据库的编码格式
// 修改配置文件
DATABASE_URL=mysql://root:root@127.0.0.1:3306/symfony
配置好之后可以使用创建命令进行测试,检测是否连接成功
// 执行创建数据库命令
$ php bin/console doctrine:database:create
// 返回如下结果则是连接成功 Created database `symfony` for connection named default
创建数据表:
Symfony 框架本身没有操作数据库的组件, 操作数据库是通过第三方的ORM包来提供的. 采用的是 Doctrine.
先检查项目中是否已经安装了该包
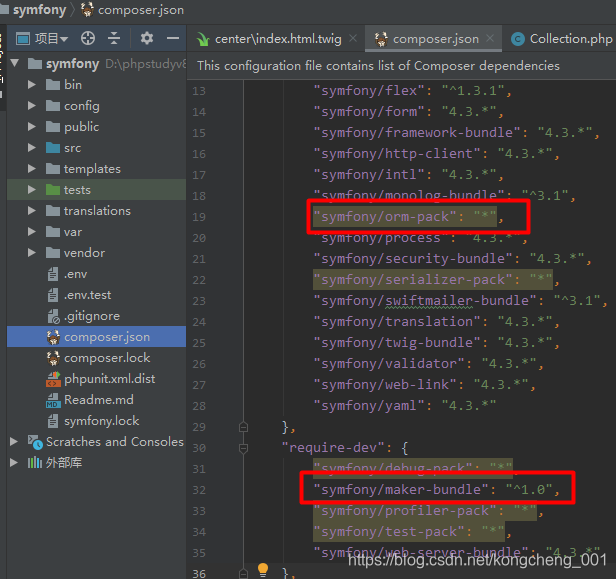
如果没有则安装 Doctrine
在SF项目中使用 Doctrine 之前, 需要安装一下包: symfony/orm-pack, 同时一个代码生成包 symfony/maker-bundle 也安装一下方便生成代码.
composer require symfony/orm-pack
composer require symfony/maker-bundle --dev
更多的数据库连接配置信息在 config/packages/doctrine.yaml 文件中可以具体进行配置. 特别注意一下 server_version, 这个要和实际使用的数据库配置一样的版本. 不然可能会影响到 Doctrine 的某些功能.
Doctrine 提供丰富的命令行操作. 具体的可以通过 bin/console list doctrine 来查看所有的Doctrine命令信息.
另外也可以使用 bin/console list make 来了解一下 make 包提供的指令, 接下来我们就开始使用 make 快速创建 php 的对象定义.
创建一个实体类: Entity Class
创建一个收藏夹实体类: Collection, 使用命令: make:entity即可, 这个命令会引导完成整改实体类的定义, 只需要按命令行的提问一步一步的回答即可. 非常的方便.
这里给 Collection实体添加了2个属性, name, link.
bin/console make:entity

 Class name of the entity to create or update (e.g. GentleElephant):
 > Collection

 created: src/Entity/Collection.php
 created: src/Repository/ProductRepository.php

 Entity generated! Now let's add some fields!
 You can always add more fields later manually or by re-running this command.

 New property name (press <return> to stop adding fields):
 > name

 Field type (enter ? to see all types) [string]:
 > string

 Field length [255]:
 > 255

 Can this field be null in the database (nullable) (yes/no) [no]:
 > no

 updated: src/Entity/Product.php

 Add another property? Enter the property name (or press <return> to stop adding fields):
 > link

 Field type (enter ? to see all types) [string]:
 > string

 Field length [255]:
 > 255

 Can this field be null in the database (nullable) (yes/no) [no]:
 > no

 updated: src/Entity/Product.php

 Add another property? Enter the property name (or press <return> to stop adding fields):
 >

  Success!

 Next: When you're ready, create a migration with make:migration
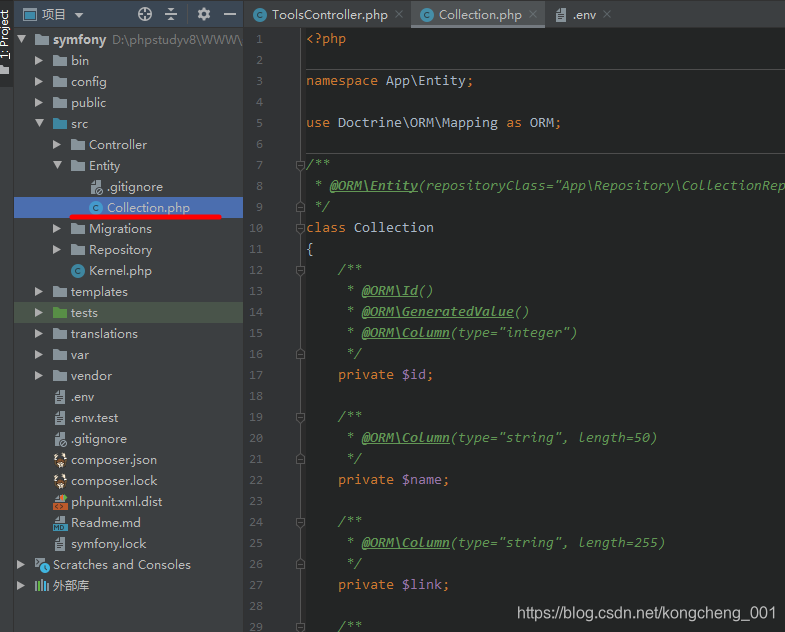
看一下生成的具体的PHP文件:src/Entity/Collection.php
<?php

namespace App\Entity;

use Doctrine\ORM\Mapping as ORM;

/**
 * @ORM\Entity(repositoryClass="App\Repository\CollectionRepository")
 */
class Collection
{
    /**
     * @ORM\Id()
     * @ORM\GeneratedValue()
     * @ORM\Column(type="integer")
     */
    private $id;

    /**
     * @ORM\Column(type="string", length=255)
     */
    private $name;

    /**
     * @ORM\Column(type="string")
     */
    private $link;
    // ... getter and setter methods
}
在正式使用 make 生成实体的时候需要注意一下属性名, 避免和数据库的关键字冲突.
make:entity 可以创建新的 Entity, 也可以修改现有的 Entity.
生成后的 Entity 需要再进行修改. make:entity 只是提供了简略的类定义.
创建数据表
创建实体后, 需要映射到真实数据库中成为数据表. 可以使用doctrine:schema:update 来在开发环境中快速把实体定义转成真实的数据表在数据库中. 在正式环境, 通常使用 ‘Migrations’ 脚本来更新数据库结构.
使用 make:migration 非常容易实现数据库的变迁脚本:
执行该命令后会生成创建数据库的脚本文件
$ bin/console make:migration

  Success!

 Next: Review the new migration "src/Migrations/Version20190316143744.php"
 Then: Run the migration with php bin/console doctrine:migrations:migrate
文件代码:
<?php

namespace App\Entity;
use Doctrine\ORM\Mapping as ORM;
/**
 * @ORM\Entity(repositoryClass="App\Repository\CollectionRepository")
 */
class Collection
{
    /**
     * @ORM\Id()
     * @ORM\GeneratedValue()
     * @ORM\Column(type="integer")
     */
    private $id;
    /**
     * @ORM\Column(type="string", length=50)
     */
    private $name;

    /**
     * @ORM\Column(type="string", length=255)
     */
    private $link;
    /**
     * @ORM\Column(type="string", length=120)
     */
    private $icon;
    /**
     * @ORM\Column(type="string", length=255)
     */
    private $descriptor;

    public function getId(): ?int
    {
        return $this->id;
    }

    public function getName(): ?string
    {
        return $this->name;
    }

    public function setName(string $name): self
    {
        $this->name = $name;

        return $this;
    }

    public function getLink(): ?string
    {
        return $this->link;
    }

    public function setLink(string $link): self
    {
        $this->link = $link;

        return $this;
    }

    public function getIcon(): ?string
    {
        return $this->icon;
    }

    public function setIcon(string $icon): self
    {
        $this->icon = $icon;

        return $this;
    }

    public function getDescriptor(): ?string
    {
        return $this->descriptor;
    }

    public function setDescriptor(string $descriptor): self
    {
        $this->descriptor = $descriptor;

        return $this;
    }
}
文件: src/Migrations/Version20190316143744.php 中包含了具体的SQL更新代码.
确认 SQL代码无误后, 执行下面的指令, 正式更新数据库结构.
$ bin/console doctrine:migrations:migrate // 创建数据库
上面的过程是可以重复执行的. 在需要修改实体后, 再重复的执行, 更新数据库结构.执行完命令后,此时数据库中的数据表就生成了
接下来来了解一下操作数据库的增删改查操作。主要是了解一下Doctrine的数据持久化操作。操作非常简单。先创建一个产品控制器来接收浏览器操作。
symfony4 操作数据库增删改查
可以执行以下命令创建一个控制器,如果已经创建可以忽略:
$ bin/console make:controller ToolsController
symfony4 添加数据
在这里我使用Tools控制器进行演示

以下是该文件代码:
<?php
/*
 * 工具模块
 *
 * This file is part of the Symfony package.
 *
 * (c) Fabien Potencier <fabien@symfony.com>
 *
 * For the full copyright and license information, please view the LICENSE
 * file that was distributed with this source code.
 */
namespace App\Controller;

use App\Entity\Collection;
use Symfony\Bundle\FrameworkBundle\Controller\AbstractController;
//use Symfony\Component\HttpFoundation\Response;
use Symfony\Component\HttpFoundation\JsonResponse;
use Symfony\Component\Routing\Annotation\Route;

class ToolsController extends AbstractController
{
    /**
     * @Route("/collection.{_format}",defaults={"_format": "html"}, name="collection")
     */
    public function collection()
    {
        return $this->render('tools/collection.html.twig', [
            'controller_name' => 'ToolsController',
        ]);
    }
    /**
     * @Route("/collection/add",name="collectionAdd")
     *
     * @return Response
     */
    public function collectionAdd()
    {
        //获取实体管理器
        $entityManager = $this->getDoctrine()->getManager();
        //创建收藏实体
        $collection = new Collection();
        $collection->setName('收藏网址-' . mt_rand(100, 999));
        $collection->setLink('收藏链接-'.mt_rand(10, 9999));
        $collection->setIcon('收藏ICON-'.mt_rand(10, 9999));
        $collection->setDescriptor('收藏描述-'.mt_rand(10, 9999));
        //标记准备持久化实体数据
        $entityManager->persist($collection);
        //写入到数据库中
        $entityManager->flush();
        // 返回请求结果
        $data = array(
            'code' => 200,
            'msg' => '请求成功',
            'data' => $collection->getId() // 获取插入后的数据ID
        );
        /*return new Response(
            json_encode($data),
            200,
            array('Content-Type' => 'application/json')
        );*/
		// return new JsonResponse($data, Response::HTTP_OK);
        return new JsonResponse($data);
    }
}
// 返回结果
{
    "code": 200,
    "msg": "请求成功",
    "data": 10
}
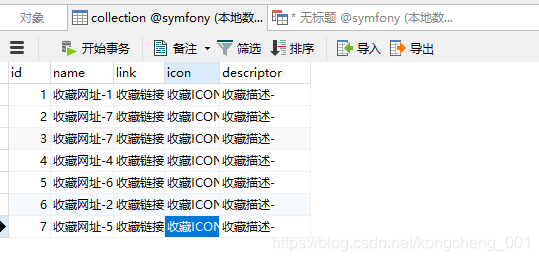
至此,插入数据成功!


 1112
1112

 被折叠的 条评论
为什么被折叠?
被折叠的 条评论
为什么被折叠?
 到【灌水乐园】发言


