


目录
一.隐藏版本号
一般来说,软件的漏洞都和版本相关,所以我们要隐藏或消除web服务对访问用户显示的各种敏感信息。
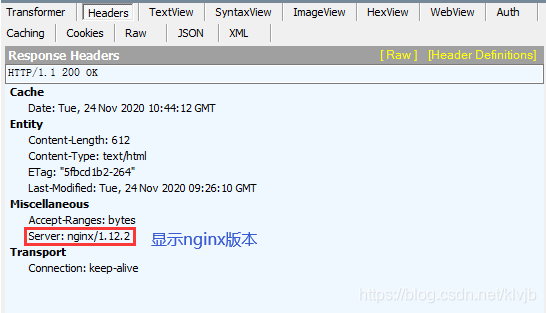
查看版本号
[root@localhost ~]# curl -I http://192.168.100.17
HTTP/1.1 200 OK
Server: nginx/1.12.2   ##nginx版本号
Date: Tue, 24 Nov 2020 11:13:26 GMT
Content-Type: text/html
Content-Length: 612
Last-Modified: Tue, 24 Nov 2020 09:26:10 GMT
Connection: keep-alive
ETag: "5fbcd1b2-264"
Accept-Ranges: bytes
隐藏版本号
http {
include mime.types;
default_type application/octet-stream;
server_tokens off; ##添加
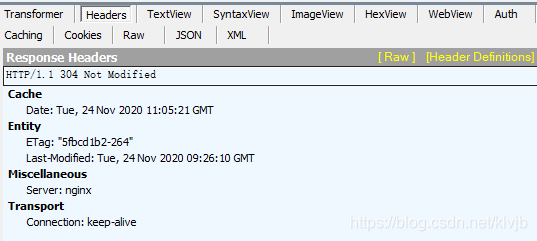
[root@localhost ~]# systemctl restart nginx #重启服务再次查看版本号
[root@localhost ~]# curl -I http://192.168.100.17
HTTP/1.1 200 OK
Server: nginx
Date: Tue, 24 Nov 2020 11:11:52 GMT
Content-Type: text/html
Content-Length: 612
Last-Modified: Tue, 24 Nov 2020 09:26:10 GMT
Connection: keep-alive
ETag: "5fbcd1b2-264"
Accept-Ranges: bytes
修改版本号(并非真实版本)
[root@localhost ~]# vi /root/nginx-1.12.2/src/core/nginx.h


/*
 * Copyright (C) Igor Sysoev
 * Copyright (C) Nginx, Inc.
 */


#ifndef _NGINX_H_INCLUDED_
#define _NGINX_H_INCLUDED_


#define nginx_version      1012002
#define NGINX_VERSION      "1.11.1"   ##改为假的版本号

[root@localhost nginx-1.12.2]# make && make install   ##修改完成后重新编译安装
[root@localhost nginx-1.12.2]# curl -I http://192.168.100.17
HTTP/1.1 200 OK
Server: nginx 1.11.1  ##查看版本号为修改后的版本号
Date: Tue, 24 Nov 2020 11:19:06 GMT
Content-Type: text/html
Content-Length: 612
Last-Modified: Tue, 24 Nov 2020 09:26:10 GMT
Connection: keep-alive
ETag: "5fbcd1b2-264"
Accept-Ranges: bytes
二.设置网页缓存时间
当nginx将网页数据返回给客户端后,可设置缓存的时间,以方便在日后进行相同内容的请求时直接返回,避免重复请求,加快了访问速度。
一般针对静态网页设置,对动态网页不设置缓存时间
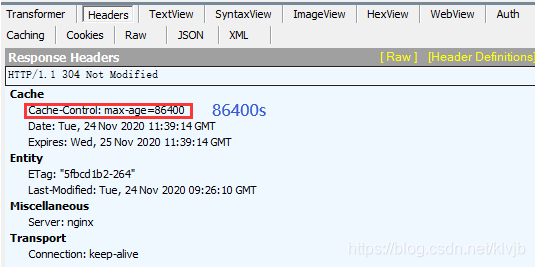
[root@localhost ~]# vi /usr/local/nginx/conf/nginx.conf


        location / {
            root   html;
            index  index.html index.htm;
            expires 1d;  ##缓存时间设置为一天
三.修改nginx进程数
在高并发、高访问量的web服务场景,需要事先启动好更多的nginx进程,以保证快速响应并处理大量并发用户的请求。
worker_processes 1; 一般调整到与CPU的颗数相同
查看物理CPU个数
[root@localhost ~]# cat /proc/cpuinfo | grep -c "physical id"
1
[root@localhost ~]# ps aux | grep nginx  ##查看运行进程数的变化情况
root      44546  0.0  0.0  20496   608 ?        Ss   03:39   0:00 nginx: master process nginx
nginx     44547  0.0  0.1  23028  1644 ?        S    03:39   0:00 nginx: worker process
root      44682  0.0  0.0 112676   984 pts/1    S+   03:53   0:00 grep --color=auto nginx
[root@localhost ~]# vi /usr/local/nginx/conf/nginx.conf


#user  nobody;
worker_processes  5;  ###进程数修改为5

[root@localhost ~]# systemctl restart nginx   ##重启服务
查看进程
[root@localhost ~]# ps aux | grep nginx
root      45113  0.0  0.0  20496   608 ?        Ss   04:07   0:00 nginx: master process /usr/local/nginx/sbin/nginx
nginx     45114  0.0  0.1  23024  1388 ?        S    04:07   0:00 nginx: worker process
nginx     45115  0.0  0.1  23024  1388 ?        S    04:07   0:00 nginx: worker process
nginx     45116  0.0  0.1  23024  1388 ?        S    04:07   0:00 nginx: worker process
nginx     45117  0.0  0.1  23024  1388 ?        S    04:07   0:00 nginx: worker process
nginx     45118  0.0  0.1  23024  1388 ?        S    04:07   0:00 nginx: worker process
root      45120  0.0  0.0 112676   984 pts/1    R+   04:07   0:00 grep --color=auto nginx
四.配置nginx网页压缩功能
nginx压缩功能的介绍:
nginx gzip压缩模块提供了压缩文件内容的功能,用户请求的内容在发送给客户端之前,nginx服务器会根据一些具体的策略实施压缩,以节省网站出口带宽,同时加快了数据传输效率,提升了用户的访问体验。
压缩的优点:
提升网站用户体验:由于发给用户的内容小了,所以用户访问单位大小的页面就快了,用户体验就提升了
节约网站带宽成本:由于数据时压缩传输的,因此,会消耗一些cpu资源
压缩的对象:
纯文本内容压缩比很高,因此,纯文本的内容最好要压缩
被压缩的纯文本文件必须要大于1KB,由于压缩算法的特殊原因,极小的文件压缩反而变大
图片、视频(流媒体)等文件尽量不要压缩,因为这些文件大多都是经过压缩的,如果再压缩很可能不会减小或减小很少,或者有可能增大,而在压缩时还会消耗大量的CPU、内存资源
[root@localhost ~]# vi /usr/local/nginx/conf/nginx.conf
 gzip on; ###开启gzip压缩功能
    gzip_min_length 1k; ###压缩阈值(超过1k的文件进行压缩)
    gzip_buffers 4 16k; ###buffer(缓冲)大小为4个16k缓冲区大小
    gzip_http_version 1.1; ###压缩版本
    gzip_comp_level 6; ###压缩比率,最小为1,处理速度快,传输速度慢;最大为9,处理速度慢,传输速度快
    gzip_types text/plain application/x-javascript text/css image/jpg image/png image/gif application/xml text/javascript application/x-http-php application/javascript application/json;
    gzip_vary on; ###选择支持vary header可以让前端的缓存服务器缓存经过gzip压缩的页面
[root@localhost ~]# vi /usr/local/nginx/html/index.html
<!DOCTYPE html>
<html>
<head>
<title>Welcome to nginx!</title>
<style>
body {
width: 35em;
margin: 0 auto;
font-family: Tahoma, Verdana, Arial, sans-serif;
}
</style>
</head>
<body>
<h1>Welcome!</h1>
<img src=123.jpg />
</body>
</html>
验证

抓包后发现网页已经被压缩

五.nginx防盗链设置
盗链主机配置
安装apache服务
[root@localhost ~]# yum -y install httpd
[root@localhost ~]# vi /etc/hosts

127.0.0.1   localhost localhost.localdomain localhost4 localhost4.localdomain4
::1         localhost localhost.localdomain localhost6 localhost6.localdomain6
192.168.100.17 www.moon.com
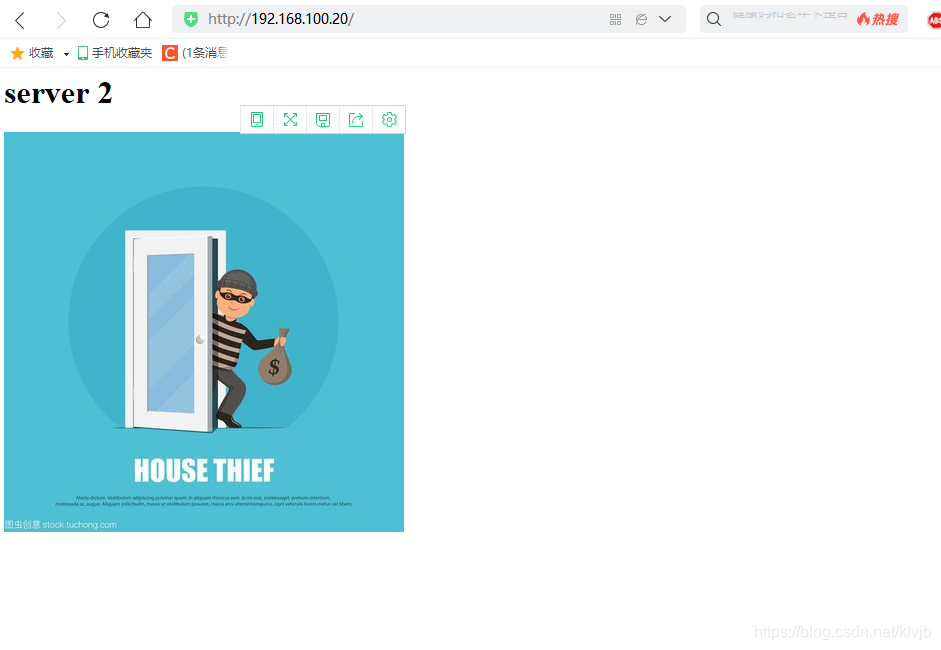
验证盗链结果

源主机防盗链配置
location ~*\.(gif|jpg|swf)$ {
             valid_referers none block 192.168.100.17;
             if ($invalid_referer) {
             rewrite ^/ http://192.168.100.17/ab.png;
              }
}
测试
六.日志分割
- 随着Nginx运行时间增加,日志也会增加。太大的日志文件对监控是一个大灾难。所以需要定期进行日志文件的切割
- Nginx自身不具备日志分割处理的功能,但可以通过Nginx信号控制功能的脚本实现日志的自动切割(Kill -HUP cat /xxx/log/nginx.pid #平滑重启nginx,类似reload)
- -QUIT :结束进程;-USR1:日志分割;-USR2:平滑升级
- 通过Linux的计划任务周期性地进行日志切割
- 编写脚本进行日志切割示例
[root@localhost ~]# vi fenge.sh

#!/bin/bash
#Filename:fenge.sh
d=$(date -d "-1 day" "+%Y%m%d")
logs_path="/var/log/nginx"
pid_path="/usr/local/nginx/logs/nginx.pid"
[ -d $logs_path ] || mkdir -p $logs_path
mv /usr/local/nginx/logs/access.log ${logs_path}/test.com-access.log-$d
kill -HUP $(cat $pid_path)
find $logs_path -mtime +30 | xargs rm -rf
执行脚本,查看日志
[root@localhost ~]# vi fenge.sh
[root@localhost ~]# chmod +x fenge.sh
[root@localhost ~]# ./fenge.sh
[root@localhost ~]# cd /var/log/nginx/
[root@localhost nginx]# ll
总用量 44
-rw-r--r--. 1 root root 43687 11月 26 22:43 test.com-access.log-20201125
配置Nginx实现连接超时
[root@localhost ~]# vi /usr/local/nginx/conf/nginx.conf
   #keepalive_timeout  0;
    keepalive_timeout  180;
    client_header_timeout 80;    ##等待客户端发送请求头的超时时间 超时会发送408错误
    client_body_timeout 80;    ##设置请求体的读超时时间

[root@localhost ~]# systemctl restart nginx


 820
820

 被折叠的 条评论
为什么被折叠?
被折叠的 条评论
为什么被折叠?
 到【灌水乐园】发言


