


在MediaPipe框架解析(二):mediapipe helloworld中我们成功运行了c++ hellowrold以及安卓的helloworld,其中安卓的helloworld是一个比较有意思的相机画面边缘识别demo,本章我打算重新回到“Hello World! in C++ example”,通过深入helloworld来学习mediapipe框架,了解框架的基本运行机制。
代码解析
namespace mediapipe {
absl::Status PrintHelloWorld() {
  // Configures a simple graph, which concatenates 2 PassThroughCalculators.
  CalculatorGraphConfig config =
      ParseTextProtoOrDie<CalculatorGraphConfig>(R"pb(
        input_stream: "in"
        output_stream: "out"
        node {
          calculator: "PassThroughCalculator"
          input_stream: "in"
          output_stream: "out1"
        }
        node {
          calculator: "PassThroughCalculator"
          input_stream: "out1"
          output_stream: "out"
        }
      )pb");

  CalculatorGraph graph;
  MP_RETURN_IF_ERROR(graph.Initialize(config));
  MP_ASSIGN_OR_RETURN(OutputStreamPoller poller,
                      graph.AddOutputStreamPoller("out"));
  MP_RETURN_IF_ERROR(graph.StartRun({}));
  // Give 10 input packets that contains the same string "Hello World!".
  for (int i = 0; i < 10; ++i) {
    MP_RETURN_IF_ERROR(graph.AddPacketToInputStream(
        "in", MakePacket<std::string>("Hello World!").At(Timestamp(i))));
  }
  // Close the input stream "in".
  MP_RETURN_IF_ERROR(graph.CloseInputStream("in"));
  mediapipe::Packet packet;
  ABSL_LOG(ERROR) << "start Poll";
  // Get the output packets string.
  while (poller.Next(&packet)) {
    ABSL_LOG(INFO) << packet.Get<std::string>();
  }
  return graph.WaitUntilDone();
}
}  // namespace mediapipe

int main(int argc, char** argv) {
  google::InitGoogleLogging(argv[0]);
  ABSL_CHECK(mediapipe::PrintHelloWorld().ok());
  return 0;
}
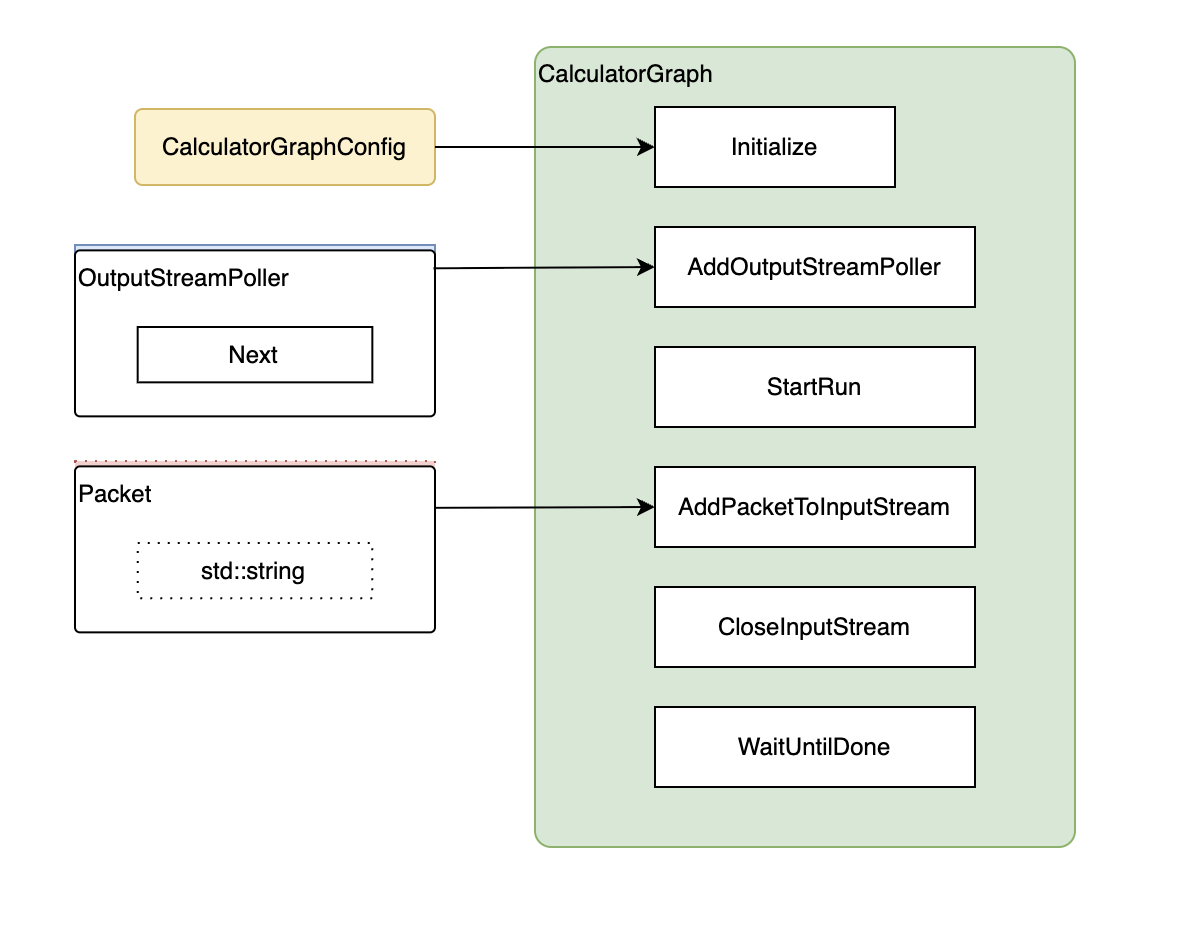
以上就是helloworld的调用代码,功能挺简单的,主要实现了通过addPacketToInputStream方法将Packet添加到“in”中,Packet会自动经过PassThroughCalculator的Process后再经过OutputStreamPoller将处理后的Packet输出。整个流程主要涉及到以下几个概念:
CalculatorGraphConfig
通过直接将一个std::string类型的配置传给ParseTextProtoOrDie就可以构建一个CalculatorGraphConfig,配置中描述了两个PassThroughCalculator类型的node,每一个node其实就是一个calculator的概念。后面会详细分析Calculator是怎么从配置中加载的
OutputStreamPoller
OutputStreamPoller主要用来从CalculatorGraph中接收结果回调,在这里是Packet<std::string>类型的数据。
Packet<std::string>
在CalculatorGraph中流转的数据封装, 这里封装的是std::string
CalculatorGraph
核心类,这里用到了initialize/addOutputStreamPoller/startRun/addPacketToInputStream/closeInputStream/WaitUntilDone等方法。
PassThroughCalculator
这里是通过在配置中定义的字符串加载出来的对象,主要是实现了数据拷贝的功能。
CalculatorGraph初始化并StartRun之后就可以通过AddPacketToInputStream添加输入数据,并循环从OutputStreamPoller中获取输出数据即可。
配置加载
配置类通过在字符串中定义,通过CalculatorGraph的Initialize方法将相应的配置转为了对应的c++对象
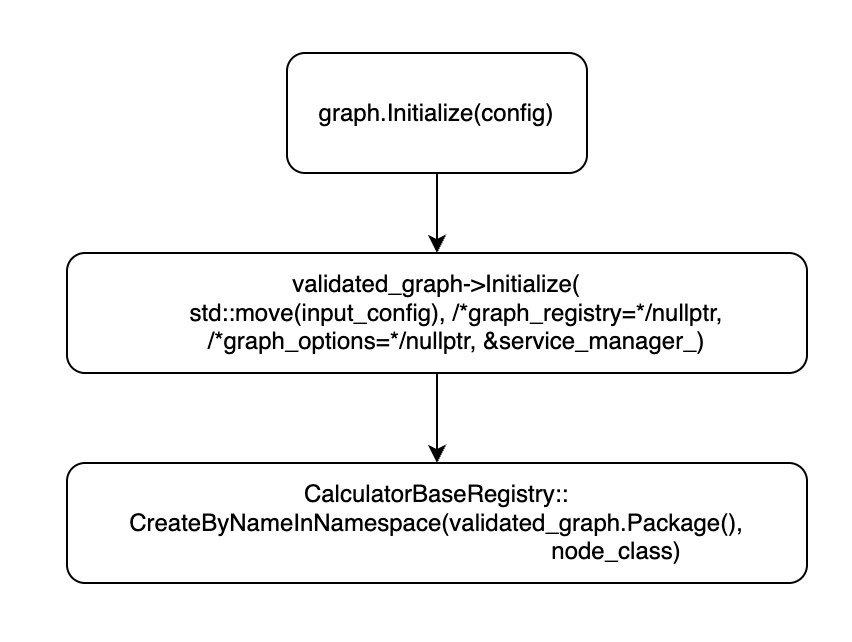
CalculatorBaseRegistry::CreateByNameInNamespace方法实际上是GlobalFactoryRegistry::CreateByNameInNamespace

在mediapipe/framework/deps/registration.h中的class GlobalFactoryRegistry中定义
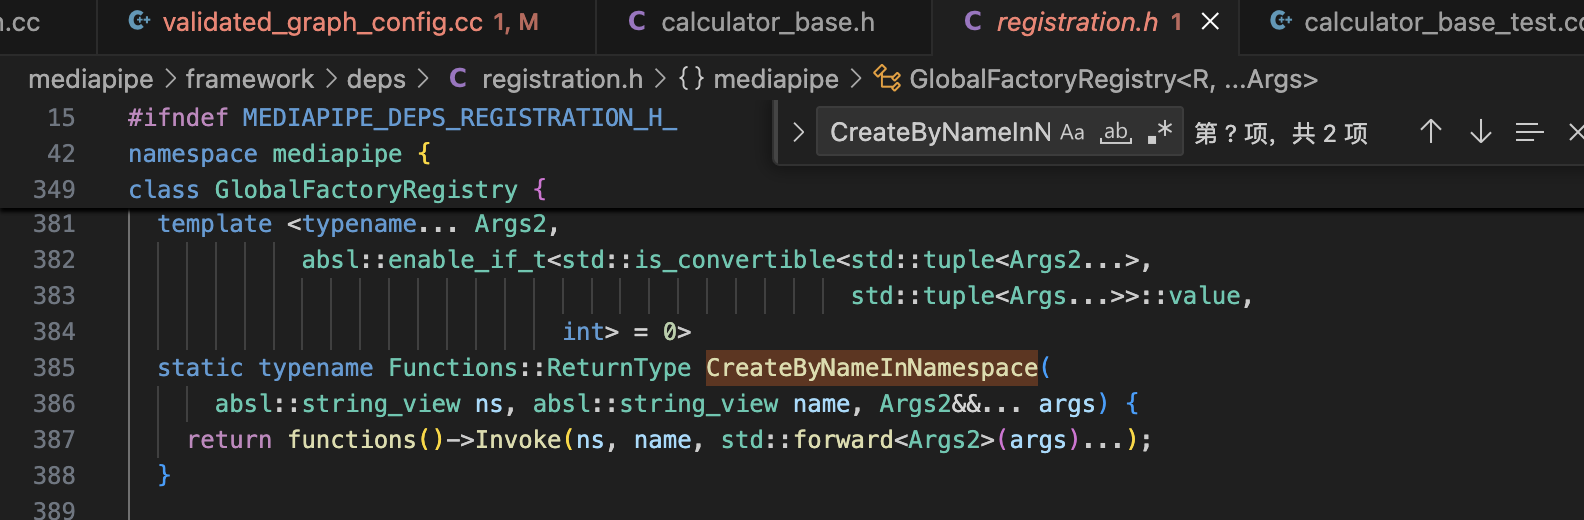
在Invoke方法中通过之前注册在functions_中的函数来执行具体操作,具体代码实现如下:
  template <typename... Args2,
            absl::enable_if_t<std::is_convertible<std::tuple<Args2...>,
                                                  std::tuple<Args...>>::value,
                              int> = 0>
  ReturnType Invoke(absl::string_view name, Args2&&... args)
      ABSL_LOCKS_EXCLUDED(lock_) {
    Function function;
    {
      absl::ReaderMutexLock lock(&lock_);
      auto it = functions_.find(name);
      if (it == functions_.end()) {
        return absl::NotFoundError(
            absl::StrCat("No registered object with name: ", name));
      }
      function = it->second;
    }
    return function(std::forward<Args2>(args)...);
  }
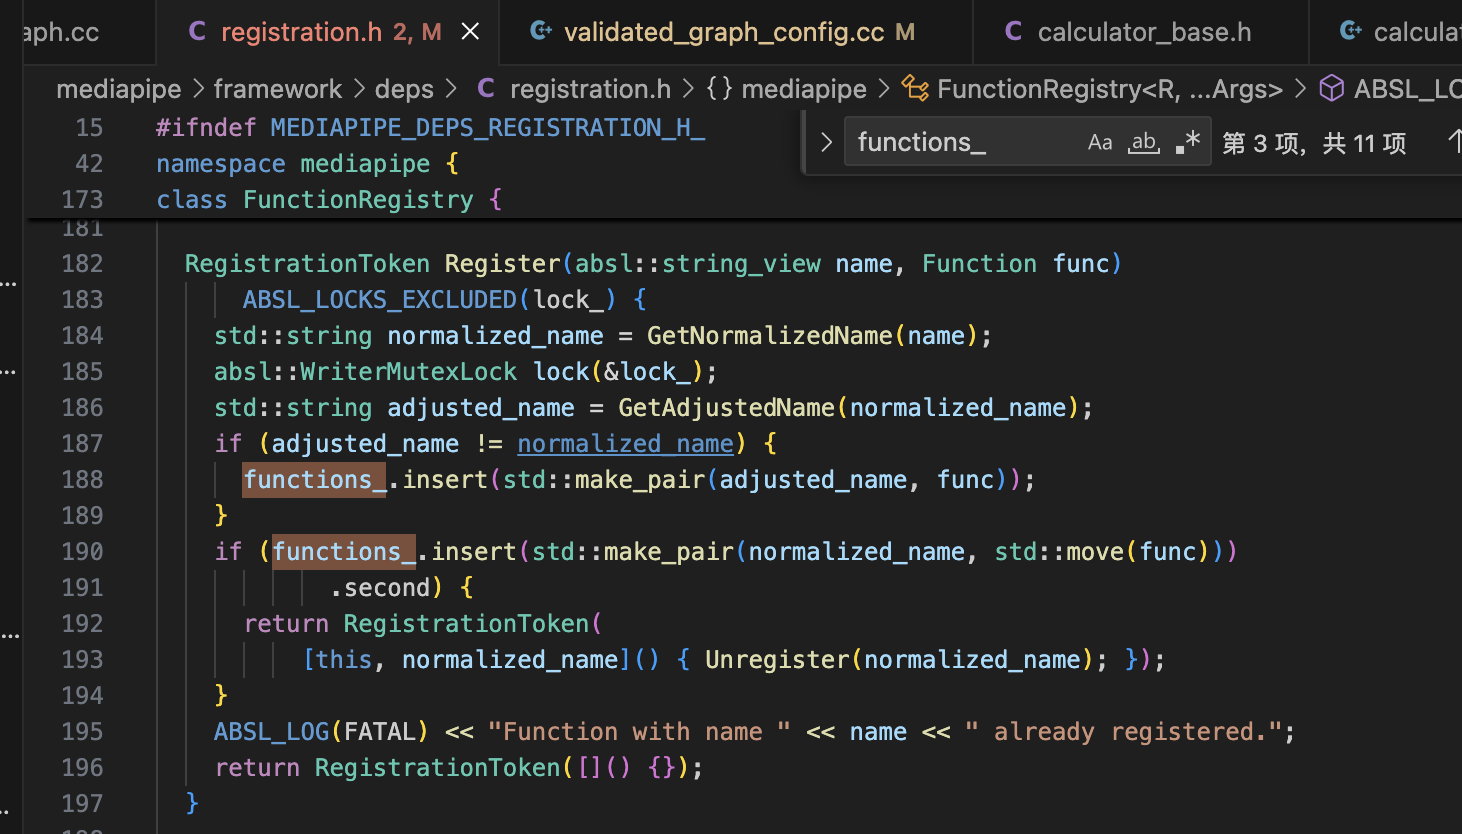
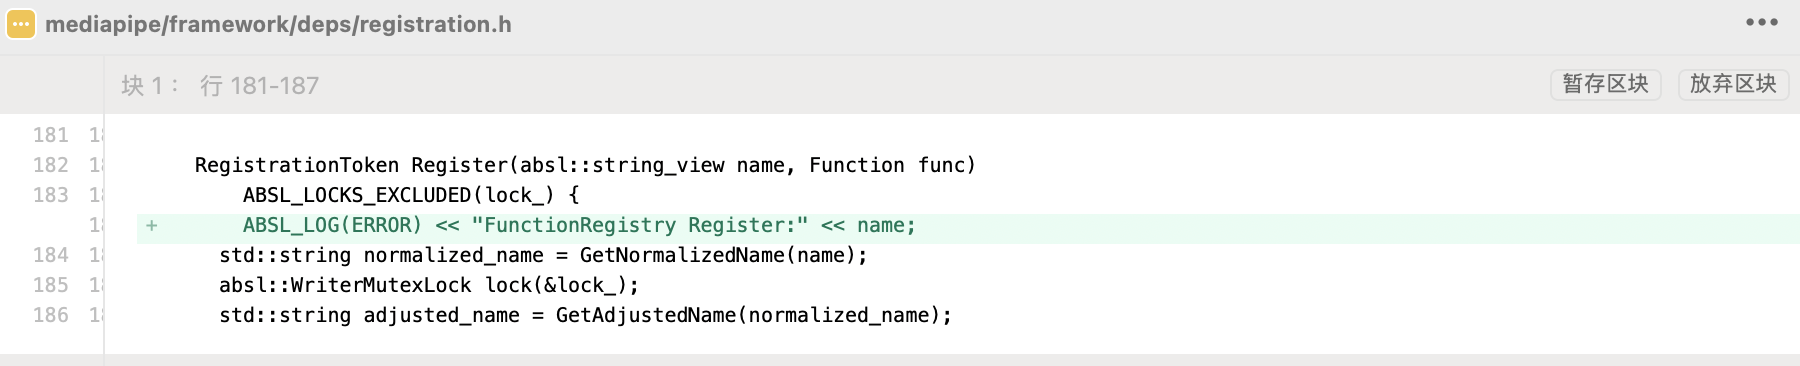
functions_中的函数是在如下图所示的Register方法中注册
为了追溯到functions_的注册过程,我添加了如下图所示的日志打印
添加的日志打印代码得到了如下所示的打印,可以看到默认注册了如下图的9种类型functions_

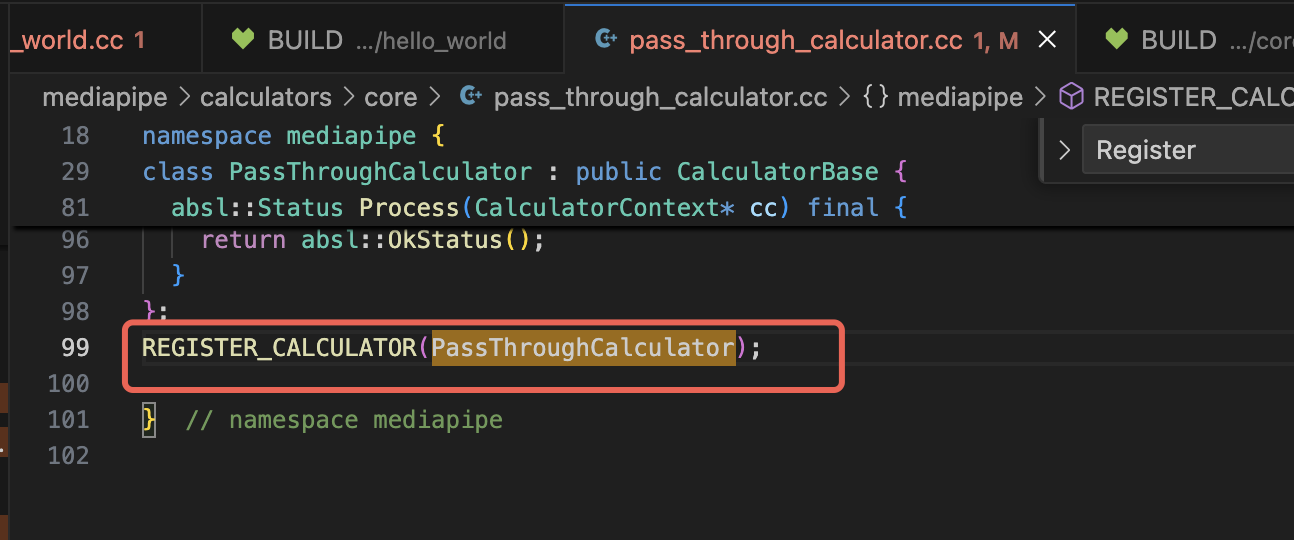
另外通过调整一些日志打印位置后发现FunctionRegistry的调用是在main方法之前,调用位置位于.cc文件中,例如Register:PassThroughCalculator是在pass_through_calculator.cc中通过REGISTER_CALCULATOR宏定义来调用的。
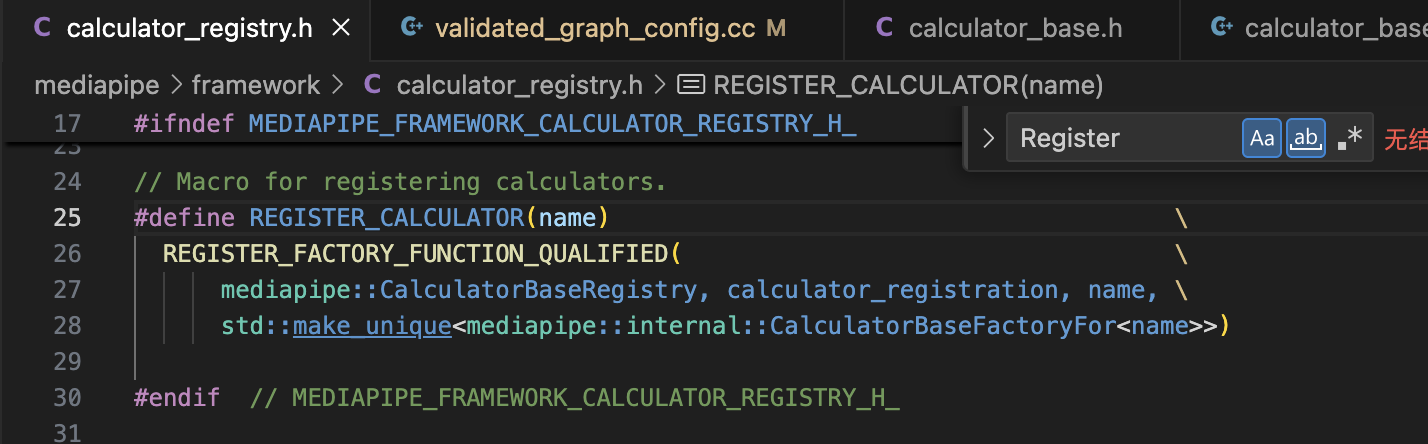
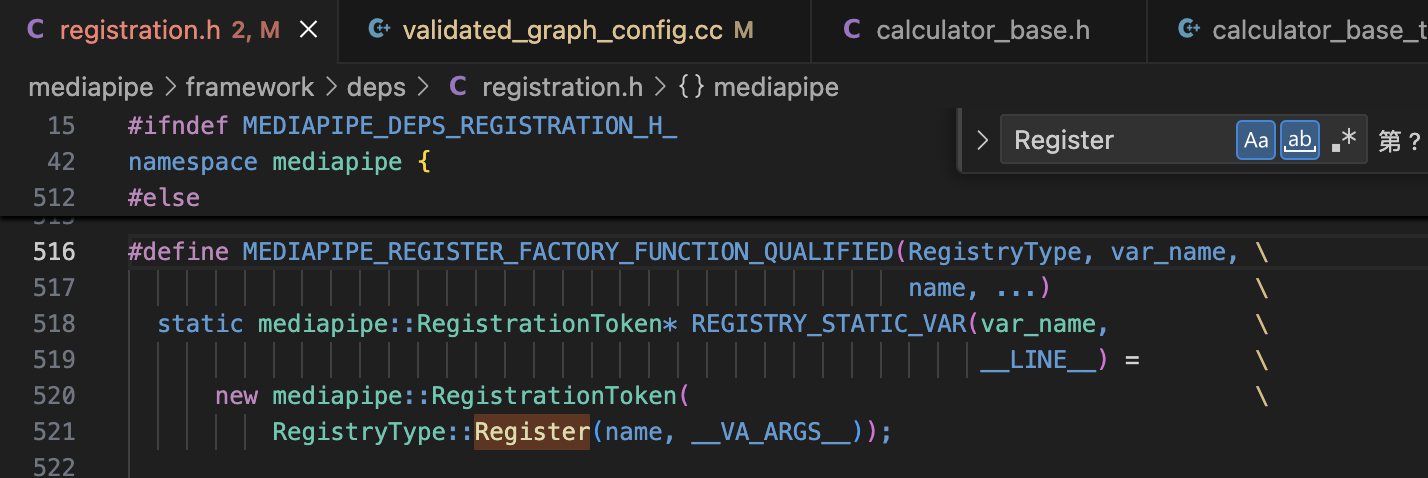
从下二图可看到REGISTER_CALCULATOR通过另一个宏定义REGISTER_FACTORY_FUNCTION_QUALIFIED实现了一个全局static变量的定义,该变量会在程序初始化时被初始化,从而实现了注册。
小结
看完了“Hello World! in C++ example”之后就对mediapipe的基本运转流程有了一个基本的了解,但是到目前为止还未设计到跟机器学习相关的内容。下一章我会继续分析安卓端的helloworld。
MediaPipe框架解析(四):android edge_detection详解


 8860
8860

 被折叠的 条评论
为什么被折叠?
被折叠的 条评论
为什么被折叠?
 到【灌水乐园】发言


