


在MIT6.S081采用gdb调试qemu的实验中,一开始老出现这样的错误
启动在xv6-lab目录下,开启终端启动GDB调试,弹出警告
hitszfxy@HItfxy:~/xv6/lab_source/xv6-labs-2020$ gdb
GNU gdb (GDB) 10.1
Copyright (C) 2020 Free Software Foundation, Inc.
License GPLv3+: GNU GPL version 3 or later <http://gnu.org/licenses/gpl.html>
This is free software: you are free to change and redistribute it.
There is NO WARRANTY, to the extent permitted by law.
Type "show copying" and "show warranty" for details.
This GDB was configured as "x86_64-pc-linux-gnu".
Type "show configuration" for configuration details.
For bug reporting instructions, please see:
<https://www.gnu.org/software/gdb/bugs/>.
Find the GDB manual and other documentation resources online at:
    <http://www.gnu.org/software/gdb/documentation/>.

For help, type "help".
Type "apropos word" to search for commands related to "word".
warning: File "/home/hitszfxy/xv6/lab_source/xv6-labs-2020/.gdbinit" auto-loading has been declined by your `auto-load safe-path' set to "$debugdir:$datadir/auto-load".
最后一段,查找相关资料,需要添加修改.gdbinit文件
auto-load safe-path' set to "$debugdir:$datadir/auto-load".

因为.开头的文件,在目录下是隐藏文件,因此需要采用
ls -dl .*命令查看
hitszfxy@HItfxy:~/xv6/lab_source/xv6-labs-2020$ ls -dl .*
drwxr-xr-x 8 hitszfxy hitszfxy 4096 3月  28 16:44 .
drwxr-xr-x 3 hitszfxy hitszfxy 4096 3月  17 15:41 ..
-rw-r--r-- 1 hitszfxy hitszfxy   86 9月  19  2020 .dir-locals.el
-rw-r--r-- 1 hitszfxy hitszfxy  248 9月  19  2020 .editorconfig
-rw-r--r-- 1 hitszfxy hitszfxy  208 3月  28 16:44 .gdbinit
-rw-r--r-- 1 hitszfxy hitszfxy  130 9月  19  2020 .gdbinit.tmpl-riscv
drwxr-xr-x 8 hitszfxy hitszfxy 4096 9月  19  2020 .git
-rw-r--r-- 1 hitszfxy hitszfxy  195 9月  19  2020 .gitignore
得到以下文件,通过
cat -.gdbinit指令查看
hitszfxy@HItfxy:~/xv6/lab_source/xv6-labs-2020$ cat .gdbinit
set confirm off
set architecture riscv:rv64
target remote 127.0.0.1:26000
symbol-file kernel/kernel
set disassemble-next-line auto
.gdbinit命令中是否为riscv:rv64,发现是的,无须修改,如果不是的话,可以通过
vi .gdbinit
进入修改,输入i进入编辑界面,编辑完成之后,按下esc,输入:wq保存退出。
然后修改自己 home 目录下的 .gdbinit 文件,允许 gdb 在xv6-labs-2020这个目录启动的时候,加载该文件夹下的 .gdbinit 文件。我这里路径为/home/hitszfxy/xv6/lab_source
/xv6-labs-2020/
echo "add-auto-load-safe-path /home/hitszfxy/xv6/lab_source
/xv6-labs-2020/.gdbinit" >> ~/.gdbinit
目录不同,请按照这里修改
echo "add-auto-load-safe-path "你的路径/.gdbinit" >> ~/.gdbinit
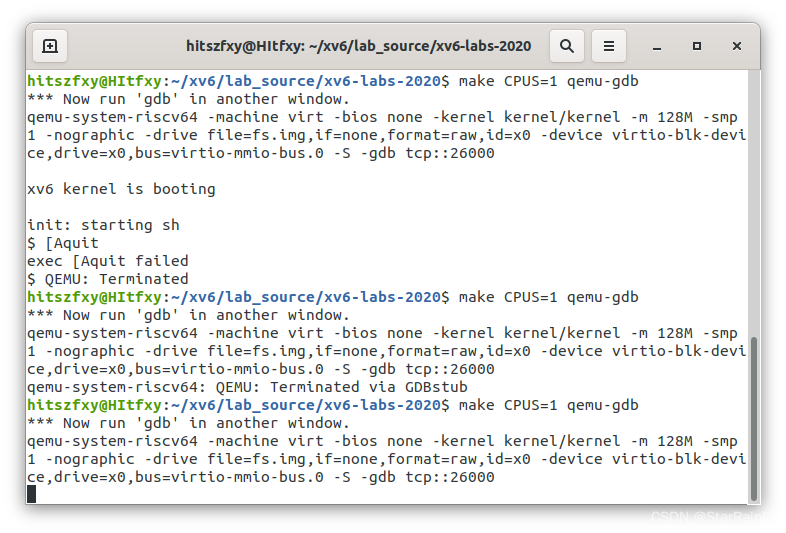
之后启动在/home/hitszfxy/xv6/lab_source/xv6-labs-2020/目录下启动make CPUS=1 qemu-gdb
hitszfxy@HItfxy:~/xv6/lab_source/xv6-labs-2020$ make CPUS=1 qemu-gdb
*** Now run 'gdb' in another window.
qemu-system-riscv64 -machine virt -bios none -kernel kernel/kernel -m 128M -smp 1 -nographic -drive file=fs.img,if=none,format=raw,id=x0 -device virtio-blk-device,drive=x0,bus=virtio-mmio-bus.0 -S -gdb tcp::26000
端口号为26000
此时在/home/hitszfxy/xv6/lab_source/xv6-labs-2020/目录下重新打开一个终端,输入gdb-multiarch
hitszfxy@HItfxy:~/xv6/lab_source/xv6-labs-2020$ gdb-multiarch
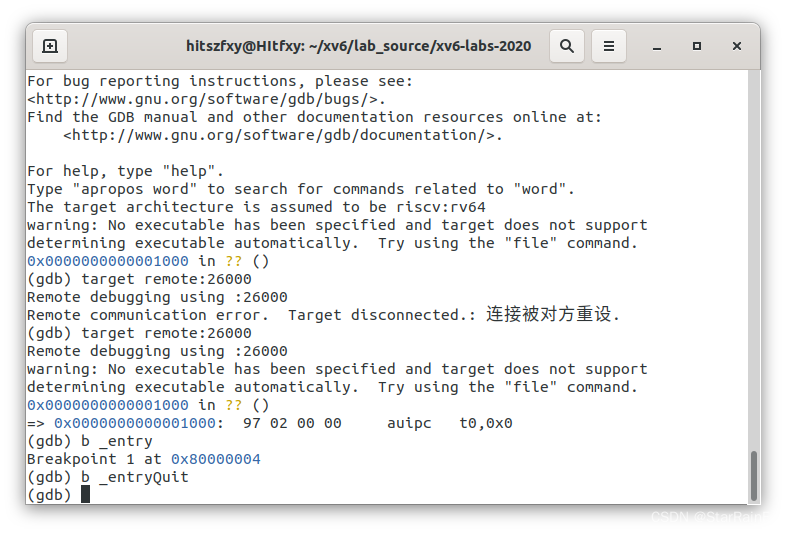
进入gdb调试界面,使用target remote:26000进行连接(target remote : 端口号)
(gdb) target remote:26000
Remote debugging using :26000
warning: No executable has been specified and target does not support
determining executable automatically.  Try using the "file" command.
0x0000000000001000 in ?? ()
=> 0x0000000000001000:	97 02 00 00	auipc	t0,0x0
之后就可以添加断点,开始调试内核启动过程啦!
总结:
1.修改home目录下的.gdbinit文件
echo "add-auto-load-safe-path /home/hitszfxy/xv6/lab_source
/xv6-labs-2020/.gdbinit" >> ~/.gdbinit
2.新建终端1 启动qemu-gdb
hitszfxy@HItfxy:~/xv6/lab_source/xv6-labs-2020$ make CPUS=1 qemu-gdb3.新建终端2 启动gdb-multiarch,并建立连接,(注意采用gdb-multiarch启动,而不是gdb)
hitszfxy@HItfxy:~/xv6/lab_source/xv6-labs-2020$ gdb-multiarch
(gdb) target remote:26000
4.开始调试


 597
597

 被折叠的 条评论
为什么被折叠?
被折叠的 条评论
为什么被折叠?
 到【灌水乐园】发言


