


 本文深入探讨了前后端通信的三种主流方法:reqwest、axios和ajax。通过实例展示了每种方法的具体应用,包括请求封装、响应处理及错误管理,适用于web开发人员提升项目中的数据交互能力。
在我们的项目,如何来通过前后端进行通信呢。下来我们分别介绍几种方法。
1.reqwest方式
reqwest简介
It's AJAX
All over again. Includes support for xmlHttpRequest, JSONP, CORS, and CommonJS Promises A.
reqwest的写法的ajax写法类似,看下面例子
// 普通请求
reqwest({
    url: 'path/to/json'
  , type: 'json'
  , method: 'post'
  , data: { foo: 'bar', baz: 100 }        // 入参
  , error: function (err) { }
  , success: function (resp) {
      qwery('#content').html(resp.content)
    }
})

// jsonp请求
reqwest({
    url: 'path/to/json'
  , type: 'jsonp'
  , method: 'get'                    // jsonp请求,method可不写,写成post,依然会被浏览器默认为get
  , error: function (err) { }
  , success: function (resp) {
      qwery('#content').html(resp.content)
    }
})

// cors请求
reqwest({
    url: 'path/to/json'
  , type: 'json'
  , method: 'post'
  , contentType: 'application/x-www-form-urlencoded'
  , crossOrigin: true                  // cors跨域,服务端与客户端存在cookie等数据凭证交互时需要设置crossOrigin,withCredentials
  , withCredentials: true
  , error: function (err) { }
  , success: function (resp) {
      qwery('#content').html(resp.content)
    }
})

// promise写法
reqwest({
    url: 'path/to/data.jsonp?foo=bar'
  , type: 'jsonp'
  , jsonpCallback: 'foo'
})
  .then(function (resp) {
    qwery('#content').html(resp.content)
  }, function (err, msg) {
    qwery('#errors').html(msg)
  })
  .always(function (resp) {
    qwery('#hide-this').hide()
  })
下来看看在项目中的使用,来看一个get请求
首先封装一个connection.js
import reqwest from 'reqwest'
import Cookies from 'js-cookie'

class Connection {
    constructor(url, headers) {
        this._url = url;
        this._headers = headers;
    }

    requestGet() {
        let url = this._url;
        if(!_url) {
            return Promise.reject(null);
        }
        let _headers = this._headers
        let token = Cookies.get('access_token')
        if(token) {
            if(!_headers) {
                _headers = {};
            }
            _headers.Authorization = 'Bearer ' + token;
        }
        return new Promise(function(resolve, reject) {
            reqwest({
                url: _url,
                type: 'json',
                method: 'GET',
                headers: _headers,
                success: resolve,
                error: reject
            })
        })
    }
}
export default Connection
request.js
import Connection from './connection.js';
import API from '../properties/api.js';

class Request {
    static getUserInfos(subjectId, success, failure) {
        const conn = new Connection(API.GetWorkFlowStatusAndNextActivities + '?subjectId=' + subjectId);
        conn.requestGet().then(success, failure);
    }
}
export default Request;
如何使用
Request.getUserInfos(subjectId,(data)=>{
    console.log(data);
},(err)=>{
    console.log(err)
})
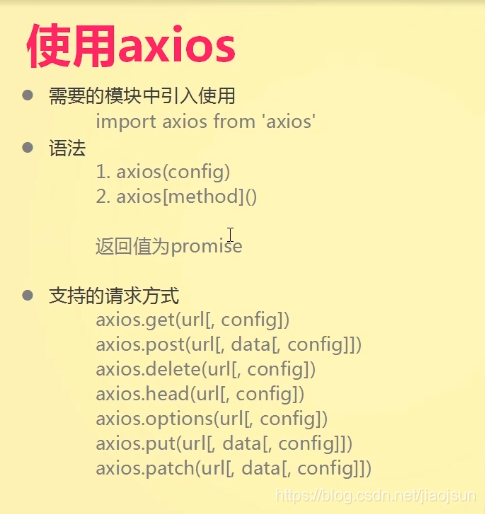
2.axios方式
看一下axios的基本使用
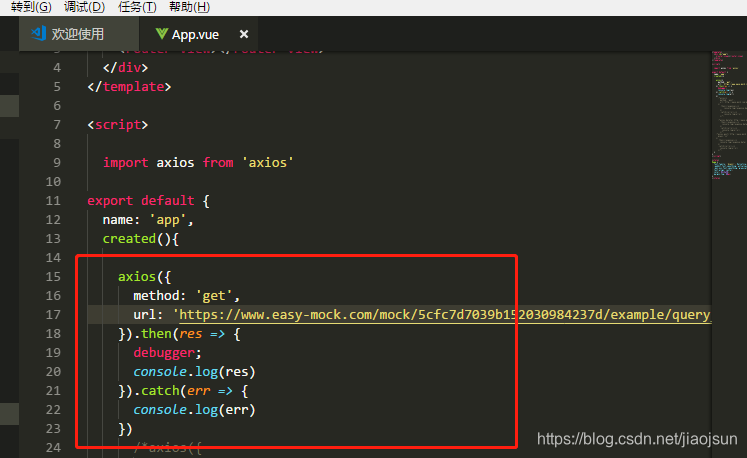
下来看看在项目中具体是怎么用的
request.js
import axios from 'axios';
import { getToken } from '@utils/auth';

const service = axios.create({
  baseURL: process.env.BASE_API,
  timeout: 150000
});

// request拦截器
service.interceptors.request.use(config => {
  if (getToken()) {
    config.headers.Authorization = 'Bearer ' + getToken();
  }
  return config;
}, error => {
  console.error(error);
  Promise.reject(error);
});

service.interceptors.response.use(
  response => {
    const res = response.data;
    if (res && res.er.Message === 'Success') {
      return res;
    } else {
      console.error(res.erMessage);
    }
  },
  error => {
    console.error(error);
    Promise.reject(error);
  }
);

export default service;
project.js
import request from '@/utils/request';
const workflowServiceHost = 'http://snbimsit.cnsuning.com/wf-snxd';

export function getDrawingInfo(param) {
  return request({
    url: `${workflowServiceHost}/api/WorkFlow/Project/GetItemInfoByWorkflowId`,
    method: 'get',
    params: params
  })
}
使用
    import { getDrawingInfo } from '@/api/project';

    getDrawingInfo({ workflowId: this.workflowId }).then(res => {
      if (res.items && res.items.Item) {
        const obj = res.items.Item;
        Object.keys(this.dialogData).forEach(key => {
          this.dialogData[key] = obj[key];
        });
      }
    });
3.ajax方式
jtl.util.Request.getData = function(url, options) {
    options = options || {};
    options.dataType = options.dataType || 'json';
    var cache = options.cache || true;
    url = jtl.util.Url.toHttps(url);
    return new Promise(function(resolve, reject) {
        var params = {
            cache: cache,
            url: url,
            type: 'GET',
            success: function(data) {
                resolve(data);
            },
            error: function(ex) {
                jtl.util.Common.error('getData error, url: ' + url, ex);
                reject(ex);
            }
        };
        Object.assign(params, options);
        $.ajax(params);
    });
};
使用
      jtl.util.Request.getData(url).then(data => {
        this.data = data;
      });


 被折叠的 条评论
为什么被折叠?
被折叠的 条评论
为什么被折叠?
 到【灌水乐园】发言


