


 本文介绍了如何在SpringBoot项目中集成Swagger,实现API文档的自动生成,并探讨了如何控制Swagger在开发和生产环境中的启用。详细讲解了配置Swagger、扫描接口及部署策略,适合前后端分离项目的API管理。
一、Swagger简介
1.1前后端分离
前端—> 前端控制层、视图层
后端—> 后端控制层、服务层、数据访问层
前后端通过API进行交互
前后端相对独立且松耦合
1.2产生的问题
前后端集成,前端或者后端无法做到“及时协商,尽早解决”,最终导致问题集中爆发
1.3解决方案
首先定义schema【计划的提纲】,并实时跟踪最新的API,降低集成风险;
因此,Swagger应运而生
1.4Swagger
(一)号称世界上最流行的API框架
(二)Restful Api 文档在线自动生成器 => Api文档与API定义同步更新
(三)直接运行,在线测试API
(四)支持多种语言【如java、PHP等】
(五)官网
二、SpringBoot集成Swagger
2.1 新建一个SpringBoot=web项目
2.2 导入相关的依赖
	<!-- https://mvnrepository.com/artifact/io.springfox/springfox-swagger-ui -->
	<dependency>
		<groupId>io.springfox</groupId>
		<artifactId>springfox-swagger-ui</artifactId>
		<version>2.9.2</version>
	</dependency>
	<!-- https://mvnrepository.com/artifact/io.springfox/springfox-swagger2 -->
	<dependency>
		<groupId>io.springfox</groupId>
		<artifactId>springfox-swagger2</artifactId>
		<version>2.9.2</version>
	</dependency>
2.3创建config>SwaggerConfig
//定义配置类
@Configuration
@EnableSwagger2//开启swagger2
public class SwaggerConfig {

}
2.4配置Swagger
//配置Swagger的Docket的bean实例
@Bean
public Docket docket(){
return new Docket(DocumentationType.SWAGGER_2).apiInfo(apiInfo());
}
//配置swagger信息
public ApiInfo apiInfo(){
Contact contact = new Contact("琴江","http://www.zhaoliangliang.work/","1003989507@qq.com");
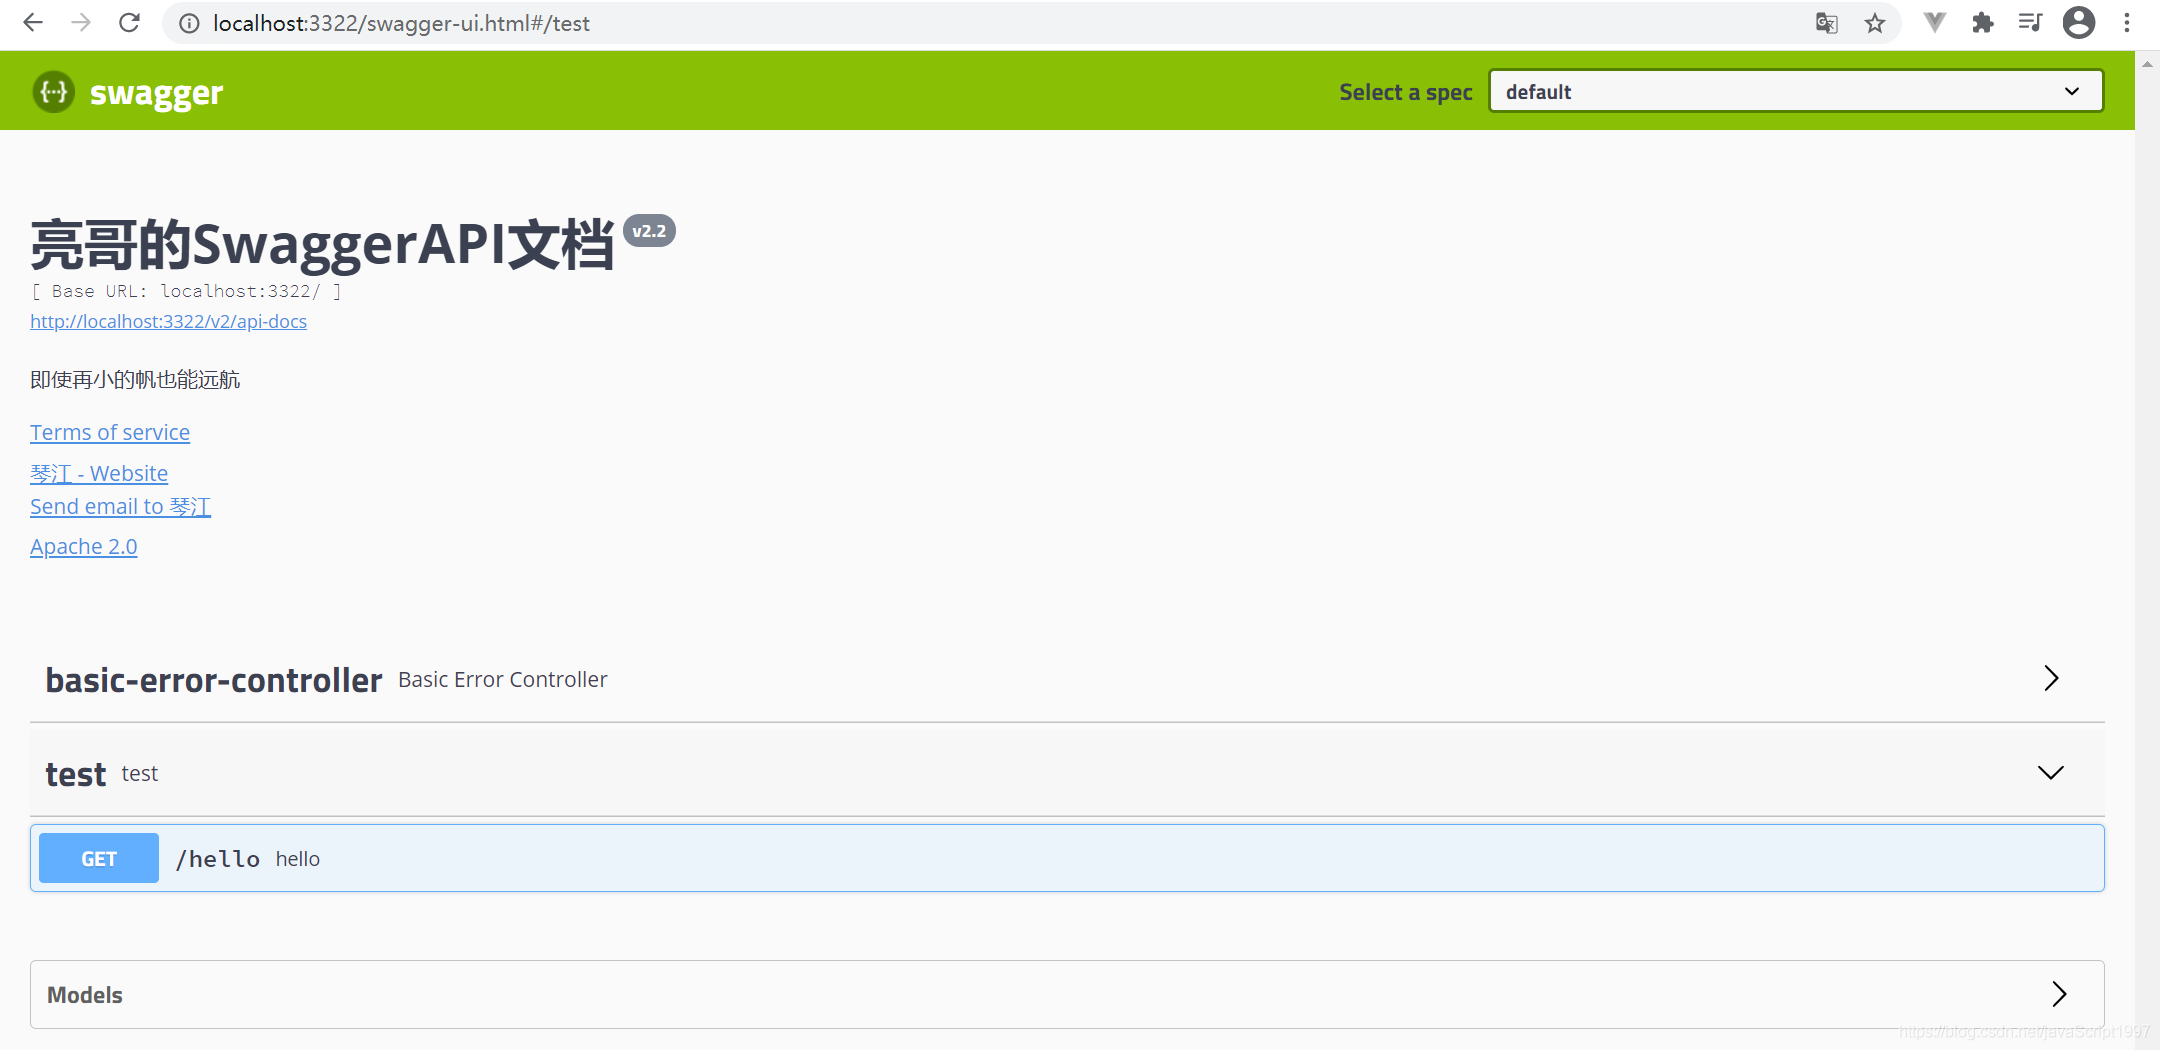
return new ApiInfo(
"亮哥的SwaggerAPI文档",
"即使再小的帆也能远航",
"v2.2",
"http://www.zhaoliangliang.work/",
contact,
"Apache 2.0",
"http://www.zhaoliangliang.work/",
new ArrayList()
);
}
2.5测试瞅瞅
三、Swagger配置扫描接口
//配置Swagger的Docket的bean实例
    @Bean
    public Docket docket(){
        return new Docket(DocumentationType.SWAGGER_2)
            .apiInfo(apiInfo())
            .select()
            //RequestHandlerSelectors,配置要扫描接口的方式
            //basePackage:指定要扫描的包
            //any():扫描全部
            //none():不扫描
            //withClassAnnotation:扫描类上的注解,参数是一个注解的反射对象
            //withMethodAnotation:扫描方法上的注解
            .apis(RequestHandlerSelectors.basePackage("com.teaiyang.swagger.controller"))
            //path() 过滤什么路径
            .paths(PathSelectors.ant("/swagger/**"))
            .build();
    }
配置是否启动Swagger
//配置Swagger的Docket的bean实例
    @Bean
    public Docket docket(){
        return new Docket(DocumentationType.SWAGGER_2)
            .apiInfo(apiInfo())
            .groupName("亮亮组")
            .enable(false)//enable是否启动swagger,如果false 则swagger不能再浏览器中访问
            .select()
            .apis(RequestHandlerSelectors.basePackage("com.teaiyang.swagger.controller"))
            //.paths(PathSelectors.ant("/swagger/**"))
            .build();
    }
四、问题:我只希望我的Swagger在生成环境中使用,在发布环境不使用?
(一)在application.yml中
springconfig:
  enable: true
(二)swagger配置类中
@Value("${springconfig.enable}")
    private boolean enable;
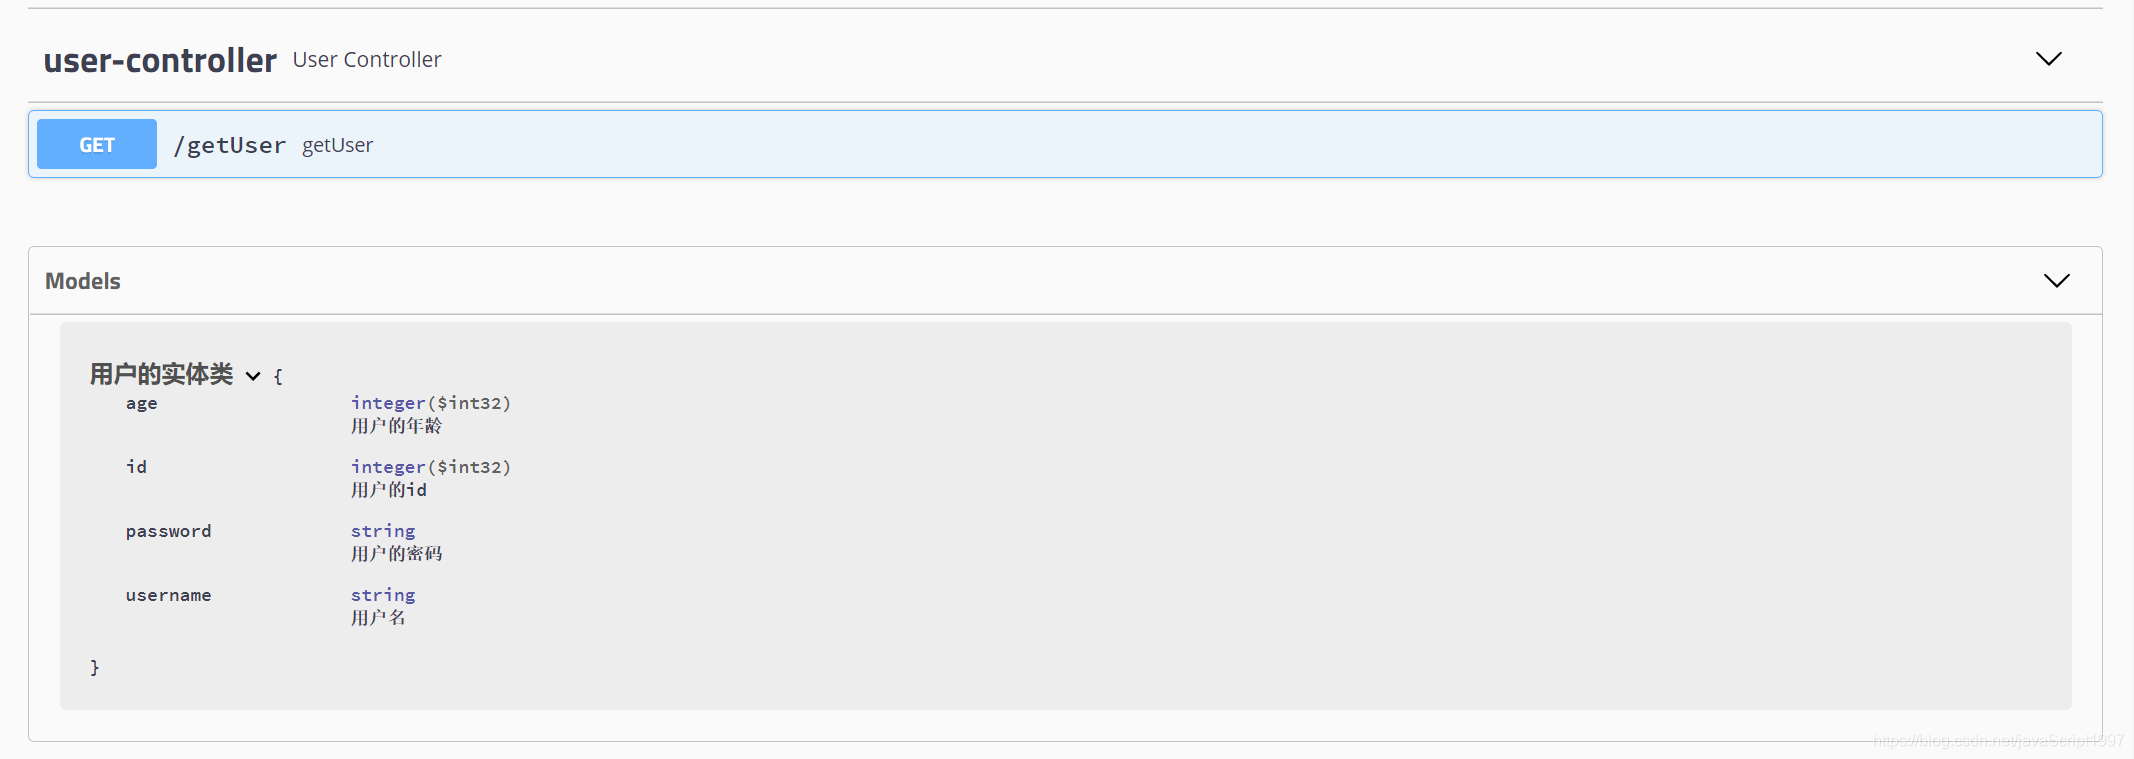
五、用户实体
@ApiModel( ) //主要用来标注返回的实体类
@ApiModelProperty( ) //主要用来标注实体类中的属性
@ApiModel("用户的实体类")
public class User implements Serializable{

    @ApiModelProperty("用户的id")
    private Integer id;

    @ApiModelProperty("用户名")
    private String username;

    @ApiModelProperty("用户的密码")
    private String password;

    @ApiModelProperty("用户的年龄")
    private Integer age;

    get/set/tostring
@ApiModelProperty用来标注API接口
@RestController
public class UserController {

    @ApiModelProperty("得到一个user")
    @GetMapping("/getUser")
    public User getUser(){
        return new User(1,"赵亮亮","papap",12);
    }
}
测试:


 8233
8233

 被折叠的 条评论
为什么被折叠?
被折叠的 条评论
为什么被折叠?
 到【灌水乐园】发言


