


 本文介绍如何使用Nginx进行访问控制,包括拒绝特定IP访问、仅允许指定IP访问以及设置用户认证的方法,并展示了HTTPS服务的配置步骤。
访问控制
可以用在http, server, location, limit_except
allow:设定允许哪台或哪些主机访问,多个参数间用空格隔开
deny:设定禁止哪台或哪些主机访问,多个参数间用空格隔开
实例
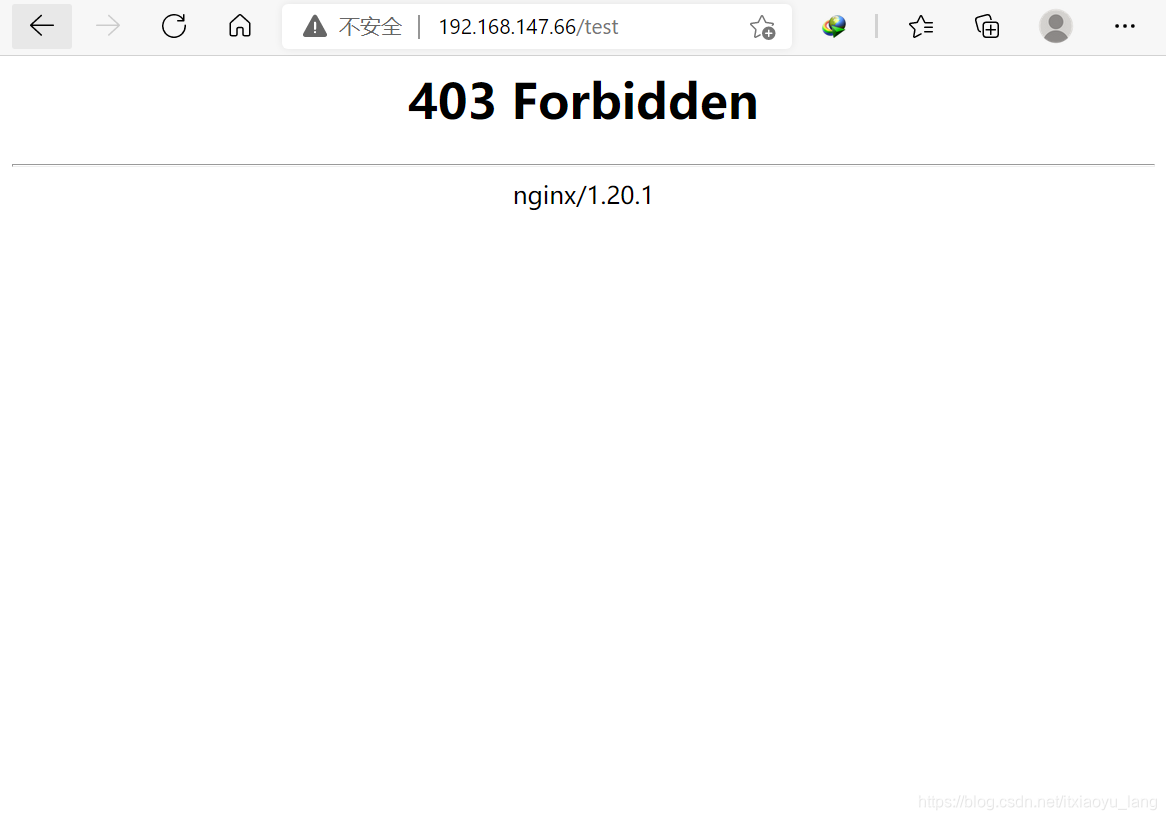
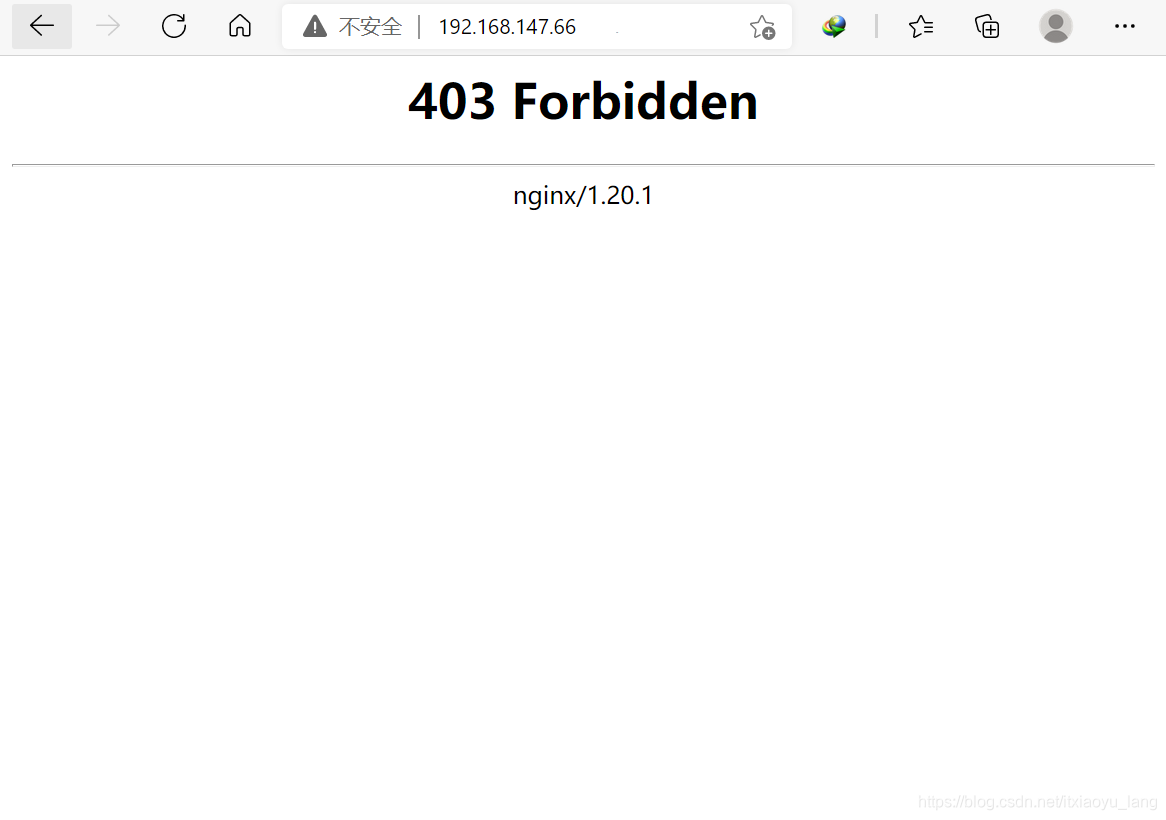
拒绝访问192.168.147.66访问
[root@localhost ~]# vim /usr/local/nginx/conf/nginx.conf
location /test {
deny 192.168.147.66;
echo "qqww";
}
[root@localhost ~]# nginx -s reload
[root@localhost ~]# curl 192.168.147.66/test
<html>
<head><title>403 Forbidden</title></head>
<body>
<center><h1>403 Forbidden</h1></center>
<hr><center>nginx/1.20.1</center>
</body>
</html>
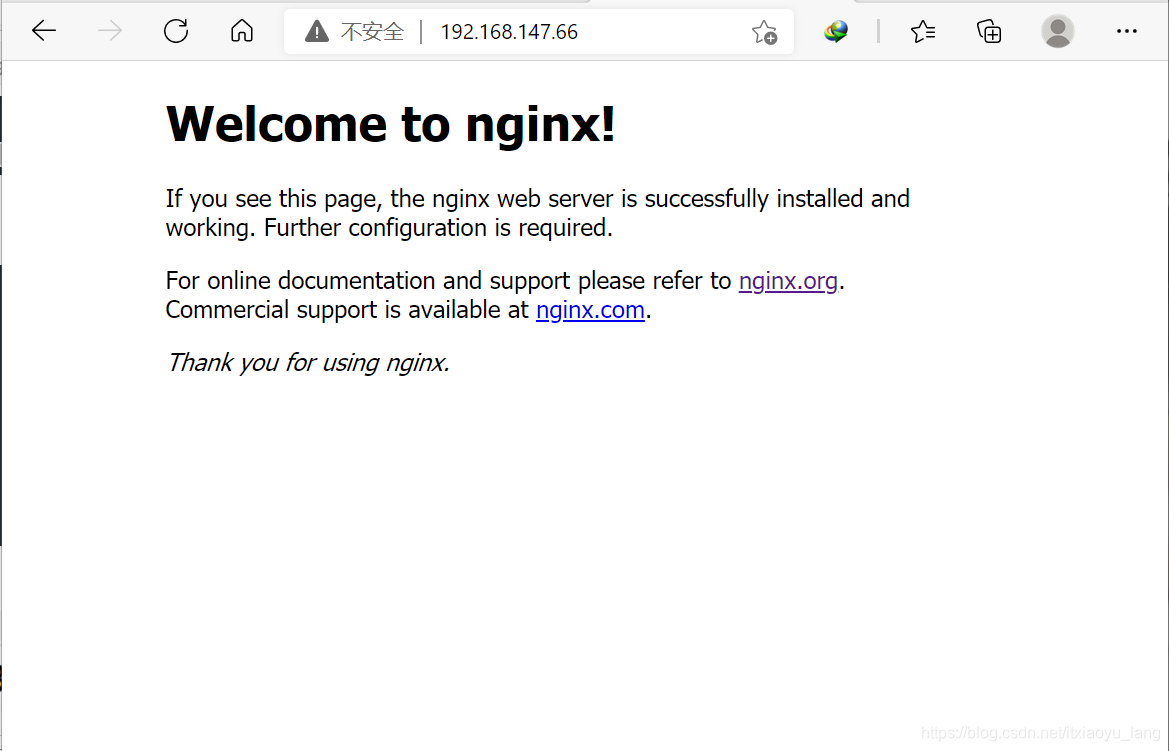
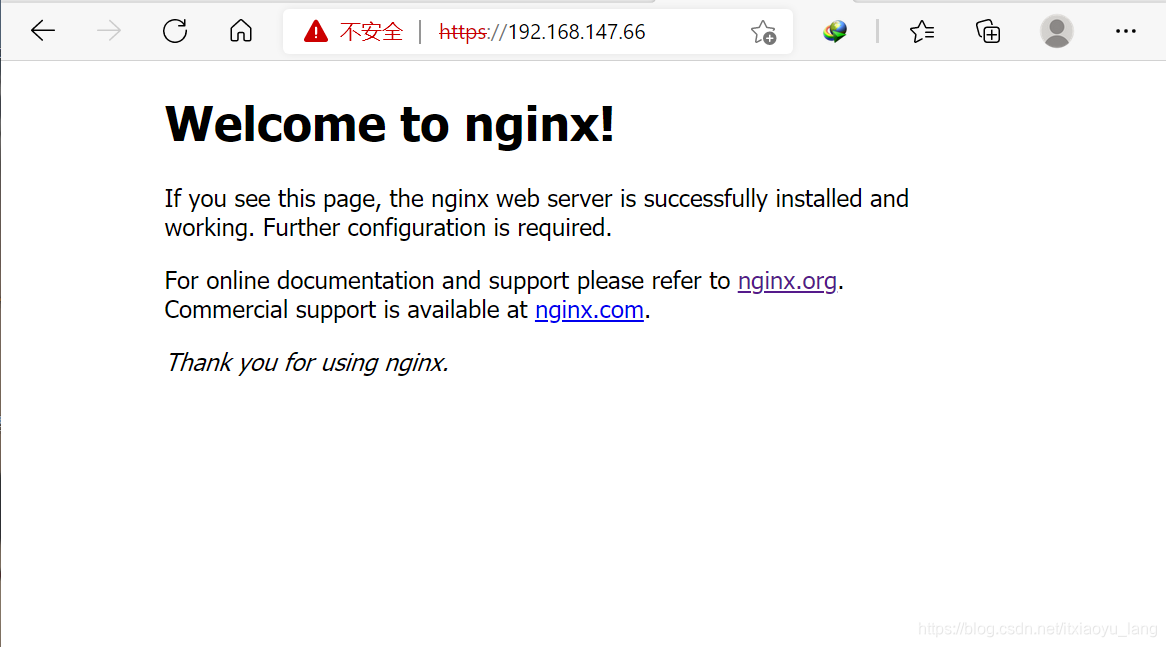
[root@localhost ~]# curl 192.168.147.66
<!DOCTYPE html>
<html>
<head>
<title>Welcome to nginx!</title>
<style>
body {
width: 35em;
margin: 0 auto;
font-family: Tahoma, Verdana, Arial, sans-serif;
}
</style>
</head>
<body>
<h1>Welcome to nginx!</h1>
<p>If you see this page, the nginx web server is successfully installed and
working. Further configuration is required.</p>
<p>For online documentation and support please refer to
<a href="http://nginx.org/">nginx.org</a>.<br/>
Commercial support is available at
<a href="http://nginx.com/">nginx.com</a>.</p>
<p><em>Thank you for using nginx.</em></p>
</body>
</html>
禁止除了192.168.147.66之外的所有ip访问
[root@localhost ~]# vim /usr/local/nginx/conf/nginx.conf

        location /test {
            allow 192.168.147.66;
            deny all;
            echo  "qqww";
        }
[root@localhost ~]# nginx -s reload
[root@localhost ~]# curl 192.168.147.66/test
qqww

在http上禁止192.168.147.66访问
[root@localhost ~]# vim /usr/local/nginx/conf/nginx.conf

http {
    include       mime.types;
    default_type  application/octet-stream;
    deny 192.168.147.66;

[root@localhost ~]# nginx -s reload
[root@localhost ~]# curl 192.168.147.66
<html>
<head><title>403 Forbidden</title></head>
<body>
<center><h1>403 Forbidden</h1></center>
<hr><center>nginx/1.20.1</center>
</body>
</html>
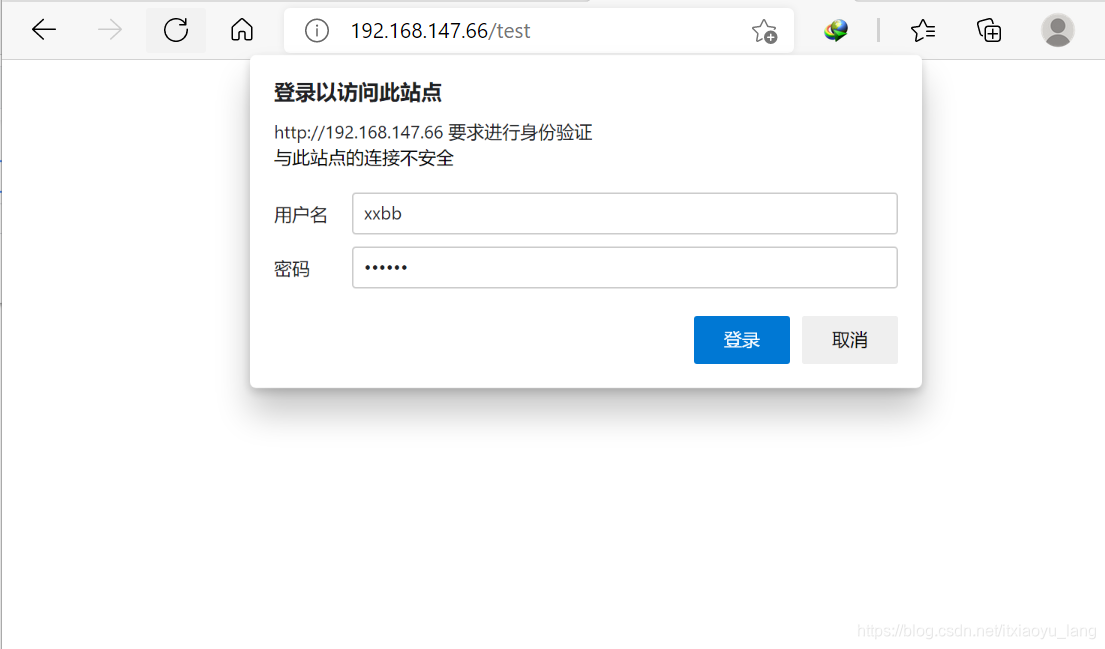
用户认证
可以用在http,server,location
auth_basic "欢迎信息";
auth_basic_user_file "/path/to/user_auth_file"
user_auth_file内容格式为:
username:password
这里的密码为加密后的密码串,建议用htpasswd来创建此文件
htpasswd -c -m /path/to/.user_auth_file USERNAME
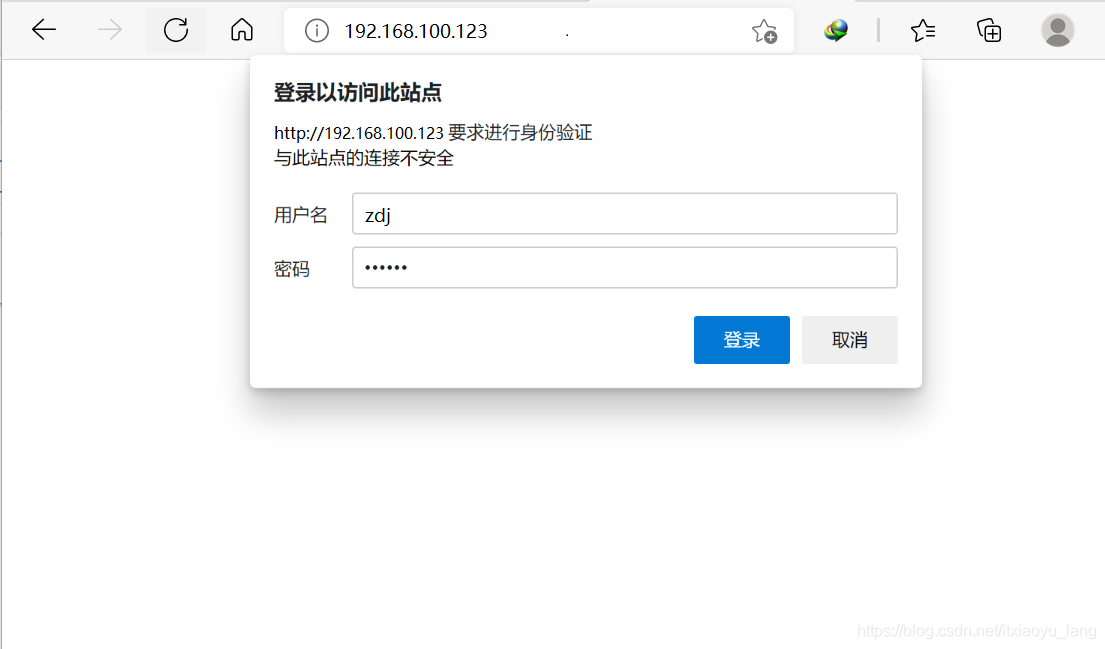
实例
[root@localhost ~]# yum -y install httpd-tools
[root@localhost ~]# htpasswd -c -m /usr/local/nginx/conf/.user_auth xxbb
New password:
Re-type new password:
Adding password for user xxbb
[root@localhost ~]# vim /usr/local/nginx/conf/nginx.conf
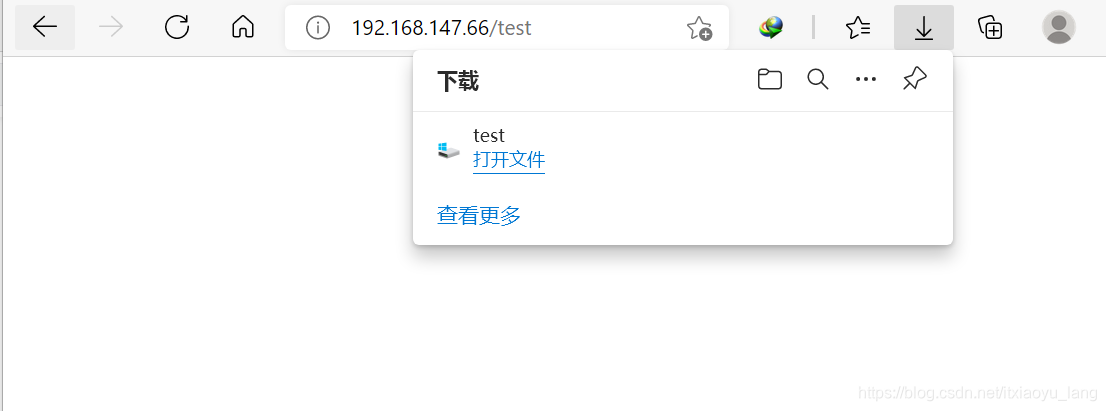
location /test {
auth_basic "test";
auth_basic_user_file ../conf/.user_auth;
echo "test";
}
在http位置
[root@localhost ~]# vim /usr/local/nginx/conf/nginx.conf

http {

    auth_basic    "test";
    auth_basic_user_file .user_auth;
[root@localhost ~]# nginx -s reload
https配置
[root@localhost ~]# cd /usr/local/nginx
[root@localhost nginx]# cd conf
[root@localhost conf]# vim nginx.conf

    server {
        listen       443 ssl;
        server_name  www.yh.com;

        ssl_certificate      ../ssl/nginx.crt;
        ssl_certificate_key  ../ssl/nginx.key;

        ssl_session_cache    shared:SSL:1m;
        ssl_session_timeout  5m;

        ssl_ciphers  HIGH:!aNULL:!MD5;
        ssl_prefer_server_ciphers  on;

        location / {
            root   html;
            index  index.html index.htm;
        }
    }

}

[root@localhost conf]# nginx -s reload
[root@localhost conf]# ss -antl
State      Recv-Q     Send-Q         Local Address:Port         Peer Address:Port     Process
LISTEN     0          128                  0.0.0.0:443               0.0.0.0:*


 737
737

 被折叠的 条评论
为什么被折叠?
被折叠的 条评论
为什么被折叠?
 到【灌水乐园】发言


