


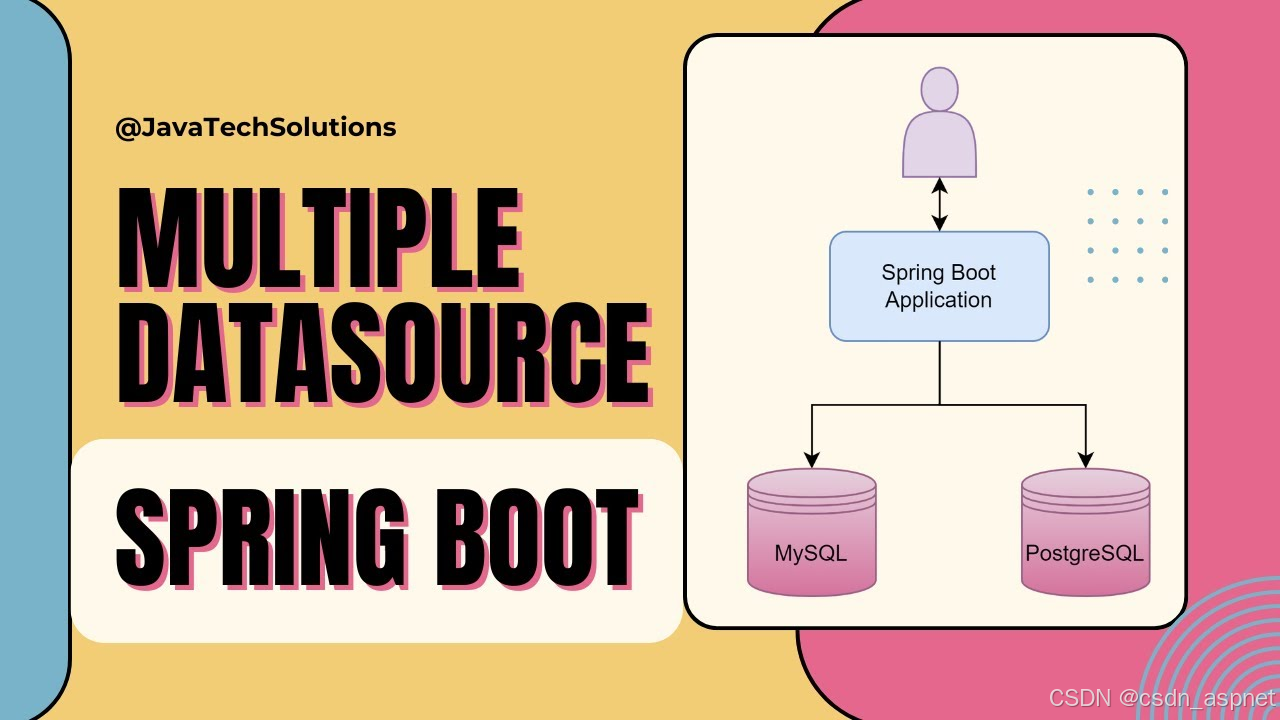
有时我们会构建一些需要多个数据库的应用程序。我们的数据会被安排存储在多个数据库中,例如,一个数据库用于满足另一个需求,另一个数据库用于满足另一个需求。因此,在本文中,我们将了解如何在 Spring Boot 应用程序中配置多个数据库。
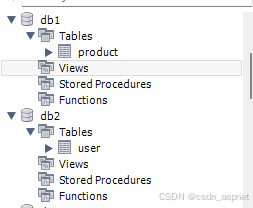
注意:我们对两个数据库都使用 MySQL 8 工作台。
在 Spring Boot 应用程序中配置多个数据源的步骤
以下是在 Spring Boot 应用程序中配置多个数据源的步骤。
步骤1
首先,我们需要配置属性文件。
application.properties:
# DataSource configuration
#DB1
spring.datasource.url=jdbc:mysql://localhost:8084/db1
spring.datasource.username=root
spring.datasource.password=tisha
spring.datasource.driver-class-name=com.mysql.cj.jdbc.Driver

#DB2
second.datasource.url=jdbc:mysql://localhost:8084/db2
second.datasource.username=root
second.datasource.password=tisha
second.datasource.driver-class-name=com.mysql.cj.jdbc.Driver
# JPA (Java Persistence API) configuration
spring.jpa.database-platform=org.hibernate.dialect.MySQLDialect
# create,update,delete
spring.jpa.hibernate.ddl-auto=update
spring.jpa.show-sql=true
步骤2
现在,我们将在pom.xml文件中配置依赖项。
<?xml version="1.0" encoding="UTF-8"?>
<project xmlns="http://maven.apache.org/POM/4.0.0" xmlns:xsi="http://www.w3.org/2001/XMLSchema-instance"
xsi:schemaLocation="http://maven.apache.org/POM/4.0.0 https://maven.apache.org/xsd/maven-4.0.0.xsd">
<modelVersion>4.0.0</modelVersion>
<parent>
<groupId>org.springframework.boot</groupId>
<artifactId>spring-boot-starter-parent</artifactId>
<version>3.2.2</version>
<relativePath/> <!-- lookup parent from repository -->
</parent>
<groupId>org.techous</groupId>
<artifactId>Trigger-demo</artifactId>
<version>0.0.1-SNAPSHOT</version>
<name>Trigger-demo</name>
<description>master slave project for Spring Boot</description>
<properties>
<java.version>17</java.version>
</properties>
<dependencies>
<dependency>
<groupId>org.springframework.boot</groupId>
<artifactId>spring-boot-starter-data-jpa</artifactId>
</dependency>
<dependency>
<groupId>org.springframework.boot</groupId>
<artifactId>spring-boot-starter-web</artifactId>
</dependency>
<dependency>
<groupId>com.mysql</groupId>
<artifactId>mysql-connector-j</artifactId>
<scope>runtime</scope>
</dependency>
<dependency>
<groupId>org.projectlombok</groupId>
<artifactId>lombok</artifactId>
<optional>true</optional>
</dependency>
<dependency>
<groupId>org.springframework.boot</groupId>
<artifactId>spring-boot-starter-test</artifactId>
<scope>test</scope>
</dependency>
</dependencies>
<build>
<plugins>
<plugin>
<groupId>org.springframework.boot</groupId>
<artifactId>spring-boot-maven-plugin</artifactId>
<configuration>
<excludes>
<exclude>
<groupId>org.projectlombok</groupId>
<artifactId>lombok</artifactId>
</exclude>
</excludes>
</configuration>
</plugin>
</plugins>
</build>
</project>
项目结构
下面我们可以看到设计多个数据源后的项目结构。
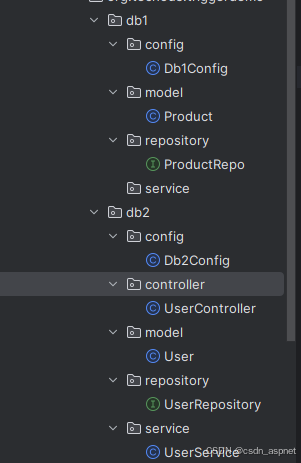
首先,我们根据上图进行数据库1的配置。
项目实现
Db1Config.java
import org.springframework.beans.factory.annotation.Autowired;
import org.springframework.context.annotation.Bean;
import org.springframework.context.annotation.Configuration;
import org.springframework.context.annotation.Primary;
import org.springframework.core.env.Environment;
import org.springframework.data.jpa.repository.config.EnableJpaRepositories;
import org.springframework.jdbc.datasource.DriverManagerDataSource;
import org.springframework.orm.jpa.JpaTransactionManager;
import org.springframework.orm.jpa.JpaVendorAdapter;
import org.springframework.orm.jpa.LocalContainerEntityManagerFactoryBean;
import org.springframework.orm.jpa.vendor.HibernateJpaVendorAdapter;
import org.springframework.transaction.PlatformTransactionManager;
import org.springframework.transaction.annotation.EnableTransactionManagement;
import javax.sql.DataSource;
import java.util.HashMap;
import java.util.Map;
@Configuration
@EnableTransactionManagement
@EnableJpaRepositories(
entityManagerFactoryRef = "firstEntityManagerFactoryBean",
basePackages = {"org.techous.triggerdemo.db1.repository"},
transactionManagerRef = "firstTransactionManager"
)
public class Db1Config {
@Autowired
private Environment environment;
@Bean(name = "firstDataSource")
@Primary
public DataSource dataSource(){
DriverManagerDataSource dataSource = new DriverManagerDataSource();
dataSource.setUrl(environment.getProperty("spring.datasource.url"));
dataSource.setDriverClassName(environment.getProperty("spring.datasource.driver-class-name"));
dataSource.setUsername(environment.getProperty("spring.datasource.username"));
dataSource.setPassword(environment.getProperty("spring.datasource.password"));
return dataSource;
}
@Primary
@Bean(name = "firstEntityManagerFactoryBean")
public LocalContainerEntityManagerFactoryBean entityManagerFactoryBean(){
LocalContainerEntityManagerFactoryBean bean = new LocalContainerEntityManagerFactoryBean();
bean.setDataSource(dataSource());
bean.setPackagesToScan("org.techous.triggerdemo.db1.model");
JpaVendorAdapter adapter = new HibernateJpaVendorAdapter();
bean.setJpaVendorAdapter(adapter);
Map<String,String> props = new HashMap<>();
props.put("hibernate.dialect","org.hibernate.dialect.MySQLDialect");
props.put("hibernate.show_sql","true");
props.put("hibernate.hbm2ddl.auto","update");
bean.setJpaPropertyMap(props);
return bean;
}
@Bean(name = "firstTransactionManager")
@Primary
public PlatformTransactionManager transactionManager(){
JpaTransactionManager manager = new JpaTransactionManager();
manager.setEntityManagerFactory(entityManagerFactoryBean().getObject());
return manager;
}
}
在上面的代码中,我们添加了用于调用 db1 的配置。我们在此类中使用了 @configuration 注释,并将其转换为 bean。这里我们使用 Environment 类来配置内部环境,然后使用 Datasourse 进行不同的数据库配置。然后使用 LocalContinerEntityManager 来设置哪个包会首先扫描并运行我们指定的数据库路径,并将所有数据存储在那里。此配置仅用于创建多个数据源。其余部分就像简单的 crud 操作一样,我们已经完成了。
ProductController.java
package org.techous.triggerdemo.db1.controller;
import org.springframework.beans.factory.annotation.Autowired;
import org.springframework.http.HttpStatus;
import org.springframework.http.ResponseEntity;
import org.springframework.web.bind.annotation.PostMapping;
import org.springframework.web.bind.annotation.RequestBody;
import org.springframework.web.bind.annotation.RequestMapping;
import org.springframework.web.bind.annotation.RestController;
import org.techous.triggerdemo.db1.model.Product;
import org.techous.triggerdemo.db1.service.ProductService;
// Controller class for handling product-related requests
@RestController
@RequestMapping("/product")
public class ProductController {
@Autowired
private ProductService productService;
// Endpoint for saving a product
@PostMapping("saveProduct")
public ResponseEntity<Product> saveProduct(@RequestBody Product product){
Product myproduct = productService.saveProduct(product);
return new ResponseEntity<>(myproduct, HttpStatus.OK);
}
}
上述类是调用 API 的服务类端点。
ProductService.java
package org.techous.triggerdemo.db1.service;
import org.springframework.beans.factory.annotation.Autowired;
import org.springframework.stereotype.Service;
import org.techous.triggerdemo.db1.model.Product;
import org.techous.triggerdemo.db1.repository.ProductRepo;
// Service class for product-related operations
@Service
public class ProductService {
@Autowired
private ProductRepo productRepo;
// Method to save a product
public Product saveProduct(Product product) {
return productRepo.save(product);
}
}
上面的类是productService类,用于在这里实现所有的业务逻辑。
Product.java
package org.techous.triggerdemo.db1.model;
import jakarta.persistence.Entity;
import jakarta.persistence.Id;
import jakarta.persistence.Table;
import lombok.AllArgsConstructor;
import lombok.Getter;
import lombok.NoArgsConstructor;
import lombok.Setter;
// Entity class for Product
@Getter
@Setter
@AllArgsConstructor
@NoArgsConstructor
@Entity
@Table(name = "product")
public class Product {
@Id
private int productId;
private String name;
private int price;
}
上面的类就是我们的实体类。
ProductRepo.java
package org.techous.triggerdemo.db1.repository;
import org.springframework.data.jpa.repository.JpaRepository;
import org.springframework.stereotype.Repository;
import org.techous.triggerdemo.db1.model.Product;
// Repository interface for Product
@Repository
public interface ProductRepo extends JpaRepository<Product,Integer> {
}
上述类是我们保存任何内容的存储库。
这是数据库 1(db1)的配置。
现在,我们下面进行另一个数据库(db2)的配置。
Db2Config2.java
import org.springframework.beans.factory.annotation.Autowired;
import org.springframework.context.annotation.Bean;
import org.springframework.context.annotation.Configuration;
import org.springframework.core.env.Environment;
import org.springframework.data.jpa.repository.config.EnableJpaRepositories;
import org.springframework.jdbc.datasource.DriverManagerDataSource;
import org.springframework.orm.jpa.JpaTransactionManager;
import org.springframework.orm.jpa.JpaVendorAdapter;
import org.springframework.orm.jpa.LocalContainerEntityManagerFactoryBean;
import org.springframework.orm.jpa.vendor.HibernateJpaVendorAdapter;
import org.springframework.transaction.PlatformTransactionManager;
import org.springframework.transaction.annotation.EnableTransactionManagement;
import javax.sql.DataSource;
import java.util.HashMap;
import java.util.Map;
@Configuration
@EnableTransactionManagement
@EnableJpaRepositories(
entityManagerFactoryRef = "secondEntityManagerFactoryBean",
basePackages = {"org.techous.triggerdemo.db2.repository"},
transactionManagerRef = "secondTransactionManager"
)
public class Db2Config {
@Autowired
private Environment environment;
@Bean(name = "secondDataSource")
public DataSource dataSource(){
DriverManagerDataSource dataSource = new DriverManagerDataSource();
dataSource.setUrl(environment.getProperty("second.datasource.url"));
dataSource.setDriverClassName(environment.getProperty("second.datasource.driver-class-name"));
dataSource.setUsername(environment.getProperty("second.datasource.username"));
dataSource.setPassword(environment.getProperty("second.datasource.password"));
return dataSource;
}
@Bean(name = "secondEntityManagerFactoryBean")
public LocalContainerEntityManagerFactoryBean entityManagerFactoryBean(){
LocalContainerEntityManagerFactoryBean bean = new LocalContainerEntityManagerFactoryBean();
bean.setDataSource(dataSource());
bean.setPackagesToScan("org.techous.triggerdemo.db2.model");
JpaVendorAdapter adapter = new HibernateJpaVendorAdapter();
bean.setJpaVendorAdapter(adapter);
Map<String,String> props = new HashMap<>();
props.put("hibernate.dialect","org.hibernate.dialect.MySQLDialect");
props.put("hibernate.show_sql","true");
props.put("hibernate.hbm2ddl.auto","update");
bean.setJpaPropertyMap(props);
return bean;
}
@Bean(name = "secondTransactionManager")
public PlatformTransactionManager transactionManager(){
JpaTransactionManager manager = new JpaTransactionManager();
manager.setEntityManagerFactory(entityManagerFactoryBean().getObject());
return manager;
}
}
如上所述,这里也进行相同的配置,并根据我们的数据库设计定义属性路径。(仅更改包 URL)
UserController.java
package org.techous.triggerdemo.db2.controller;
import org.springframework.beans.factory.annotation.Autowired;
import org.springframework.http.HttpStatus;
import org.springframework.http.ResponseEntity;
import org.springframework.web.bind.annotation.PostMapping;
import org.springframework.web.bind.annotation.RequestBody;
import org.springframework.web.bind.annotation.RequestMapping;
import org.springframework.web.bind.annotation.RestController;
import org.techous.triggerdemo.db2.model.User;
import org.techous.triggerdemo.db2.service.UserService;
@RestController
@RequestMapping("/api")
public class UserController {
@Autowired
private UserService userService;
// Endpoint to save a user
@PostMapping("/saveUser")
public ResponseEntity<User> save(@RequestBody User user){
User myuser = userService.saveUser(user);
return new ResponseEntity<>(myuser, HttpStatus.OK);
}
}
UserService.java
package org.techous.triggerdemo.db2.service;
import org.springframework.beans.factory.annotation.Autowired;
import org.springframework.stereotype.Service;
import org.techous.triggerdemo.db2.model.User;
import org.techous.triggerdemo.db2.repository.UserRepository;
@Service
public class UserService {
@Autowired
private UserRepository userRepository;
// Service method to save a user
public User saveUser(User user) {
return userRepository.save(user);
}
}
User.java
package org.techous.triggerdemo.db2.model;
import jakarta.persistence.*;
import lombok.AllArgsConstructor;
import lombok.Getter;
import lombok.NoArgsConstructor;
import lombok.Setter;
@Getter
@Setter
@AllArgsConstructor
@NoArgsConstructor
@Entity
@Table(name = "user")
public class User {
@Id
@GeneratedValue(strategy = GenerationType.IDENTITY)
private int userId; // Unique identifier for the user
private String name; // Name of the user
private int age; // Age of the user
}
UserRepository.java
package org.techous.triggerdemo.db2.repository;
import org.springframework.data.jpa.repository.JpaRepository;
import org.springframework.stereotype.Repository;
import org.techous.triggerdemo.db2.model.User;
@Repository
public interface UserRepository extends JpaRepository<User,Integer> {
}
我们已经完成了所有数据库配置。
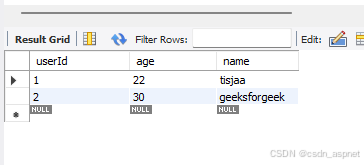
现在,当我们插入用户时,它将保存在 db2 数据库中,而当我们保存产品时,它将保存在 db1 中。
输出
首先,我们将添加用户。
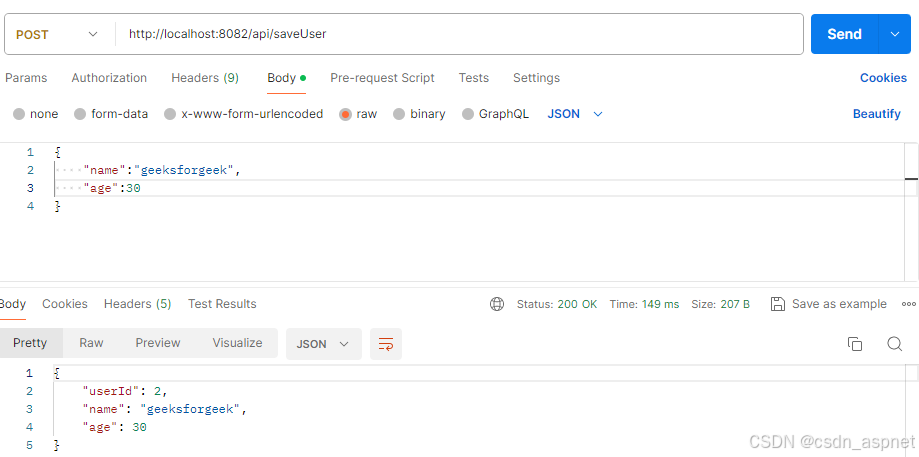
在下面的屏幕中,我们可以看到添加到数据库的用户。
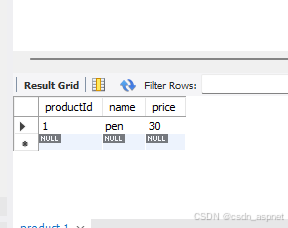
现在,我们将添加产品。
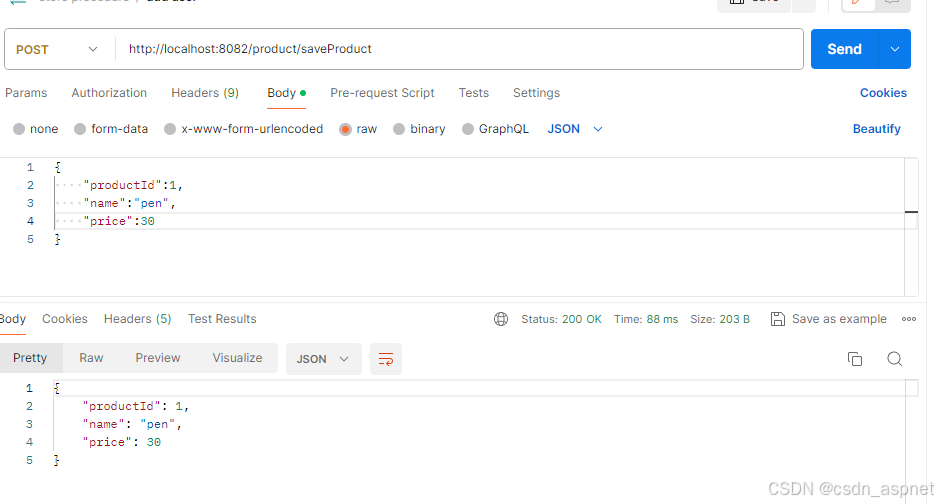
现在,我们可以看到产品已添加到数据库中。
这样,我们可以在单个 Spring Boot 应用程序中配置多个数据源。
如果您喜欢此文章,请收藏、点赞、评论,谢谢,祝您快乐每一天。


 8742
8742

 被折叠的 条评论
为什么被折叠?
被折叠的 条评论
为什么被折叠?
 到【灌水乐园】发言


