


 本文介绍了如何通过Kong代理实现WebSocket连接,并以RabbitMQ的STOMP协议为例,详细讲解了进入RabbitMQ Docker容器开启STOMP、设置路由和服务、构造请求包结构的步骤。
以rabbitmq的stomp协议为例
1 进入rabbmitmq的docker容器,开启stomp
root@d8f9ff5ca26c:/# rabbitmq-plugins enable rabbitmq_web_stomp
Enabling plugins on node rabbit@d8f9ff5ca26c:
rabbitmq_web_stomp
The following plugins have been configured:
  rabbitmq_management
  rabbitmq_management_agent
  rabbitmq_stomp
  rabbitmq_web_dispatch
  rabbitmq_web_stomp
Applying plugin configuration to rabbit@d8f9ff5ca26c...
Plugin configuration unchanged.
2添加设置路由和服务

路由设置

3 请求
// Stomp.js boilerplate
        const queueName = 'User_1'; // 定义队列名称
        var client = Stomp.client('ws://' + '10.1.252.31' + ':8000/ws');
        client.debug = pipe('#second');

        var print_first = pipe('#first', function (data) {
            client.send('/topic/test', { "content-type": "text/plain" }, data);
        });

        var on_connect = function (x) {
            id = client.subscribe("/queue/" + queueName, function (m) {
                console.log('收到来自MQ的消息:' + m.body);

            });
        };
        var on_error = function () {
            console.log('error');
        };
        client.connect('guest', 'guest', on_connect, on_error, '/');

        $('#first input').focus(function () {
            if (!has_had_focus) {
                has_had_focus = true;
                $(this).val("");
            }
        });
请求的包结构:
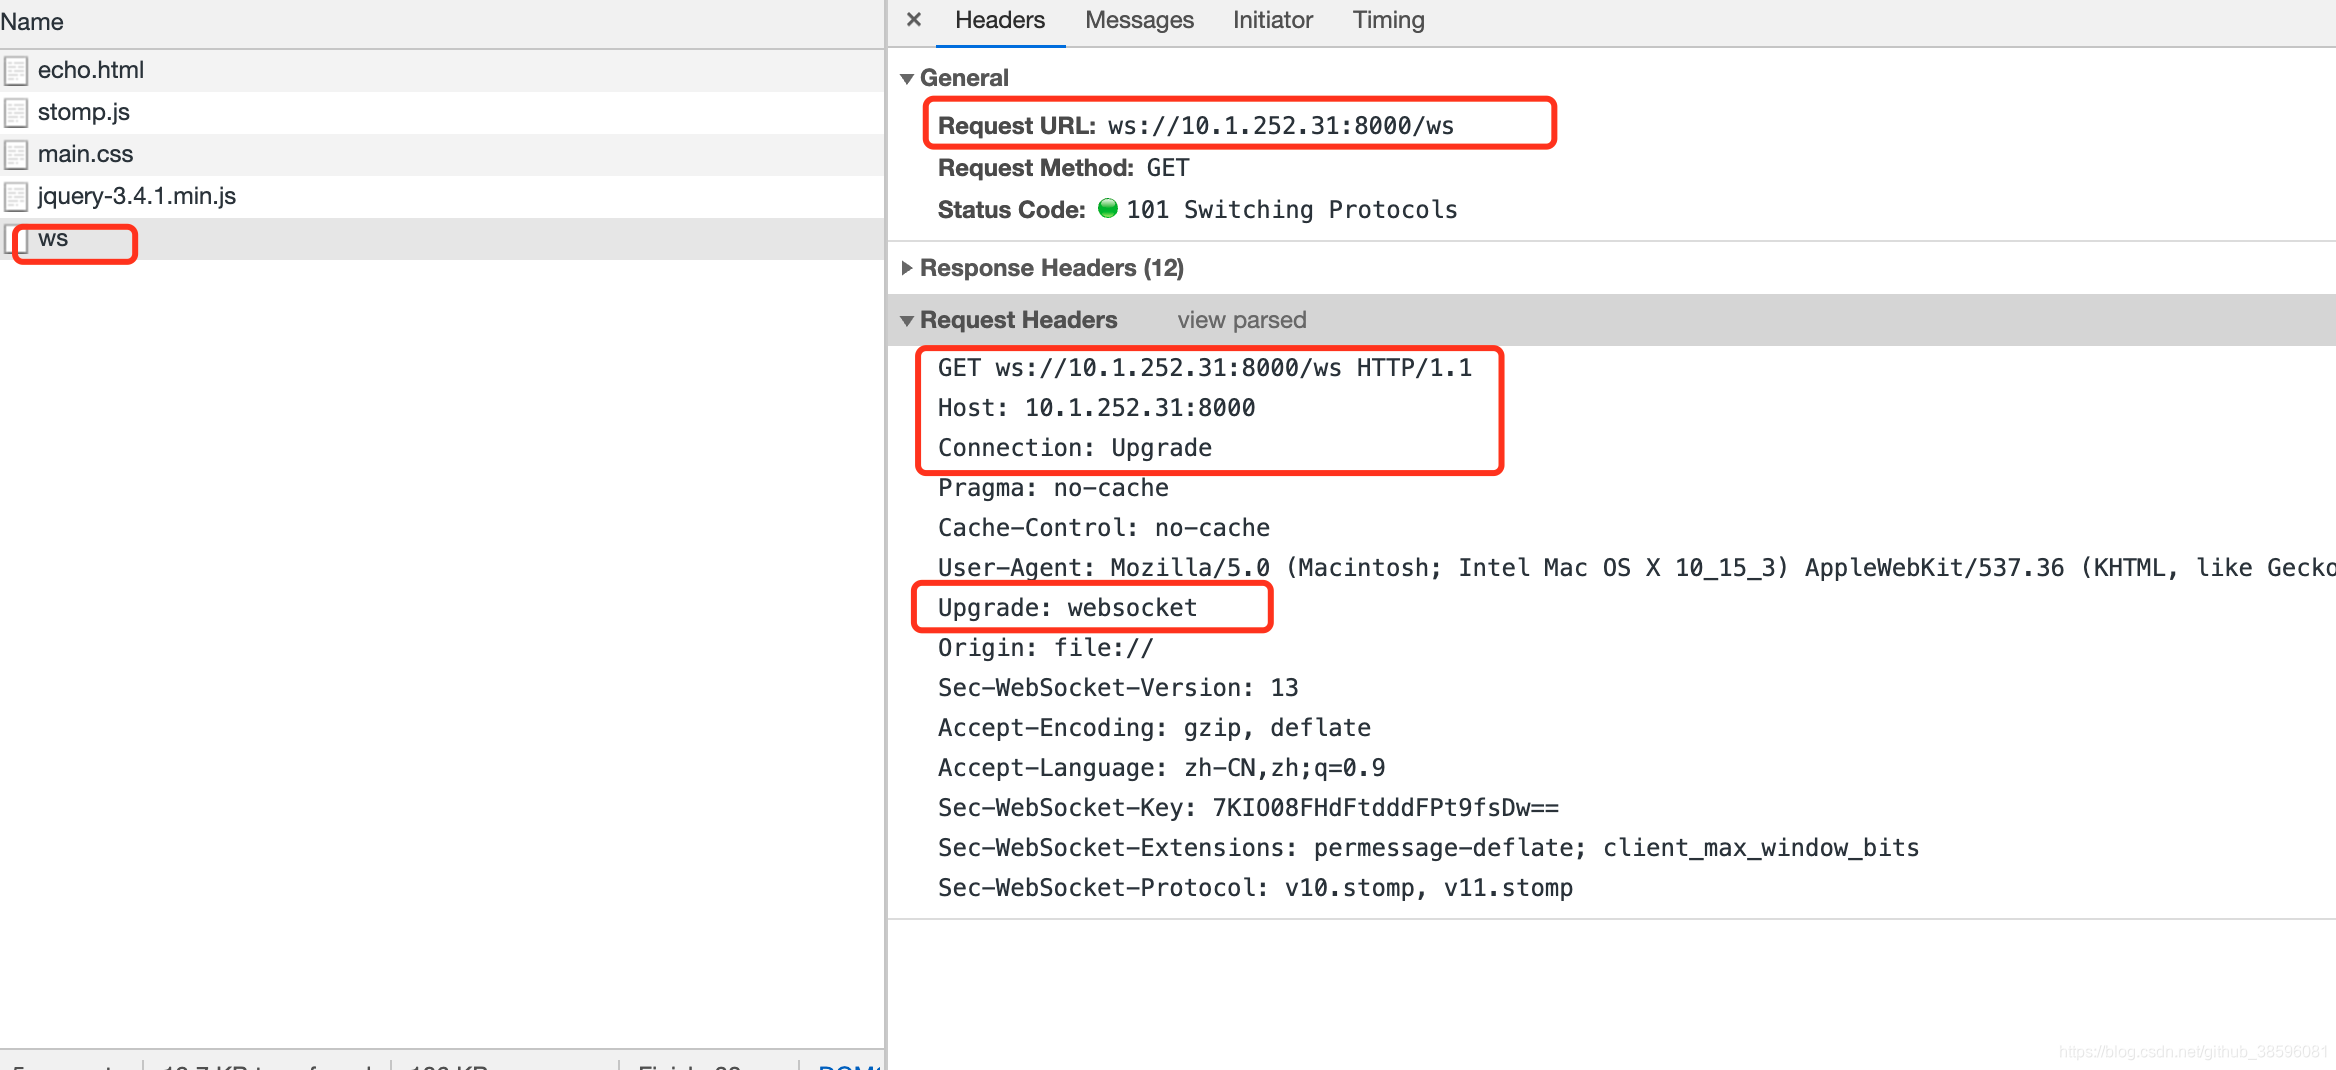


 1231
1231

 被折叠的 条评论
为什么被折叠?
被折叠的 条评论
为什么被折叠?
 到【灌水乐园】发言


