openlayers实现箭头轨迹线

该文介绍如何利用OpenLayers的Feature样式功能,结合线要素和箭头图标,创建轨迹线。通过设定线条样式,计算线段长度和箭头间隔,动态生成箭头位置和方向,最终在地图上展示箭头轨迹线。
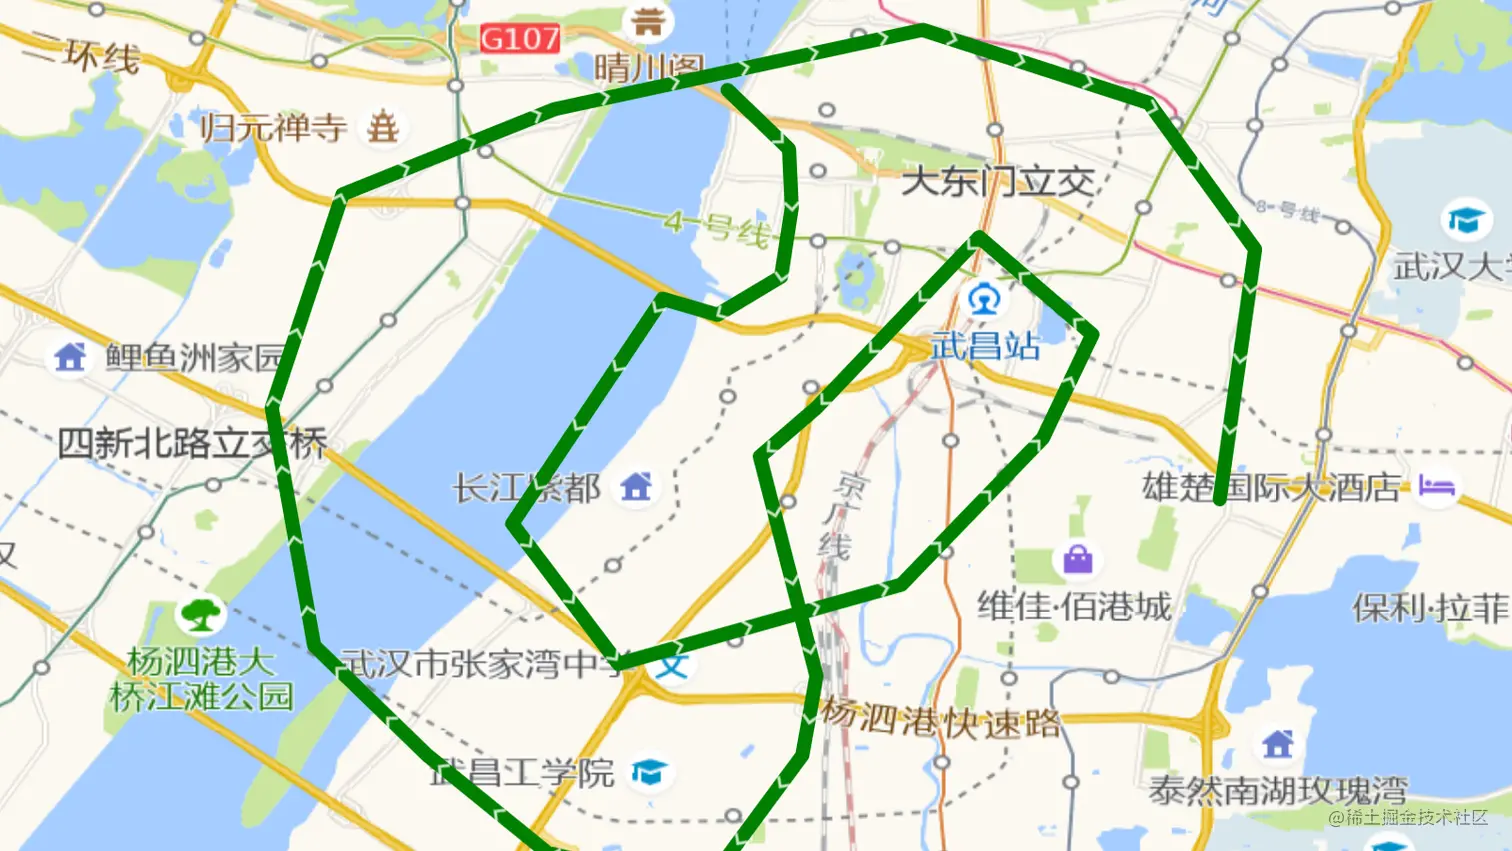
摘要生成于 C知道 ,由 DeepSeek-R1 满血版支持, 前往体验 >

openlayers实现箭头轨迹线

openlayers实现箭头轨迹线

1. 实现思路

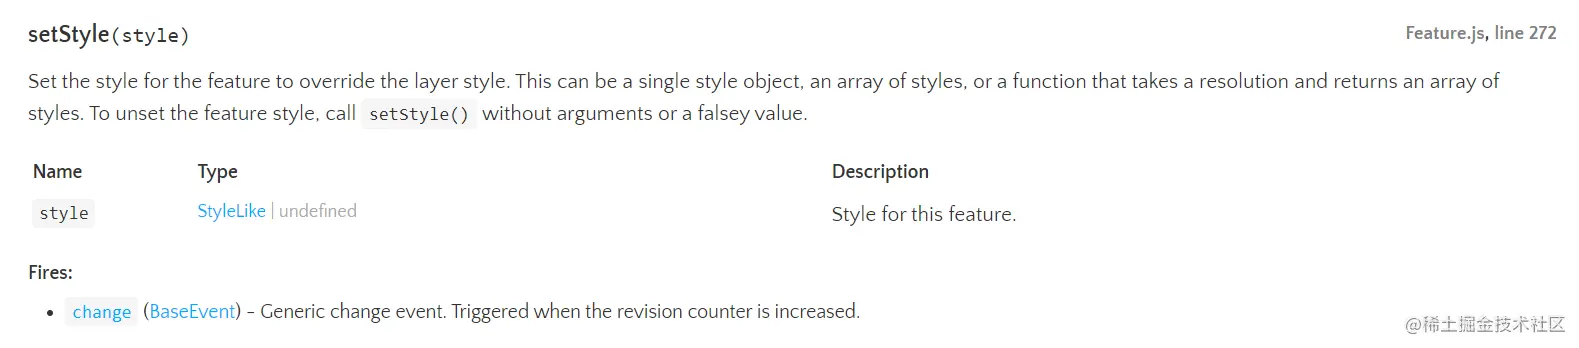
使用ol/Feature 的setStyle 方法,轨迹线可以由实线+多个箭头icon组成。setStyle可以接收一个function回调方法,根据分辨率,设定每个箭头间隔的像素,计算线要素Feature的长度,根据总长度计算箭头个数。还要计算每个箭头的位置Point,箭头的方向,将其转化成Style对象。

2. 实现过程

1.加载底图和Map对象

let gaodeMapLayer = new TileLayer({
  source: new XYZ({
    url: "http://wprd0{1-4}.is.autonavi.com/appmaptile?lang=zh_cn&size=1&style=7&x={x}&y={y}&z={z}",
  }),
});

let map = new Map({
  layers: [gaodeMapLayer],
  view: new View({
    center: [114.31, 30.55],
    projection: "EPSG:4326",
    zoom: 14,
  }),
  target: "map",
});
复制代码

2.加载矢量图层,绘制线

let layer = new VectorLayer({
  source: new VectorSource(),
});
map.addLayer(layer);
复制代码

3.加载测试数据到矢量图层上

let gjson = {
        type: "FeatureCollection",
        features: [
          {
            type: "Feature",
            properties: {},
            geometry: {
              type: "LineString",
              coordinates: [
                [114.2924451828003, 30.548735055676342],
                [114.29841041564941, 30.543006308026428],
                [114.29866790771484, 30.53731418530321],
                [114.29763793945311, 30.530623666534726],
                [114.29145812988281, 30.526927049704433],
                [114.28613662719725, 30.528479645904042],
                [114.27154541015625, 30.50666709259759],
                [114.28184509277342, 30.49305949630156],
                [114.30931091308594, 30.500750980290693],
                [114.32304382324219, 30.51494904517773],
                [114.32785034179688, 30.525004753369974],
                [114.31686401367188, 30.534467998833467],
                [114.30107116699219, 30.517906714408557],
                [114.29557800292969, 30.513174400443376],
                [114.30107116699219, 30.491876137098675],
                [114.29969787597656, 30.484183951487754],
                [114.29008483886717, 30.4711650216242],
                [114.2749786376953, 30.47471581151385],
                [114.2633056640625, 30.484183951487754],
                [114.2523193359375, 30.49483450812004],
                [114.24819946289062, 30.517906714408557],
                [114.25506591796875, 30.538607878854556],
                [114.27566528320312, 30.54688710949595],
                [114.31137084960938, 30.554574334398687],
                [114.33334350585938, 30.547478456100688],
                [114.34364318847656, 30.53328514356082],
                [114.3402099609375, 30.50903343674927],
              ],
            },
          },
        ],
      };
      let feat = geojsonFormat.readFeature(gjson.features[0], {
        featureProjection: map.getView().getProjection(),
      });
      layer.getSource().addFeature(feat);
复制代码

4.箭头样式计算

// 箭头样式
arrowLineStyles(feature, resolution) {
  let styles = [];
  // 线条样式
  let backgroundLineStyle = new ol_style_Style({
    stroke: new ol_style_Stroke({
      color: "green",
      width: 10,
    }),
  });
  styles.push(backgroundLineStyle);
  let geometry = feature.getGeometry();
  // 获取线段长度
  const length = geometry.getLength();
  // 箭头间隔距离(像素)
  const step = 50;
  // 将间隔像素距离转换成地图的真实距离
  const StepLength = step * resolution;
  // 得到一共需要绘制多少个 箭头
  const arrowNum = Math.floor(length / StepLength);
  const rotations = [];
  const distances = [0];
  geometry.forEachSegment(function (start, end) {
    let dx = end[0] - start[0];
    let dy = end[1] - start[1];
    let rotation = Math.atan2(dy, dx);
    distances.unshift(Math.sqrt(dx ** 2 + dy ** 2) + distances[0]);
    rotations.push(rotation);
  });
  // 利用之前计算得到的线段矢量信息,生成对应的点样式塞入默认样式中
  // 从而绘制内部箭头
  for (let i = 1; i < arrowNum; ++i) {
    const arrowCoord = geometry.getCoordinateAt(i / arrowNum);
    const d = i * StepLength;
    const grid = distances.findIndex((x) => x <= d);

    styles.push(
      new ol_style_Style({
        geometry: new Point(arrowCoord),
        image: new ol_style_Icon({
          src: routearrow,
          opacity: 0.8,
          anchor: [0.5, 0.5],
          rotateWithView: false,
          // 读取 rotations 中计算存放的方向信息
          rotation: -rotations[distances.length - grid - 1],
          scale: 0.8,
        }),
      })
    );
  }
  return styles;
},
复制代码

5.应用样式到feature上

 // 设置样式 
 feat.setStyle(this.arrowLineStyles); 
 map.getView().fit(feat.getGeometry());
复制代码

3. 实现效果

评论 3
添加红包

请填写红包祝福语或标题

红包个数最小为10个

红包金额最低5元

当前余额3.43前往充值 >
需支付:10.00
成就一亿技术人!
领取后你会自动成为博主和红包主的粉丝 规则
hope_wisdom
发出的红包

打赏作者

三顾科技

你的鼓励将是我创作的最大动力

¥1 ¥2 ¥4 ¥6 ¥10 ¥20
扫码支付:¥1
获取中
扫码支付

您的余额不足,请更换扫码支付或充值

打赏作者

实付
使用余额支付
点击重新获取
扫码支付
钱包余额 0

抵扣说明:

1.余额是钱包充值的虚拟货币,按照1:1的比例进行支付金额的抵扣。
2.余额无法直接购买下载,可以购买VIP、付费专栏及课程。

余额充值