


 本文详细介绍了Linux下的I2C驱动框架,包括裸机驱动、内核框架、I2C总线和设备结构,重点讲解了如何编写AP3216C设备驱动,以及如何通过I2C与之交互。驱动源码展示了如何注册设备、实现数据传输,并通过字符设备驱动进行测试。
文章目录
一、I2C驱动框架
1.1 裸机I2C驱动框架
我们编写了四个文件: bsp_i2c.c、bsp_i2c.h、 bsp_ap3216c.c 和 bsp_ap3216c.h。
其中前两个是 I.MX6U 的 IIC 接口驱动,后两个文件是 AP3216C 这个 I2C 设备驱动文件。
相当于有两部分驱动:I2C 主机驱动 和 I2C 设备驱动。
首先编写 iic 控制器驱动:bsp_i2c.c、bsp_i2c.h。向外提供 i2c_master_transfer 函数。
然后编写具体的 iic设备驱动:bsp_ap3216c.c 和 bsp_ap3216c.h
1.2 linux下的 I2C驱动框架
不管是什么 iic 芯片,都可以通过此函数进行读写。
iic控制器的驱动 和 具体的iic设备驱动 分离开来。只要编写一次iic控制器的驱动,那么所有的 iic设备驱动 都可以用来使用它。
一般 iic控制器驱动由半导体原厂写好,符合linux框架,开发人员负责 具体的iic设备驱动,iic设备驱动中需要调用 iic控制器的驱动。
1.3 I2C总线驱动
已经有内核写好了,不再需要我们去管。
I2C适配器在内核里面使用 i2c_adapter 结构体。定义在 include/linux/i2c.h。
I2C适配器驱动的核心就是:申请 i2c_adapter 结构体,然后初始化,最后注册。
初始化完成 i2c_adapter 结构体后,使用i2c_add_adapter 或者 i2c_add_numbered_adapter 来向内核注册 i2c适配器驱动。
i2c_adapter 结构体中有个重要的成员变量: struct i2c_algorithm,此结构体包含了 i2c控制器访问 i2c设备的 api接口函数。需要开发iic适配器的开发者来实现。
struct i2c_adapter
-> struct i2c_algorithm
->master_xfer
此函数就是 i2c控制器最终进行数据收发的驱动。(此函数重要)
通过搜索设备树文件(imx6ull.dtsi)中搜索 compatible 属性值,找到此节点对应的i2c适配器驱动文件为:drivers/i2c/busses/i2c-imx.c。
利用 platform_driver 来引入?
驱动与设备匹配后,i2c_imx_probe 函数会执行。
NXP创建了一个结构体:struct imx_i2c_struct,包含 imx6u 的 i2c 相关属性。此结构体里面包含 struct i2c_adapter。
设置 i2c_adapter 下的 i2c_algorithm 为 i2c_imx_algo。
base 是内存映射后的 i2c适配器的基地址。
i2c_imx_isr 是 i2c 的中断处理函数,内部是读相关寄存器。
static struct i2c_algorithm i2c_imx_algo = {
	.master_xfer	= i2c_imx_xfer,
	/* 返回 i2c 适配器能提供的功能,能操作... */
	.functionality	= i2c_imx_func,
};
通过 imx6u 的 i2c适配器 读取 i2c 或者 向 i2c 设备写入数据的时候最终是通过上面的 i2c_imx_xfer 函数。
1.4 I2C设备结构体
这个需要我们自己去写。
i2c_client:表示 i2c 设备。不需要我们自己创建 i2c_client。一般在设备树里面添加具体的 i2c芯片,比如 设备树中 i2c1节点 下的 fxls8471。内核在解析设备树的时候就会知道有这个 i2c 设备,然后会创建对应的 i2c_client。
i2c 设备驱动框架,i2c_driver 初始化与注册。i2c_driver 需要我们自己去创建和实现的,是本章重点。i2c驱动程序就是初始化 i2c_driver ,然后向系统注册 i2c_driver。
注册使用函数:i2c_register_driver 或 i2c_add_driver。
注销 i2c_driver:使用函数 i2c_del_driver
i2c_transfer 函数进行数据传输。
1.5 添加 I2C设备信息
在设备树中添加。i2c设备 挂载在哪个 i2c控制器下就在哪个控制器下添加对应的节点。
二、驱动编写和测试
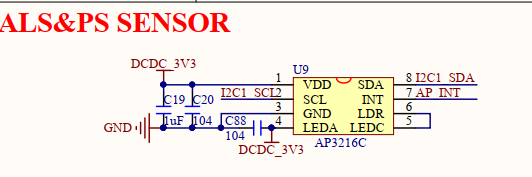
在 i2c 上 接了一个 ap3216c。
UART4_RXD 作为 I2C1_SDA;UART4_TXD 作为 I2C1_SCL。
设备树中的 pinctrl 结点设置这两个 gpio 即可。
注意,原理图中的 AP_INT 引脚是中断引脚,本次实验不使用中断,因此 pinctrl 中不对该引脚进行初始化。
一个 i2c 上不能有两个器件地址一样的设备。
1、修改设备树 io 相关,添加 ap3216c 设备节点相关
&i2c1 {
	clock-frequency = <100000>;
	pinctrl-names = "default";
	pinctrl-0 = <&pinctrl_i2c1>;
	status = "okay";

	/* 地址 1e 从数据手册中获取 */
	ap3216c@1e {
		compatible = "alientek,ap3216c";
		reg = <0x1e>;

	};
};
在系统中可以看到对应的设备节点
/sys/bus/i2c/devices #
/sys/bus/i2c/devices #
/sys/bus/i2c/devices # ls 0-001e/
modalias   name       of_node    power      subsystem  uevent
/sys/bus/i2c/devices #
/sys/bus/i2c/devices #
/sys/bus/i2c/devices # cat 0-001e/name
ap3216c
/sys/bus/i2c/devices #
加载驱动并且匹配设备树后可以在系统中查看
/lib/modules/4.1.15 # ls /sys/bus/i2c/drivers
ap3216c             mc13xxx             stmpe-i2c
at24                mma8450             tlv320aic23-codec
da9052              ov2640              tsc2007
dummy               pca953x             vtl_ts
egalax_ts           pfuze100-regulator  wm8962
ir-kbd-i2c          sgtl5000
/lib/modules/4.1.15 #
现在的驱动匹配都是靠compatible和设备树结点中的节点进行比较,成功了执行probe函数。
2、编写驱动框架,I2C设备驱动框架,字符设备驱动框架(非必须,只是为了便于测试。若是触摸屏,则可以采用input子系统框架)。
3、初始化 ap3216c 芯片。实现 file_operations 中的成员函数。重点就是通过 i2c控制器(适配器)来向 ap3216c 里面发送或者读取数据。这里使用 i2c_transfer 这个 api 函数 来完成数据的传输。
定义在文件 i2c-core.c
int i2c_transfer(struct i2c_adapter *adap, struct i2c_msg *msgs, int num)
adap: i2c设备对应的适配器,就是i2c接口。当 i2c设备和驱动匹配以后,probe函数会执行,probe函数传递进来的第一个参数就是 i2c_client,在
		i2c_client 里面保存了此 i2c 设备对应的适配器,即 i2c_adapter。
msgs:就是构成的 i2c 传输数据。struct i2c_msg 数据类型定义在 i2c-imx.c
具体的读写流程参考 裸机26讲。
读看起来要四步,实际只要两步?
写一步就行,只需要一个msg
支持环境光强度(ALS 16bit)、接近距离(PS 10bit)和红外线强度(IR 10bit)
2. 驱动源码
#include<linux/module.h>
#include<linux/kernel.h>
#include<linux/init.h>
#include <linux/fs.h>
#include<linux/slab.h>
#include<linux/io.h>
#include<linux/uaccess.h>
#include<linux/cdev.h>
#include<linux/device.h>
#include<linux/of.h>
#include<linux/of_address.h>
#include<linux/of_irq.h>
#include<linux/gpio.h>
#include<linux/of_gpio.h>
#include<linux/atomic.h>
#include<linux/timer.h>
#include<linux/string.h>
#include<linux/jiffies.h>
#include<linux/irq.h>
#include<asm/mach/map.h>
#include<asm/uaccess.h>
#include<asm/io.h>
#include<linux/interrupt.h>
#include<linux/delay.h>
#include<linux/i2c.h>
#include"ap3216creg.h"
#define AP3216C_CNT 1
#define AP3216C_NAME "ap3216c"
//#define READ_USE_KERNEL_API
static int ap3216c_probe(struct i2c_client *client,
const struct i2c_device_id *id);
static int ap3216c_remove(struct i2c_client *client);
static int ap3216c_open(struct inode *inode, struct file *filp);
static ssize_t ap3216c_read(struct file *filp,
char __user *buf,
size_t cnt,
loff_t *offt);
static int ap3216c_release(struct inode *inode, struct file *filp);
/* 传统 设备文件和驱动文件 匹配表 */
static struct i2c_device_id ap3216c_id[] = {
{"alientek,ap3216c", 0},
{},
};
/* 使用设备树的匹配表 */
static struct of_device_id ap3216c_of_match[] = {
{.compatible = "alientek,ap3216c"},
{},
};
/* i2c_driver 结构体*/
static struct i2c_driver ap3216c_driver = {
/* 与设备树中的节点匹配时会执行此函数 */
.probe = ap3216c_probe,
.remove = ap3216c_remove, /* 一般都是初始化这两个函数 */
/* 继承 struct device_driver */
.driver = {
.name = "ap3216c",
.owner = THIS_MODULE,
/* 使用设备树时的匹配表 */
.of_match_table = of_match_ptr(ap3216c_of_match),
},
/* 传统匹配表 */
.id_table = ap3216c_id,
};
static struct file_operations ap3216c_fops = {
.owner = THIS_MODULE,
.open = ap3216c_open,
.read = ap3216c_read,
.release = ap3216c_release,
};
/* 自定义设备类型 */
struct ap3216c_dev {
int major;
int minor;
dev_t devid;
struct cdev cdev;
/* 注意下面两个是结构体指针 */
struct class *class;
struct device *device;
/* 用于指向 struct i2c_client */
void *private_data;
/* ap32216c:3个传感器数据 */
u16 ir, als, ps;
};
static struct ap3216c_dev ap3216c;
static int ap3216c_read_regs(struct ap3216c_dev *dev, u8 reg, void *val, int n);
static int ap3216c_write_regs(struct ap3216c_dev *dev, u8 reg, u8 *buf, int n);
#ifdef READ_USE_KERNEL_API
static s32 ap3216c_read_reg(struct ap3216c_dev *dev, u8 reg);
#else
static u8 ap3216c_read_reg(struct ap3216c_dev *dev, u8 reg);
#endif
static void ap3216c_write_reg(struct ap3216c_dev *dev, u8 reg, u8 data);
void ap3216c_readdata(struct ap3216c_dev *dev);
/*
* 驱动文件和设备(树节点)匹配时会执行此函数,
* 此函数里面搭建字符设备框架,
* 注意设备树中的设备节点和驱动文件匹配以后,系统会分配
* 一个 struct i2c_client 来表示此 i2c设备,这个 i2c_client
* 会作为参数传入。
*/
static int ap3216c_probe(struct i2c_client *client,
const struct i2c_device_id *id) {
int ret = 0;
printk("%s(%d):\n", __FILE__, __LINE__);
/* 选择由系统来分配一个设备号 */
ap3216c.major = 0;
if (ap3216c.major) { /* 定义了设备号 */
ap3216c.devid = MKDEV(ap3216c.major, 0);
/* 内部调用 __register_chrdev_region
*详见94,chrdevs哈希表。
*/
ret = register_chrdev_region(ap3216c.devid, AP3216C_CNT, AP3216C_NAME);
} else { /* 没有定义设备号 */
/* 内部调用 __register_chrdev_region
* 由系统分配设备号
*/
ret = alloc_chrdev_region(&ap3216c.devid, 0, AP3216C_CNT, AP3216C_NAME);
ap3216c.major = MAJOR(ap3216c.devid); /* 获取分配号的主设备号 */
ap3216c.minor = MINOR(ap3216c.devid); /* 获取分配号的次设备号 */
}
if(ret < 0) {
printk("%s(%d):error\n", __FILE__, __LINE__);
goto fail_devid;
}
printk("ap3216c major=%d,minor=%d\r\n",ap3216c.major, ap3216c.minor);
/* 2、初始化cdev */
ap3216c.cdev.owner = THIS_MODULE;
/* 将fops赋值给cdev的成员变量 */
cdev_init(&ap3216c.cdev, &ap3216c_fops);
/* 将设备号赋给cdev,然后将cdev放入哈希表cdev_map->probe */
ret = cdev_add(&ap3216c.cdev, ap3216c.devid, AP3216C_CNT);
if(ret < 0) {
printk("%s(%d):error\n", __FILE__, __LINE__);
goto fail_cdev;
}
/* 3、创建类 */
ap3216c.class = class_create(THIS_MODULE, AP3216C_NAME);
if (IS_ERR(ap3216c.class)) {
ret = PTR_ERR(ap3216c.class);
printk("%s(%d):error\n", __FILE__, __LINE__);
goto fail_class;
}
/* 5、创建设备 */
ap3216c.device = device_create(ap3216c.class, NULL, ap3216c.devid, NULL, AP3216C_NAME);
if (IS_ERR(ap3216c.device)) {
ret = PTR_ERR(ap3216c.device);
printk("%s(%d):error\n", __FILE__, __LINE__);
goto fail_device;
}
ap3216c.private_data = client;
return 0;
fail_device:
class_destroy(ap3216c.class);
fail_class:
cdev_del(&ap3216c.cdev);
fail_cdev:
unregister_chrdev_region(ap3216c.devid, AP3216C_CNT);
fail_devid:
return ret;
}
static int ap3216c_remove(struct i2c_client *client) {
printk("%s(%d):\n", __FILE__, __LINE__);
/* 注销字符设备驱动,删除cdev */
cdev_del(&ap3216c.cdev);
/* 注销设备号 */
unregister_chrdev_region(ap3216c.devid, AP3216C_CNT);
device_destroy(ap3216c.class, ap3216c.devid);
class_destroy(ap3216c.class);
return 0;
}
/* 在此函数中初始化 ap3216c */
static int ap3216c_open(struct inode *inode, struct file *filp)
{
#ifdef READ_USE_KERNEL_API
s32 value;
#else
u8 value = 0;
#endif
filp->private_data = &ap3216c; /* 设置私有数据 */
printk("%s(%d):\n", __FILE__, __LINE__);
/* 初始化 ap3216c 相关寄存器*/
ap3216c_write_reg(&ap3216c, AP3216C_SYSTEMCONG, 0x4);/*0x4 means reset*/
/* 在两次写操作之间加上延时 */
mdelay(50);
ap3216c_write_reg(&ap3216c, AP3216C_SYSTEMCONG, 0x3);
printk("%s(%d):\n", __FILE__, __LINE__);
/* 读写测试,先写后读 */
value = ap3216c_read_reg(&ap3216c, AP3216C_SYSTEMCONG);
printk("%s(%d):AP3216C_SYSTEMCONG = %#x\n", __FILE__, __LINE__, value);
return 0;
}
/* 此函数是 file_operations 的成员函数,
* 通过此函数向 用户空间app返回原始数据。
*/
static ssize_t ap3216c_read(struct file *filp,
char __user *buf,
size_t cnt,
loff_t *offt)
{
long err = 0;
u16 data[3];
struct ap3216c_dev *dev = (struct ap3216c_dev* )filp->private_data;
ap3216c_readdata(dev);
data[0] = dev->ir;
data[1] = dev->als;
data[2] = dev->ps;
err = copy_to_user(buf, data, sizeof(data));
if(err) {
printk("%s(%d):fail.\n", __FILE__, __LINE__);
return -1;
}
return 0;
}
static int ap3216c_release(struct inode *inode, struct file *filp)
{
struct ap3216c_dev *dev = (struct ap3216c_dev* )filp->private_data;
printk("%s(%d):%s\n", __FILE__, __LINE__, __func__);
return 0;
}
/* 从ap3216c的某个寄存器读取n字节的数据到val*/
static int ap3216c_read_regs(struct ap3216c_dev *dev, u8 reg, void *val, int n) {
struct i2c_msg msg[2];
struct i2c_client *client = dev->private_data;
/*msg[0] 负责发送尧都区的寄存器首地址*/
/* 从机地址也就是ap3216c的设备地址可从i2c_client获取,i2c_client 在驱动设备匹配后由内核分配,
* 内含这个i2c设备的所有信息。
*/
msg[0].addr = client->addr;
/* 表示数据传送方向是写从机 */
msg[0].flags = 0;
/* 要发送的数据的内容是寄存器地址 */
msg[0].buf = ®
/* 要发送的数据所占的字节数 */
msg[0].len = 1;
/* msg[1] 用来读从机*/
msg[1].addr = client->addr;
/* 此flag表示数据传送方向是读从机 */
msg[1].flags = I2C_M_RD;
/* 接收到的数据保存在 val */
msg[1].buf = val;
/* 要读取的数据长度 */
msg[1].len = n;
/* 内核提供的数据传送api,可以双向传输数据 */
return i2c_transfer(client->adapter, msg, 2);
}
/* 向ap3216的某个寄存器写n个数据*/
static int ap3216c_write_regs(struct ap3216c_dev *dev, u8 reg, u8 *buf, int n) {
u8 b[256];
struct i2c_msg msg;
struct i2c_client *client = dev->private_data;
/* 构建要发送的数据,寄存器地址,后接数据内容 */
b[0] = reg;
memcpy(b+1, buf, n);
msg.addr = client->addr;
/* 表示数据传送方向是写从机 */
msg.flags = 0;
/* 寄存器地址和数据合在一起一次性发送出去 */
msg.buf = b;
msg.len = n+1;
/* 内核提供的数据传送api,双向传输 */
return i2c_transfer(client->adapter, &msg, 1);
}
#ifdef READ_USE_KERNEL_API
/* 内核提供的读取寄存器单个数据的值 */
static s32 ap3216c_read_reg(struct ap3216c_dev *dev, u8 reg) {
return i2c_smbus_read_byte_data(dev->private_data, reg);
}
#else
static u8 ap3216c_read_reg(struct ap3216c_dev *dev, u8 reg) {
u8 data = 0;
ap3216c_read_regs(dev, reg, &data, 1);
return data;
}
#endif
/* 读取ap3216c 1个字节的数据 */
static void ap3216c_write_reg(struct ap3216c_dev *dev, u8 reg, u8 data) {
u8 buf = 0;
buf = data;
ap3216c_write_regs(dev, reg, &buf, 1);
}
/*此函数在file_operations->read中调用*/
void ap3216c_readdata(struct ap3216c_dev *dev)
{
unsigned char buf[6];
unsigned char i;
/* 循环读取所有传感器数据 */
for(i = 0; i < 6; i++)
{
buf[i] = ap3216c_read_reg(dev, AP3216C_IRDATALOW + i);
}
if(buf[0] & 0X80) /* IR_OF位为1,则数据无效 */
dev->ir = 0;
else /* 读取IR传感器的数据 */
dev->ir = ((unsigned short)buf[1] << 2) | (buf[0] & 0X03);
dev->als = ((unsigned short)buf[3] << 8) | buf[2]; /* 读取ALS传感器的数据 */
if(buf[4] & 0x40) /* IR_OF位为1,则数据无效 */
dev->ps = 0;
else /* 读取PS传感器的数据 */
dev->ps = ((unsigned short)(buf[5] & 0X3F) << 4) | (buf[4] & 0X0F);
}
static int __init ap3216c_init(void) {
int ret = 0;
/* 添加i2c设备驱动,若匹配到对应i2c设备,那么
* 会执行驱动结构体中的probe函数。
* 在 probe 函数搭建字符设备框架。
*/
ret = i2c_add_driver(&ap3216c_driver);
return ret;
}
static void __exit ap3216c_exit(void) {
i2c_del_driver(&ap3216c_driver);
}
module_init(ap3216c_init);
module_exit(ap3216c_exit);
MODULE_LICENSE("GPL");
/* 此文件用来存放ap3216c的寄存器地址信息*/

#ifndef AP3216CREG_H
#define AP3216CREG_H

/* AP3316C寄存器 */
#define AP3216C_SYSTEMCONG	0x00	/* 配置寄存器 			*/
#define AP3216C_INTSTATUS	0X01	/* 中断状态寄存器 			*/
#define AP3216C_INTCLEAR	0X02	/* 中断清除寄存器 			*/
#define AP3216C_IRDATALOW	0x0A	/* IR数据低字节 			*/
#define AP3216C_IRDATAHIGH	0x0B	/* IR数据高字节 			*/
#define AP3216C_ALSDATALOW	0x0C	/* ALS数据低字节 		*/
#define AP3216C_ALSDATAHIGH	0X0D	/* ALS数据高字节			*/
#define AP3216C_PSDATALOW	0X0E	/* PS数据低字节 			*/
#define AP3216C_PSDATAHIGH	0X0F	/* PS数据高字节 			*/

#endif
3. 测试app
#include "stdio.h"
#include "unistd.h"
#include "sys/types.h"
#include "sys/stat.h"
#include "fcntl.h"
#include "stdlib.h"
#include "string.h"
#include "linux/ioctl.h"
#include<linux/input.h>

static struct input_event inputevent;

int main(int argc, char *argv[])
{
	int fd;
	int ret = 0;
	char *filename;
	unsigned short data[3];
	unsigned short ir, als, ps;

	if (argc != 2) {
		printf("APP:Error Usage!\r\n");
		return -1;
	}

	filename = argv[1];
	fd = open(filename, O_RDWR);
	if (fd < 0) {
		printf("APP:Can't open file %s\r\n", filename);
		return -1;
	}

	while(1) {
		ret = read(fd, data, sizeof(data));
		if(ret >= 0) {
			ir = data[0];
			als = data[1];
			ps = data[2];
			printf("ap3216c:\n\tir = %d\n\tals = %d\n\tps = %d\n", ir, als, ps);
		}
		else {
			printf("%d:fail, ret = %d\n", __LINE__, ret);
		}
		usleep(200000);
	}


	close(fd);

	return ret;
}


 416
416

 被折叠的 条评论
为什么被折叠?
被折叠的 条评论
为什么被折叠?
 到【灌水乐园】发言


