


在实际应用中,视频分帧,输入图像到图像增强(主要是解决低画质,分辨率低,以及夜间场景),图像增强完进入目标检测类算法(通过任务的特征)得到具有任务特征的结果,对后续结果需要结合实际任务进行,本文只讨论跟踪算法,及为了避免目标检测网络一直输出结果,会对视频中的结果进行跟踪,解决同一目标频繁输出的问题。
原因:
利用 SAM2 进行跟踪时,首先通过检测器(或人工提示)在关键帧上给出目标的初始框或点,然后用 SAM2 对该目标生成高精度的像素级掩码,在随后的视频帧中通过对掩码区域的逐帧拓展或相似度匹配,将分割结果与新帧中的掩码进行关联,从而实现对目标的持续跟踪。相比 DeepSORT 仅依赖边界框、卡尔曼滤波与外观 ReID 特征,SAM2 提供了更精细的掩码信息,可以在目标外观相似或密集场景下减少遮挡误匹配,以及解决跟踪ID反复横跳的问题。
算法逻辑:
基于“SAM2”的多目标跟踪
参考链接:
-
SAM 2 论文(arXiv):[2408.00714] SAM 2: Segment Anything in Images and Videos arxiv.org
-
SAM 2 官方 GitHub 仓库:https://github.com/facebookresearch/sam2 github.com
SAM2简介:
SAM2(Segment Anything Model 2) 是 Meta AI 提出的第二代“任意物体分割”模型,它能够高效地对任意图像或视频中的物体进行精确分割。相比上一代 SAM,SAM2 引入了更多的视频特有机制,专门优化了视频分割的效果和实时性能。
SAM2 模型通过结合图像分割和视频理解的机制,采用了高效的 流式记忆模块,能有效跟踪视频帧间的物体关联与变化。这使得 SAM2 在视频中进行交互式实时分割更加精准与高效,并能够处理更加复杂和密集的场景。
核心特性包括:
-
交互式提示分割:可通过框、点或文本提示快速定位和分割任意目标。
-
高效视频分割:流式记忆机制提高了帧间连续性与实时性能。
-
更优泛化能力:在大量视频数据(SA-V数据集)上训练,能够泛化到未知物体。
典型应用场景:
-
视频目标跟踪与分割
-
AR/VR实时交互分割
-
智能视频编辑与自动标注
环境安装:
克隆SAM2代码仓库
git clone https://github.com/facebookresearch/sam2.git
cd sam2
pip install -r requirements.txt
或者
pip install -e .
SAM2处理图像脚本:
#!/usr/bin/env python3
# -*- coding: utf-8 -*-
"""
单张推理代码基础上,添加批量处理指定文件夹内其他图片的逻辑。
使用 tqdm 显示处理进度,无需手动计算时间和 FPS。
"""
import os # 用于文件和路径操作
# 如果使用 Apple MPS,对于不支持的操作回退到 CPU
os.environ["PYTORCH_ENABLE_MPS_FALLBACK"] = "1"
import numpy as np # 数组和数值计算
import torch # PyTorch,用于加载模型和推理
import matplotlib.pyplot as plt # 用于可选的可视化
from PIL import Image # 用于图像读取
# 新增批量处理所需模块
import cv2 # OpenCV,用于掩码保存和叠加处理
import glob # 用于搜索文件
from tqdm import tqdm # 用于显示进度条
# -------------------------------
# 1. 选择设备(CUDA > MPS > CPU)
# -------------------------------
if torch.cuda.is_available():
device = torch.device("cuda") # 优先使用 CUDA
elif torch.backends.mps.is_available():
device = torch.device("mps") # Apple MPS
else:
device = torch.device("cpu") # 回退到 CPU
print(f"using device: {device}") # 输出当前使用的设备
if device.type == "cuda":
# 如果是 CUDA 设备,开启自动混合精度加速并允许 Ampere GPU 使用 TF32
torch.autocast("cuda", dtype=torch.bfloat16).__enter__()
if torch.cuda.get_device_properties(0).major >= 8:
torch.backends.cuda.matmul.allow_tf32 = True
torch.backends.cudnn.allow_tf32 = True
elif device.type == "mps":
# 如果是 MPS 设备,打印兼容性提醒
print(
"\nSupport for MPS devices is preliminary. SAM 2 is trained with CUDA and might "
"give numerically different outputs and sometimes degraded performance on MPS. "
"See e.g. https://github.com/pytorch/pytorch/issues/84936 for a discussion."
)
np.random.seed(3) # 固定随机种子,保证可复现
def show_mask(mask, ax, random_color=False, borders=True):
"""
在 matplotlib 轴上叠加掩码,可选随机颜色和边界绘制。
mask: 2D 二值掩码 (0 或 1)
ax: matplotlib 轴对象
random_color: 是否使用随机颜色
borders: 是否绘制轮廓边框
"""
if random_color:
color = np.concatenate([np.random.random(3), np.array([0.6])], axis=0)
else:
color = np.array([30/255, 144/255, 255/255, 0.6]) # 固定蓝色半透明
h, w = mask.shape[-2:] # 掩码高度和宽度
mask_uint8 = mask.astype(np.uint8) # 转为 uint8
mask_rgba = mask_uint8.reshape(h, w, 1) * color.reshape(1, 1, -1) # 转为 RGBA
if borders:
# 查找掩码轮廓并绘制白色边框
contours, _ = cv2.findContours(mask_uint8, cv2.RETR_EXTERNAL, cv2.CHAIN_APPROX_NONE)
contours = [cv2.approxPolyDP(contour, 0.01, True) for contour in contours]
tmp = (mask_rgba * 255).astype(np.uint8)
tmp = cv2.drawContours(tmp, contours, -1, (255, 255, 255, 128), thickness=2)
mask_rgba = tmp.astype(np.float32) / 255.0
ax.imshow(mask_rgba) # 在轴上显示掩码
def show_points(coords, labels, ax, marker_size=375):
"""
在 matplotlib 轴上绘制正负点。
coords: (N, 2) 点坐标数组
labels: (N,) 点标签数组,1 表示正,0 表示负
ax: matplotlib 轴对象
marker_size: 标记大小
"""
pos_points = coords[labels == 1] # 正例点
neg_points = coords[labels == 0] # 负例点
ax.scatter(pos_points[:, 0], pos_points[:, 1], color='green', marker='*',
s=marker_size, edgecolor='white', linewidth=1.25) # 正例绿色星标
ax.scatter(neg_points[:, 0], neg_points[:, 1], color='red', marker='*',
s=marker_size, edgecolor='white', linewidth=1.25) # 负例红色星标
def show_box(box, ax):
"""
在 matplotlib 轴上绘制矩形框。
box: [x0, y0, x1, y1]
ax: matplotlib 轴对象
"""
x0, y0 = box[0], box[1]
w, h = box[2] - box[0], box[3] - box[1] # 计算宽高
ax.add_patch(plt.Rectangle((x0, y0), w, h, edgecolor='green', facecolor=(0, 0, 0, 0), lw=2))
def show_masks(image, masks, scores, point_coords=None, box_coords=None, input_labels=None, borders=True):
"""
遍历展示多个掩码候选,每个掩码单独绘图。
image: RGB 原图 (H, W, 3)
masks: (N, H, W) 掩码数组
scores: (N,) 掩码分数数组
point_coords: 可选,点坐标
box_coords: 可选,框坐标
input_labels: 可选,点标签
borders: 是否绘制掩码边框
"""
for i, (mask, score) in enumerate(zip(masks, scores)):
plt.figure(figsize=(10, 10))
plt.imshow(image) # 显示原图
show_mask(mask, plt.gca(), borders=borders) # 叠加掩码
if point_coords is not None:
assert input_labels is not None
show_points(point_coords, input_labels, plt.gca()) # 绘制点
if box_coords is not None:
show_box(box_coords, plt.gca()) # 绘制框
if len(scores) > 1:
plt.title(f"Mask {i+1}, Score: {score:.3f}", fontsize=18)
plt.axis('off')
plt.show() # 展示图像
# -------------------------------
# 原有单张图片推理逻辑(首帧处理)
# -------------------------------
# 读取首帧
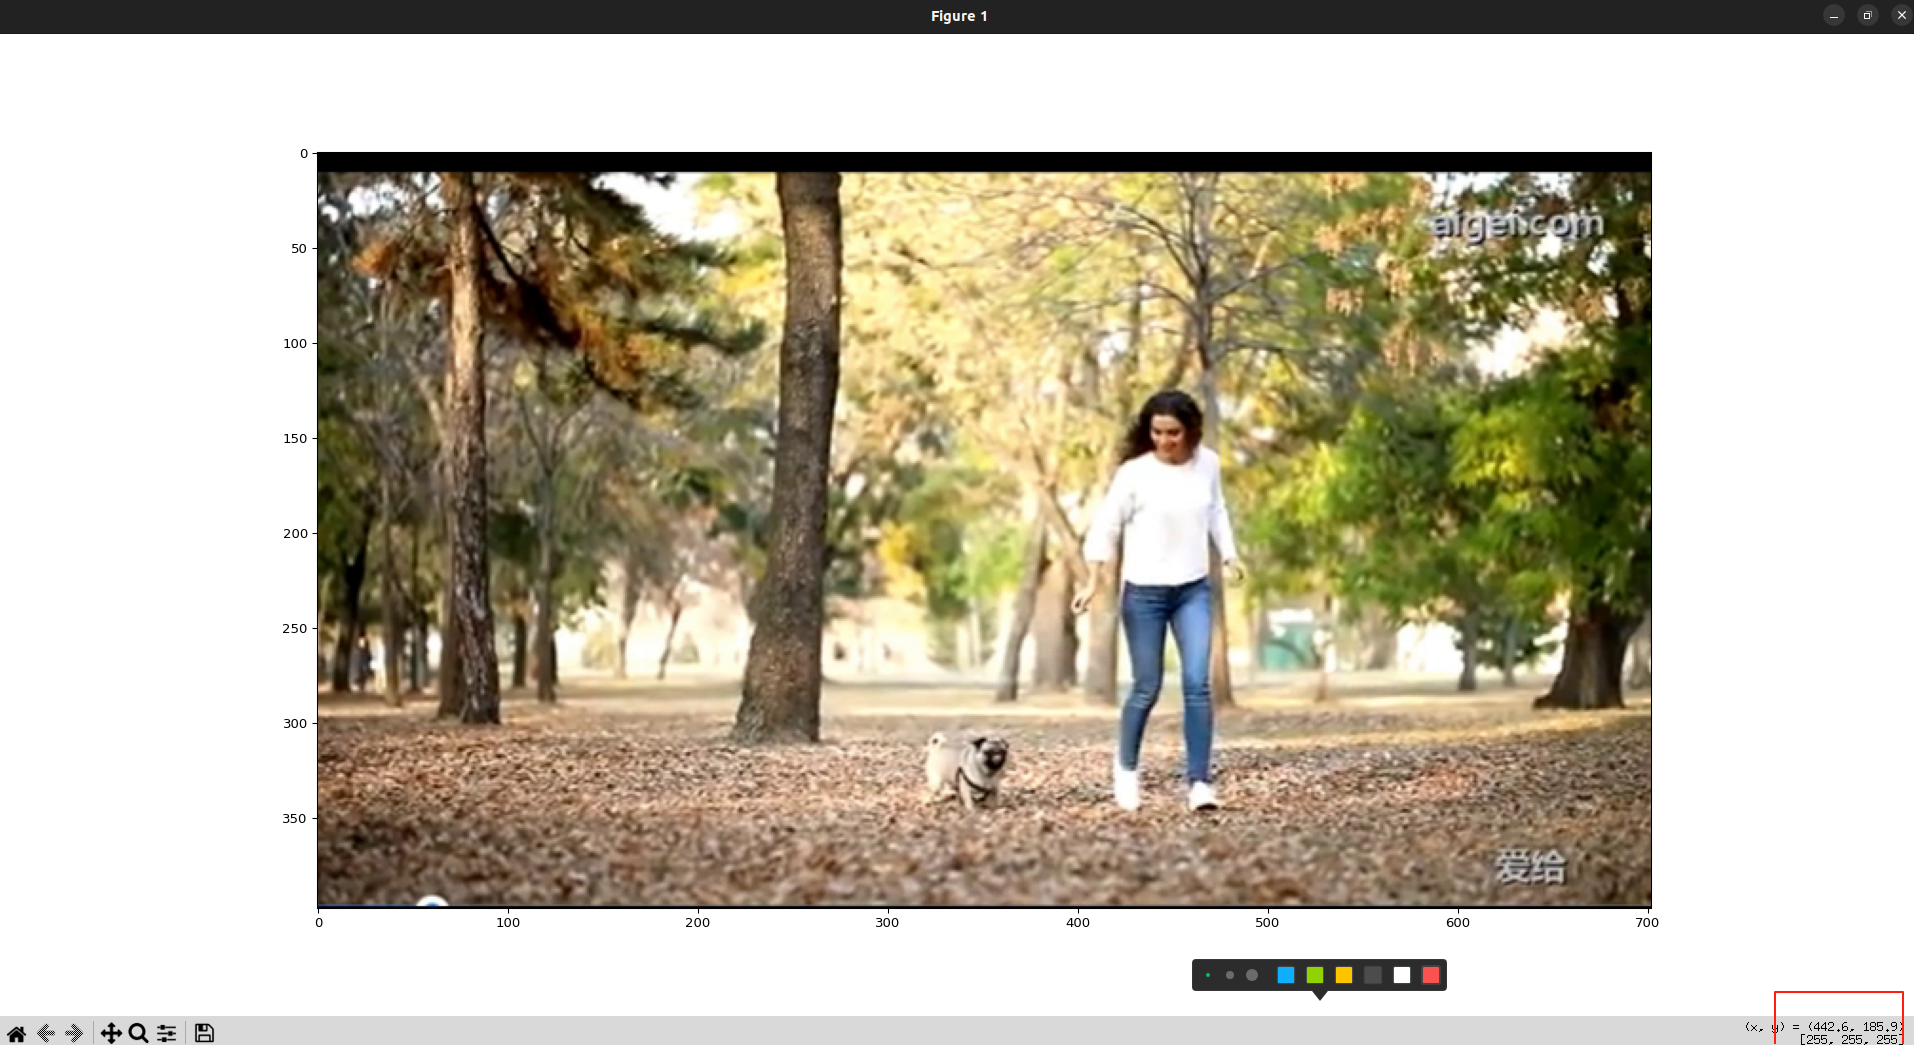
image = Image.open('/home/test4/frame_0006.png')
image = np.array(image.convert("RGB")) # 转为 RGB 数组
plt.figure(figsize=(10, 10))
plt.imshow(image) # 显示首帧
plt.axis('on')
plt.show()
# 加载 SAM 2 模型权重(保持原来写法)
from sam2.build_sam import build_sam2 # 构建模型函数
from sam2.sam2_image_predictor import SAM2ImagePredictor # SAM2 推理器
sam2_checkpoint = "checkpoints/sam2.1_hiera_tiny.pt" # 权重路径
model_cfg = "configs/sam2.1/sam2.1_hiera_t.yaml" # 配置文件路径
sam2_model = build_sam2(model_cfg, sam2_checkpoint, device=device) # 构建 SAM2 模型
predictor = SAM2ImagePredictor(sam2_model) # 初始化预测器
# 对首帧进行点提示并推理
predictor.set_image(image) # 设置首帧图像
# 定义提示点和标签(1=正,0=负)
input_point = np.array([
[446, 150],
[440, 228],
[427, 336],
[406, 232],
[484, 218],
[452, 181],
[468, 338],
[475, 222],
[499, 221],
[392, 227],
[419, 238],
[448, 273],
[447, 307],
[445, 333],
],)
input_label = np.array([1, 1, 1, 1, 1, 1, 1,0, 0, 0, 0, 0, 0, 0])
plt.figure(figsize=(10, 10))
plt.imshow(image)
show_points(input_point, input_label, plt.gca()) # 绘制提示点
plt.axis('on')
plt.show()
# 进行推理,multimask_output=True 返回多个候选
masks, scores, logits = predictor.predict(
point_coords=input_point,
point_labels=input_label,
multimask_output=True,
)
# 对掩码按照分数排序,取最高分候选放到首位
sorted_ind = np.argsort(scores)[::-1]
masks = masks[sorted_ind]
scores = scores[sorted_ind]
logits = logits[sorted_ind]
# 显示首帧所有掩码候选(可选注释掉以加速)
# show_masks(image, masks, scores, point_coords=input_point, input_labels=input_label, borders=True)
# -------------------------------
# 新增:批量处理同一文件夹下其他图片,使用 tqdm 显示进度
# -------------------------------
frames_dir = "/home/test4" # 帧所在目录
out_mask_dir = os.path.join(frames_dir, "sam2_masks") # 掩码保存目录
os.makedirs(out_mask_dir, exist_ok=True) # 创建掩码目录
out_overlay_dir = os.path.join(frames_dir, "sam2_overlay") # 叠加图保存目录
os.makedirs(out_overlay_dir, exist_ok=True) # 创建叠加图目录
# 获取该目录下所有 .jpg 文件并排序
all_paths = sorted(glob.glob(os.path.join(frames_dir, "*.jpg")))
# 排除已处理的首帧
remaining_paths = [p for p in all_paths if os.path.basename(p) != "frame_000000.jpg"]
total_frames = len(remaining_paths) # 剩余总帧数
print(f">>> 开始批量处理剩余 {total_frames} 张帧 ...")
# 使用 tqdm 包裹 remaining_paths,每处理一帧自动显示进度和已用/剩余时间
for frame_path in tqdm(remaining_paths, desc="Processing frames", unit="frame"):
img = np.array(Image.open(frame_path).convert("RGB")) # 读取并转换为 RGB 数组
# 1) 直接对新图像调用 set_image,会覆盖之前的特征
predictor.set_image(img) # 设置当前帧图像
# 2) 推理:仅输出最佳掩码(multimask_output=False)
masks_pred, scores_pred, _ = predictor.predict(
point_coords=input_point, # 与首帧相同的提示点坐标
point_labels=input_label, # 与首帧相同的提示点标签
multimask_output=False, # 只要最佳掩码
)
# 3) 将掩码转为 0/255 uint8 方便保存
mask_uint8 = (masks_pred[0].astype(np.uint8)) * 255 # 二值 -> 0/255
# 4) 保存掩码到磁盘
base_name = os.path.basename(frame_path).rsplit(".", 1)[0] # 获取不带后缀文件名
mask_filename = base_name + "_mask.png" # 掩码文件名
mask_path = os.path.join(out_mask_dir, mask_filename) # 掩码保存路径
cv2.imwrite(mask_path, mask_uint8) # 保存掩码
# 5) 生成叠加效果图:将掩码叠加到原始图像上
# 首先将原图转换为 BGR,因为 cv2.addWeighted 需要 BGR 格式
img_bgr = cv2.cvtColor(img, cv2.COLOR_RGB2BGR) # RGB -> BGR
# 创建与原图大小相同的纯色掩码图层(蓝色)
mask_color = np.zeros_like(img_bgr) # 与原图同尺寸的全零数组
mask_color[:, :, 0] = mask_uint8 # 将掩码值赋给蓝色通道 (B);G, R 通道为 0
# 使用 addWeighted 叠加原图和掩码,权重分别为 0.7 和 0.3
overlay = cv2.addWeighted(img_bgr, 0.7, mask_color, 0.3, 0)
# 6) 保存叠加图到磁盘
overlay_filename = base_name + "_overlay.png" # 叠加图文件名
overlay_path = os.path.join(out_overlay_dir, overlay_filename) # 保存路径
cv2.imwrite(overlay_path, overlay) # 保存叠加效果图
print("批量处理完成!")
显示第一帧的时候,鼠标可以在图像图像上移动,图像的右下角会显示坐标,方便进行坐标标记:
这个结果就不给出了,这个脚本是过渡,主要是使用下面的多目标跟踪。
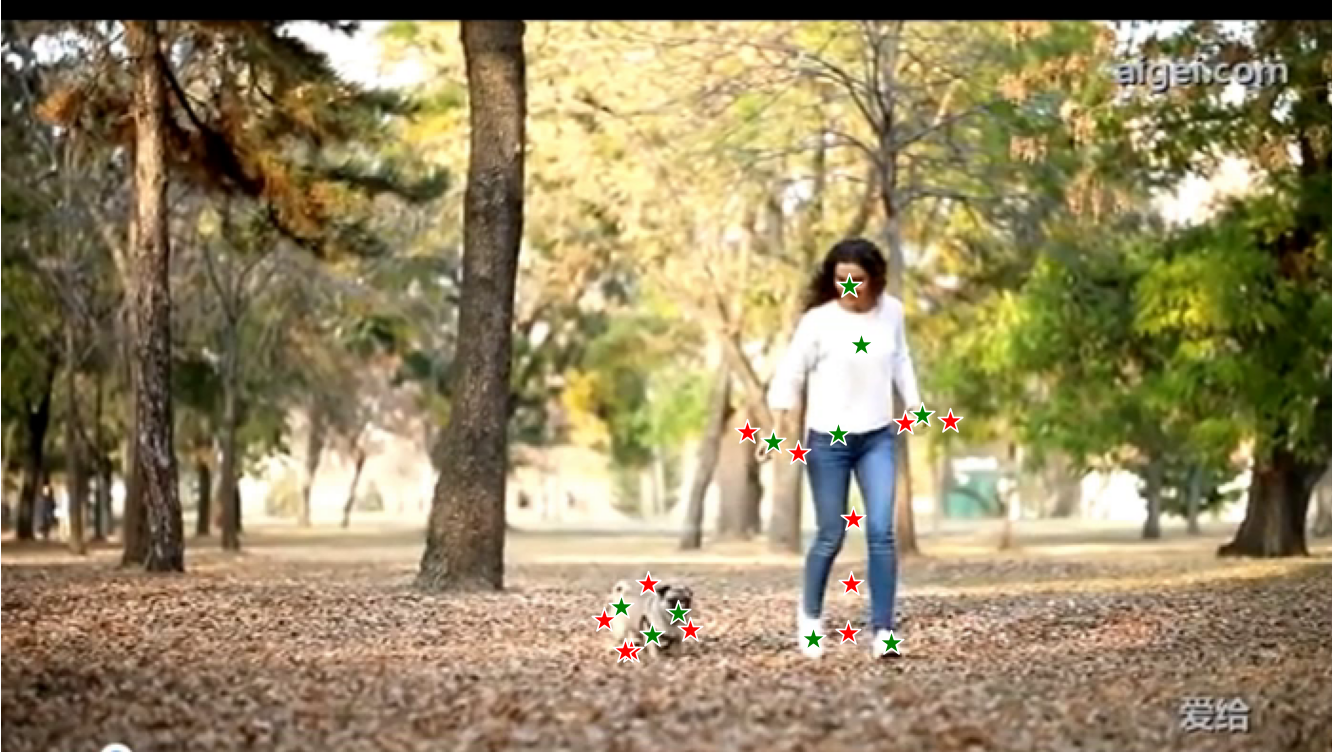
图像方式处理多个目标:
标记点的处理方式:
脚本中对人和狗分别做了正向点 和 负向点的标记。
#!/usr/bin/env python3
# -*- coding: utf-8 -*-
"""
批量处理同一文件夹下多目标分割,每帧分别对多个目标调用 predict(),
并保存单目标掩码及全部目标的叠加可视化。使用 tqdm 显示进度,无需手动计算时间和 FPS。
"""

import os
# 如果使用 Apple MPS,对于不支持的操作回退到 CPU
os.environ["PYTORCH_ENABLE_MPS_FALLBACK"] = "1"

import numpy as np
import torch
import cv2
import glob
from tqdm import tqdm
from PIL import Image
import matplotlib.pyplot as plt

# --------------------------------------
# 1. 选择设备(CUDA > MPS > CPU)
# --------------------------------------
if torch.cuda.is_available():
    device = torch.device("cuda")
elif torch.backends.mps.is_available():
    device = torch.device("mps")
else:
    device = torch.device("cpu")
print(f"using device: {device}")

if device.type == "cuda":
    torch.autocast("cuda", dtype=torch.bfloat16).__enter__()
    if torch.cuda.get_device_properties(0).major >= 8:
        torch.backends.cuda.matmul.allow_tf32 = True
        torch.backends.cudnn.allow_tf32 = True
elif device.type == "mps":
    print(
        "\nSupport for MPS devices is preliminary. SAM 2 是在 CUDA 下训练的,"
        "在 MPS 上可能数值略有不同或性能下降。"
    )

np.random.seed(3)

def show_mask(mask, ax, random_color=False, borders=True):
    """
    在 matplotlib 轴上叠加单个二值掩码(0/1),random_color=True 则随机颜色,否则使用固定蓝色半透明。
    """
    if random_color:
        color = np.concatenate([np.random.random(3), np.array([0.6])], axis=0)
    else:
        color = np.array([30/255, 144/255, 255/255, 0.6])
    h, w = mask.shape[-2:]
    mask_uint8 = mask.astype(np.uint8)
    mask_rgba = mask_uint8.reshape(h, w, 1) * color.reshape(1, 1, -1)
    if borders:
        contours, _ = cv2.findContours(mask_uint8, cv2.RETR_EXTERNAL, cv2.CHAIN_APPROX_NONE)
        contours = [cv2.approxPolyDP(cnt, 0.01, True) for cnt in contours]
        tmp = (mask_rgba * 255).astype(np.uint8)
        tmp = cv2.drawContours(tmp, contours, -1, (255, 255, 255, 128), thickness=2)
        mask_rgba = tmp.astype(np.float32) / 255.0
    ax.imshow(mask_rgba)

def show_points(coords, labels, ax, marker_size=375):
    """
    在 matplotlib 轴上绘制正负点:labels=1 时绿星,labels=0 时红星。
    coords: (N,2),labels: (N,)。
    """
    pos = coords[labels == 1]
    neg = coords[labels == 0]
    ax.scatter(pos[:, 0], pos[:, 1], color='green', marker='*',
               s=marker_size, edgecolor='white', linewidth=1.25)
    ax.scatter(neg[:, 0], neg[:, 1], color='red', marker='*',
               s=marker_size, edgecolor='white', linewidth=1.25)


# --------------------------------------
# 2. 加载 SAM2 模型(与你之前的代码保持一致)
# --------------------------------------
from sam2.build_sam import build_sam2
from sam2.sam2_image_predictor import SAM2ImagePredictor

sam2_checkpoint = "checkpoints/sam2.1_hiera_tiny.pt"
model_cfg = "configs/sam2.1/sam2.1_hiera_t.yaml"

sam2_model = build_sam2(model_cfg, sam2_checkpoint, device=device)
predictor = SAM2ImagePredictor(sam2_model)

# --------------------------------------
# 3. 定义多目标提示信息
# --------------------------------------
# 每个目标用一个 dict,里面放 name、points(M×2 数组)、labels(M,)数组。
# 下面示例把你提供的两组点展平到同一个数组,并对应标签长度。
# 注意:points 和 labels 必须一一对应、长度一致。
targets = [
    {
        "name": "person1",
        "points": np.array([
            [446, 150],
            [440, 228],
            [427, 336],
            [406, 232],
            [484, 218],
            [452, 181],
            [468, 338],
            [475, 222],
            [499, 221],
            [392, 227],
            [419, 238],
            [448, 273],
            [447, 307],
            [445, 333],
            # 如果还想把第二组一并当作 person1 的点,也可以接着往下加……
            # 例如:[356, 322], [326, 319], [342, 334], [331, 342]
        ]),
        "labels": np.array([1, 1, 1, 1, 1, 1, 1,0, 0, 0, 0, 0, 0, 0])
    },
    {
        "name": "dog",
        "points": np.array([
            [356, 322],
            [326, 319],
            [342, 334],
            [331, 342],
            [317,326],
            [328,342],
            [362,331],
            [340,307]
        ]),
        "labels": np.array([1, 1, 1, 0,0,0,0,0])
    },
    # 如果还有第 3、4 ... 个目标,就继续在列表里加字典
]

# --------------------------------------
# 4. 先调试一下首帧(确保多个目标的点能正确分割)
# --------------------------------------
first_frame = "/home/test4/frame_0006.png"
image = np.array(Image.open(first_frame).convert("RGB"))
plt.figure(figsize=(6, 6))
plt.imshow(image)
for t in targets:
    show_points(t["points"], t["labels"], plt.gca())
plt.axis("off")
plt.show()

# (可选)只针对某个目标单独调用 predict 看效果
# predictor.set_image(image)
# masks_p, scores_p, _ = predictor.predict(
#     point_coords=targets[0]["points"],
#     point_labels=targets[0]["labels"],
#     multimask_output=False
# )
# show_mask(masks_p[0], plt.gca()); plt.axis("off"); plt.show()

# --------------------------------------
# 5. 批量处理整文件夹:对每帧分别遍历所有目标
# --------------------------------------
frames_dir = "/home/test4"
out_mask_dir = os.path.join(frames_dir, "sam2_masks")
os.makedirs(out_mask_dir, exist_ok=True)

out_overlay_dir = os.path.join(frames_dir, "sam2_overlay")
os.makedirs(out_overlay_dir, exist_ok=True)

# 支持 .jpg、.png 等多种后缀,这里同时搜两种:
all_paths = sorted(glob.glob(os.path.join(frames_dir, "*.jpg")) +
                   glob.glob(os.path.join(frames_dir, "*.png")))
# 如果有首帧不想重复,就在这里排除
remaining = [p for p in all_paths if os.path.basename(p) != os.path.basename(first_frame)]

print(f">>> 批量处理 {len(remaining)} 张帧(多目标)……")
for frame_path in tqdm(remaining, desc="Processing frames", unit="frame"):
    img = np.array(Image.open(frame_path).convert("RGB"))
    predictor.set_image(img)

    # 用来叠加所有目标的累计图 (BGR)
    overlay_acc = img[..., ::-1].astype(np.float32)

    base = os.path.basename(frame_path).rsplit(".", 1)[0]

    for idx, t in enumerate(targets):
        # 1. SAM2 推理
        masks_t, scores_t, _ = predictor.predict(
            point_coords=t["points"],
            point_labels=t["labels"],
            box =   None,
            multimask_output=False
        )
        mask_np = masks_t[0]
        assert mask_np.any(), f"[{base}] {t['name']} 掩码为空,请检查点"
        mask_u8 = (mask_np * 255).astype(np.uint8)

        # 2. 固定颜色
        color_map = [
            (0, 0, 255),  # 红
            (0, 255, 0),  # 绿
            (255, 0, 0),  # 蓝
            (0, 255, 255),  # 黄
        ]
        bgr_color = color_map[idx % len(color_map)]

        # 3. 生成“彩色填充层” (float32)
        fill_layer = np.zeros_like(overlay_acc, dtype=np.float32)
        for c in range(3):  # BGR 三通道
            fill_layer[..., c] = mask_u8 * (bgr_color[c] / 255.0)

        # 4. 生成“白色边缘层” (float32)
        contours, _ = cv2.findContours(
            mask_u8, cv2.RETR_EXTERNAL, cv2.CHAIN_APPROX_NONE
        )
        edge_u8 = np.zeros_like(mask_u8)
        cv2.drawContours(edge_u8, contours, -1, 255, thickness=2)
        edge_layer = cv2.cvtColor(edge_u8, cv2.COLOR_GRAY2BGR).astype(np.float32)

        # 5. 叠加:原图权重1.0 + 填充0.4 + 边缘1.0
        overlay_acc = cv2.addWeighted(overlay_acc, 1.0, fill_layer, 0.4, 0)
        overlay_acc = cv2.addWeighted(overlay_acc, 1.0, edge_layer, 1.0, 0)

        # 6. 保存当前目标掩码 (uint8)
        mask_name = f"{base}_{t['name']}_mask.png"
        ok = cv2.imwrite(os.path.join(out_mask_dir, mask_name), mask_u8)
        if not ok:
            print("‼️ 保存掩码失败:", mask_name)

    # 循环结束后,把 overlay_acc 转回 uint8 并保存
    overlay_bgr = np.clip(overlay_acc, 0, 255).astype(np.uint8)
    overlay_name = f"{base}_overlay.png"
    cv2.imwrite(os.path.join(out_overlay_dir, overlay_name), overlay_bgr)

    # ● 可选:避免 GPU 内存累积 ●
    if device.type == "cuda":
        torch.cuda.empty_cache()

print(">>> 批量处理完成!")
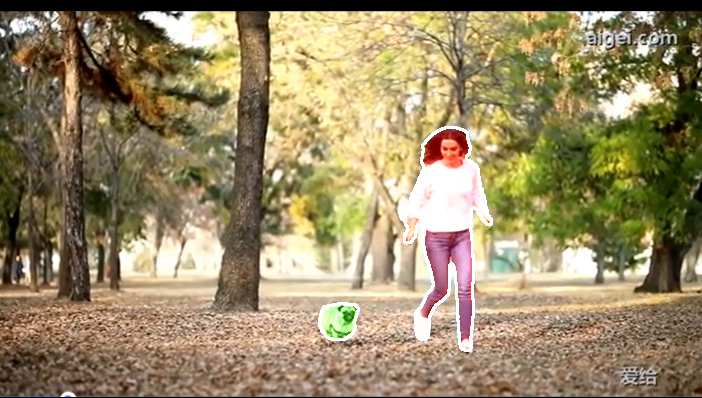
第一帧的处理结果(这里做一下说明:文件夹里面的第一帧图片是frame_0006.png,所以路径给的是frame_0006.png):
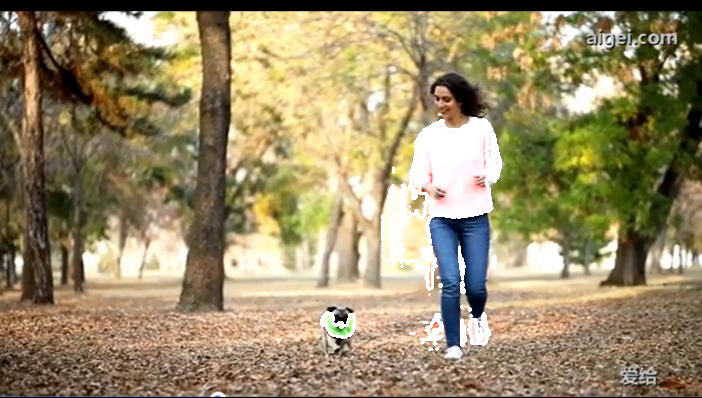
标记完第一帧,然后让其处理剩下的帧, 运行结果:
处理的第一帧:

处理的第158帧:
受图像分辨率的要求,对图像中的人和狗做多目标跟踪的时候使用box作为提示:
#!/usr/bin/env python3
# -*- coding: utf-8 -*-
"""
批量处理同一文件夹下多目标分割,每帧分别对多个目标调用 predict(),
并保存单目标掩码及全部目标的叠加可视化。使用 tqdm 显示进度,无需手动计算时间和 FPS。
改为通过“框 (box)” 作为提示,而非“点 (points/labels)”。
"""

import os
# 如果使用 Apple MPS,对于不支持的操作回退到 CPU
os.environ["PYTORCH_ENABLE_MPS_FALLBACK"] = "1"

import numpy as np
import torch
import cv2
import glob
from tqdm import tqdm
from PIL import Image
import matplotlib.pyplot as plt

# --------------------------------------
# 1. 选择设备(CUDA > MPS > CPU)
# --------------------------------------
if torch.cuda.is_available():
    device = torch.device("cuda")
elif torch.backends.mps.is_available():
    device = torch.device("mps")
else:
    device = torch.device("cpu")
print(f"using device: {device}")

if device.type == "cuda":
    torch.autocast("cuda", dtype=torch.bfloat16).__enter__()
    if torch.cuda.get_device_properties(0).major >= 8:
        torch.backends.cuda.matmul.allow_tf32 = True
        torch.backends.cudnn.allow_tf32 = True
elif device.type == "mps":
    print(
        "\nSupport for MPS devices 是初步支持。SAM 2 是在 CUDA 下训练的,"
        "在 MPS 上可能数值略有不同或性能下降。"
    )

np.random.seed(3)

def show_mask(mask, ax, random_color=False, borders=True):
    """
    在 matplotlib 轴上叠加单个二值掩码(0/1),random_color=True 则随机颜色,否则使用固定蓝色半透明。
    """
    if random_color:
        color = np.concatenate([np.random.random(3), np.array([0.6])], axis=0)
    else:
        color = np.array([30/255, 144/255, 255/255, 0.6])
    h, w = mask.shape[-2:]
    mask_uint8 = mask.astype(np.uint8)
    mask_rgba = mask_uint8.reshape(h, w, 1) * color.reshape(1, 1, -1)
    if borders:
        contours, _ = cv2.findContours(mask_uint8, cv2.RETR_EXTERNAL, cv2.CHAIN_APPROX_NONE)
        contours = [cv2.approxPolyDP(cnt, 0.01, True) for cnt in contours]
        tmp = (mask_rgba * 255).astype(np.uint8)
        tmp = cv2.drawContours(tmp, contours, -1, (255, 255, 255, 128), thickness=2)
        mask_rgba = tmp.astype(np.float32) / 255.0
    ax.imshow(mask_rgba)

def show_points(coords, labels, ax, marker_size=375):
    """
    在 matplotlib 轴上绘制正负点:labels=1 时绿星,labels=0 时红星。
    coords: (N,2),labels: (N,)。
    (本示例因改用 box 提示,show_points 仅保留以防后续调试用)
    """
    pos = coords[labels == 1]
    neg = coords[labels == 0]
    ax.scatter(pos[:, 0], pos[:, 1], color='green', marker='*',
               s=marker_size, edgecolor='white', linewidth=1.25)
    ax.scatter(neg[:, 0], neg[:, 1], color='red', marker='*',
               s=marker_size, edgecolor='white', linewidth=1.25)


# --------------------------------------
# 2. 加载 SAM2 模型(与你之前的代码保持一致)
# --------------------------------------
from sam2.build_sam import build_sam2
from sam2.sam2_image_predictor import SAM2ImagePredictor

sam2_checkpoint = "checkpoints/sam2.1_hiera_tiny.pt"
model_cfg = "configs/sam2.1/sam2.1_hiera_t.yaml"

sam2_model = build_sam2(model_cfg, sam2_checkpoint, device=device)
predictor = SAM2ImagePredictor(sam2_model)

# --------------------------------------
# 3. 定义多目标提示信息 (用 box 代替 points/labels)
# --------------------------------------
# 每个目标用一个 dict,里面放 name、box(4元列表),原 points/labels 不再使用
# box 格式为 [x1, y1, x2, y2],注意是像素坐标:左上和右下
targets = [
    {
        "name": "person1",
        # 原先的 points/labels 注释掉;改用 box 提示
        # "points": np.array([...]),
        # "labels": np.array([...]),
        "box": [396, 123, 489, 345]   # 示例:人目标的边界框(x1, y1, x2, y2)
    },
    {
        "name": "dog",
        "box": [323, 302, 364, 348]   # 示例:狗目标的边界框
    },
    # 如果还有第 3、4 ... 个目标,就继续在列表里加字典
]

# --------------------------------------
# 4. 先调试一下首帧:在图上画出 box 看是否准确
# --------------------------------------
first_frame = "/home/test4/frame_0006.png"
image = np.array(Image.open(first_frame).convert("RGB"))
plt.figure(figsize=(6, 6))
plt.imshow(image)
ax = plt.gca()
for t in targets:
    x1, y1, x2, y2 = t["box"]
    # 绿色矩形框,线宽 2
    rect = plt.Rectangle((x1, y1), x2 - x1, y2 - y1,
                         edgecolor='lime', linewidth=2, facecolor='none')
    ax.add_patch(rect)
    ax.text(x1, y1 - 5, t["name"], color='lime', fontsize=12, weight='bold')
plt.axis("off")
plt.show()

# --------------------------------------
# 5. 批量处理整文件夹:对每帧分别遍历所有目标(使用 box)
# --------------------------------------
frames_dir = "/home/test4"
out_mask_dir = os.path.join(frames_dir, "sam2_masks")
os.makedirs(out_mask_dir, exist_ok=True)

out_overlay_dir = os.path.join(frames_dir, "sam2_overlay")
os.makedirs(out_overlay_dir, exist_ok=True)

# 支持 .jpg、.png 等多种后缀,这里同时搜两种:
all_paths = sorted(glob.glob(os.path.join(frames_dir, "*.jpg")) +
                   glob.glob(os.path.join(frames_dir, "*.png")))
# 如果有首帧不想重复,就在这里排除
remaining = [p for p in all_paths if os.path.basename(p) != os.path.basename(first_frame)]

print(f">>> 批量处理 {len(remaining)} 张帧(多目标,用 box 提示)……")
for frame_path in tqdm(remaining, desc="Processing frames", unit="frame"):
    # 1. 读取图像并载入模型
    img = np.array(Image.open(frame_path).convert("RGB"))
    predictor.set_image(img)

    # 2. 初始化 overlay_acc 为 float32 BGR(与下面 fill_layer/edge_layer 匹配)
    overlay_acc = img[..., ::-1].astype(np.float32)  # BGR → float32

    base = os.path.basename(frame_path).rsplit(".", 1)[0]

    # ───────────────────────────────────────────────────────────────────
    # 3. 循环遍历每个目标,用 box 提示做分割 → 生成掩码 → 叠加可视化
    # ───────────────────────────────────────────────────────────────────
    for idx, t in enumerate(targets):
        # 3.1 从 targets 里取出当前目标的 box
        box_xyxy = t["box"]  # [x1, y1, x2, y2]

        # 3.2 调用 predict 时,不再传 point_coords/point_labels,而传入 box 参数
        #     如果要结合点提示,也可以同时传,但这里示例仅用 box。
        masks_t, scores_t, _ = predictor.predict(
            point_coords=None,
            point_labels=None,
            box=np.array(box_xyxy, dtype=np.float32),  # 注意类型 float32 或 float64 均可
            multimask_output=False
        )
        mask_np = masks_t[0]  # (H, W) 二值 mask
        assert mask_np.any(), f"[{base}] {t['name']} 掩码为空,请检查 box 坐标"
        mask_u8 = (mask_np * 255).astype(np.uint8)

        # 3.3 固定颜色:0→红、1→绿、2→蓝、3→黄……循环使用
        color_map = [
            (  0,   0, 255),   # 红 (BGR)
            (  0, 255,   0),   # 绿
            (255,   0,   0),   # 蓝
            (  0, 255, 255),   # 黄
        ]
        bgr_color = color_map[idx % len(color_map)]

        # 3.4 生成“彩色填充层” (float32)
        fill_layer = np.zeros_like(overlay_acc, dtype=np.float32)
        for c in range(3):  # BGR 三通道
            fill_layer[..., c] = mask_u8 * (bgr_color[c] / 255.0)

        # 3.5 生成“白色边缘层” (float32)
        contours, _ = cv2.findContours(
            mask_u8, cv2.RETR_EXTERNAL, cv2.CHAIN_APPROX_NONE
        )
        edge_u8 = np.zeros_like(mask_u8)
        cv2.drawContours(edge_u8, contours, -1, 255, thickness=2)
        edge_layer = cv2.cvtColor(edge_u8, cv2.COLOR_GRAY2BGR).astype(np.float32)

        # 3.6 按权重叠加:原图(1.0) + 填充(0.4) + 边缘(1.0)
        overlay_acc = cv2.addWeighted(overlay_acc, 1.0, fill_layer,   0.4, 0)
        overlay_acc = cv2.addWeighted(overlay_acc, 1.0, edge_layer,  1.0, 0)

        # 3.7 保存当前目标的独立掩码 (uint8)
        mask_name = f"{base}_{t['name']}_mask.png"
        ok = cv2.imwrite(os.path.join(out_mask_dir, mask_name), mask_u8)
        if not ok:
            print("‼️ 保存掩码失败:", mask_name)

    # ───────────────────────────────────────────────────────────────────
    # 4. 循环结束后,把 overlay_acc 转回 uint8 并保存
    # ───────────────────────────────────────────────────────────────────
    overlay_bgr = np.clip(overlay_acc, 0, 255).astype(np.uint8)
    overlay_name = f"{base}_overlay.png"
    cv2.imwrite(os.path.join(out_overlay_dir, overlay_name), overlay_bgr)

    # 5. ● 可选:避免 GPU 内存累积 ●
    if device.type == "cuda":
        torch.cuda.empty_cache()

print(">>> 批量处理完成!")
第一帧显示标记结果:
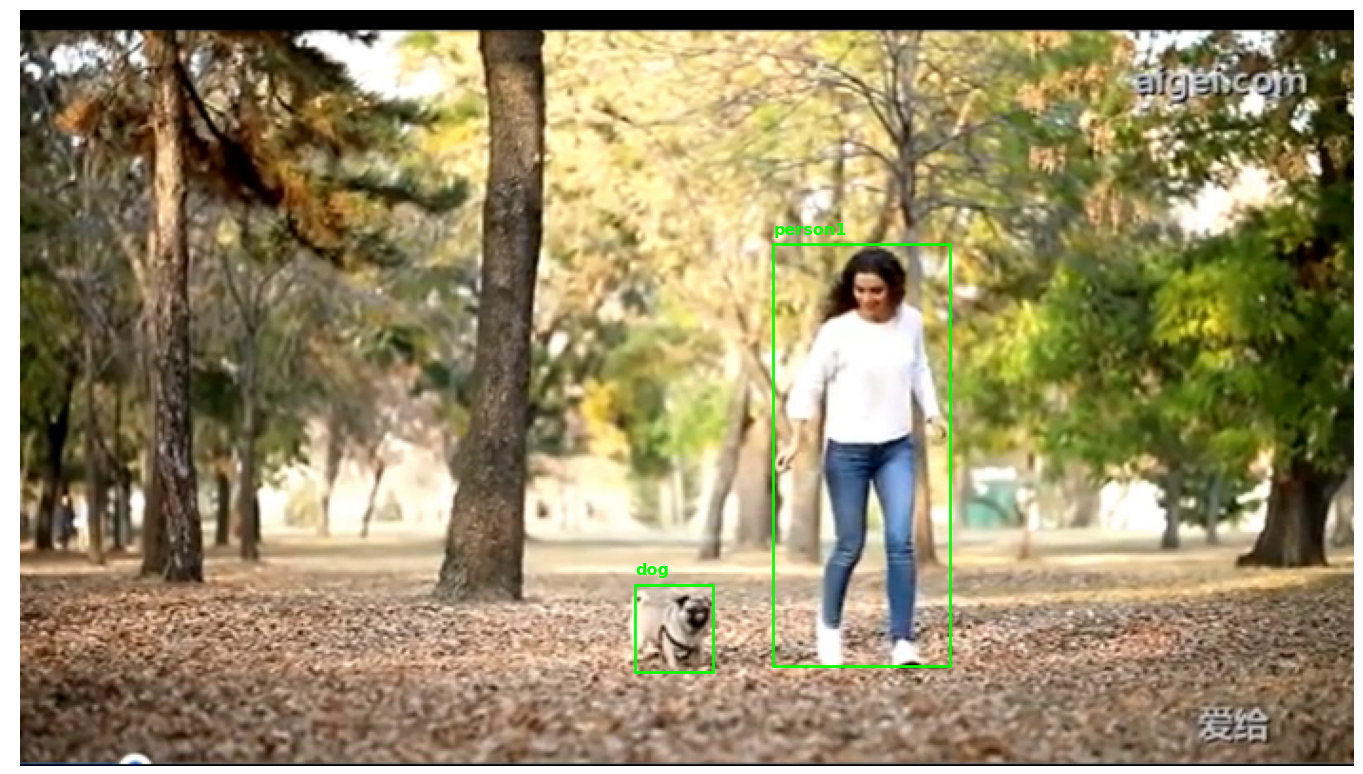
处理结果:
第一帧:
第158帧:
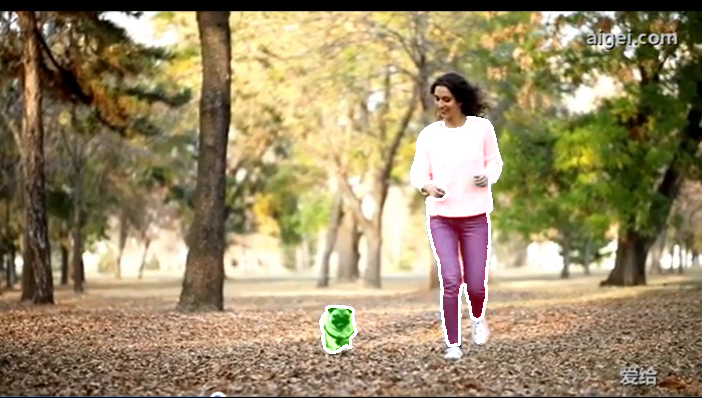
SAM2使用图片推理函数,还是使用的SAM1的原理,没有使用到SAM2的记忆流的机制,所以效果很差,但是从同样帧的对比结果看,使用BOX的准确度远大于使用点标记的
注:本文内容基于作者个人实际应用过程的总结与记录,旨在技术分享与学习交流之用。如内容中涉及任何版权问题或存在争议,欢迎联系作者进行处理或删除。


 622
622

 被折叠的 条评论
为什么被折叠?
被折叠的 条评论
为什么被折叠?
 到【灌水乐园】发言


