


提示:文章写完后,目录可以自动生成,如何生成可参考右边的帮助文档
目录
参考
官方文档
全志 SOC / WhyCan Forum(哇酷开发者社区)
全志A20 / A64 / A133 / D1 / Tina / Android 文档合集
1 SDK编译
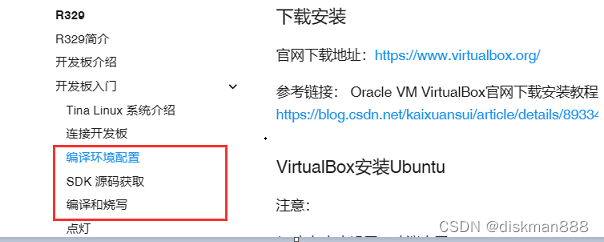
参照官方文档里的编译环境配置、源码获取、编译和烧写章节。
天敏sdk的编译过程
wsl ubuntu20.04下编译天敏提供的SDK
可以设置阿里云源,执行apt-get update后,安装全志官网要求的软件包。
跟官网SDK一样,需要配置公钥、安装repo引导脚本。
执行repo sync要把python版本切换为2.7,编译sdk时切回python3,注意:python3的版本要跟系统包里的python版本一致。
r329-ss-1956 源码解压
-
解压缩后得到.repo 隐藏仓库目录
-
repo sync -l 释放出本地工作目录
-
repo forall -c git checkout R329-1956SS-20200207-REL
此命令通过指定的TAG切换到本项目(SS 1956)的对应源码
编译步骤:
hush@hush-Z270-HD3:/mnt/6T/329/r329-Tina$ . build/envsetup.sh
Setup env done! Please run lunch next.
hush@hush-Z270-HD3:/mnt/6T/329/r329-Tina$ lunch

You're building on Linux

Lunch menu... pick a combo:
     1. r329_evb1-tina
     2. r329_evb1_xr829-tina
     3. r329_evb5_min-tina
     4. r329_evb5_v1-tina
     5. r329_evb5-tina
     6. r329_evb6-tina
     7. r329_fpga-tina
     8. r329_robot-tina
     9. r329_spk1-tina
     10. r329_ubidemo-tina

Which would you like? [Default r329_robot]: 8
============================================
TINA_BUILD_TOP=/mnt/6T/329/r329-Tina
TINA_TARGET_ARCH=aarch64
TARGET_PRODUCT=r329_robot
TARGET_PLATFORM=r329
TARGET_BOARD=r329-robot
TARGET_PLAN=robot
TARGET_BUILD_VARIANT=tina
TARGET_BUILD_TYPE=release
TARGET_KERNEL_VERSION=4.9
TARGET_UBOOT=u-boot-2018
TARGET_CHIP=sun50iw11p1
============================================
hush@hush-Z270-HD3:/mnt/6T/329/r329-Tina$ make -j4 && pack
R329编译过程分析
top-> makefile调用build->main.mk。
问题集
源文件编译警告升为错误
gdbusauth.c: In function '_g_dbus_auth_run_server':
gdbusauth.c:1298:11: error: '%s' directive argument is null [-Werror=format-overflow=]
 1298 |           debug_print ("SERVER: WaitingForBegin, read '%s'", line);
解决:增加判断条件,限制可能为空
python版本问题
编译时要求目标系统的python版本跟编译主机的python版本一致。先把安装主机的对应版本python,然后make package/lang/python3/clean,再make package/lang/python3/install。
ModuleNotFoundError: No module named ‘_ctypes’
解决:
主机安装libffi-dev,并重新编译安装跟目标机相同版本python。
sudo apt-get install libffi-dev
执行 make package/python3/clean,再执行 make package/python3/install
还不能解决问题,则把主机的_ctype.s拷到out/host/lib/python3.7/lib_dlnload/下,命名为 _ctypes.so,不确定是否用主机的python来验证各python包依赖关系。
/home/jiang/share/r329-1956/prebuilt/gcc/linux-x86/aarch64/toolchain-sunxi-glibc/toolchain/bin/../lib/gcc/aarch64-openwrt-linux-gnu/6.4.1/../../../../aarch64-openwrt-linux-gnu/bin/ld: warning: libdl.so.2, needed by /home/jiang/share/r329-1956/out/r329-robot/staging_dir/target/usr/lib/libasound.so, not found (try using -rpath or -rpath-link)
/home/jiang/share/r329-1956/out/r329-robot/staging_dir/target/usr/lib/libasound.so: undefined reference to `dlsym@GLIBC_2.17'
/home/jiang/share/r329-1956/out/r329-robot/staging_dir/target/usr/lib/libasound.so: undefined reference to `dlopen@GLIBC_2.17'
/home/jiang/share/r329-1956/out/r329-robot/staging_dir/target/usr/lib/libasound.so: undefined reference to `dlclose@GLIBC_2.17'
/home/jiang/share/r329-1956/out/r329-robot/staging_dir/target/usr/lib/libasound.so: undefined reference to `dladdr@GLIBC_2.17'
把prebuilt\gcc\linux-x86\aarch64\toolchain-sunxi-glibc\toolchain\lib对应库复制到out\r329-robot\staging_dir\target\usr\lib
主机没安装编译需要的包
缺什么补什么,必要时,重装安装主机python。
安装wiringPi出错
Error:  Building this module requires either that swig is installed
        (e.g., 'sudo apt install swig') or that wiringpi_wrap.c from the
        source distribution (on pypi) is available.
make[3]: *** [Makefile:64: /home/jiang/share/r329-1956/out/r329-robot/compile_dir/target/wiringpi/.built] Error 1
make[3]: Leaving directory '/home/jiang/share/r329-1956/package/lang/wiringpi'
按提示安装swig包。
sudo apt install swig
主机python缺少相关包或版本太低
intltool版本太低
./configure: line 9599: intltool-update: command not found
checking for intltool >= 0.35.0...  found
configure: error: Your intltool is too old.  You need intltool 0.35.0 or later.
make[3]: *** [Makefile:85: /home/jiang/share/r329-1956/out/r329-robot/compile_dir/target/libsoup-2.54.1/.configured_yyyn] Error 1
make[3]: Leaving directory '/home/jiang/share/r329-1956/package/libs/libsoup'
make[2]: *** [package/Makefile:193: package/libs/libsoup/compile] Error 2
主机安装新版本,intltool安装不上跟此有关?
sudo apt-get install intltool
intltool无makefile
bash: -c: line 0: syntax error near unexpected token `('
bash: -c: line 0: `(cd /home/jiang/share/r329-1956/out/r329-robot/compile_dir/target/host/intltool-0.51.0/; if [ -x configure ]; then cp -fpR /home/jiang/share/r329-1956/scripts/config.{guess,sub} /home/jiang/share/r329-1956/out/r329-robot/compile_dir/target/host/intltool-0.51.0// &&  bash ./configure CC="gcc" CFLAGS="-O2 -I/home/jiang/share/r329-1956/out/host/include -I/home/jiang/share/r329-1956/out/host/usr/include -I/home/jiang/share/r329-1956/out/r329-robot/staging_dir/target/host/include" CPPFLAGS="-I/home/jiang/share/r329-1956/out/host/include -I/home/jiang/share/r329-1956/out/host/usr/include -I/home/jiang/share/r329-1956/out/r329-robot/staging_dir/target/host/include" LDFLAGS="-L/home/jiang/share/r329-1956/out/host/lib -L/home/jiang/share/r329-1956/out/host/usr/lib -L/home/jiang/share/r329-1956/out/r329-robot/staging_dir/target/host/lib" SHELL="/usr/bin/env bash" PATH=/bin:/usr/bin:/home/jiang/share/r329-1956/out/host/bin:/home/jiang/share/r329-1956/out/r329-robot/staging_dir/toolchain/bin:/home/jiang/share/r329-1956/prebuilt/gcc/linux-x86/aarch64/toolchain-sunxi-glibc/toolchain/usr/bin:/home/jiang/share/r329-1956/prebuilt/gcc/linux-x86/aarch64/toolchain-sunxi-glibc/toolchain/bin:/home/jiang/share/r329-1956/out/r329-robot/staging_dir/toolchain/bin:/home/jiang/share/r329-1956/prebuilt/gcc/linux-x86/aarch64/toolchain-sunxi-glibc/toolchain/usr/bin:/home/jiang/share/r329-1956/prebuilt/gcc/linux-x86/aarch64/toolchain-sunxi-glibc/toolchain/bin:/home/jiang/share/r329-1956/out/host/bin:/home/jiang/share/r329-1956/out/r329-robot/staging_dir/toolchain/bin:/home/jiang/share/r329-1956/prebuilt/gcc/linux-x86/aarch64/toolchain-sunxi-glibc/toolchain/usr/bin:/home/jiang/share/r329-1956/prebuilt/gcc/linux-x86/aarch64/toolchain-sunxi-glibc/toolchain/bin:/home/jiang/share/r329-1956/out/host/bin:/home/jiang/share/r329-1956/out/host/bin:/home/jiang/.vscode-server/bin/ee2b180d582a7f601fa6ecfdad8d9fd269ab1884/bin/remote-cli:/usr/local/sbin:/usr/local/bin:/usr/sbin:/usr/bin:/sbin:/bin:/usr/games:/usr/local/games:/usr/lib/wsl/lib:/mnt/c/Program:Files:(x86)/NetSarang/Xshell:6/:/mnt/c/Program:Files:(x86)/Common:Files/Oracle/Java/javapath:/mnt/c/Windows/system32:/mnt/c/Windows:/mnt/c/Windows/System32/Wbem:/mnt/c/Windows/System32/WindowsPowerShell/v1.0/:/mnt/c/Windows/System32/OpenSSH/:/mnt/c/Program:Files/Git/cmd:/mnt/c/Program:Files/Java/jre1.8.0_333/bin:/mnt/c/Program:Files/nodejs/:/mnt/c/Program:Files:(x86)/NetSarang/Xshell:7/:/mnt/c/Program:Files:(x86)/NetSarang/Xftp:7/:/mnt/c/Users/diskman88/AppData/Local/Programs/Python/Python310/Scripts/:/mnt/c/Users/diskman88/AppData/Local/Programs/Python/Python310/:/mnt/c/Users/diskman88/AppData/Local/Microsoft/WindowsApps:/mnt/c/Users/diskman88/AppData/Local/Programs/Microsoft:VS:Code/bin:/mnt/c/Users/diskman88/AppData/Roaming/npm:/mnt/d/Program:Files/PhoenixSuit-v1.10/PhoenixSuit/:/snap/bin --target=x86_64-linux-gnu --host=x86_64-linux-gnu --build=x86_64-linux-gnu --program-prefix="" --program-suffix="" --prefix=/home/jiang/share/r329-1956/out/r329-robot/staging_dir/target/host --exec-prefix=/home/jiang/share/r329-1956/out/r329-robot/staging_dir/target/host --sysconfdir=/home/jiang/share/r329-1956/out/r329-robot/staging_dir/target/host/etc --localstatedir=/home/jiang/share/r329-1956/out/r329-robot/staging_dir/target/host/var --sbindir=/home/jiang/share/r329-1956/out/r329-robot/staging_dir/target/host/bin ; fi )'
进入out下的源码目录,主机上执行…/configure产生makefile文件。
安装BT-Manager-0.3.0时No local packages or download links found for cffi>=0.7
Couldn't find index page for 'cffi' (maybe misspelled?)
No local packages or download links found for cffi>=0.7
Traceback (most recent call last):
  File "./setup.py", line 44, in <module>
    'Topic :: Communications',
  File "/home/jiang/share/r329-1956/out/r329-robot/staging_dir/target/usr/lib/python3.7/distutils/core.py", line
解决:主要是可能访问不到包仓库,修改out\r329-robot\compile_dir\target\bt-manager/setup.cfg。加入:
[easy_install]
index_url = https://pypi.tuna.tsinghua.edu.cn/simple
缺文件
提示:fatal error: hb.h: No such file or directory
解决办法:链接
libgpg-error
install -m0755 /home/jiang/r329-1956/out/r329-robot/compile_dir/target/libgpg-error-1.46/ipkg-install/usr/bin/gpg-error-config /home/jiang/r329-1956/tmp/stage-libgpg-error/host/bin/
install: cannot stat ‘/home/jiang/r329-1956/out/r329-robot/compile_dir/target/libgpg-error-1.46/ipkg-install/usr/bin/gpg-error-config’: No such file or directory
主机上找同名文件复制过去。
openwir根文件系统制作
openwrt package makefile
作者:Creator_Ly ,链接
来源:简书
在"Openwrt main Makefile"章节里面有说明:
-
主Makefile会通过include package/Makefile调用package下的Makefile
-
package下的Makefile又会调用调用$(call subdir,package)遍历package子目录下的Makefile。
package下的Makefile是源码里面就提供的,不会修改,但package子目录下的Makefile确是我们经常要打交道的,本章节将对其进行说明。
打开package下面的子目录,通常会发现几样东西:
package/$(PKG_NAME)/Makefile [必备]
package/$(PKG_NAME)/src/ [可选]
package/$(PKG_NAME)/patches/ [可选]
package/$(PKG_NAME)/files/ [可选]
src目录、patches目录、files目录都是可选的,src目录存放的是该功能模块的源代码,pactches目录通常包括bug修复和对可执行文件体积的优化,files目录通常是运行脚本包括配置文件等。你也可能看到其它目录,因为只要在Makefile文件中指明,目录名字是可以任取的。
Makefile文件最关键,一般来说它提供了下载、编译、安装这个软件包的步骤。
当我们打开package子目录的Makefile文件,很难认出这是一个Makefile。它的格式跟一般的Makefile不一样,因为它的功能跟普通Makefile就是不一样的,它是一种编写方便的模板。
这里,以package/bridge/Makefile文件为例:
include $(TOPDIR)/rules.mk

PKG_NAME:=bridge
PKG_VERSION:=1.0.6
PKG_RELEASE:=1

PKG_BUILD_DIR:=$(BUILD_DIR)/bridge-utils-$(PKG_VERSION)
PKG_SOURCE:=bridge-utils-$(PKG_VERSION).tar.gz
PKG_SOURCE_URL:=@SF/bridge
PKG_MD5SUM:=9b7dc52656f5cbec846a7ba3299f73bd
PKG_CAT:=zcat

include $(INCLUDE_DIR)/package.mk

define Package/bridge
  SECTION:=base
  CATEGORY:=Network
  DEFAULT:=y
  TITLE:=Ethernet bridging configuration utility
  DESCRIPTION:=Ethernet bridging configuration utility\\\
    Manage ethernet bridging; a way to connect networks together to\\\
    form a larger network.
  URL:=http://bridge.sourceforge.net/
endef

define Build/Configure
  $(call Build/Configure/Default,--with-linux-headers=$(LINUX_DIR))
endef

define Package/bridge/install
        $(INSTALL_DIR) $(1)/usr/sbin
        $(INSTALL_BIN) $(PKG_BUILD_DIR)/brctl/brctl $(1)/usr/sbin/
endef

$(eval $(call BuildPackage,bridge))
1. 包含全局变量
首先在Makefile中的第一行一定要包含下面这个命令,这是Makefile的一些全局变量的相关定义
include $(TOPDIR)/rules.mk
- 软件包变量
建立一个软件包不需要太多工作;大部分工作都隐藏在其它的makefiles中,编写工作被抽象成对几个变量的赋值。
- PKG_NAME : 软件包的名字, 在 menuconfig 和 ipkg 显示
- PKG_VERSION :软件包的版本,主干分支的版本正是我们要下载的
- PKG_RELEASE :这个 makefile 的擦写版本
- PKG_BUILD_DIR :编译软件包的目录
- PKG_SOURCE :要下载的软件包的名字,一般是由 PKG_NAME 和 PKG_VERSION 组成
- PKG_SOURCE_URL :下载这个软件包的链接
- PKG_MD5SUM :软件包的 MD5 值
- PKG_CAT :解压软件包的方法 (zcat, bzcat, unzip)
- PKG_BUILD_DEPENDS :需要预先构建的软件包,但只是在构建本软件包时,而不是运行的时候。它的语法和下面的DEPENDS一样。
BuildPackage相关的宏定义
1.描述软件包在menuconfig和ipkg中的信息,可以定义如下变量:
define  Package/< PKG_NAME >
    SECTION : 软件包类型
    CATEGORY :  软件包在menuconfig里的位置,如Network, Utilities
    SUBMENU : menuconfig中软件包所属的二级目录,如dial-in/up
    DEFAULT: 默认的编译模式,m=编译成模块,y=编译到镜像,n或者不加不编译,[依赖
            包 两个之间通过空格分隔 前面加+为默认显示 选中该软件包自动选中依
            赖包 不加+为默认不显示 选中依赖包才显示]
    TITLE : 软件包标题
    DESCRIPTION : 软件包的详细说明,由于存在bug,现在已经放弃
    URL : 软件的原始位置,一般是软件作者的主页
    MAINTAINER :  (optional) 软件包维护人员
    DEPENDS : (optional) 依赖项,运行本软件依赖的其他包
endif
2.配置说明
define  Build/Configure (可选)
        在Automake中需要进行./configure,所以本配置方法主要针对需要配置的软件
        包而设计,一般自行开发的软件包可以不在这里说明。
 endif
3.软件包安装
define Package/install
        软件包的安装方法,包括一系列拷贝编译好的文件到指定位置。調用時會帶一
        個參數,就是嵌入系統的鏡像文件系統目錄,因此$(1)表示嵌入系统的镜像目
        录。一般可以采用下面的方法:
        $(INSTALL_DIR)  $(1)/usr/bin
        $(INSTALL_BIN)  $(PKG_BUILD_DIR)/$(PKG_NAME)  $(1)/usr/bin/
endif
4.其他BuildPackage相关的宏定义
上面列出的三个是在bridge这个模块下面用的宏定义,其他还有很多其他的定义,我们也可以了解下,再其他情况可能也会用到。
4.1…编译准备
define  Build/Prepare (可选)
    对于网上下载的软件包不需要再描述,对于非网上下载或自行开发的软件包
    必须说明编译准备方法,如下:
    mkdir -p $(PKG_BUILD_DIR)
    创建编译目录,也就是$(TOPDIR)/build_dir/target-<ARCH>*/$(PKG_NAME)-%(PKG_VERSION)
    $(CP) ./src/* $(PKG_BUILD_DIR)/
    将软件包的src的源码文件拷贝到编译目录去
endif
4.2…编译源代码
define  Build/Compile (可选)
    默认是编译源码里面的Makefile,如果你想传递一些参数比如环
    境变量什么的,那就可以定义,编译方法,没有特别说明的可以不予以定义。如果不
    定义将使用默认的编译方法Build/Compile/Default
    自行开发的软件包可以考虑使用下面的定义。
    $(MAKE) -C  $(PKG_BUILD_DIR)    \
                $(TARGET_CONFIGURE_OPTS)  \
                CFLAGS="$(TARGET_CFLAGS)  -I$(LINUX_DIR)/include"
endif
4.3…安装之前执行的脚本
define  Package/ $(PKG_NAME)/ preinst (可选)
    软件安装之前被执行的脚本,别忘了在第一句加上#!/bin/sh,如果脚本执行完毕要取消 安装过程,直接让它返回false即可。
    #!/bin/sh
    .........
    exit 0
endif
4.4…安装之后执行的脚本
define  Package/ $(PKG_NAME)/ postinst (可选)
    软件安装之后被执行的脚本,别忘了在第一句加上#!/bin/sh。
    #!/bin/sh
    .........
    exit 0
endif
4.5…删除之前被执行的脚本
define Package/ $(PKG_NAME)/ prerm (可选)
    软件删除之前被执行的脚本,别忘了在第一句加上#!/bin/sh。如果脚本执行完毕要取消 删除过程,直接让它返回false即可。
    #!/bin/sh
    .........
    exit 0
endif
4.6…删除之后被执行的脚本
define  Package/ $(PKG_NAME)/ postrm (可选)
    软件删除之后被执行的脚本,别忘了在第一句加上#!/bin/sh。
    #!/bin/sh
    .........
    exit 0
endif
为什么一些定义是"Package/"前缀,另一些定义却是"Build"前缀?这是因为Openwrt支持一个特性:从单个源代码构建多个软件包。OpenWrt工作在一个Makefile对应一个源代码的假设之上,但是你可以把编译生成的程序分割成任意多个软件包。因为编译只要一次,所以使用全局的"Build"定义是最合适的。然后你可以增加很多“Package/"定义,为各软件包分别指定安装方法。
5.软件包的实现
完成前面定义后,必须使用eval函数实现各种定义。这是最为关键的BuildPackage宏,它是在$(INCLUDE_DIR)/package.mk文件里定义的。BuildPackage宏只要求一个参数,即要编译的软件包名,在本例中是"bridge"。
对于一般软件包$(eval ( c a l l P a c k a g e , (call Package, (callPackage,(PKG_NAME)))
对于内核模块$(eval ( c a l l K e r n e l P a c k a g e , (call KernelPackage, (callKernelPackage,(PKG_NAME)))
如果一个软件包有多个程序,eval函数也可以设计多个软件包处理。
在编辑好Makefile文件,并放到指定目录后,这个新的软件包将在下次执行make menuconfig时出现,你可以选择这个软件包,保存退出,编译,就把一个软件包成功移植到OpenWrt中了,具体例子将在“Openwrt add function module to package”章节就行说明。
Openwrt package Makefile的分析就到这边,有感悟时会持续会更新。


 1204
1204

 被折叠的 条评论
为什么被折叠?
被折叠的 条评论
为什么被折叠?
 到【灌水乐园】发言


