


属性都形如layout_constraintXXX_toYYYOf,
这里我的理解,constraintXXX里的XXX代表是这个子控件自身的哪条边(Left、Right、Top、Bottom、Baseline),
而toYYYOf里的YYY代表的是和约束控件的哪条边 发生约束 (取值同样是 Left、Right、Top、Bottom、Baseline)。
当XXX和YYY相反时,表示控件自身的XXX在约束控件的YYY的一侧,
例如app:layout_constraintLeft_toRightOf="@id/button1" ,表示的是控件自身的左侧在button1的右侧。
当XXX和YYY相同时,表示控件自身的XXX和约束控件的YYY的一侧 对齐,
例如:app:layout_constraintBottom_toBottomOf="parent",表示控件自身底端和父控件底端对齐。
代码为:
<Button
android:id=“@+id/button1”
android:layout_width=“wrap_content”
android:layout_height=“wrap_content”
android:text=“Demo”/>
<Button
android:id=“@+id/button2”
android:layout_width=“wrap_content”
android:layout_height=“wrap_content”
android:text=“button2”
app:layout_constraintLeft_toRightOf=“@id/button1”/>
<Button
android:id=“@+id/button3”
android:layout_width=“wrap_content”
android:layout_height=“wrap_content”
android:layout_marginBottom=“20dp”
android:text=“button3 跳转match页”
app:layout_constraintBottom_toBottomOf=“parent”/>
图示:

Margins
margin和以往的使用一致,注意margin**不能为负值**即可。
在上图中也顺便展示了margin的使用。
当约束的widget为GONE时的Margins
Margins when connected to a GONE widget
举例,当A控件 约束 在B控件的左边,B控件GONE了,此时A会额外拥有一个margin的能力,来“补充”B消失的导致的“位移”。
这就是本节的属性。
这一节的属性开始我并没有理解,后来是通过写了一些Demo实验才明白。奈何官方文档惜字如金,只有一句话,并没有Demo展示:
When a position constraint target’s visibility is View.GONE, you can also indicates a different margin value to be used using the following attributes:
先看属性:
* layout_goneMarginStart
* layout_goneMarginEnd
* layout_goneMarginLeft
* layout_goneMarginTop
* layout_goneMarginRight
* layout_goneMarginBottom
在看Demo:
<Button
android:id=“@+id/button4”
android:layout_width=“100dp”
android:layout_height=“wrap_content”
android:text=“button4”
app:layout_constraintRight_toRightOf=“parent”
/>
<Button
android:id=“@+id/button5”
android:layout_width=“wrap_content”
android:layout_height=“wrap_content”
android:layout_marginRight=“10dp”
android:text=“button5”
app:layout_constraintRight_toLeftOf=“@id/button4”
app:layout_goneMarginRight=“110dp”/>
此时图示:
当给button4 隐藏GONE掉以后:
图示:

会发现Button5纹丝不动,并没有收到Button4消失的影响。
这里我们再仔细看看button4的android:layout_width="100dp",
而button5的android:layout_marginRight="10dp",app:layout_goneMarginRight="110dp"
110 = 100 +10 , 这是一道小学计算题。
什么意思?
几个注意事项:
* app:layout_goneMarginRight要配合android:layout_marginRight一起使用。
* 如果只设置了app:layout_goneMarginRight没有设置android:layout_marginRight,则无效。(alpha版本的bug,1.0.1版本已经修复)
* 在约束的布局gone时,控件自身的marginXXX会被goneMarginXXX替换掉,以本文Demo为例,原本button4宽度是100,button5的marginRight是10, 加起来是110,如果想让button4隐藏之后,button5仍然纹丝不动,则需要设置goneMarginRight为10+100 = 110.
居中定位和倾向(Centering positioning and bias)
居中定位
约束布局一个有用的地方是它如何处理“不可能”的约束。
比如你定义如下:
<android.support.constraint.ConstraintLayout
…
android:layout_width=“match_parent”
android:layout_height=“match_parent”>
<Button
android:layout_width=“wrap_content”
android:layout_height=“wrap_content”
android:text=“button”
app:layout_constraintLeft_toLeftOf=“parent”
app:layout_constraintRight_toRightOf=“parent”/>
</android.support.constraint.ConstraintLayout>
按照我们第一小节讲的属性值,这个定义的意思是,Button的左边和父控件的左边对齐,Button的右边和父控件的右边对齐。
可是控件是wrap_content的,它如果不铺满父控件要如何能满足这两个约束呢?
实际效果如下:


控件会居中显示,因为这两个约束作用 类似于 水平方向上,有相反的力 去拉控件,最终控件会居中显示。
倾向(Bias)
搭配bias,能使约束偏向某一边,默认是0.5,有以下属性:
* layout_constraintHorizontal_bias (0最左边 1最右边)
* layout_constraintVertical_bias (0最上边 1 最底边)
比如上个Demo,我加入app:layout_constraintHorizontal_bias="0.9" ,则会在水平方向上向右偏移至90%。
<android.support.constraint.ConstraintLayout
…
android:layout_width=“match_parent”
android:layout_height=“match_parent”>
<Button
…
app:layout_constraintHorizontal_bias=“0.9”
app:layout_constraintLeft_toLeftOf=“parent”
app:layout_constraintRight_toRightOf=“parent”/>
</android.support.constraint.ConstraintLayout>

对可见性的处理(Visibility behavior)
这一节是对前一节goneMargin的补充。
重点是Gone隐藏掉的控件,会被解析成一个点,并忽略margin。
ConstraintLayout能为View.Gone的View特殊处理。
通常,GONE的控件不会被显示,并且不是布局本身的一部分(即如果标记为GONE,则其实际尺寸并不会更改)。
但是在布局计算方面,GONE的View仍然是其中的一个重要区别:
对于布局传递,它们的维度将被视为零(基本上它们将被解析为一个点)
如果他们对其他小部件有约束力,那么他们仍然会受到尊重,但任何margin都将等于零

注意A的margin也被忽略了。
拿上个Demo改一下,为A 加上一个android:layout_marginRight="10dp",
为了使A 隐藏后,B仍能纹丝不动,则B的app:layout_goneMarginRight="120dp"。
B goneMarginRight120 = A宽度100 + A marginRight10 +B marginRight10
<Button
android:id=“@+id/button4”
android:layout_width=“100dp”
android:layout_height=“wrap_content”
android:layout_marginRight=“10dp”
android:text=“button4”
app:layout_constraintRight_toRightOf=“parent”
/>
<Button
android:id=“@+id/button5”
android:layout_width=“wrap_content”
android:layout_height=“wrap_content”
android:layout_marginRight=“10dp”
android:text=“button5”
app:layout_constraintRight_toLeftOf=“@id/button4”
app:layout_goneMarginRight=“120dp”/>
尺寸约束(Dimensions constraints)
ConstraintLayout的最小尺寸 (Minimum dimensions on ConstraintLayout)
可以为ConstraintLayout 自身定义最小的尺寸,他会在 ConstraintLayout为WRAP_CONTENT时起作用。
● android:minWidth
● android:minHeight
控件尺寸约束(Widgets dimension constraints)
控件的宽高有三种方式为其设置:
* 确定尺寸
* WRAP_CONTENT
* 0dp,就等于MATCH_CONSTRAINT
有些人可能有疑问,为什么不用MATCH_PARENT了。
官方文档如是说:
MATCH_PARENT is not supported for widgets contained in a ConstraintLayout, though similar behavior can be defined by using MATCH_CONSTRAINT with the corresponding left/right or top/bottom constraints being set to “parent”.
意思是MATCH_PARENT不再被支持了,通过MATCH_CONSTRAINT替代。
我们写个Demo看一下三种方式设置的效果吧:
<?xml version="1.0" encoding="utf-8"?><android.support.constraint.ConstraintLayout
…
android:layout_width=“match_parent”
android:layout_height=“match_parent”>
<Button
android:id=“@+id/button”
android:layout_width=“200dp”
android:layout_height=“100dp”
android:text=“Button”
app:layout_constraintLeft_toLeftOf=“parent”
app:layout_constraintTop_toTopOf=“parent”/>
<Button
android:id=“@+id/button10”
android:layout_width=“wrap_content”
android:layout_height=“wrap_content”
android:text=“Button”
app:layout_constraintLeft_toLeftOf=“@+id/button”
app:layout_constraintRight_toRightOf=“@+id/button”
app:layout_constraintTop_toBottomOf=“@+id/button”/>
<Button
android:id=“@+id/button11”
android:layout_width=“0dp”
android:layout_height=“wrap_content”
android:text=“Button”
app:layout_constraintLeft_toLeftOf=“@+id/button10”
app:layout_constraintRight_toRightOf=“@+id/button10”
app:layout_constraintTop_toBottomOf=“@+id/button10”/>
</android.support.constraint.ConstraintLayout>
效果如图:

有些人是不是要说,你特么逗我,不是说好的0dp等于MATCH_CONSTRAINT,应该是撑满屏幕的呀,
OK ,把刀放下。让我们仔细看这个MATCH_CONSTRAINT属性。它match的是约束。
而这里第三个按钮的约束是第二个按钮,所以它的宽度设置为MATCH_CONSTRAINT 时,是和它的约束按钮,即第二个按钮一样宽。
注意,此时,竖直方向上没有约束,所以不能使用MATCH_CONSTRAINT属性.
我们仅仅将第三个按钮的属性修改为
app:layout_constraintLeft_toLeftOf=“parent”
app:layout_constraintRight_toRightOf=“parent”
则它宽度会撑满屏幕:

我们再修改Demo,分别为后两个按钮加上margin:
<android.support.constraint.ConstraintLayout
…
android:layout_width=“match_parent”
android:layout_height=“match_parent”>
<Button
android:id=“@+id/button”
android:layout_width=“200dp”
android:layout_height=“100dp”
android:text=“Button”
app:layout_constraintLeft_toLeftOf=“parent”
app:layout_constraintTop_toTopOf=“parent”/>
<Button
android:id=“@+id/button10”
android:layout_width=“wrap_content”
android:layout_height=“wrap_content”
android:text=“Button”
app:layout_constraintLeft_toLeftOf=“@+id/button”
app:layout_constraintRight_toRightOf=“@+id/button”
app:layout_constraintTop_toBottomOf=“@+id/button”/>
<Button
android:id=“@+id/button12”
android:layout_width=“0dp”
android:layout_height=“wrap_content”
android:layout_marginLeft=“10dp”
app:layout_constraintLeft_toLeftOf=“@id/button10”
app:layout_constraintRight_toRightOf=“@id/button10”
app:layout_constraintTop_toBottomOf=“@id/button10”/>
<Button
android:id=“@+id/button11”
android:layout_width=“0dp”
android:layout_height=“wrap_content”
android:layout_marginRight=“10dp”
android:text=“Button”
app:layout_constraintLeft_toLeftOf=“parent”
app:layout_constraintRight_toRightOf=“parent”
app:layout_constraintTop_toBottomOf=“@+id/button12”/>
</android.support.constraint.ConstraintLayout>
效果如图:

最后,记住一句话约束要和 0dp 的 方向一致。否则无效。
比例(Ratio)
只有一个方向约束:
可以以比例去定义View的宽高。
为了做到这一点,需要将至少一个约束维度设置为0dp(即MATCH_CONSTRAINT)
并将属性layout_constraintDimentionRatio设置为给定的比例。
例如:
<Button
android:layout_width=“200dp”
android:layout_height=“0dp”
android:text=“Ratio”
app:layout_constraintBottom_toBottomOf=“parent”
app:layout_constraintDimensionRatio=“2:1”
app:layout_constraintTop_toTopOf=“parent”/>
如图:

比例值有两种取值:
* 浮点值,表示宽度和高度之间的比率 (2,0.5)
* “width:height”形式的比例 (5:1,1:5)
当约束多于一个(宽高都被约束了)
如果两个维度均设置为MATCH_CONSTRAINT(0dp),也可以使用比例。 在这种情况下,系统会使用满足所有约束条件和比率的最大尺寸。
如果需要根据一个维度的尺寸去约束另一个维度的尺寸。
则可以在比率值的前面添加 W 或者 H 来分别约束宽度或者高度。
例如,如果一个尺寸被两个目标约束(比如宽度为0,在父容器中居中),可以使用 W 或H 来指定哪个维度被约束。
<Button
android:layout_width=“0dp”
android:layout_height=“0dp”
app:layout_constraintBottom_toBottomOf=“parent”
app:layout_constraintDimensionRatio=“H,2:1”
app:layout_constraintTop_toTopOf=“parent”/>
这里用“H”表示以高度为约束,高度的最大尺寸就是父控件的高度,“2:1”表示高:宽 = 2 : 1.
则宽度为高度的一半:

链条(Chains)
链条在同一个轴上(水平或者垂直)提供一个类似群组的统一表现。另一个轴可以单独控制。
创建链条(Creating a chain)
如果一组小部件通过双向连接(见图,显示最小的链,带有两个小部件),则将其视为链条。

链条头(Chain heads)
链条由在链的第一个元素(链的“头”)上设置的属性控制:

头是水平链最左边的View,或垂直链最顶端的View。
链的margin(Margins in chains)
如果在连接上指定了边距,则将被考虑在内。
例如
<Button
android:id=“@+id/buttonA”
android:layout_width=“wrap_content”
android:layout_height=“wrap_content”
android:layout_marginLeft=“50dp”
android:text=“Button”
app:layout_constraintLeft_toLeftOf=“parent”
app:layout_constraintRight_toLeftOf=“@+id/buttonB”/>
<Button
android:id=“@+id/buttonB”
android:layout_width=“wrap_content”
android:layout_height=“wrap_content”
android:text=“Button”
app:layout_constraintLeft_toRightOf=“@+id/buttonA”
app:layout_constraintRight_toRightOf=“parent”/>
通过app:layout_constraintRight_toLeftOf="@+id/buttonB"和app:layout_constraintLeft_toRightOf="@+id/buttonA"就建立了链条,(我中有你,你中有我)。
然后它们两个成了一个整体,所以链条左边设置app:layout_constraintLeft_toLeftOf="parent" 使得和父控件左对齐,
右边设置app:layout_constraintRight_toRightOf="parent"使得和父控件右对齐,
这样整个链条就居中了,最后对左控件设置了margin,相当于整个链条左边有了margin
效果:

链条样式(Chain Style)
当在链的第一个元素上设置属性 layout_constraintHorizontal_chainStyle 或layout_constraintVertical_chainStyle 时,链的行为将根据指定的样式(默认为CHAIN_SPREAD)而更改。
看图这里就很像JS里的flexible有木有。因为ConstraintLayout就是模仿flexible做的。

取值如下:
* spread - 元素将被展开(默认样式)
* 加权链 - 在spread模式下,如果某些小部件设置为MATCH_CONSTRAINT,则它们将拆分可用空间
* spread_inside - 类似,但链的端点将不会扩展
* packed - 链的元素将被打包在一起。 孩子的水平或垂直偏差属性将影响包装元素的定位
拿加权链举个例子:
<Button
android:id=“@+id/buttonA”
android:layout_width=“wrap_content”
android:layout_height=“wrap_content”
android:layout_marginLeft=“50dp”
android:text=“Button”
app:layout_constraintHorizontal_chainStyle=“spread”
app:layout_constraintLeft_toLeftOf=“parent”
app:layout_constraintRight_toLeftOf=“@+id/buttonB”/>
<Button
自我介绍一下,小编13年上海交大毕业,曾经在小公司待过,也去过华为、OPPO等大厂,18年进入阿里一直到现在。
深知大多数初中级Android工程师,想要提升技能,往往是自己摸索成长或者是报班学习,但对于培训机构动则近万的学费,着实压力不小。自己不成体系的自学效果低效又漫长,而且极易碰到天花板技术停滞不前!
因此收集整理了一份《2024年Android移动开发全套学习资料》,初衷也很简单,就是希望能够帮助到想自学提升又不知道该从何学起的朋友,同时减轻大家的负担。
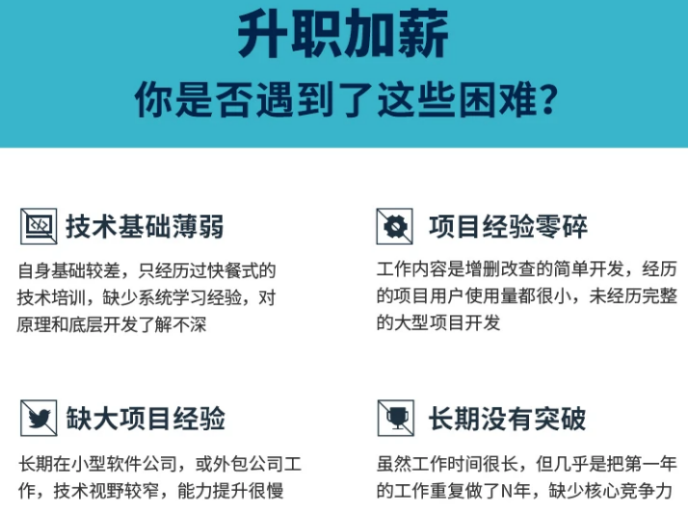
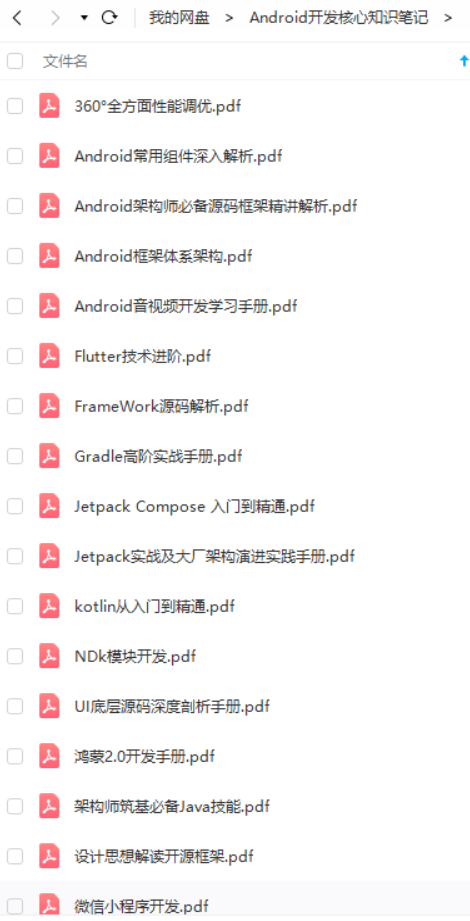
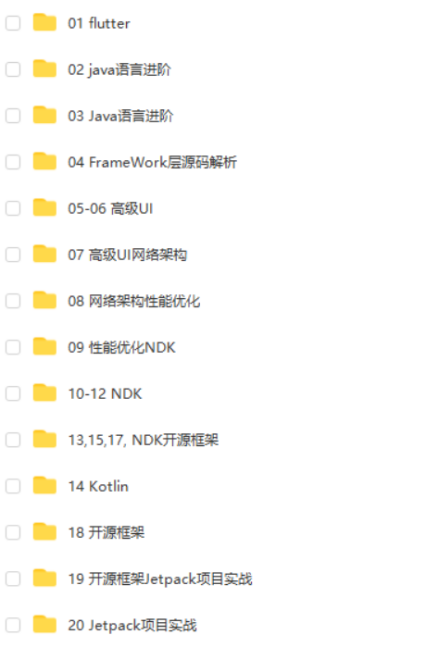
既有适合小白学习的零基础资料,也有适合3年以上经验的小伙伴深入学习提升的进阶课程,基本涵盖了95%以上Android开发知识点,真正体系化!
由于文件比较大,这里只是将部分目录截图出来,每个节点里面都包含大厂面经、学习笔记、源码讲义、实战项目、讲解视频,并且会持续更新!
如果你觉得这些内容对你有帮助,可以扫码获取!!(备注:Android)

推荐学习资料
-
Android进阶学习全套手册
-
Android对标阿里P7学习视频
-
BAT TMD大厂Android高频面试题
《互联网大厂面试真题解析、进阶开发核心学习笔记、全套讲解视频、实战项目源码讲义》点击传送门即可获取!
训机构动则近万的学费,着实压力不小。自己不成体系的自学效果低效又漫长,而且极易碰到天花板技术停滞不前!**
因此收集整理了一份《2024年Android移动开发全套学习资料》,初衷也很简单,就是希望能够帮助到想自学提升又不知道该从何学起的朋友,同时减轻大家的负担。
[外链图片转存中…(img-hrKaRI3A-1712484409692)]
[外链图片转存中…(img-P4cjSpny-1712484409692)]
[外链图片转存中…(img-Z4jhW4AB-1712484409692)]
[外链图片转存中…(img-RCbpVRWc-1712484409693)]
[外链图片转存中…(img-QBi4NHrX-1712484409693)]
既有适合小白学习的零基础资料,也有适合3年以上经验的小伙伴深入学习提升的进阶课程,基本涵盖了95%以上Android开发知识点,真正体系化!
由于文件比较大,这里只是将部分目录截图出来,每个节点里面都包含大厂面经、学习笔记、源码讲义、实战项目、讲解视频,并且会持续更新!
如果你觉得这些内容对你有帮助,可以扫码获取!!(备注:Android)
推荐学习资料
-
Android进阶学习全套手册
[外链图片转存中…(img-4BXKnl5Y-1712484409693)]
-
Android对标阿里P7学习视频
[外链图片转存中…(img-Zgk582cF-1712484409693)]
-
BAT TMD大厂Android高频面试题
[外链图片转存中…(img-T6e0XxEK-1712484409693)]
《互联网大厂面试真题解析、进阶开发核心学习笔记、全套讲解视频、实战项目源码讲义》点击传送门即可获取!


 1543
1543

 被折叠的 条评论
为什么被折叠?
被折叠的 条评论
为什么被折叠?
 到【灌水乐园】发言


