


SpringBoot中使用Thymeleaf
Thymeleaf 是一个服务器端 Java 模板引擎,能够处理 HTML、XML、CSS、JAVASCRIPT 等模板文件。Thymeleaf 模板可以直接当作静态原型来使用,它主要目标是为开发者的开发工作流程带来优雅的自然模板,也是 Java 服务器端 HTML5 开发的理想选择。
Spring Boot支持FreeMarker、Groovy、Thymeleaf和Mustache四种模板解析引擎,官方推荐使用Thymeleaf。
1.引入 spring-boot-starter-thymeleaf
在pom中引入
 <!--thymeleaf模板引擎-->
<dependency>
    <groupId>org.springframework.boot</groupId>
    <artifactId>spring-boot-starter-thymeleaf</artifactId>
</dependency>
在Spring Boot 1.5.9.RELEASE版本中,默认的Thymeleaf版本为2.1.6.RELEASE版本,也可以引入高版本的。

在Spring Boot中,默认的html页面地址为src/main/resources/templates,默认的静态资源地址为src/main/resources/static。
2.配置Thymeleaf
spring:
  thymeleaf:
    #关闭模板缓存(默认为true)
    cache: false
    #模板编码
    encoding: utf-8
    #在构建URL时添加到视图名称前的前缀(默认值:classpath:/templates/)
    prefix: classpath:/templates/
    #在构建URL时添加到视图名称后的后缀(默认值:.html)
    suffix: .html
    mode: HTML5
    check-template-location: true
    content-type: text/html
3.示例
编写一个controller,获取数据跳转到user页面
方案一使用 HttpServletRequest :
public class UserController {

    @RequestMapping("/getUserAll")
    public String getUserAll(HttpServletRequest request){
        List<User> result = userService.getUserAll();
        request.setAttribute("userAll",result);
        return "user/user";
    }
}
方案二使用 Model:
public class UserController {

	@RequestMapping("/getUserAll")
	public String getUserAll(Model model){
	        List<User> result = userService.getUserAll();
	        model.addAttribute("userAll",result);
	        return "user/user";
	    }
}
方案三:使用 ModelAndView:
public class UserController {

	@RequestMapping("/getUserAll")
	public ModelAndView getUserAll(ModelAndView modelAndView){
        List<User> result = userService.getUserAll();
        modelAndView.addObject("userAll",result);
        modelAndView.setViewName("user/user");
        return modelAndView;
    }
}
在resources文件夹下的templates目录下,创建模板user.html页面
<!DOCTYPE html>
<html lang="en" xmlns:th="http://www.thymeleaf.org">
<head>
    <meta charset="UTF-8"/>
    <title>user</title>
    <script type="text/javascript" th:src="@{/js/jquery-3.1.1.min.js}"></script>
</head>
<body>
   <h1>thymeleaf模板引擎</h1>
   <table border="1">
       <tr>
           <th>编号</th>
           <th>姓名</th>
           <th>密码</th>
           <th>部门</th>
           <th>状态</th>
       </tr>
       <tr th:each="user: ${userAll}">
           <td th:text="${user.id}"></td>
           <td th:text="${user.name}"></td>
           <td th:text="${user.password}"></td>
           <td th:text="${user.deptId}"></td>
           <td th:text="${user.delFlag}"></td>
       </tr>
   </table>

</script>
</body>
</html>
通过 html标签 引入 xmlns:th=“http://www.thymeleaf.org” Thymeleaf 命名空间。
注意: 有时候默认创建的html文件 meta标签 charset=“UTF-8” 不带结束符,需添加,不然启动报错。
目录结构:

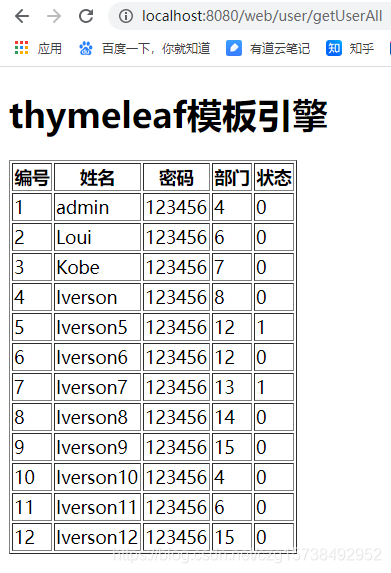
启动项目,访问http://localhost:8080/web/user/getUserAll:
4.Thymeleaf语法
4.1 简单表达式
| 语法 | 名称 | 描述 | 作用 |
|---|---|---|---|
| ${…} | Variable Expressions | 变量表达式 | 取出上下文变量的值 |
| *{…} | Selection Variable Expressions | 选择变量表达式 | 取出选择的对象的属性值 |
| #{…} | Message Expressions | 消息表达式 | 使文字消息国际化,I18N |
| @{…} | Link URL Expressions | 链接表达式 | 用于表示各种超链接地址 |
| ~{…} | Fragment Expressions | 片段表达式 | 引用一段公共的代码片段 |
4.1.1 ${…}
通过变量表达式${}取出上下文环境中的message变量:
<td th:text="${user.id}"></td>
4.1.2 *{…}
变量表达式${}是面向整个上下文的,而选择变量表达式*{}的上下文是父标签(th:object)所选择的对象:
<div th:object="${session.user}">
    <p th:text="*{name}"></p>
    <p th:text="*{sex}"></p>
    <p th:text="*{age}"></p>
</div>
4.13 @{…}
链接表达式@{}是专门用来处理 URL 链接地址的。
<script type="text/javascript" th:src="@{/js/jquery-3.1.1.min.js}"></script>
4.2字面值
所谓字面值,首先它不是一个变量,它是一个具体的确切的值
4.2.1文本
文字字面值是用单引号引起来的任何字符内容,如果字符内容里面含有单引号,则需要进行转义:
<!-- Welcome to BeiJing! -->
<p th:text="'Welcome to BeiJing!'"></p>
<!-- 'Welcome to BeiJing!' -->
<p th:text="'\'Welcome to BeiJing!\''"></p>
4.2.2数字
<p th:text="2020+1"></p>
4.2.3布尔
<p th:text="1 > 2 ? '是' : '否'"></p>
4.24 空字
4.3文本
<p th:text="${message}"></p>
4.4设置属性值
a. th:attr
<a th:attr="href=@{https://www.baidu.com/}">百度一下你就知道</a>

b. th:*
更加简洁,其中th:中的可以是 HTML5 支持的任意属性名称
<a th:href="@{https://www.baidu.com/}">百度一下你就知道</a>
附地址:Thymeleaf中文文档 https://fanlychie.github.io/post/thymeleaf.html
官网地址:
https://www.thymeleaf.org/doc/tutorials/2.1/usingthymeleaf.html#standard-expression-syntax


 21万+
21万+

 被折叠的 条评论
为什么被折叠?
被折叠的 条评论
为什么被折叠?
 到【灌水乐园】发言


