


 本文档详细介绍了如何使用Docker安装MySQL和Phabricator,并提供了Phabricator的配置步骤,包括邮件配置、汉化、Arcanist安装、代码库配置及工作流等关键环节。
术语
phabricator怎么念
http://www.howtopronounce.cc/phabricator
安装
安装mysql
docker search mysql 搜索
docker pull mysql:5.6 下载
docker images |grep mysql 查看
docker run -p 3306:3306 --name mysql_docker -v $PWD/conf:/etc/mysql/conf.d -v $PWD/logs:/logs -v $PWD/data:/var/lib/mysql -e MYSQL_ROOT_PASSWORD=123456 -d mysql:5.6 运行
命令说明:
-p 3306:3306:将容器的 3306 端口映射到主机的 3306 端口。
-v -v $PWD/conf:/etc/mysql/conf.d:将主机当前目录下的 conf/my.cnf 挂载到容器的 /etc/mysql/my.cnf。
-v $PWD/logs:/logs:将主机当前目录下的 logs 目录挂载到容器的 /logs。
-v $PWD/data:/var/lib/mysql :将主机当前目录下的data目录挂载到容器的 /var/lib/mysql 。
-e MYSQL_ROOT_PASSWORD=123456:初始化 root 用户的密码。
docker ps 查看镜像的运行
运行后进入容器进行初始化
安装Phabricator
docker pull redpointgames/phabricator
docker run --name phabricator -p 443:443 -p 332:22 -p 8891:80 -v /root/phabricator/backup:/repos -e PHABRICATOR_HOST=xxxxxx:8891 -e MYSQL_HOST=172.17.0.2 -e MYSQL_USER=root -e MYSQL_PASS=123456 -e PHABRICATOR_REPOSITORY_PATH=/repos -e PATH=/usr/local/sbin:/usr/local/bin:/usr/sbin:/usr/bin:/sbin:/bin -it redpointgames/phabricator /bin/bash /app/init.sh邮件配置p
http://192.168.10.101:8891/config/group/phpmailer/
http://192.168.10.101:8891/config/group/metamta/
设置metamta.default-address
metamta.domain metamta.mail-adapter
bin/config set phpmailer.smtp-host smtp.exmail.qq.com
bin/config set phpmailer.smtp-port 465
bin/config set phpmailer.smtp-user xx@xx
bin/config set phpmailer.smtp-password xxxxxx
汉化
参考文章:
https://blog.youkuaiyun.com/u011028179/article/details/79036880
安装到目录:/srv/phabricator/phabricator/src/extensions
安装Arcanist
参考:https://www.jianshu.com/p/a6ee738da1aa
https://secure.phabricator.com/book/phabricator/article/arcanist_windows/
https://secure.phabricator.com/book/phabricator/article/arcanist_quick_start/
安装php和arcanist后要加入环境变量:
D:\app\php-8.0.2-Win32-vs16-x64;
D:\app\arcanist-master\bin;
设置默认编辑器
arc set-config editor "\"C:\Program Files (x86)\Notepad++\notepad++.exe\" -multiInst -nosession"最后执行arc install-certificate
配置代码库
选择菜单 Repositories
选择Create New Repository
选择Import an Existing External Repository选项
在Repository Type中选项Subversion
设置Name和callsign,name的设置可以随意,根据指示callsign只能是大写的字母,方便记忆,后续在代码审核的时候看到的是callsign而不是name,所以好好设置个callsign
设置SVN根路径(Repository Root),填写SVN跟路径,不是trunk/branchs之类的,一定要是根路径,如果希望忽略某个文件夹是可以后期设置的。
添加一个授权,已经差不多成功了,如果SVN是可以匿名访问的,那么你可以在这一步直接点击continue就可以了,不然的话,需要添加一个访问授权
工作流
Pre-Commit
1、修改代码,保存。
svn add,delete
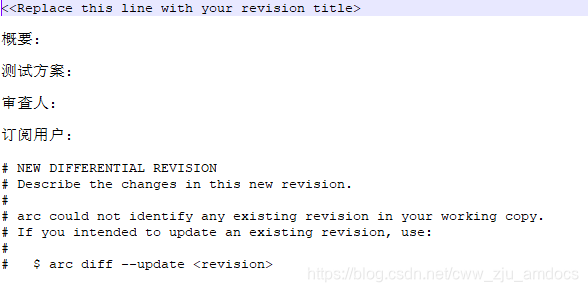
2、arc diff
3、reviewer Accept Revision或者Request Changes
如上图所示,审查者可以进行如下操作:
https://www.cnblogs.com/LeeGof/p/7116757.html
Comment:评论。针对某行代码进行评论,直接点击代码行便会弹出
Accept Revision:接受变更。经过几次Comment沟通后,代码已完善,通过审核
Request Changes:不行,代码需要继续修改。
Resign as Reviewer:重新指定审查代码的人。
Commandeer Revision:字面意思是将这个Revision据为己有的意思,实际上这个时候Reviewer的身份已经变为Owner的身份了,不能再进行Review了,但是Comment还是可以的。
Add Reviewer:添加审查人。
Add Subscribers:添加订阅者。
3、arc commit
编码
有时候使用Visual Studio编写的代码,上传到SVN后,可以再Phabricator中看到变更记录,看到.h或.cpp文件提示为this is a binary file,
但是实际上这都是代码,出现这个情况是因为设置的编码不对,这个需要在Phabricator的Repository中将编码修改为代码的编码,如GB2312。
LINT
先配置.arclint,
{
  "linters": {
    "cpplint": {
      "type": "cppcheck",
      "include": "(\\.(c|cc|cpp|h)$)",
      "exclude": "(^third-party/)"
    },
    "shellcheck": {
      "type": "shellcheck",
      "include": "(\\.sh$)"
    },
    "phplint": {
      "type": "php",
      "include": "(\\.php$)"
    }
  }
}
比如上面,配置了cppcheck,那么本机要安装cppcheck工具,然后加入到PATH环境变量中;
同理要安装shellcheck。
set-executionpolicy remotesigned -scope currentuser
iex (new-object net.webclient).downloadstring('https://get.scoop.sh')
scoop help
scoop install shellcheck
ShortCut
https://secure.phabricator.com/book/phabricator/article/jump/
- T - Jump to Maniphest.
- T123 - Jump to Maniphest Task 123.
- D - Jump to Differential.
- D123 - Jump to Differential Revision 123.
- r - Jump to Diffusion.
- rXYZ - Jump to Diffusion Repository XYZ.
- rXYZabcdef - Jump to Diffusion Commit rXYZabcdef.
- r <name> - Search for repositories by name.
- u - Jump to People
- u username - Jump to username's Profile
- p - Jump to Project
- p Some Project - Jump to Project: Some Project
- s SymbolName - Jump to Symbol SymbolName
- (default) - Search for input.
Paste
应用场景:
常用的命令
短的,碎片化的信息
Ponder
简单的问答系统
SlowVote
投票系统
倒计时事件
可以用来设置项目里程碑


 5331
5331

 被折叠的 条评论
为什么被折叠?
被折叠的 条评论
为什么被折叠?
 到【灌水乐园】发言


