


在分布式系统中,由于服务数量非常多,配置文件分散在不同的微服务项目中,管理不方便。为了方便配置文件集中
管理,需要分布式配置中心组件。在Spring Cloud中,提供了Spring Cloud Config,它支持配置文件放在配置服务
的本地,也支持放在远程Git仓库(GitHub、码云)。
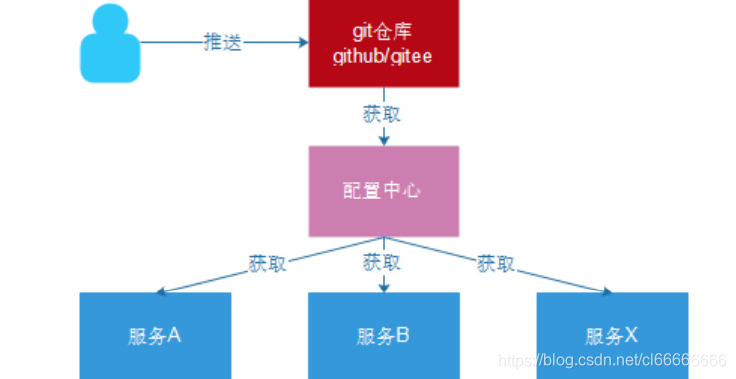
配置中心本质上也是一个微服务,同样需要注册到Eureka服务注册中心!
配置中心仓库
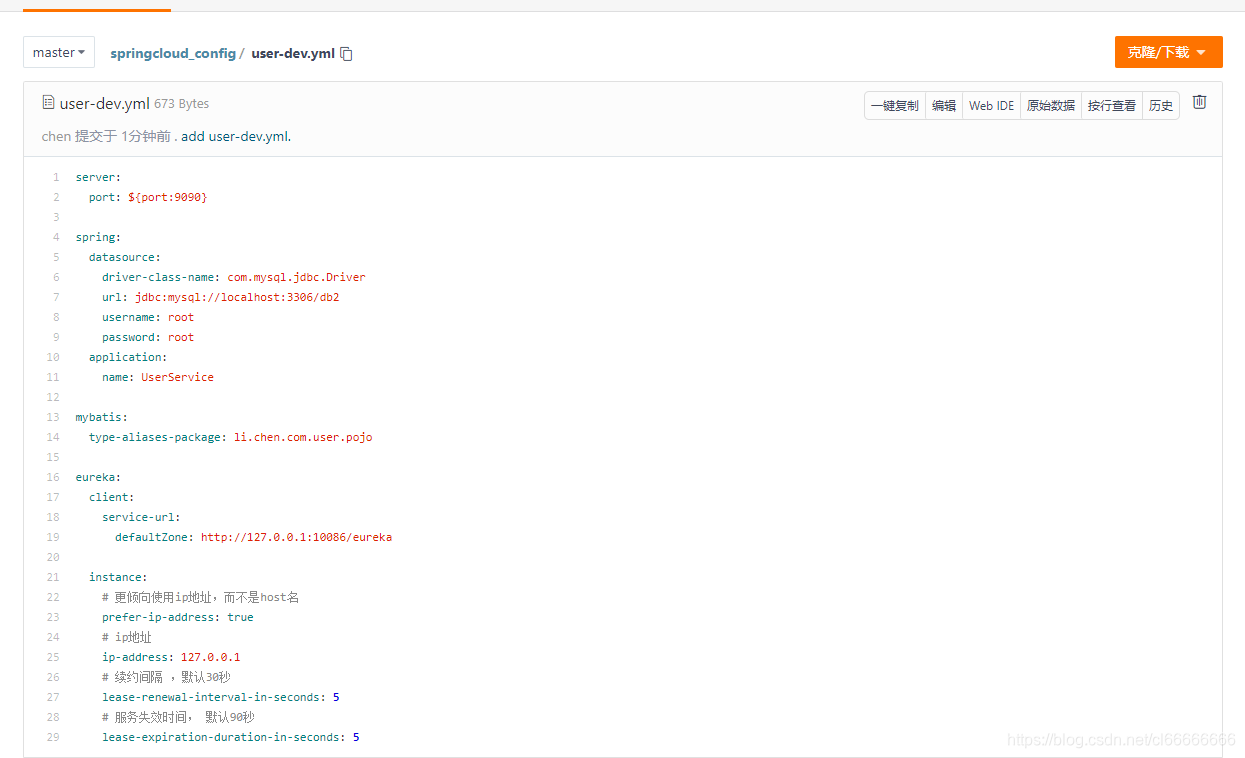
在码云新建一个配置中心仓库,项目从配置中心拉取配置
创建码云的远程公开git仓库:springcloud_config
将user-Service的配置文件放到git仓库中,命名为user-dev.yml
- 配置文件的2种命名方式
{application}-{profile}.yml
{application}-{profile}.properties - 配置文件说明
application:为应用名称
profile:用于区分开发环境,测试环境、生产环境等
配置中心服务
pom.xml
<?xml version="1.0" encoding="UTF-8"?>
<project xmlns="http://maven.apache.org/POM/4.0.0"
         xmlns:xsi="http://www.w3.org/2001/XMLSchema-instance"
         xsi:schemaLocation="http://maven.apache.org/POM/4.0.0 http://maven.apache.org/xsd/maven-4.0.0.xsd">
    <parent>
        <artifactId>springcloud_parent</artifactId>
        <groupId>li.chen.com</groupId>
        <version>1.0-SNAPSHOT</version>
    </parent>
    <modelVersion>4.0.0</modelVersion>

    <artifactId>config_server</artifactId>

    <dependencies>
        <dependency>
            <groupId>org.springframework.cloud</groupId>
            <artifactId>spring-cloud-starter-netflix-eureka-client</artifactId>
        </dependency>
        <dependency>
            <groupId>org.springframework.cloud</groupId>
            <artifactId>spring-cloud-config-server</artifactId>
        </dependency>
    </dependencies>


</project>
配置文件
application.yml
server:
  port: 12000
spring:
  application:
    name: config-server
  cloud:
    config:
      server:
        git:
          uri: https://gitee.com/chenli_click/springcloud_config.git
eureka:
  client:
    service-url:
      defaultZone: http://127.0.0.1:10086/eureka
启用类
ConfigServerApplication
package li.chen.com;

import org.springframework.boot.SpringApplication;
import org.springframework.boot.autoconfigure.SpringBootApplication;
import org.springframework.cloud.config.server.EnableConfigServer;
import org.springframework.cloud.netflix.eureka.EnableEurekaClient;

@SpringBootApplication
@EnableConfigServer //开启配置服务
public class ConfigServerApplication {
    public static void main(String[] args) {
        SpringApplication.run(ConfigServerApplication.class, args);
    }
}
运行测试
http://localhost:12000/user-dev.yml
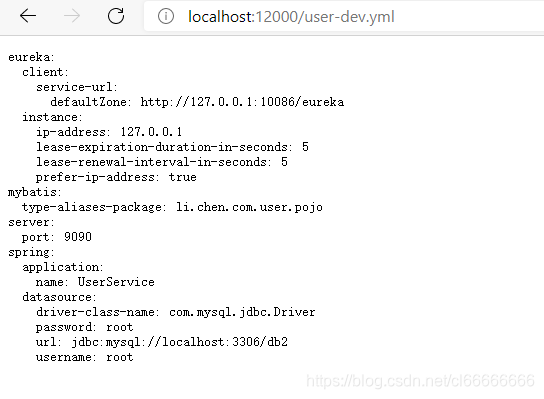
读取配置中心文件内容
删除user_service服务中的application.yml
bootstrap.yml是spring boot的默认配置文件,其内容经常配置一些项目中固定的配置项。如果是项目经常变动的应该配置到application.yml中,现在使用了配置中心则应该配置到git仓库中对于的配置文件。
添加依赖
pom.xml
<?xml version="1.0" encoding="UTF-8"?>
<project xmlns="http://maven.apache.org/POM/4.0.0"
         xmlns:xsi="http://www.w3.org/2001/XMLSchema-instance"
         xsi:schemaLocation="http://maven.apache.org/POM/4.0.0 http://maven.apache.org/xsd/maven-4.0.0.xsd">
    <parent>
        <artifactId>springcloud_parent</artifactId>
        <groupId>li.chen.com</groupId>
        <version>1.0-SNAPSHOT</version>
    </parent>
    <modelVersion>4.0.0</modelVersion>

    <artifactId>user_service</artifactId>

    <dependencies>
        <dependency>
            <groupId>org.springframework.boot</groupId>
            <artifactId>spring-boot-starter-web</artifactId>
        </dependency>
        <!-- 通用Mapper启动器 -->
        <dependency>
            <groupId>tk.mybatis</groupId>
            <artifactId>mapper-spring-boot-starter</artifactId>
        </dependency>
        <!-- mysql驱动 -->
        <dependency>
            <groupId>mysql</groupId>
            <artifactId>mysql-connector-java</artifactId>
        </dependency>
        <dependency>
            <groupId>org.springframework.cloud</groupId>
            <artifactId>spring-cloud-starter-netflix-eureka-client</artifactId>
        </dependency>
        <!-- bus依赖 -->
        <dependency>
            <groupId>org.springframework.cloud</groupId>
            <artifactId>spring-cloud-bus</artifactId>
        </dependency>
        <dependency>
            <groupId>org.springframework.cloud</groupId>
            <artifactId>spring-cloud-stream-binder-rabbit</artifactId>
        </dependency>
        <dependency>
            <groupId>org.springframework.boot</groupId>
            <artifactId>spring-boot-starter-actuator</artifactId>
        </dependency>
    </dependencies>

</project>
bootstrap.yml
配置rabbitmq
spring:
  cloud:
    config:
      # 要与仓库中的配置文件的application保持一致
      name: user
      # 要与仓库中的配置文件的profile保持一致
      profile: dev
      # 要与仓库中的配置文件所属的版本(分支)一样
      label: master
      discovery:
        # 使用配置中心
        enabled: true
        # 配置中心服务名
        service-id: config-server
  # 配置rabbitmq信息;如果是都与默认值一致则不需要配置
  rabbitmq:
    host: localhost
    port: 5672
    username: guest
    password: guest

eureka:
  client:
    service-url:
      defaultZone: http://127.0.0.1:10086/eureka
UserController
添加刷新配置注解
package li.chen.com.user.controller;

import li.chen.com.user.pojo.User;
import li.chen.com.user.service.UserService;
import org.springframework.beans.factory.annotation.Autowired;
import org.springframework.cloud.context.config.annotation.RefreshScope;
import org.springframework.web.bind.annotation.GetMapping;
import org.springframework.web.bind.annotation.PathVariable;
import org.springframework.web.bind.annotation.RequestMapping;
import org.springframework.web.bind.annotation.RestController;

@RestController
@RequestMapping("/UserController")
@RefreshScope //刷新配置
public class UserController {

    @Autowired
    private UserService userService;

    @GetMapping("/{id}")
    public User queryById(@PathVariable Long id){
        /*
        try {
            Thread.sleep(2000);  //设置睡眠时间2s
        } catch (InterruptedException e) {
            e.printStackTrace();
        }

         */
        return userService.queryById(id);
    }
}
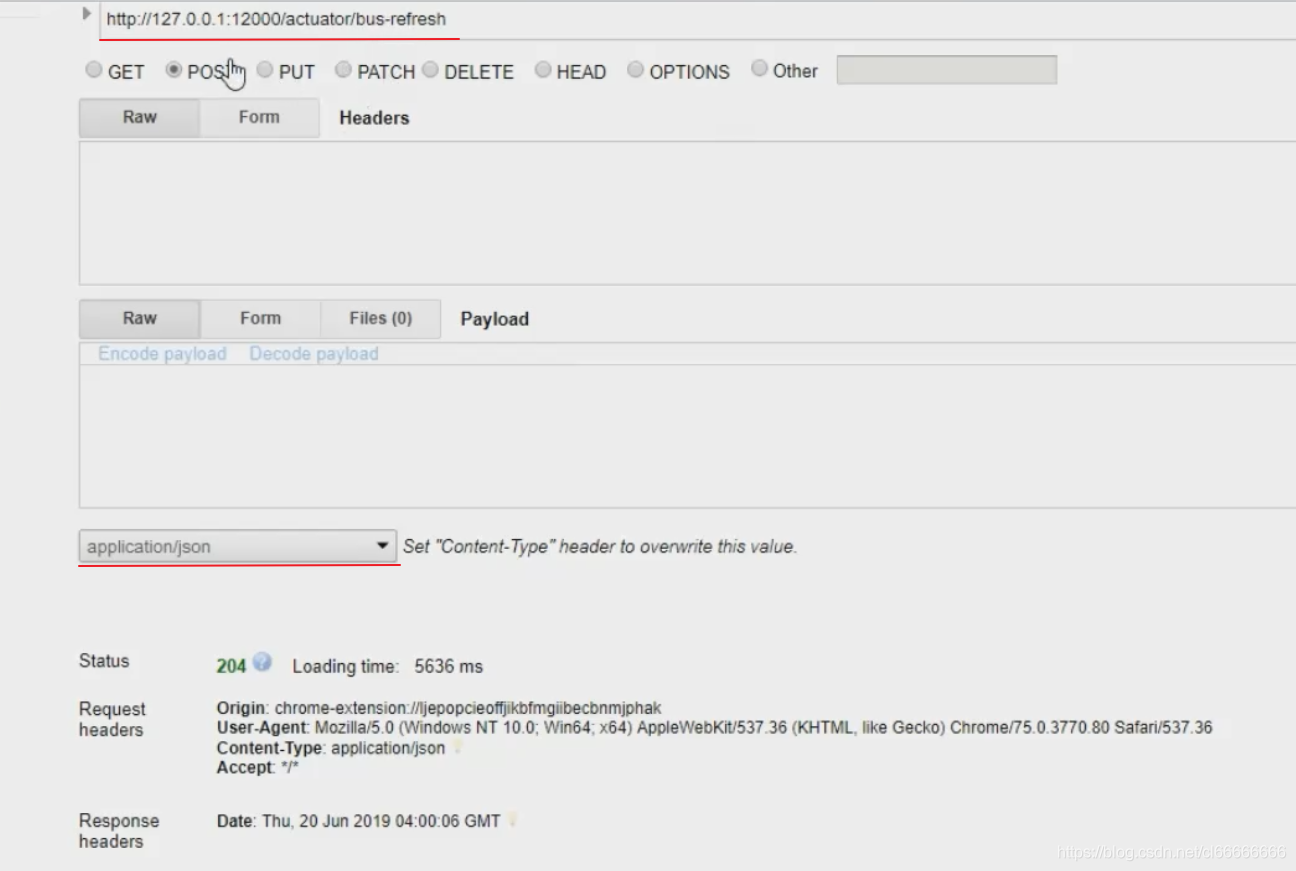
修改git仓库里面的配置文件内容后;
发送此请求会刷新配置文件


 3万+
3万+

 被折叠的 条评论
为什么被折叠?
被折叠的 条评论
为什么被折叠?
 到【灌水乐园】发言


