


 博客介绍了Vue中绑定类名的方法,即 :class 绑定布尔类型属性。还给出了CSS样式示例。同时分享了项目中Tab栏切换文章详情的代码,包括Tab栏代码、文章详情页对应、引入接口、主要方法等,以及详情页跳转和显示的相关内容,还提到了CSS样式引入问题。
1.绑定类名 :class="{'属性名:后面为布尔类型,true为生效'}"
2.定义
3)在css中样式
.active {
font-size: 18px;
color: #2878ff;
}
扩展知识,在我做的项目中:关于tab栏切换文章详情代码
1.tab栏代码
<div class="menu">
<!-- 比较成熟的tab栏切换 -->
<ul>
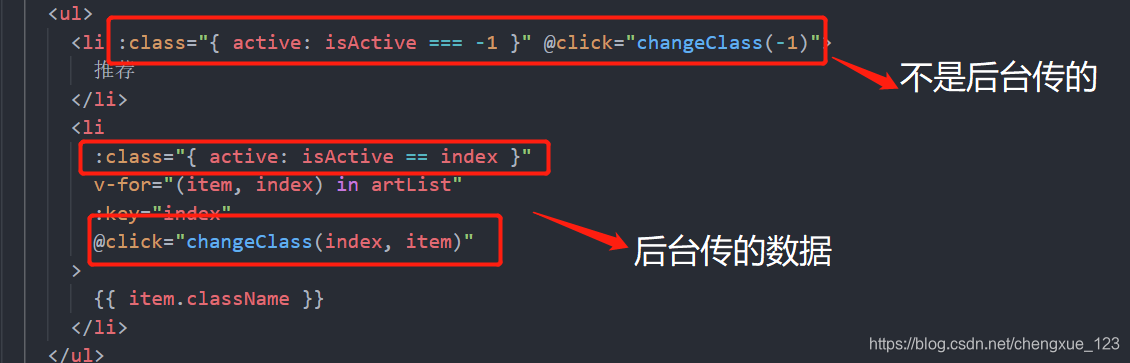
<li :class="{ active: isActive === -1 }" @click="changeClass(-1)">
推荐
</li>
<li
:class="{ active: isActive == index }"
v-for="(item, index) in artList"
:key="index"
@click="changeClass(index, item)"
>
{{ item.className }}
</li>
</ul>
</div>
2.文章详情页对应
  <div class="artical">
      <el-card class="item" v-for="(item, index) in articalList" :key="index">
        <div class="title">
          <el-avatar size="small" :src="item.avatar"></el-avatar>
          <span>{{ item.username }}</span>
          <span>{{ item.updateTime | formatTime }}</span>
          <h5>
            <router-link :to="'/detail/' + item.articalId">{{
              item.articalName
            }}</router-link>
          </h5>
        </div>
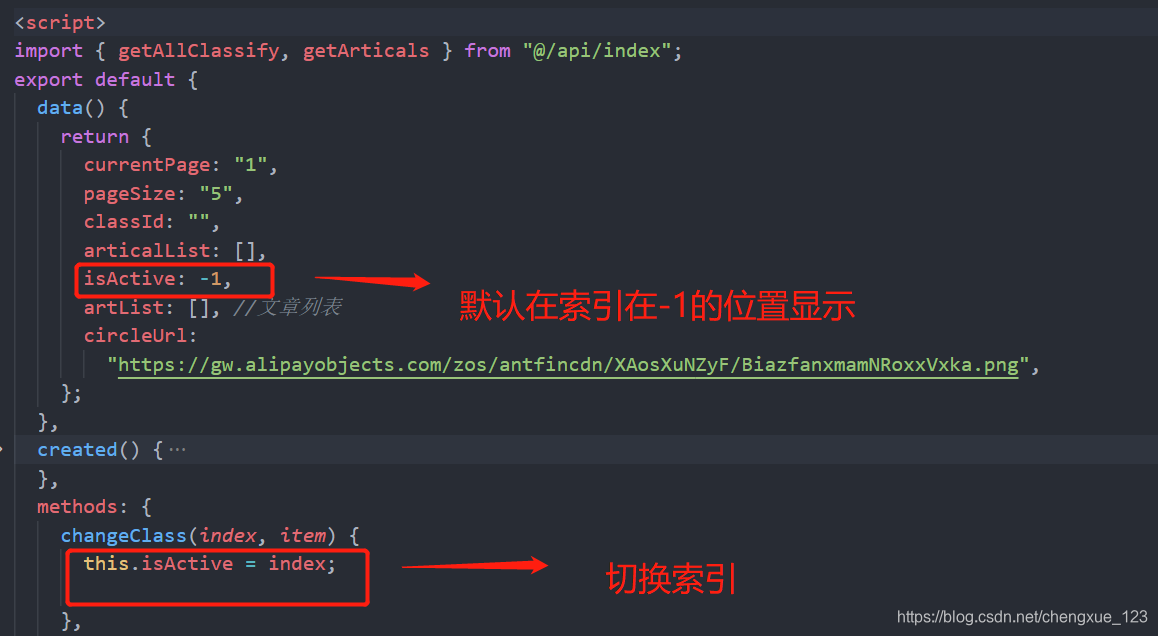
3.引入方法接口 定义变量

4.主要方法
  created() {
    this.initClassify();
    this.initArtical();
  },
  methods: {
     changeClass(index, item) {
      this.currentPage = 1;
      this.isActive = index;
      if (item) {
        this.classId = item.classId;
      } else {
        this.classId = null;
      }
      this.initArtical();
    },
    initClassify() {
      getAllClassify().then((res) => {
        if (res.code == 200) {
          // console.log(res);
          this.artList = res.data;
        }
      });
    },
    initArtical() {
      var params = {
        currentPage: this.currentPage,
        pageSize: this.pageSize,
        classId: this.classId,
      };
      getArticals(params).then((res) => {
        if (res.code == 200) {
          // console.log(res);
          this.articalList = res.data;
        }
      });
    },
//.....
}
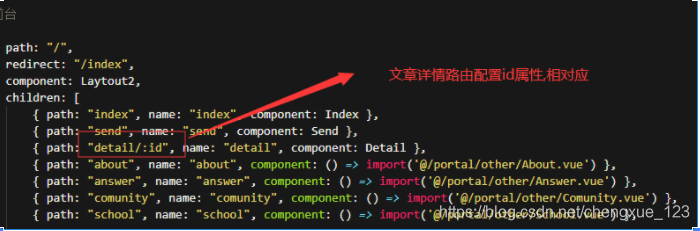
5.对tab栏内容详情的跳转和显示更多 需要在路由里面配id
   <router-link :to="'/detail/' + item.articalId">{{
              item.articalName
   }}</router-link>
加载更多
async more() {
      //加载更多
      this.currentPage++;
      var params = {
        currentPage: this.currentPage,
        pageSize: this.pageSize,
        classId: this.classId,
      };
      var res = await getArticals(params);
      console.log(res);

      if (res.code == 200) {
        res.data.forEach((item, index, array) => {
          this.articalList.push(item);
        });
      } else {
        console.log("没有更多了");
      }
    },
    // more() {
    //   //用上述more方法比较好用,这个用起来还是有点问题的
    //   this.currentPage++;
    //   var aData = JSON.parse(JSON.stringify(this.articalList));
    //   var params = {
    //     currentPage: this.currentPage,
    //     pageSize: this.pageSize,
    //     classId: this.classId,
    //   };
    //   getArticals(params).then((res) => {
    //     console.log(res);
    //     res.data.forEach(function (item, index) {
    //       aData.push(item);
    //     });
    //     this.articalList = aData;
    //   });
    // },
6.详情页的跳转
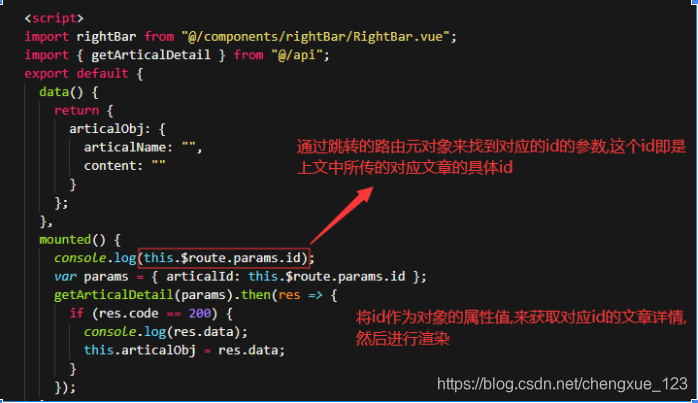
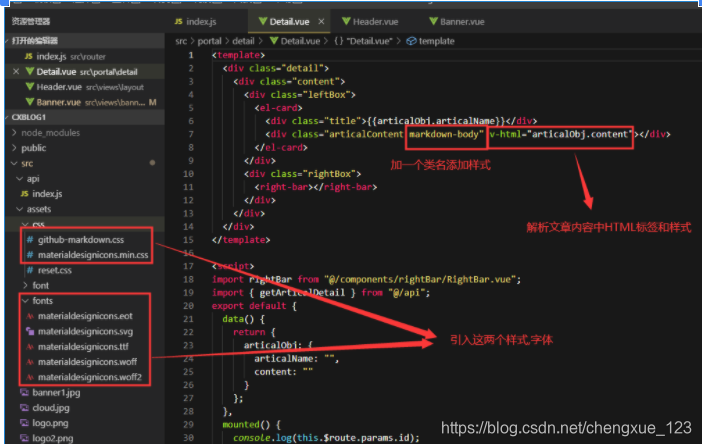
7.详情页的显示
引入这两个
样式 @import + 空格+ url(CSS文件路径地址); 记得在css中引入 不然就会出问题


 1314
1314

 被折叠的 条评论
为什么被折叠?
被折叠的 条评论
为什么被折叠?
 到【灌水乐园】发言


