


在Spring源码分析-开篇中我们已经了解到,SpringIOC可以通过ClassPathXmlApplicationContext将spring-application.xml中我们配置的bean信息读取到内存中,并创建对应的对象供我们获取,看着非常的简单,那么Spring在这过程中到底做了些什么呢,我画了一张SpringIOC的处理流程图如下:
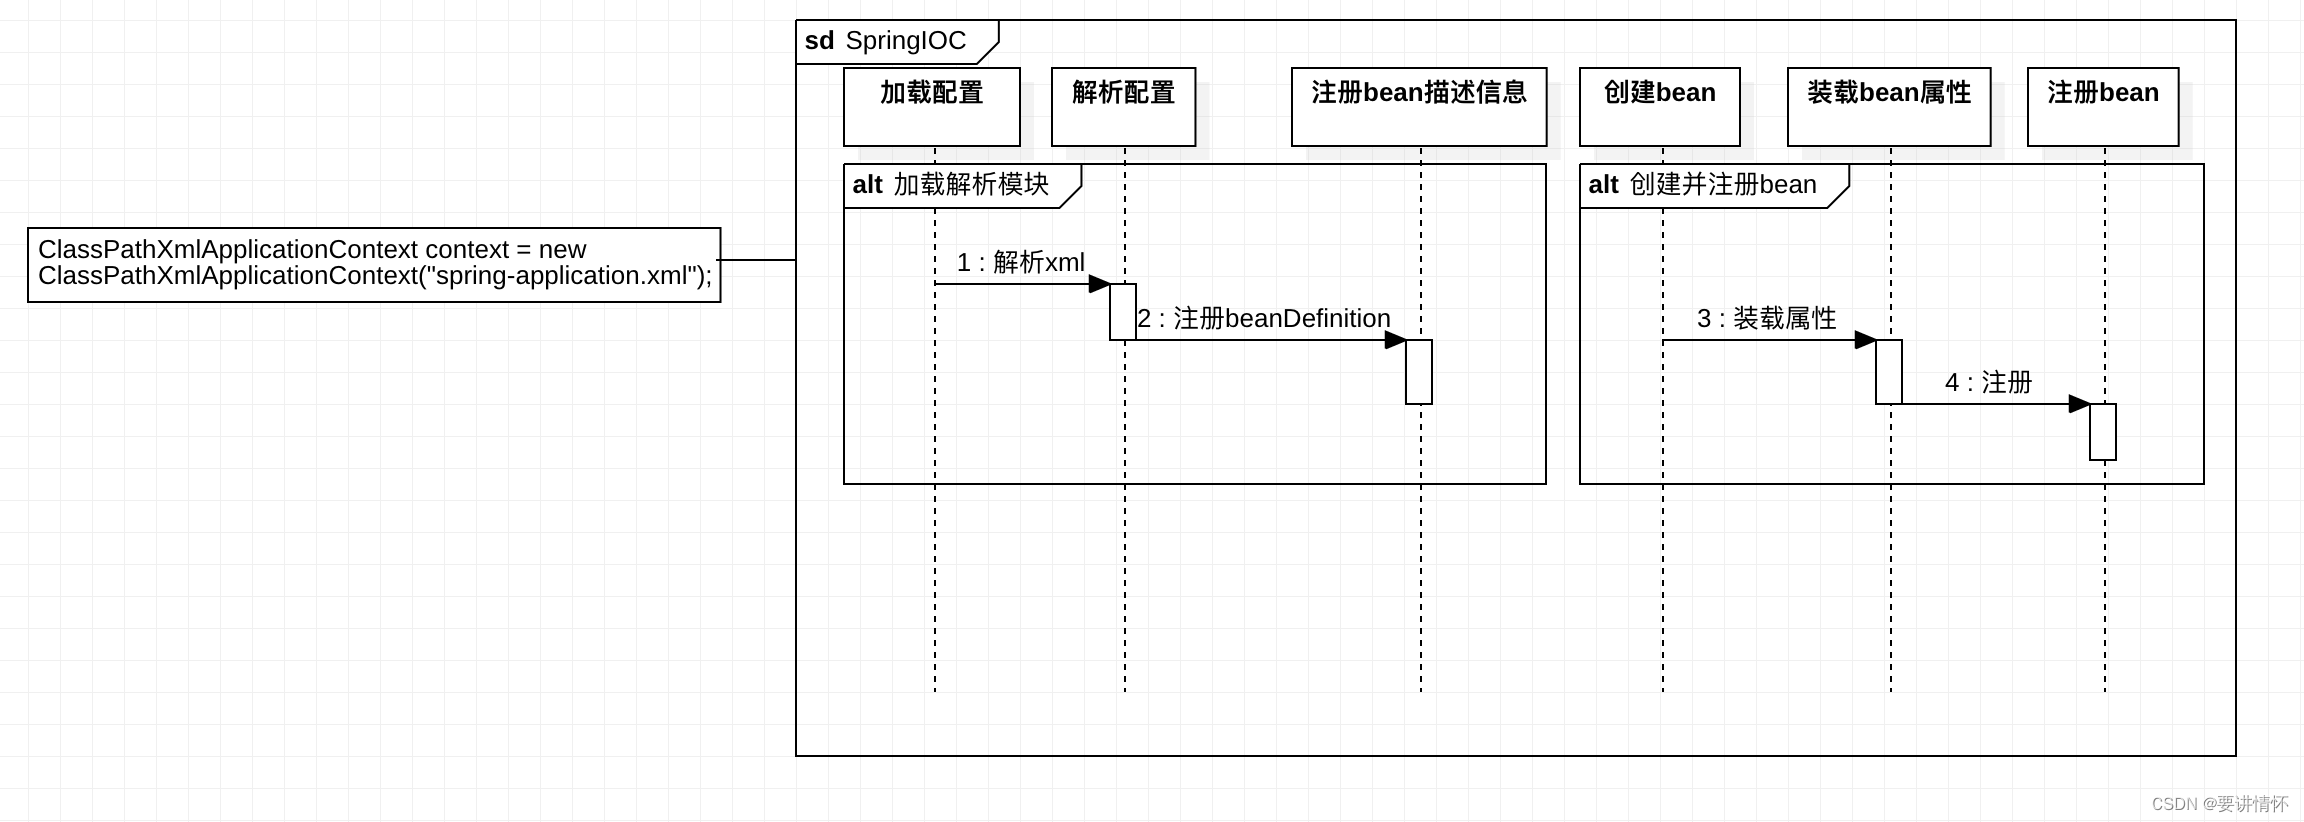
可以看到SpringIOC一共分为加载解析xml模块和创建注册bean模块,当然每个模块中都有很多处理,我们先从加载解析配置模块开始分析。
加载解析配置主要是将我们的配置文件如本项目中的spring-application.xml进行加载解析成BeanDefinition的过程,BeanDefinition是定义 Bean 的配置元信息接口,BeanDefinition实现类包含了我们配置的bean的类名,父类名,单例还是多例,是否是懒加载,init_method方法,bean全路径名,bean的Class对象,构造器等等,主要是用来bean工厂创建bean对象的。
首先通过ClassPathXmlApplicationContext有参构造器创建ClassPathXmlApplicationContext对象:
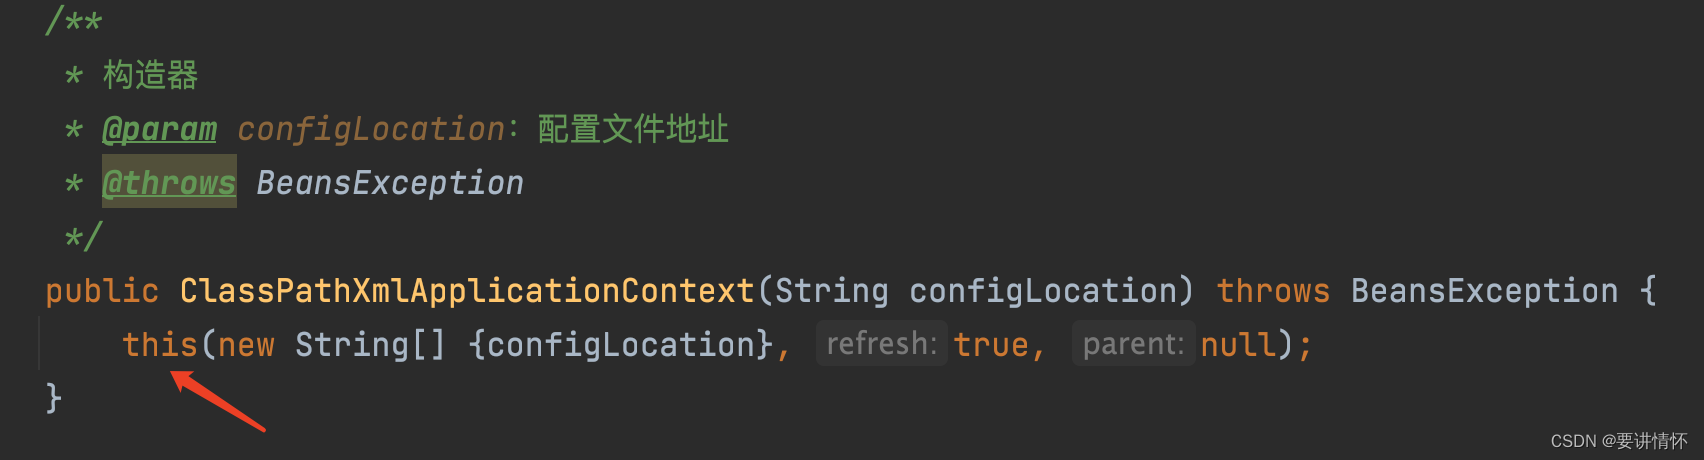
this是ClassPathXmlApplicationContext重载的一个构造器。
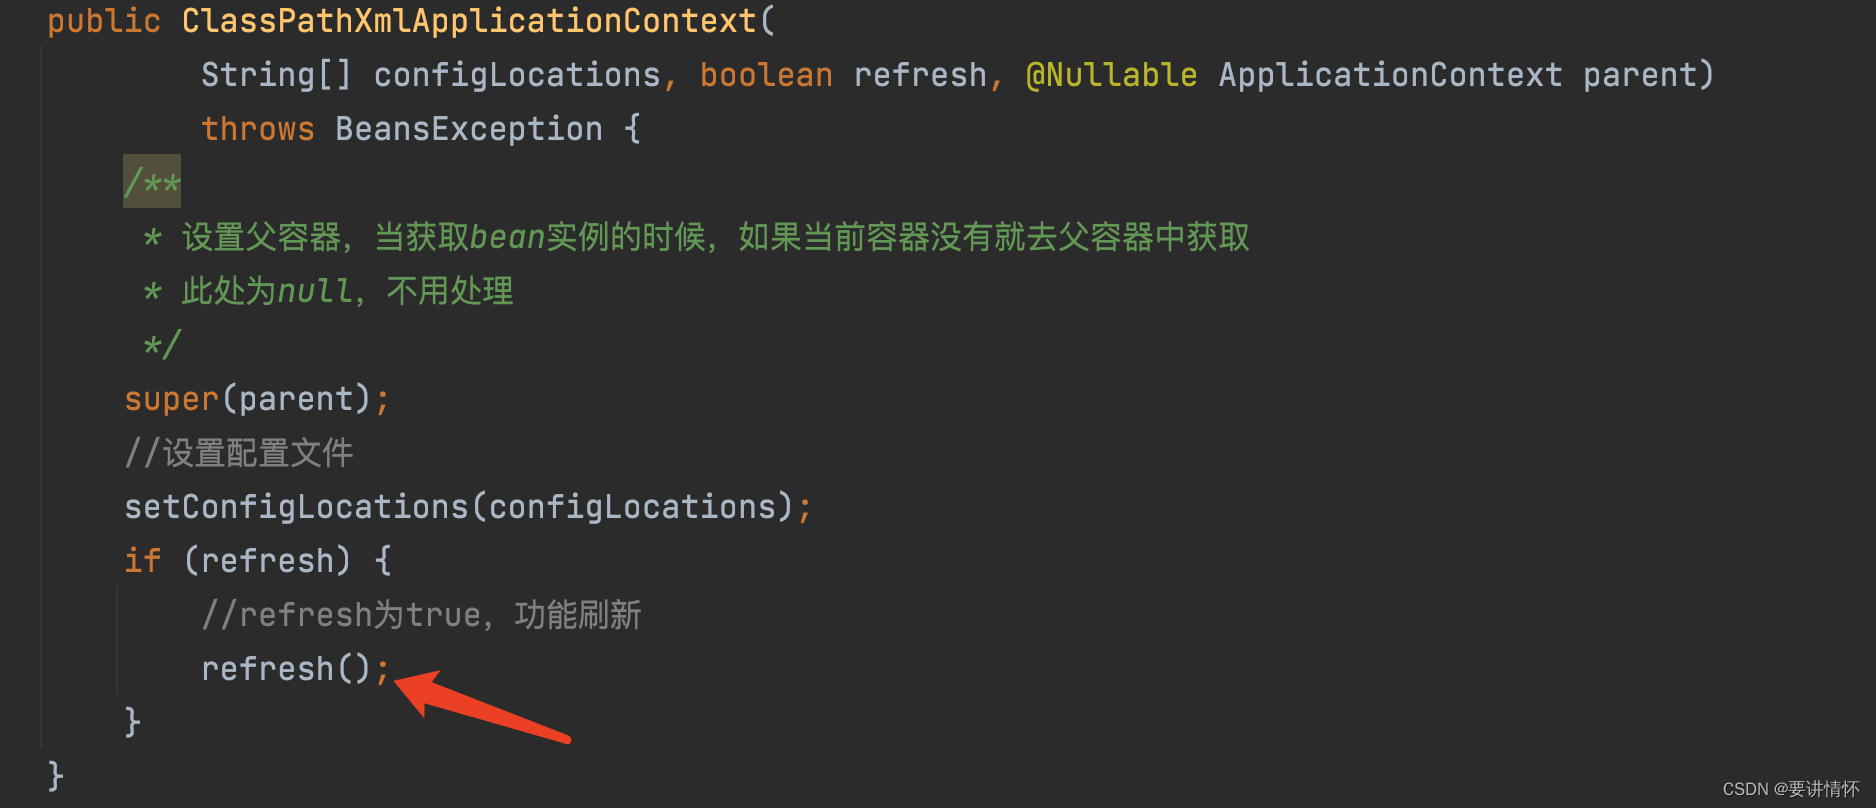
重点来了,refresh即为核心代码,我们先进入一探究竟:
public void refresh() throws BeansException, IllegalStateException {
        synchronized (this.startupShutdownMonitor) {
            //环境准备以及校验
            prepareRefresh();
            //初始化DefaultListableBeanFactory,加载读取资源属性封装到BeanDefinition中,向容器注册BeanDefinition
            ConfigurableListableBeanFactory beanFactory = obtainFreshBeanFactory();
            //对容器进行功能补充,设置classLoader、解析器、注册beanPostProcessor、环境设置等
            prepareBeanFactory(beanFactory);
            try {
                //空方法,留给子类覆写以对容器进行修改
                postProcessBeanFactory(beanFactory);
                //执行已经提前注册的工厂处理器,BeanFactoryPostProcessor同BeanPostProcessor接口,对bean进行处理,
                //BeanFactoryPostProcessor是容器级别,且只对当前容器有效,
                invokeBeanFactoryPostProcessors(beanFactory);
                //注册BeanPostProcessor,在getBean的时候调用,属于spring的一个扩展,用来在创建bean的过程中对bean进行一些自定义设置
                registerBeanPostProcessors(beanFactory);
                //为上下文初始化消息资源,支持国际化信息
                initMessageSource();
                //初始化事件广播器,如果用户有自定义的广播器就用用户的,没有就用系统默认广播器SimpleApplicationEventMulticaster
                initApplicationEventMulticaster();
                //在特定的子类容器中初始化特殊的bean,空方法,留给子类实现
                onRefresh();
                //注册消息监听者,从已加载进容器的beanDefinitionNames中查找ApplicationListener类型的监听者并注册
                registerListeners();
                //实例化所有剩下的单例(非惰性)
                finishBeanFactoryInitialization(beanFactory);
                //最后一步:发布相关的事件
                finishRefresh();
            }catch (BeansException ex) {
                if (logger.isWarnEnabled()) {
                    logger.warn("Exception encountered during context initialization - " +
                            "cancelling refresh attempt: " + ex);
                }

                // 应用启动失败,销毁已经创建的bean
                destroyBeans();

                // 设置active标志为false
                cancelRefresh(ex);

                // 抛出异常给调用者
                throw ex;
            }

            finally {
                // Reset common introspection caches in Spring's core, since we
                // might not ever need metadata for singleton beans anymore...
                resetCommonCaches();
            }
        }
    }
好长的代码.........首先是获取对象锁,获取到就可以继续下一步初始化,调用prepareRefresh代码:
protected void prepareRefresh() {
        // Switch to active.
        this.startupDate = System.currentTimeMillis();
        this.closed.set(false);
        //设置容器存活状态为true
        this.active.set(true);

        if (logger.isDebugEnabled()) {
            if (logger.isTraceEnabled()) {
                logger.trace("Refreshing " + this);
            }
            else {
                logger.debug("Refreshing " + getDisplayName());
            }
        }

        // 初始化容器中有占位符的资源属性,空方法,由子类实现
        initPropertySources();

        // 校验所有被设置为需要校验标记的属性
        // 委托给ConfigurablePropertyResolver#setRequiredProperties
        getEnvironment().validateRequiredProperties();

        // 设置需要监听容器启动时的监听器,不是IOC的核心逻辑,可以不关注
        if (this.earlyApplicationListeners == null) {
            this.earlyApplicationListeners = new LinkedHashSet<>(this.applicationListeners);
        }
        else {
            // Reset local application listeners to pre-refresh state.
            this.applicationListeners.clear();
            this.applicationListeners.addAll(this.earlyApplicationListeners);
        }

        // Allow for the collection of early ApplicationEvents,
        // to be published once the multicaster is available...
        this.earlyApplicationEvents = new LinkedHashSet<>();
    }
prepareRefresh是容器启动前的环境准备,Environment的校验等等。
继续从主流程往下走,进入到本篇的核心代码:ConfigurableListableBeanFactory beanFactory = obtainFreshBeanFactory();
/**
     * ConfigurableListableBeanFactory为BeanFactory的子类,
     * ConfigurableListableBeanFactory注释写的很清楚,主要提供分析和修改definitions
     * 以及初始化单例bean时的前置执行
     * @return
     */
    protected ConfigurableListableBeanFactory obtainFreshBeanFactory() {
        //空方法,由子类实现,刷新bean工厂
        refreshBeanFactory();
        //返回bean工厂
        return getBeanFactory();
    }
refreshBeanFactory为空实现,由ClassPathXmlApplicationContext父类AbstractRefreshableApplicationContext实现,主要将配置文件加载解析并注册到容器中,属于核心代码逻辑,进入该代码看一下:
protected final void refreshBeanFactory() throws BeansException {
//如果beanFactory属性不为空,则销毁beanFactory,并清除所有信息
if (hasBeanFactory()) {
destroyBeans();
closeBeanFactory();
}
try {
//创建BeanFactory,DefaultListableBeanFactory类型
DefaultListableBeanFactory beanFactory = createBeanFactory();
//设置序列化id
beanFactory.setSerializationId(getId());
// 定制beanFactory,设置allowBeanDefinitionOverriding、allowCircularReferences属性,
// 表示是否允许覆盖同名称的不同定义的对象以及循环依赖
customizeBeanFactory(beanFactory);
// 加载解析配置文件,注册BeanDefinition
loadBeanDefinitions(beanFactory);
this.beanFactory = beanFactory;
}
catch (IOException ex) {
throw new ApplicationContextException("I/O error parsing bean definition source for " + getDisplayName(), ex);
}
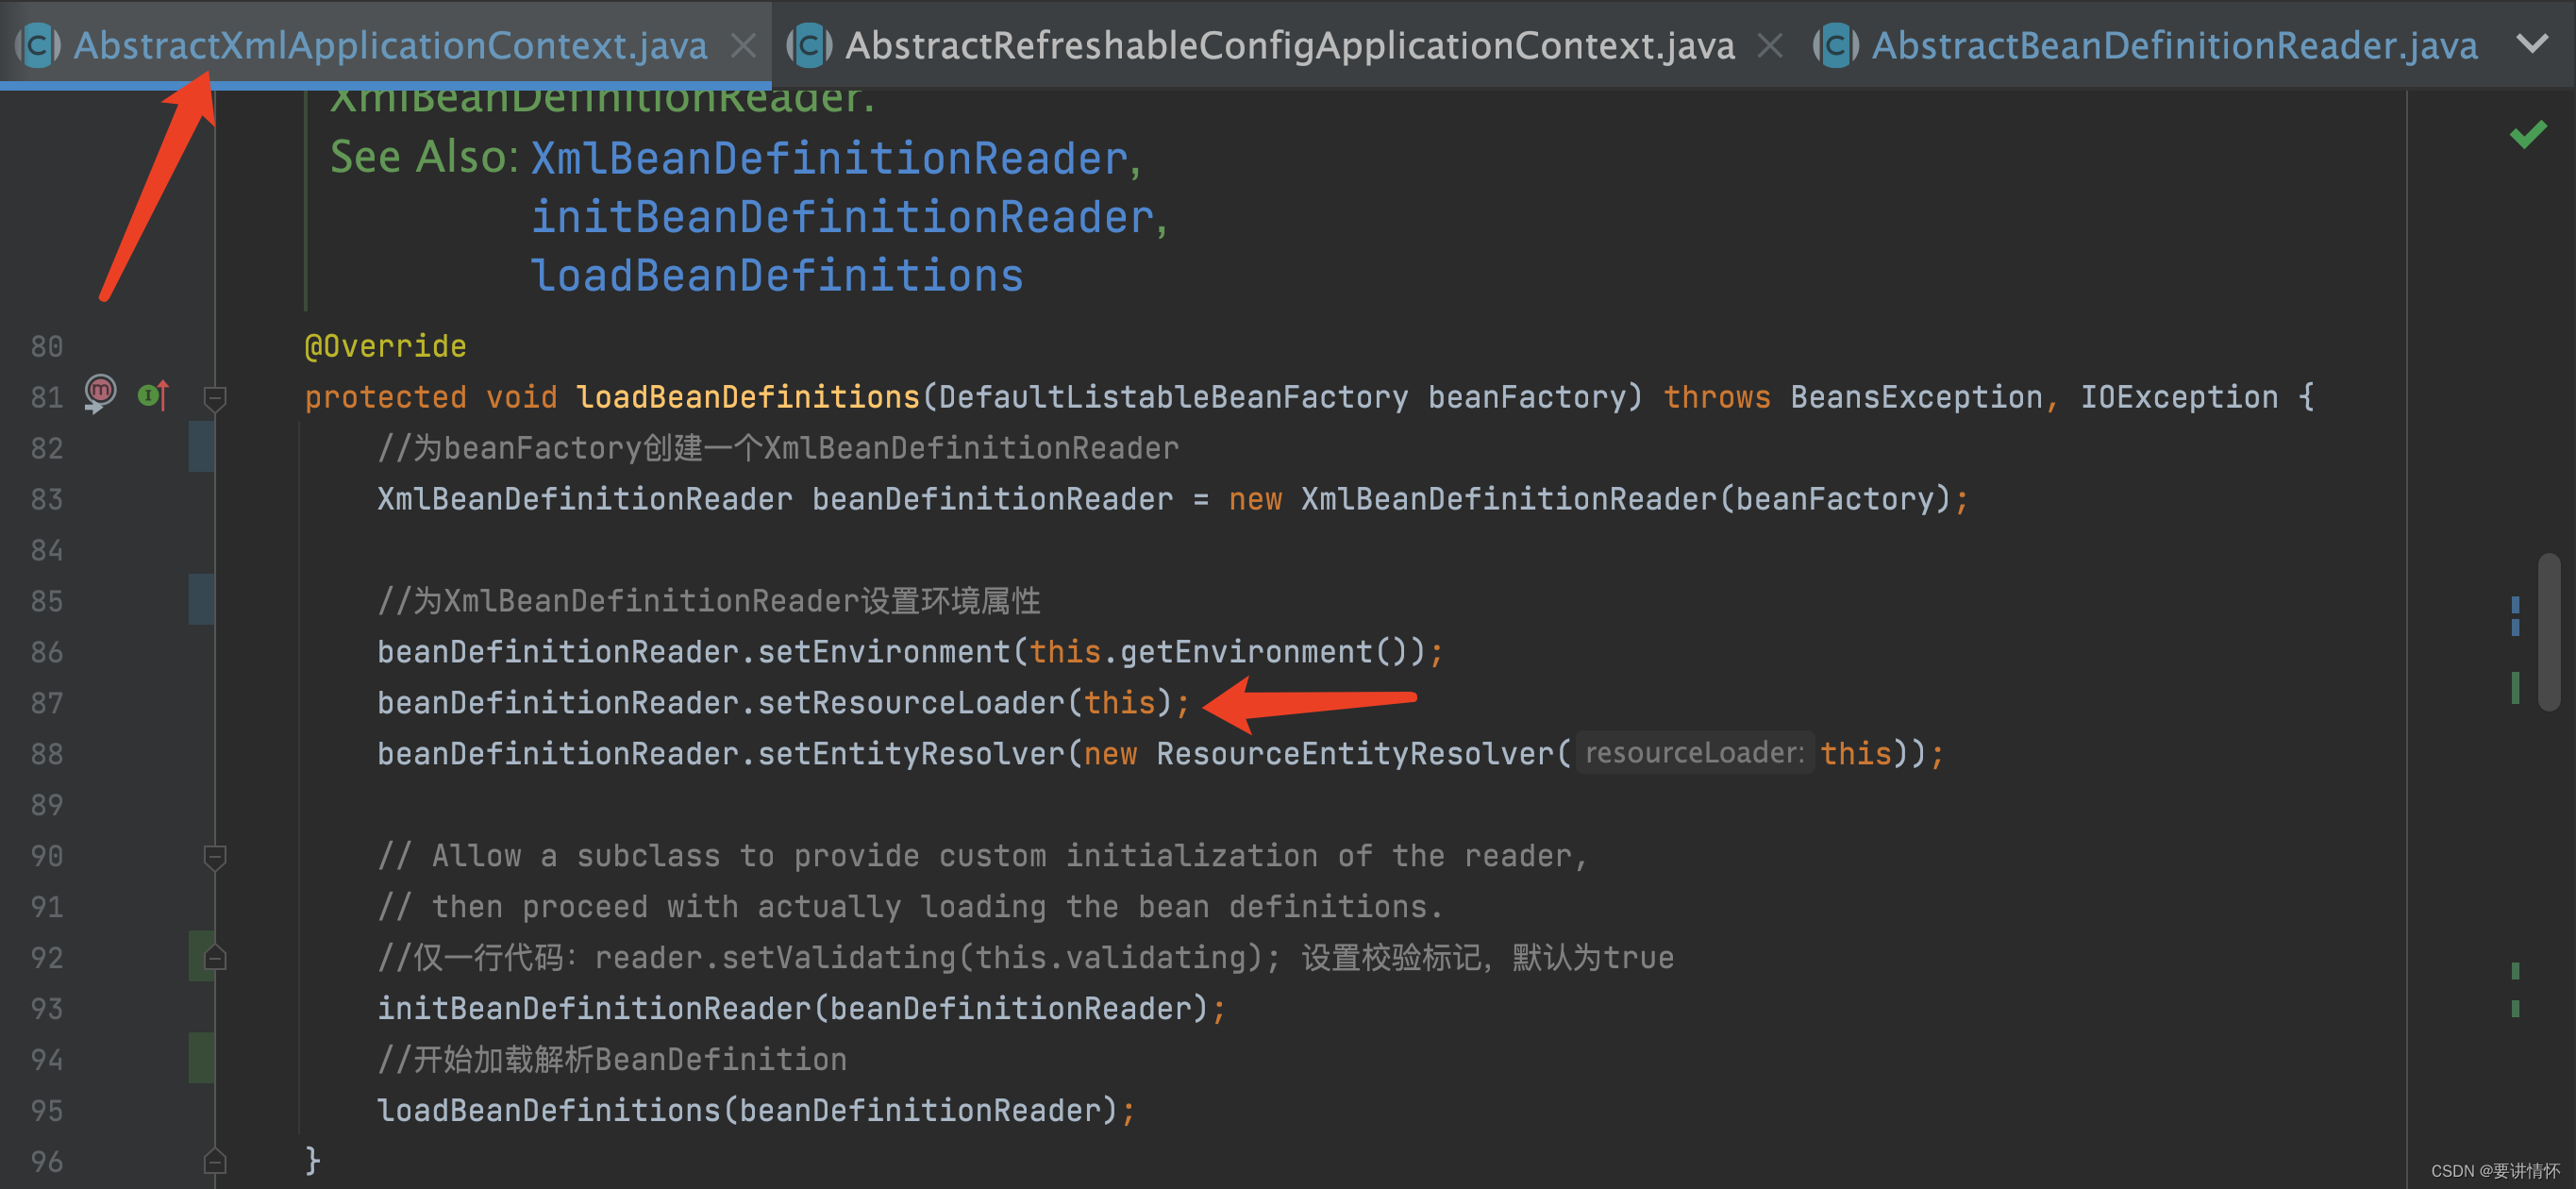
}那么核心中的核心就是loadBeanDefinitions(beanFactory),是抽象方法,需要子类来实现,我们是AbstractXmlApplicationContext类,所以直接进入AbstractXmlApplicationContext#loadBeanDefinitions
protected void loadBeanDefinitions(XmlBeanDefinitionReader reader) throws BeansException, IOException {
        // 获取Resource资源,此时为空
        Resource[] configResources = getConfigResources();
        if (configResources != null) {
            reader.loadBeanDefinitions(configResources);
        }
        //我们传的是spring-application.xml地址,所以走这里
        String[] configLocations = getConfigLocations();
        if (configLocations != null) {
            reader.loadBeanDefinitions(configLocations);
        }
    }
可以看到最终委托给XmlBeanDefinitionReader去处理配置文件,并循环配置文件去加载并解析,我们项目中一般会有多个配置文件,就是在这里一起加载处理的。
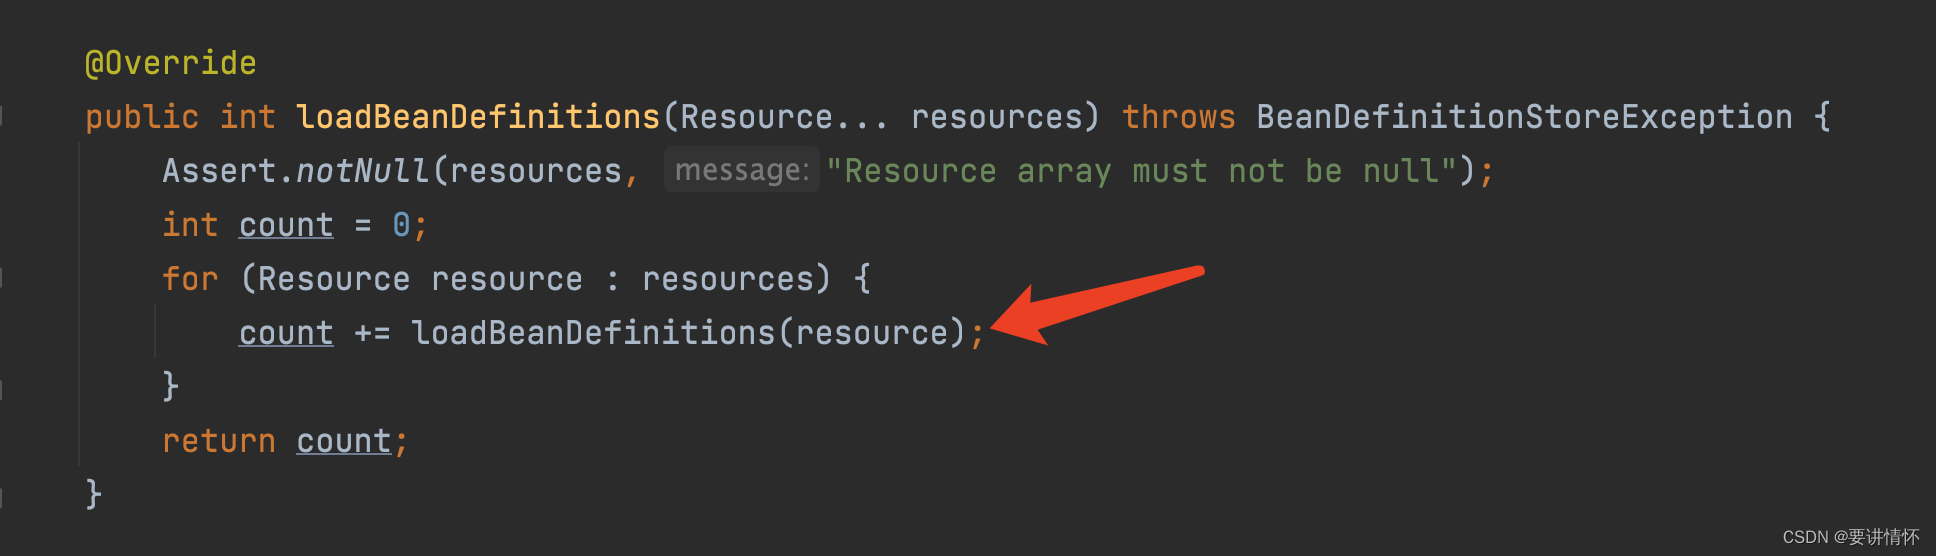
@Override
    public int loadBeanDefinitions(String... locations) throws BeanDefinitionStoreException {
        Assert.notNull(locations, "Location array must not be null");
        int count = 0;
        //循环遍历所有的配置文件,进行加载解析
        for (String location : locations) {
            count += loadBeanDefinitions(location);
        }
        return count;
    }
进入重载loadBeanDefinitions方法:
public int loadBeanDefinitions(String location) throws BeanDefinitionStoreException {
        return loadBeanDefinitions(location, null);
    }
没什么可说的,继续进入loadBeanDefinitions(location, null),欣慰resourceLoader在前面已经设置了,所以此时resourceLoader为ClassPathXmlApplicationContext,又因为ClassPathXmlApplicationContext继承了ResourcePatternResolver,所以进入if逻辑,继续调用loadBeanDefinitions的重载方法。
public int loadBeanDefinitions(String location, @Nullable Set<Resource> actualResources) throws BeanDefinitionStoreException {
        // 此时resourceLoader真实类型为ClassPathXmlApplicationContext
        ResourceLoader resourceLoader = getResourceLoader();
        if (resourceLoader == null) {
            throw new BeanDefinitionStoreException(
                    "Cannot load bean definitions from location [" + location + "]: no ResourceLoader available");
        }
        //ClassPathXmlApplicationContext的父类ApplicationContext继承了ResourcePatternResolver
        //所以ClassPathXmlApplicationContext也属于ResourcePatternResolver
        if (resourceLoader instanceof ResourcePatternResolver) {
            // Resource pattern matching available.
            try {
                //将spring-application.xml封装为Resource
                Resource[] resources = ((ResourcePatternResolver) resourceLoader).getResources(location);
                //解析注册
                int count = loadBeanDefinitions(resources);
                if (actualResources != null) {
                    Collections.addAll(actualResources, resources);
                }
                if (logger.isTraceEnabled()) {
                    logger.trace("Loaded " + count + " bean definitions from location pattern [" + location + "]");
                }
                return count;
            }
            catch (IOException ex) {
                throw new BeanDefinitionStoreException(
                        "Could not resolve bean definition resource pattern [" + location + "]", ex);
            }
        }
        else {
            // Can only load single resources by absolute URL.
            Resource resource = resourceLoader.getResource(location);
            int count = loadBeanDefinitions(resource);
            if (actualResources != null) {
                actualResources.add(resource);
            }
            if (logger.isTraceEnabled()) {
                logger.trace("Loaded " + count + " bean definitions from location [" + location + "]");
            }
            return count;
        }
    }
进入loadBeanDefinitions的重载方法后,发现又调用了一个重载方法(PS:重载的真多啊,大家可以思考下为什么会有这么多重载方法);
继续进入重载方法,由子类实现:XmlBeanDefinitionReader#loadBeanDefinitions(org.springframework.core.io.Resource)

再进入重载方法:
public int loadBeanDefinitions(EncodedResource encodedResource) throws BeanDefinitionStoreException {
        Assert.notNull(encodedResource, "EncodedResource must not be null");
        if (logger.isTraceEnabled()) {
            logger.trace("Loading XML bean definitions from " + encodedResource);
        }
        //从ThreadLocal中获取加载资源集合,保证了线程安全
        Set<EncodedResource> currentResources = this.resourcesCurrentlyBeingLoaded.get();
        //将当前加载资源加入到集合中
        if (!currentResources.add(encodedResource)) {
            throw new BeanDefinitionStoreException(
                    "Detected cyclic loading of " + encodedResource + " - check your import definitions!");
        }
        //将资源以输入流的形式读进内存
        try (InputStream inputStream = encodedResource.getResource().getInputStream()) {
            InputSource inputSource = new InputSource(inputStream);
            if (encodedResource.getEncoding() != null) {
                inputSource.setEncoding(encodedResource.getEncoding());
            }
            //Spring中一般以do开头的就是真正干活的方法
            return doLoadBeanDefinitions(inputSource, encodedResource.getResource());
        }
        catch (IOException ex) {
            throw new BeanDefinitionStoreException(
                    "IOException parsing XML document from " + encodedResource.getResource(), ex);
        }
        finally {
            //清除加载资源
            currentResources.remove(encodedResource);
            if (currentResources.isEmpty()) {
                this.resourcesCurrentlyBeingLoaded.remove();
            }
        }
    }
通过一行一行看代码我们最终发现doLoadBeanDefinitions方法,加了do就表明离我们想要了解的地方不远了。我们进入该方法一探究竟:
protected int doLoadBeanDefinitions(InputSource inputSource, Resource resource)
            throws BeanDefinitionStoreException {

        try {
            //因为我们的配置文件是spring-application.xml,所以需要将xml转换为Document对象
            Document doc = doLoadDocument(inputSource, resource);
            //解析转换后的document对象为BeanDefinition,并注册
            int count = registerBeanDefinitions(doc, resource);
            if (logger.isDebugEnabled()) {
                logger.debug("Loaded " + count + " bean definitions from " + resource);
            }
            return count;
        }
        catch (BeanDefinitionStoreException ex) {
            throw ex;
        }
        catch (SAXParseException ex) {
            throw new XmlBeanDefinitionStoreException(resource.getDescription(),
                    "Line " + ex.getLineNumber() + " in XML document from " + resource + " is invalid", ex);
        }
        catch (SAXException ex) {
            throw new XmlBeanDefinitionStoreException(resource.getDescription(),
                    "XML document from " + resource + " is invalid", ex);
        }
        catch (ParserConfigurationException ex) {
            throw new BeanDefinitionStoreException(resource.getDescription(),
                    "Parser configuration exception parsing XML from " + resource, ex);
        }
        catch (IOException ex) {
            throw new BeanDefinitionStoreException(resource.getDescription(),
                    "IOException parsing XML document from " + resource, ex);
        }
        catch (Throwable ex) {
            throw new BeanDefinitionStoreException(resource.getDescription(),
                    "Unexpected exception parsing XML document from " + resource, ex);
        }
    }
里面主要做了两件事,就是先将xml输入流转换为Document对象,然后再去解析Document对象,为了合理的控制篇幅大小,解析Document对象我们下一篇再讲,谢谢阅读。


 1322
1322

 被折叠的 条评论
为什么被折叠?
被折叠的 条评论
为什么被折叠?
 到【灌水乐园】发言


