


文章目录
官方说明
MCP - Model Context Protocol
https://modelcontextprotocol.io/introduction
https://docs.cursor.com/context/model-context-protocol

1、MCP Tool 的集合
2、一个 demo :Sequential Thinking
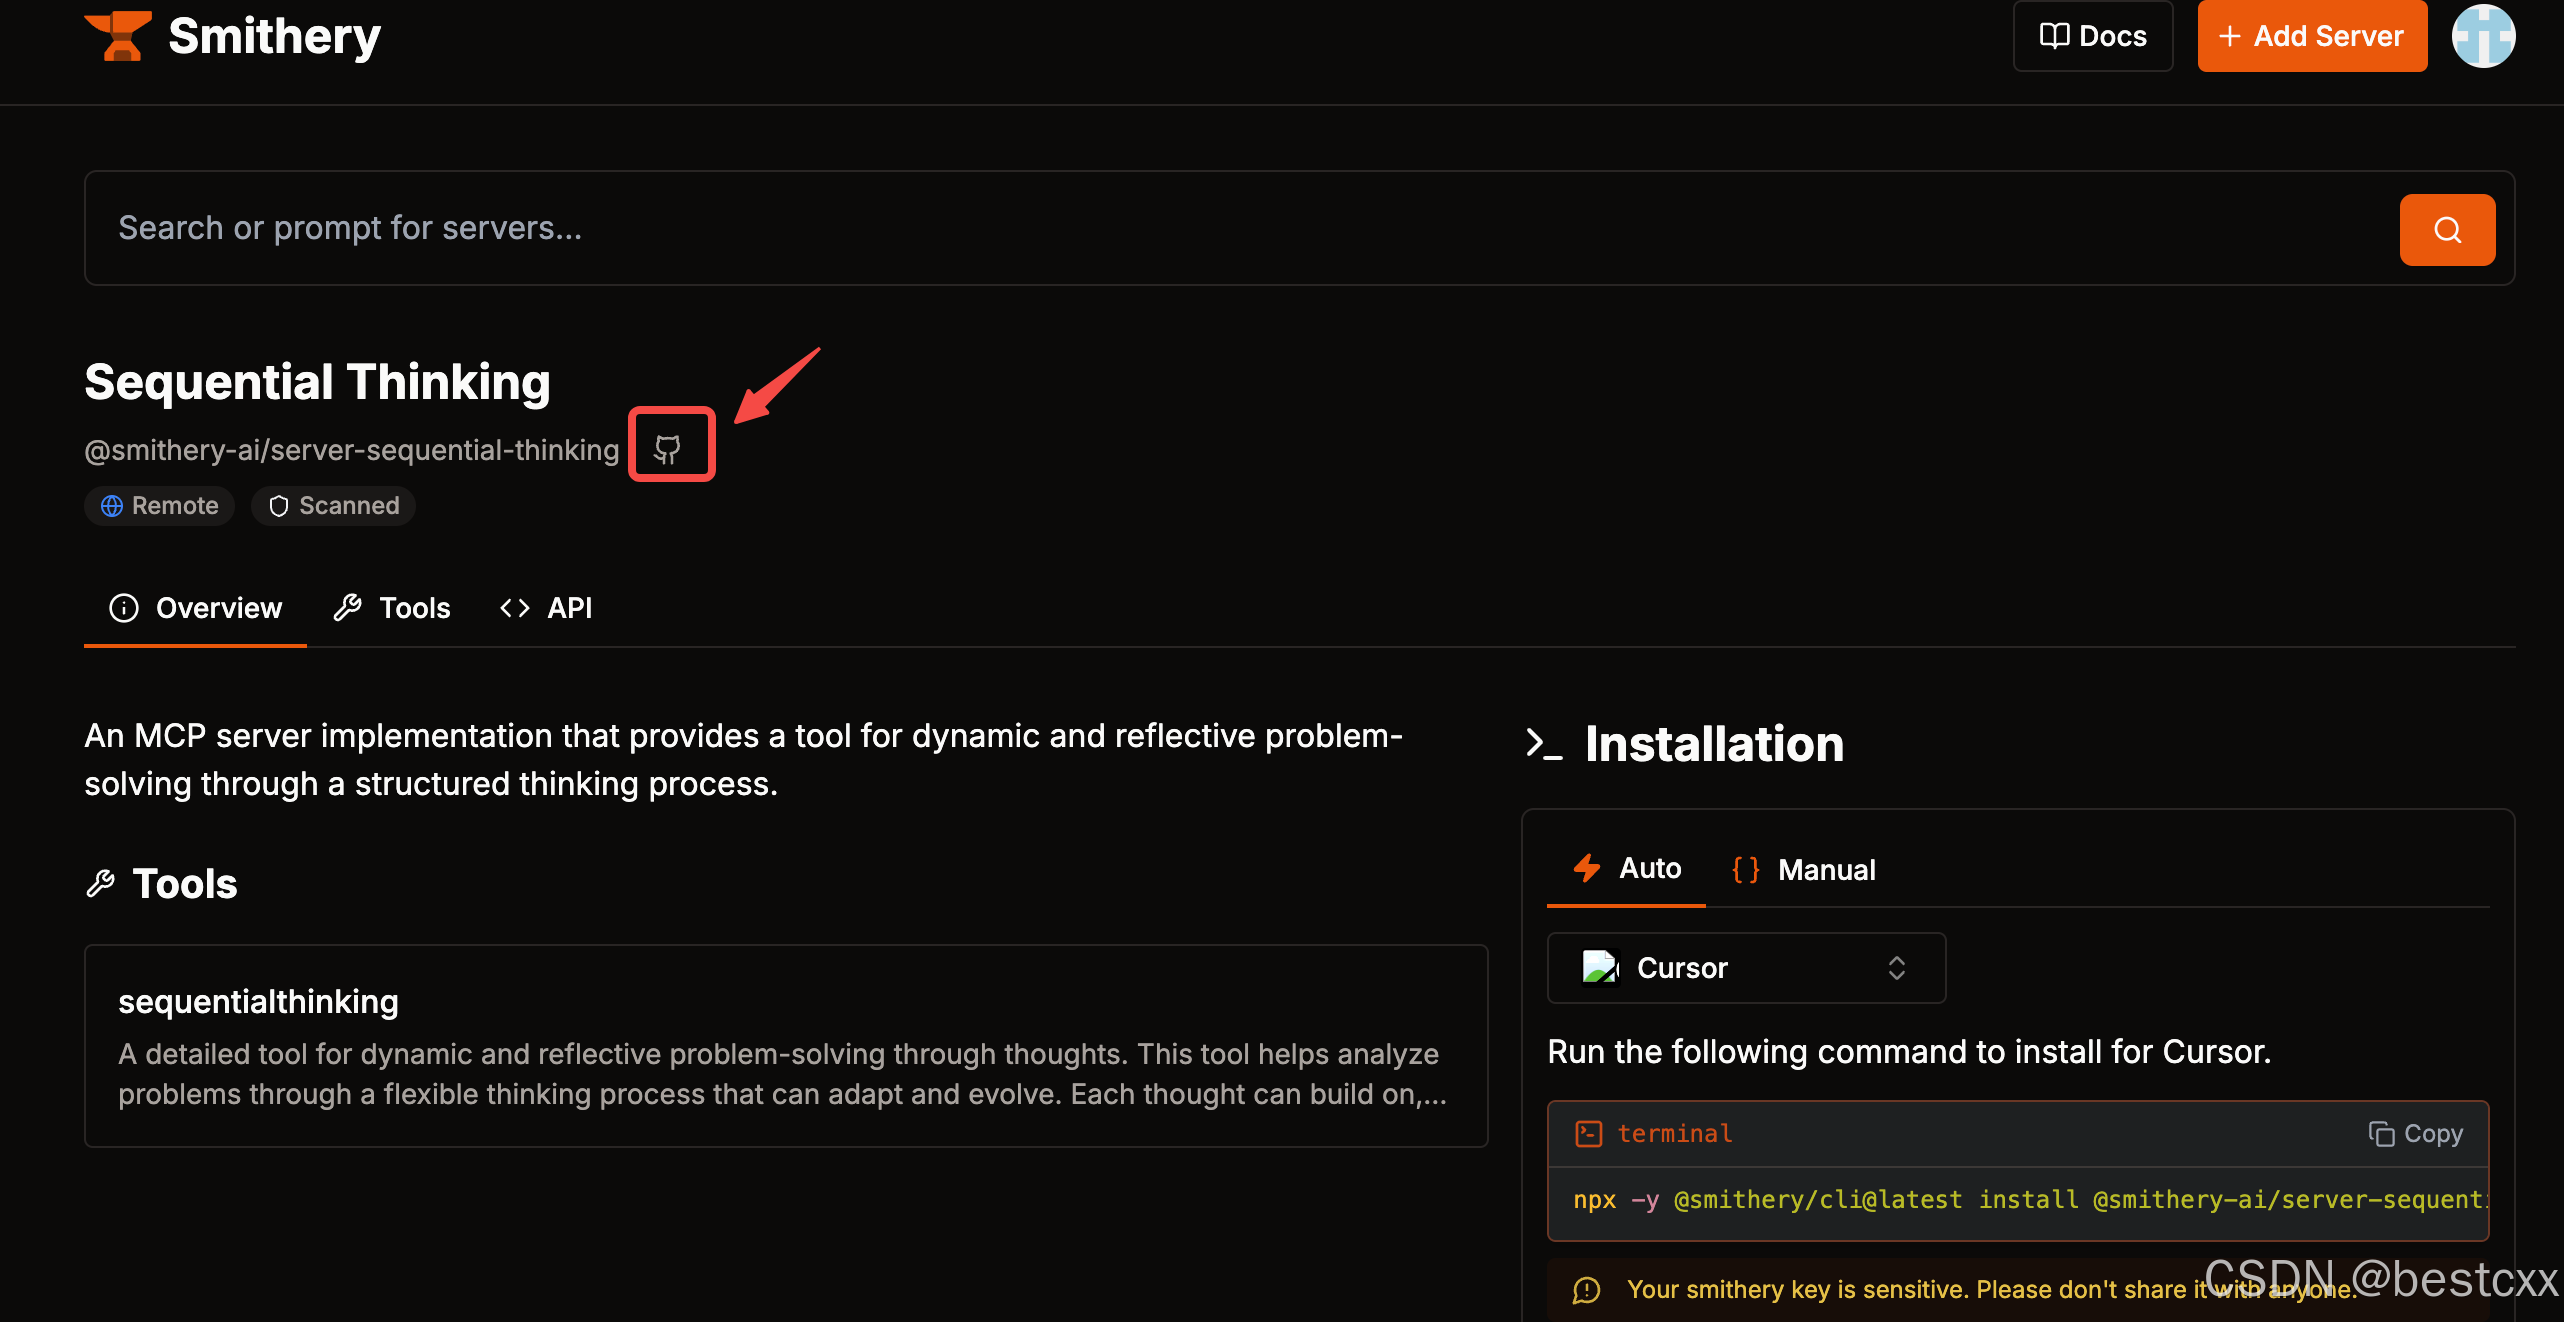
我们以 Sequential Thinking 这个 MCP Server 作为 demo 配置一下
2.1、搜索一个 MCP Tool 获取 command 命令
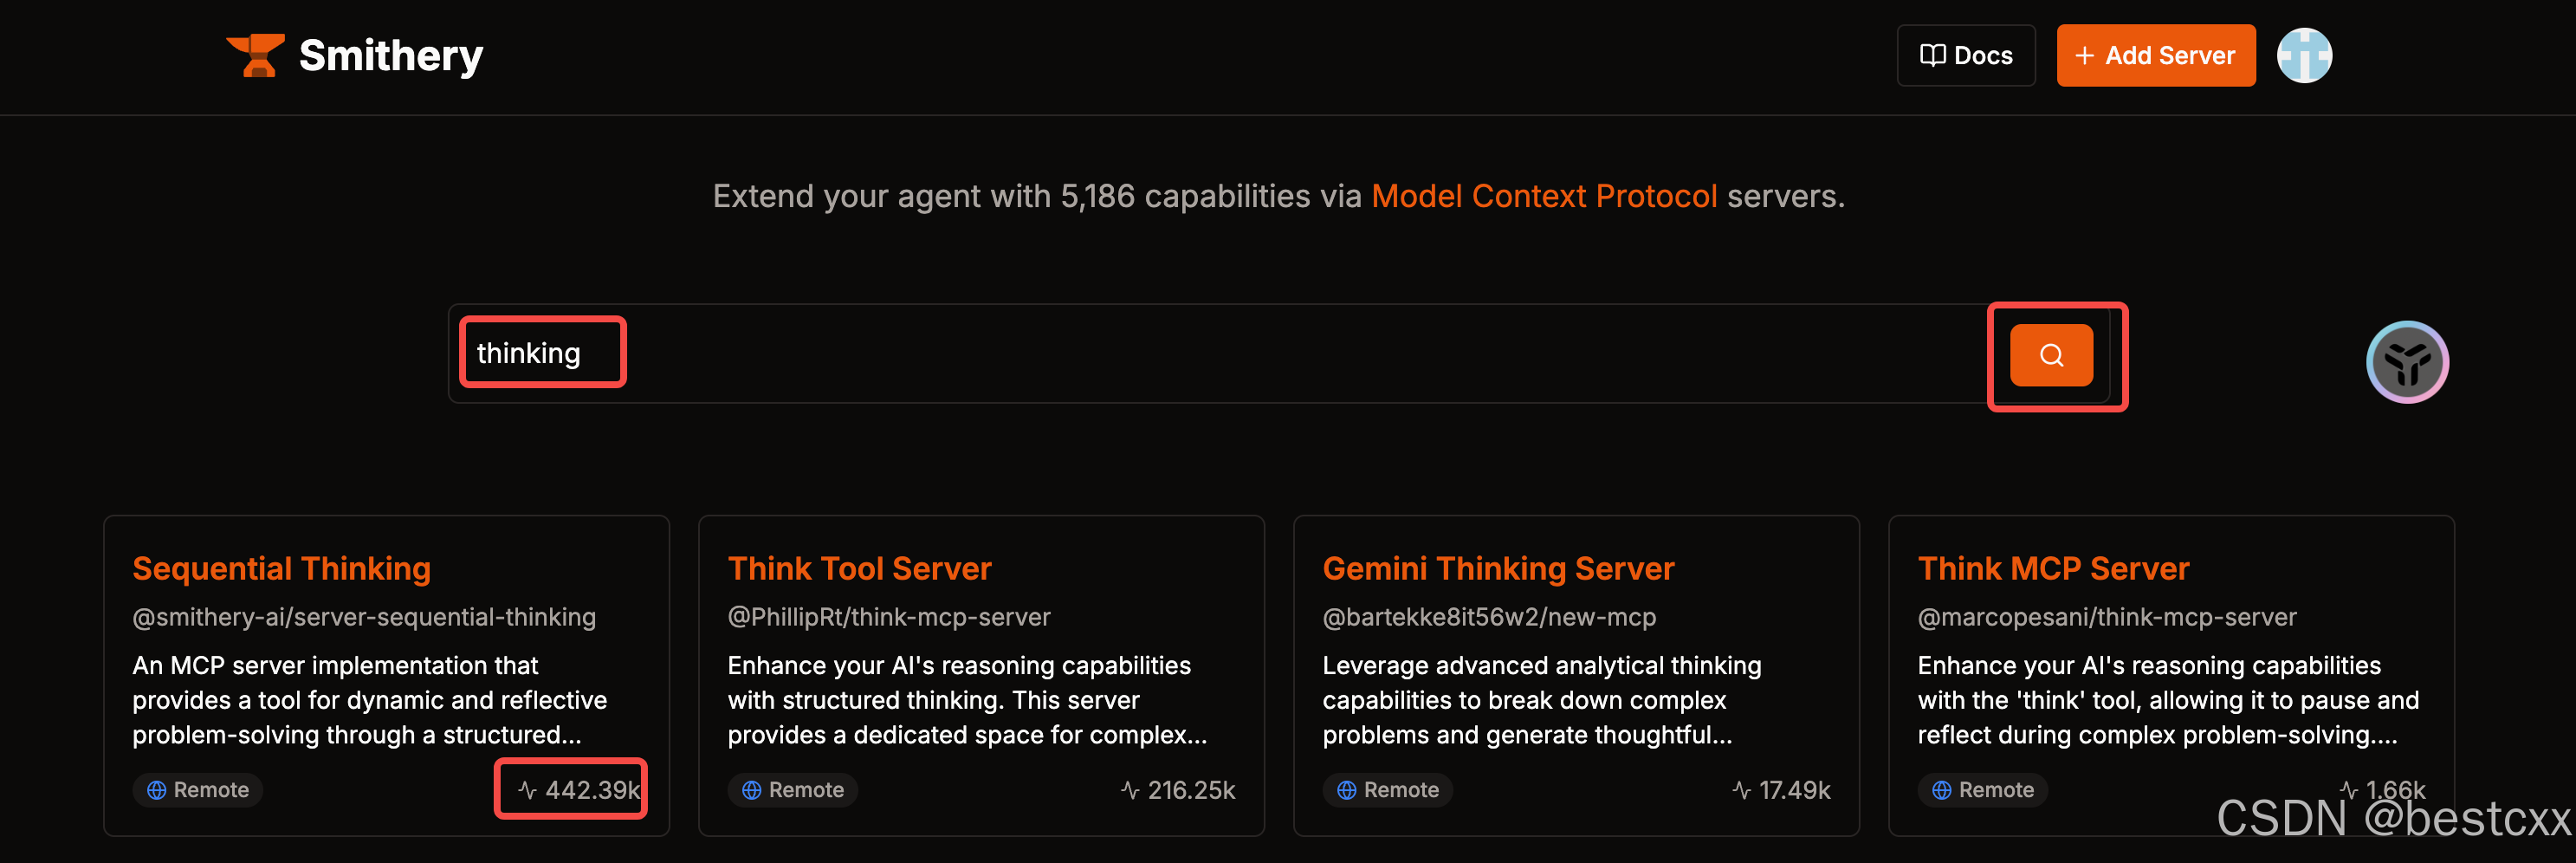
https://smithery.ai/server/@smithery-ai/server-sequential-thinking
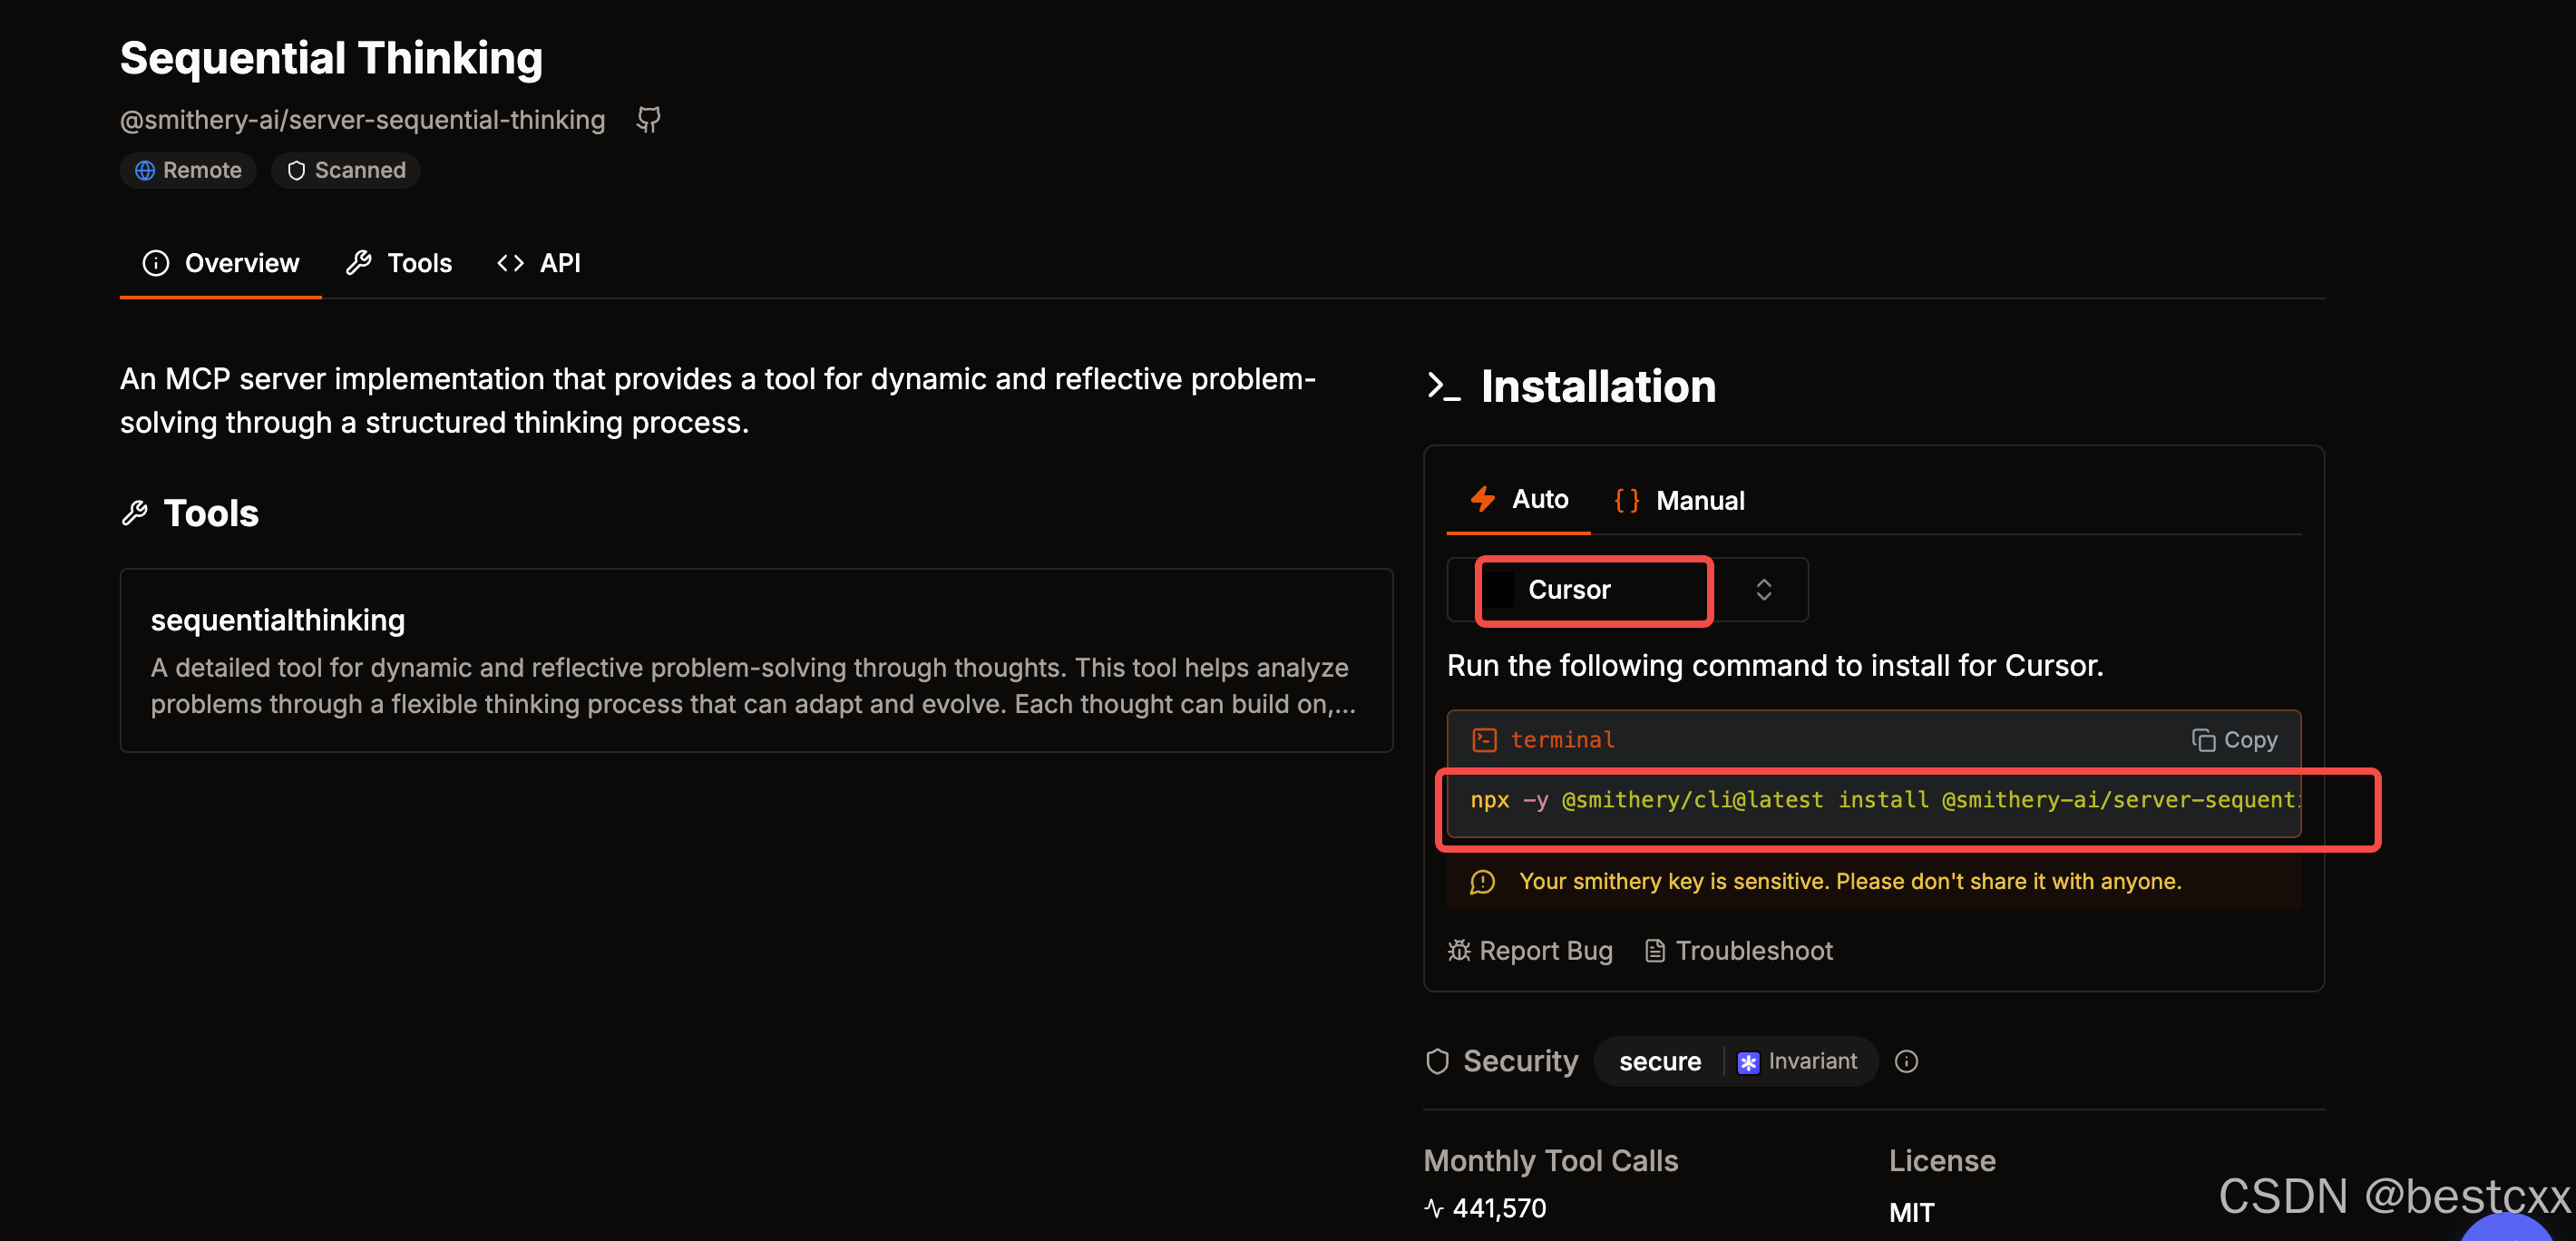
得到:
npx -y @smithery/cli@latest install @smithery-ai/server-sequential-thinking --client cursor --key d17b0085-f937-4a71-b723-cc2671612b9a
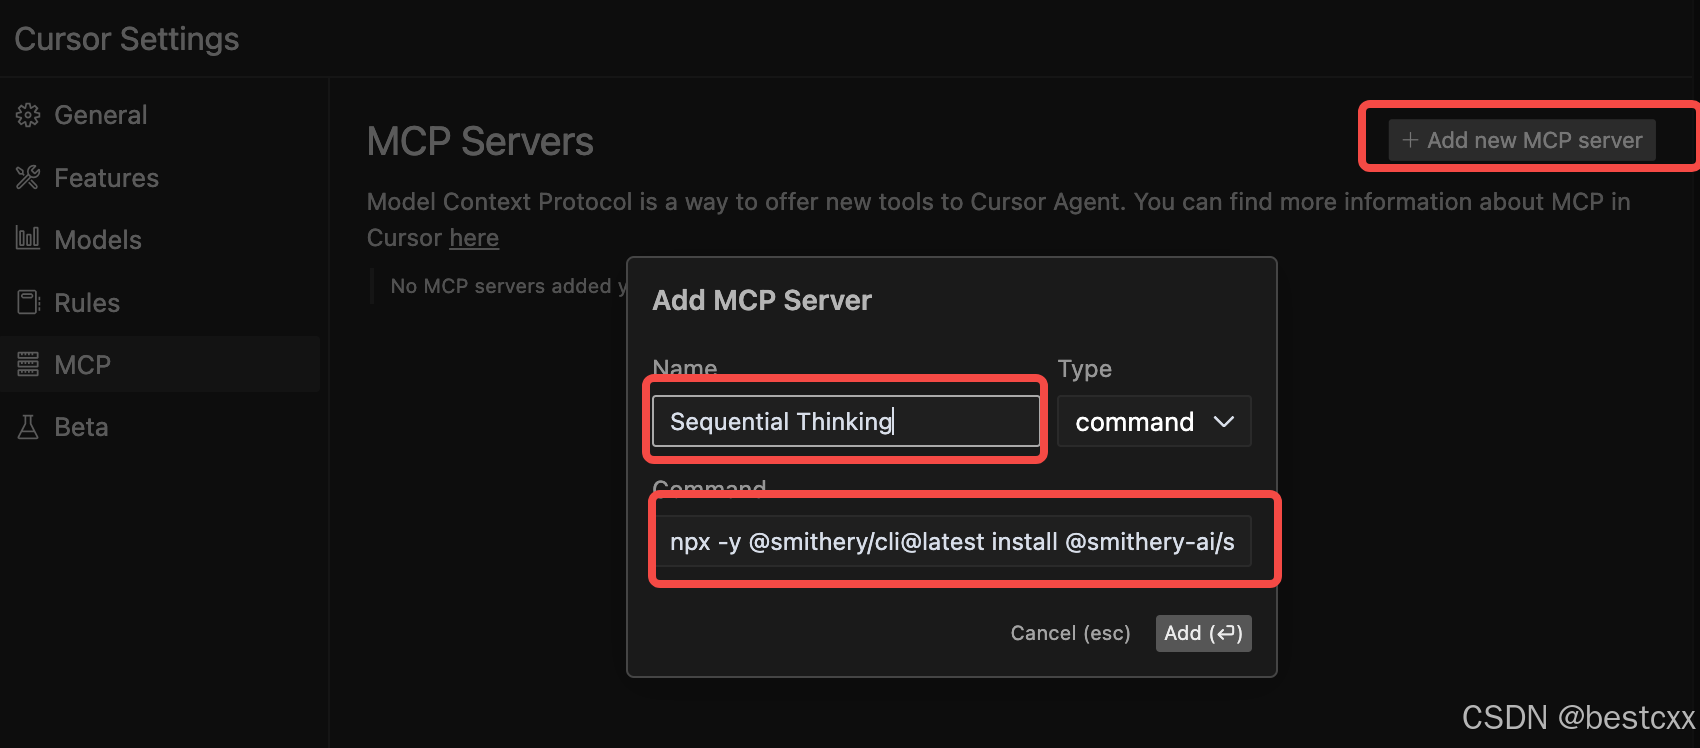
2.2、在 Cursor 配置
Name 是自定义的
Type 选择 command
Command 直接填写上面得到的
npx -y @smithery/cli@latest install @smithery-ai/server-sequential-thinking --client cursor --key d17b0085-f937-4a71-b723-cc2671612b9a
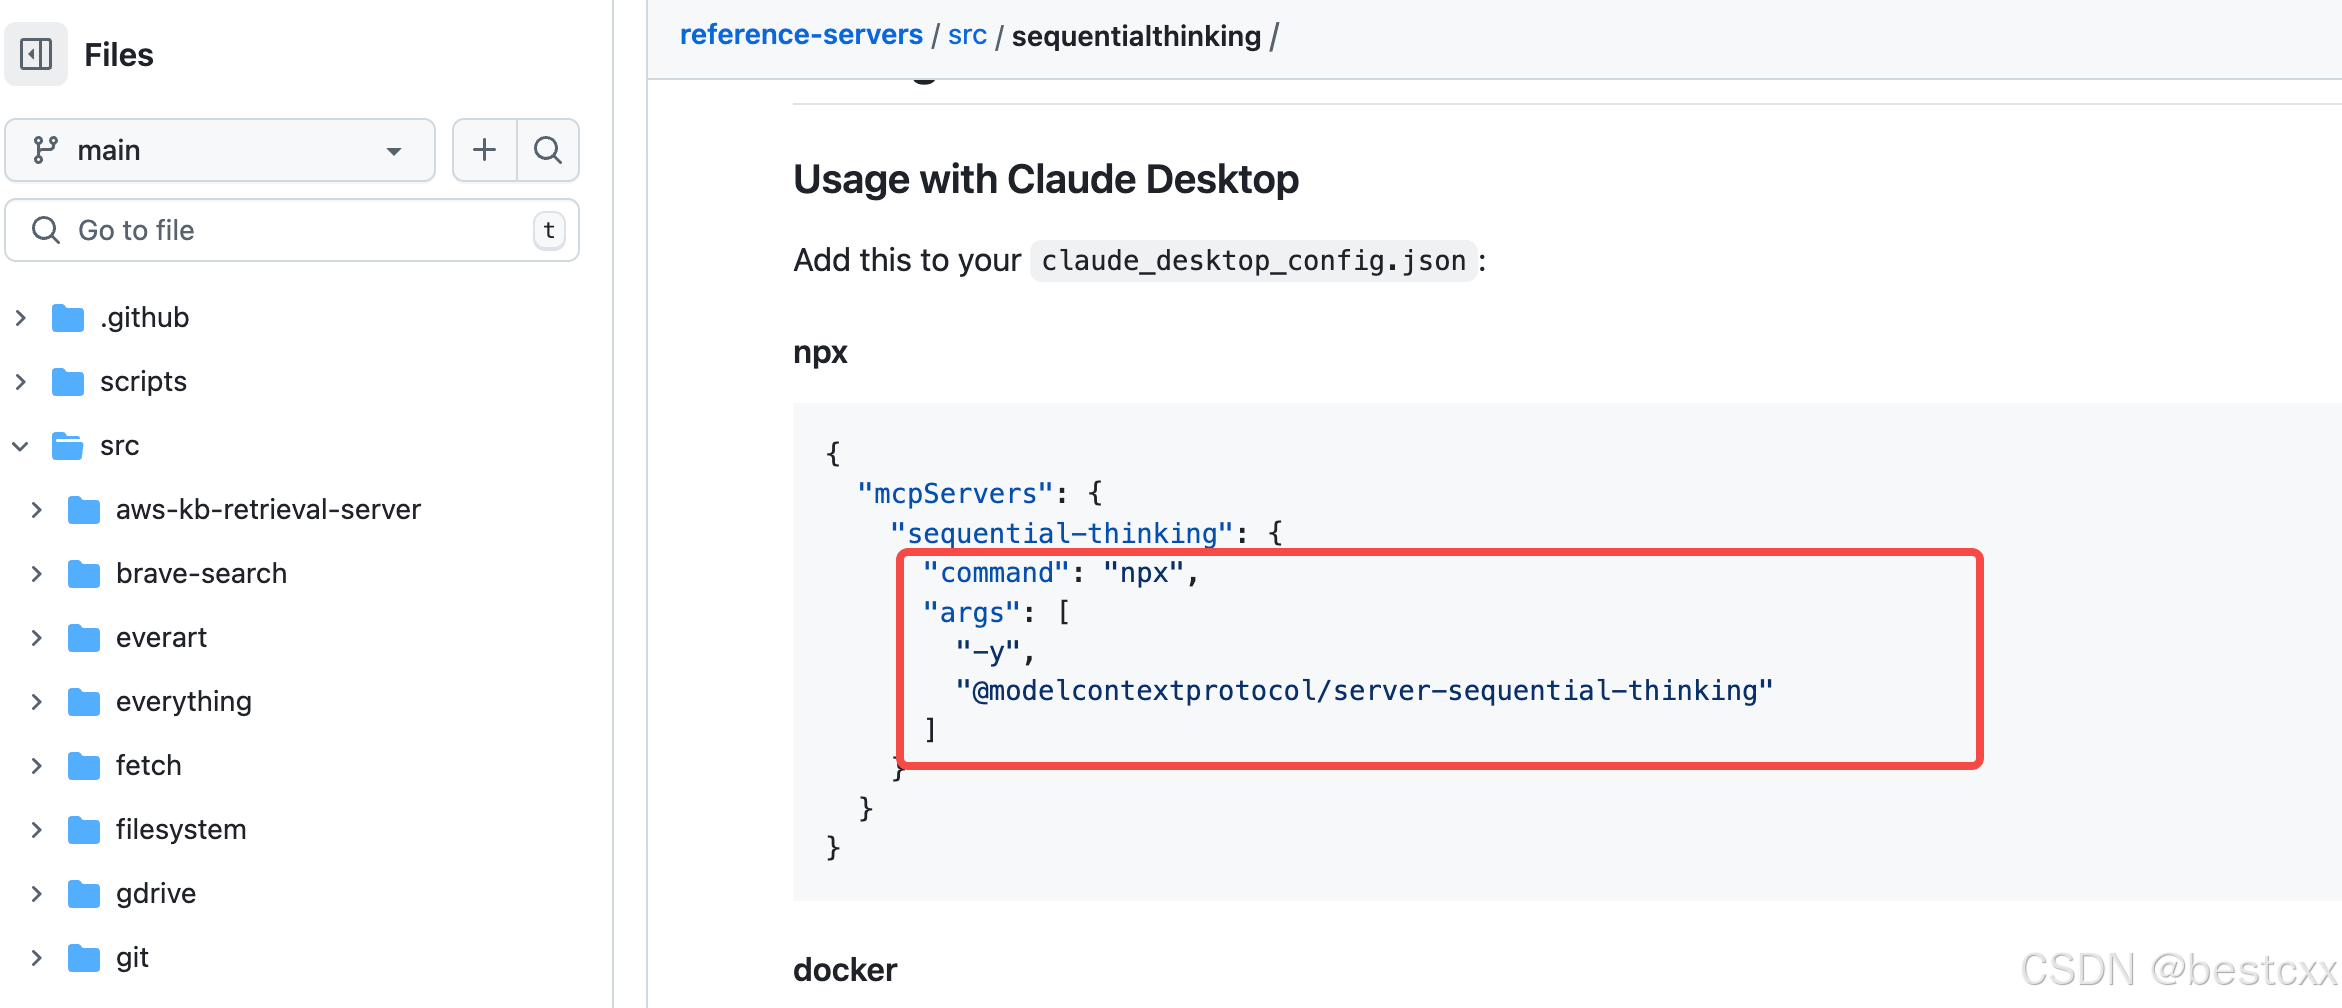
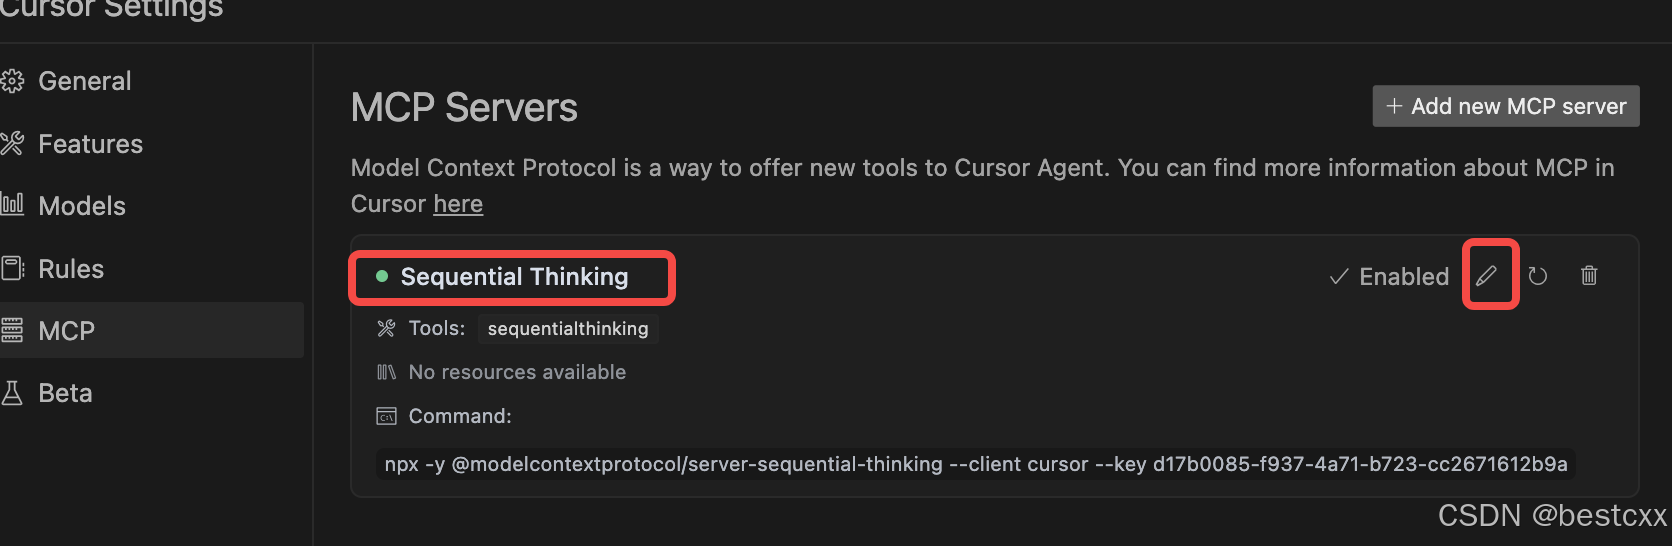
2.3、配置状态检查与修正(解决网络问题)
检查
配置完毕后,如果前面的点是绿色的,表示正常,否则表示配置没有生效。
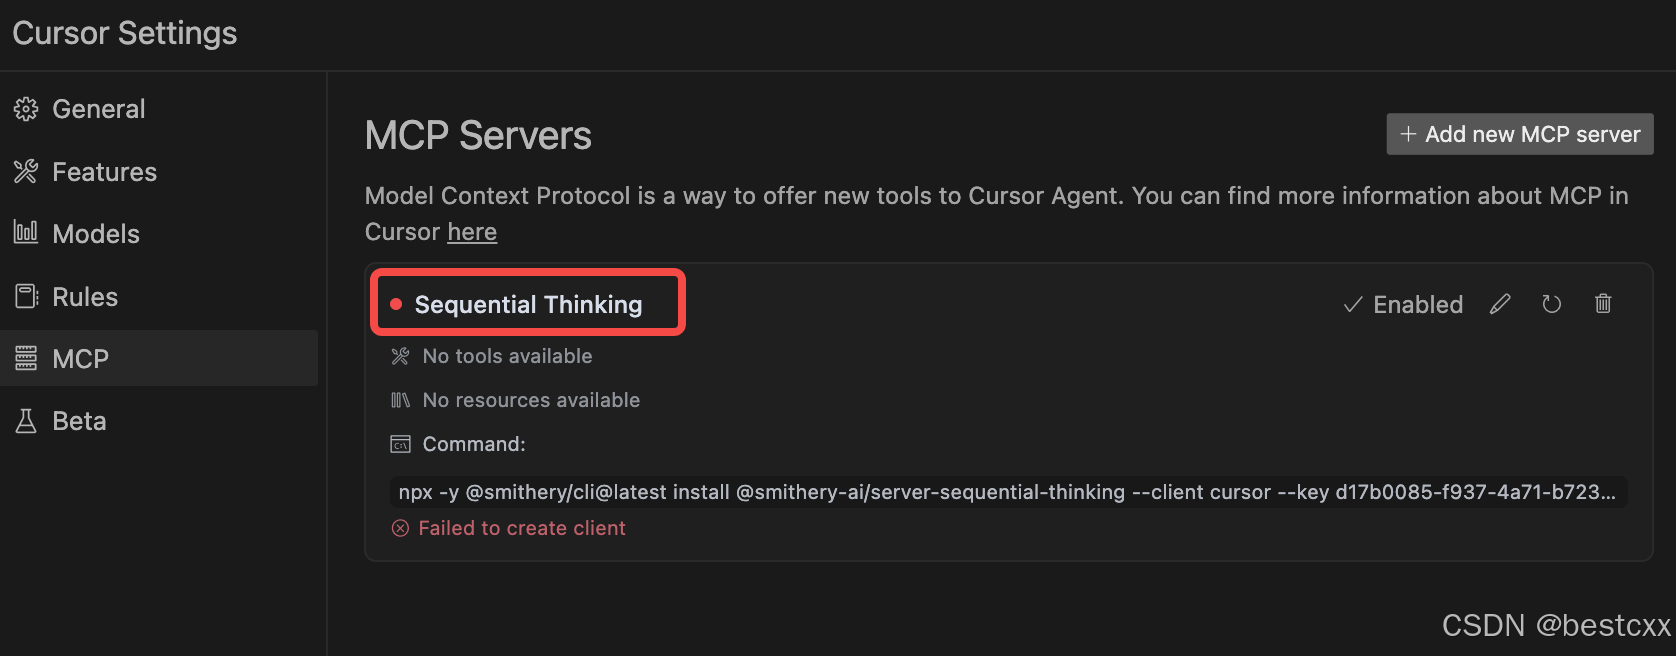
解决办法
把
npx -y @smithery/cli@latest install @smithery-ai/server-sequential-thinking --client cursor --key d17b0085-f937-4a71-b723-cc2671612b9a
中 @xxx 部分 替换为 github 开源项目中提供的原始命令
比如下面 https://github.com/smithery-ai/reference-servers/tree/main/src/sequentialthinking
你可以获取的命令就是
npx -y @modelcontextprotocol/server-sequential-thinking
npx -y @smithery/cli@latest install @smithery-ai/server-sequential-thinking --client cursor --key d17b0085-f937-4a71-b723-cc2671612b9a
=>
npx -y @modelcontextprotocol/server-sequential-thinking --client cursor --key d17b0085-f937-4a71-b723-cc2671612b9a
然后就正常了
2.4、json 配置格式
部分低版本的 cursor 只支持 json格式的配置,道理是一样的 ,在页面勾选即可
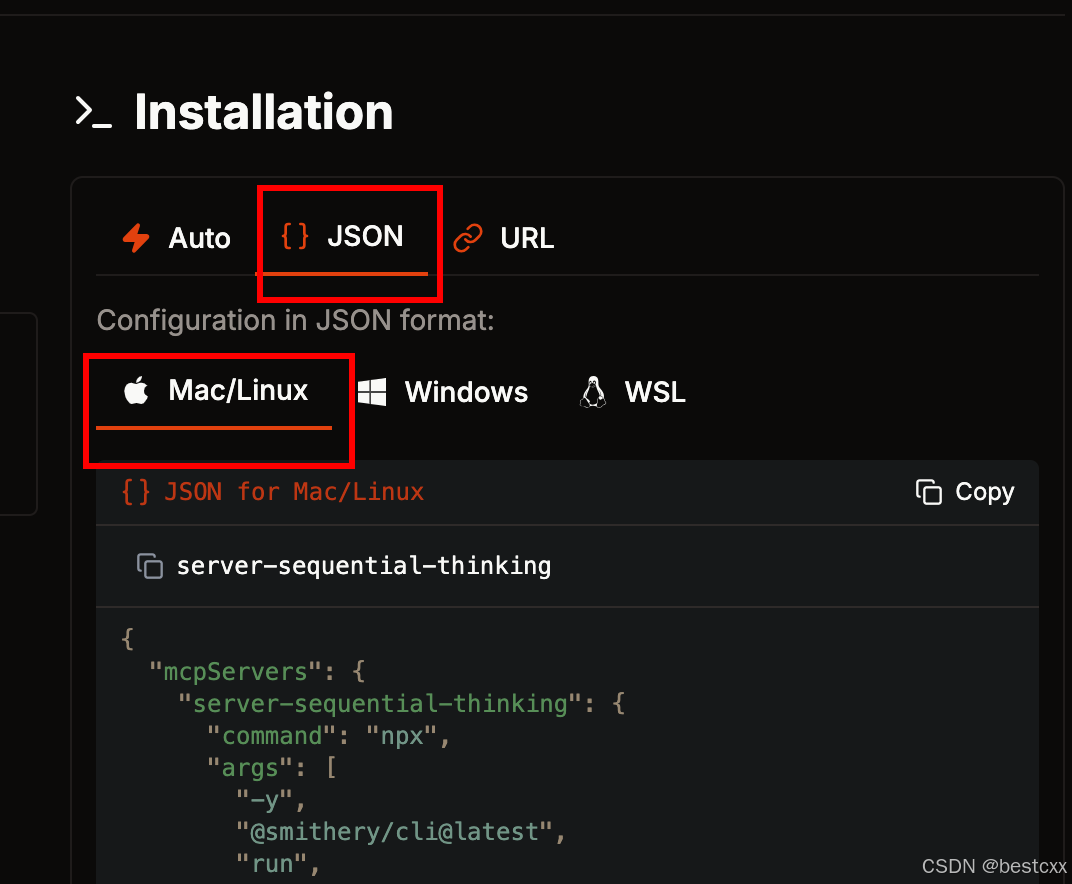
推荐直接使用 github 的内容
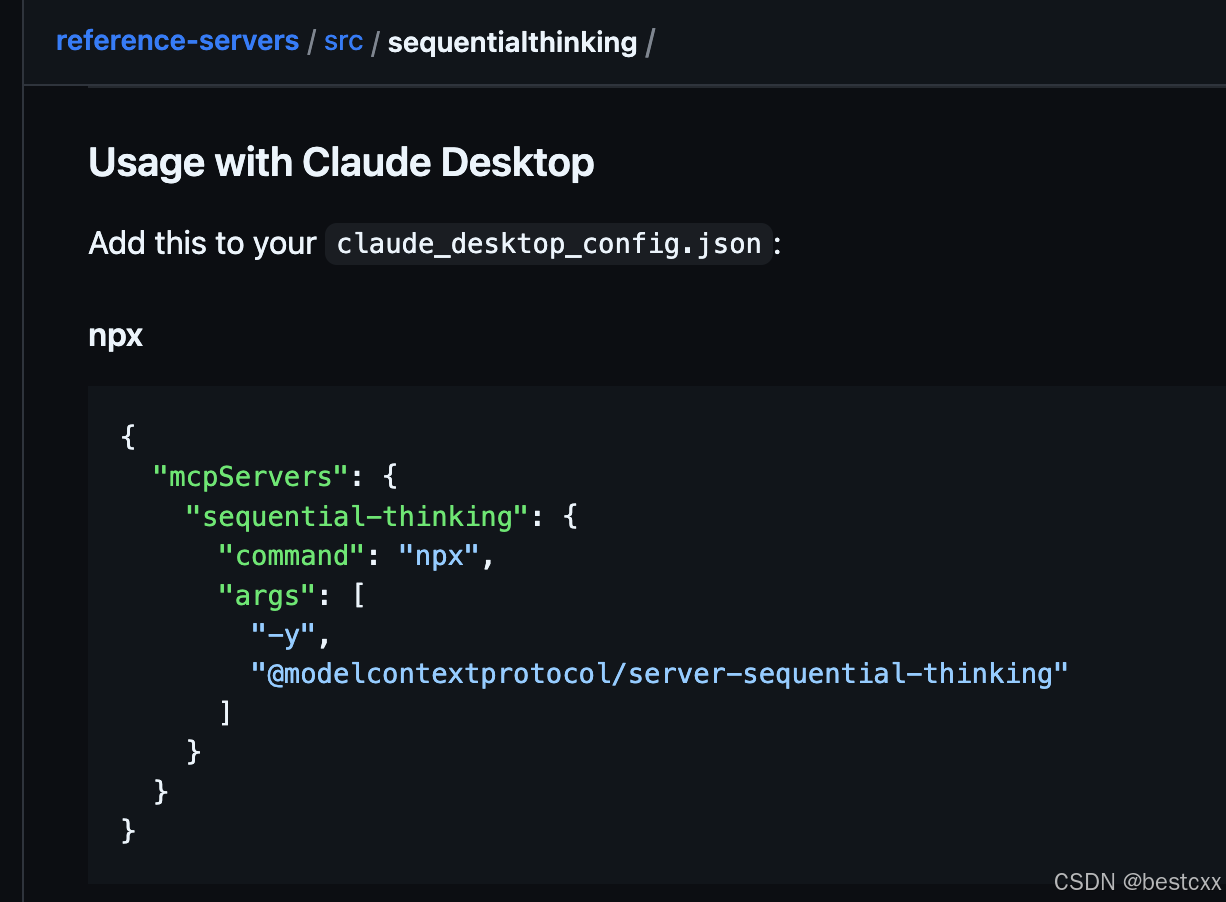
{
  "mcpServers": {
    "sequential-thinking": {
      "command": "npx",
      "args": [
        "-y",
        "@modelcontextprotocol/server-sequential-thinking"
      ]
    }
  }
}
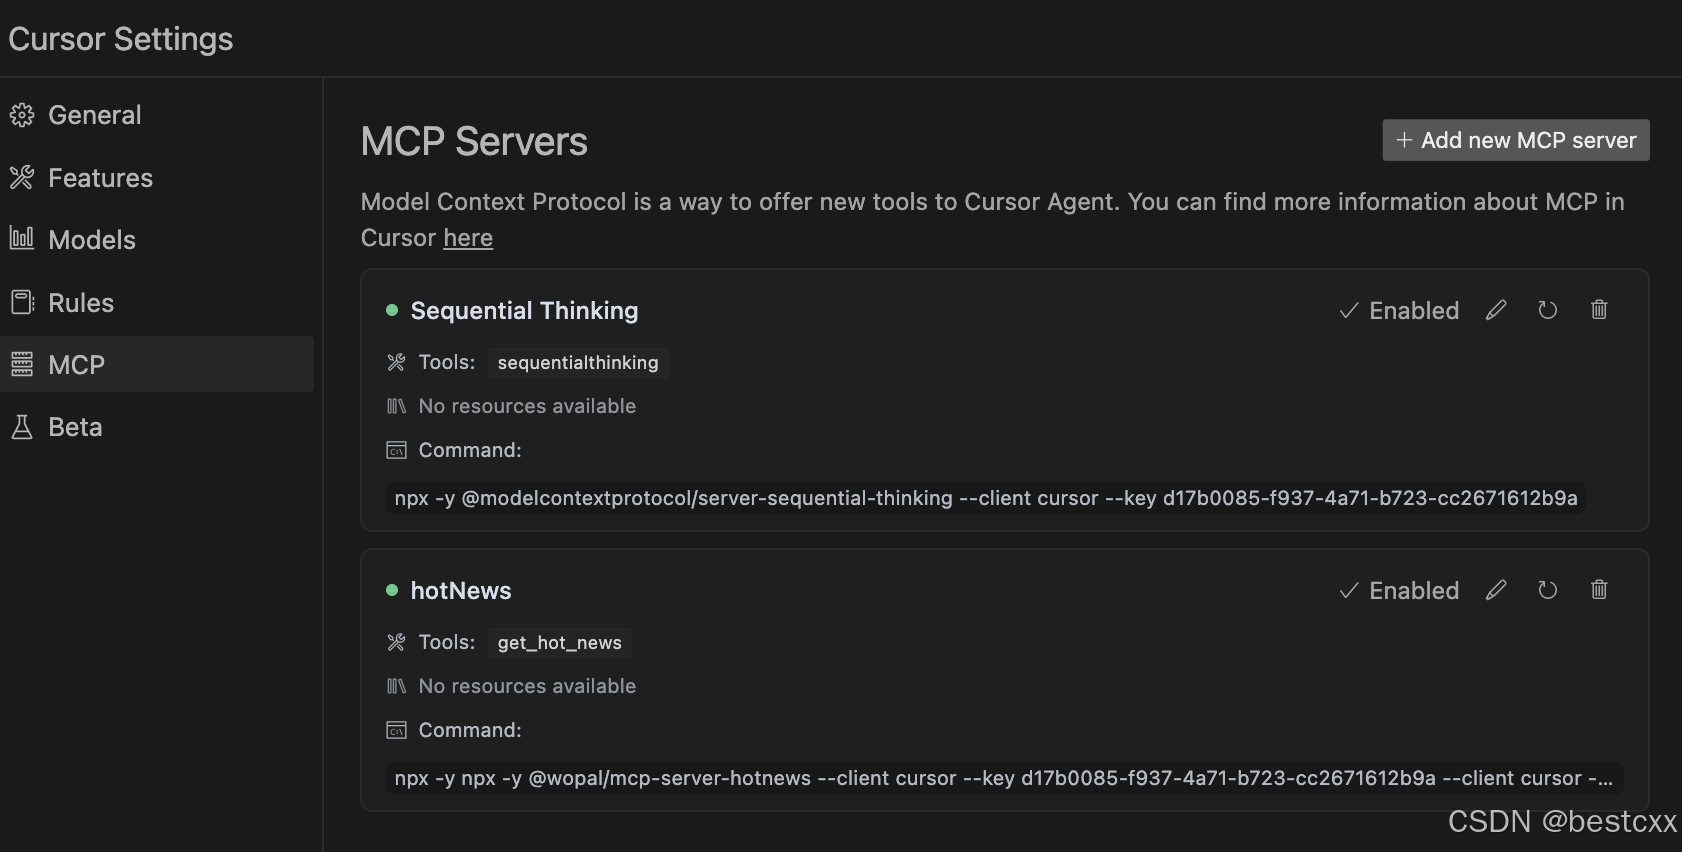
2.5、使用
- 比如我再配置一个热点新闻
npx -y @wopal/mcp-server-hotnews --client cursor --key d17b0085-f937-4a71-b723-cc2671612b9a
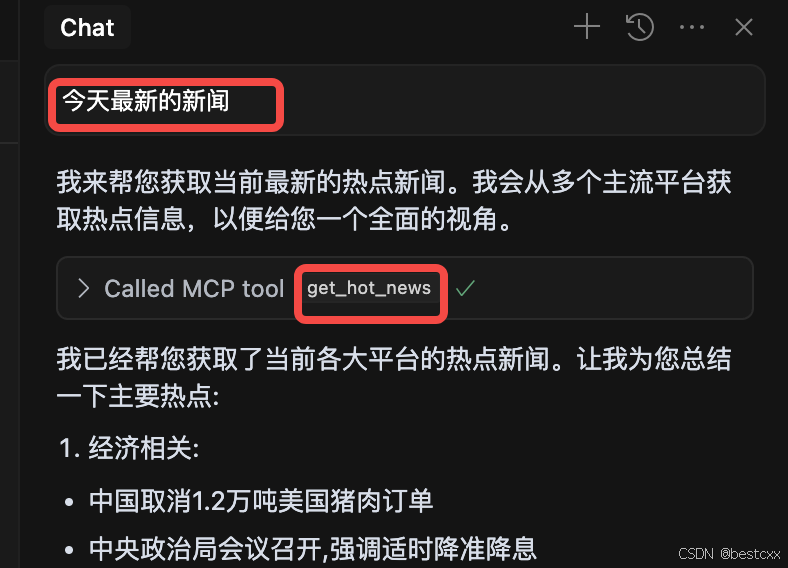
- 然后使用
- 可以发现,我的指令,直接调用了查询新闻的 MCP tool
3、其它 MCP
3.1、前端设计稿 → Figma MCP Server
- Figma MCP Server
- 获取 token 路径
获取 Figma Token 的路径
登录 Figma 账户
访问 [Figma 官网](https://www.figma.com/) 并登录你的账户。
进入账号设置
点击右上角的个人头像或头像图标。
在下拉菜单中选择 "Settings"(设置)。
找到开发者选项
在左侧菜单栏中,找到并点击 "Account"(账户) 或 "Dev Mode"(开发者模式)(根据 Figma 版本可能略有不同)。
向下滚动到 "Personal access tokens"(个人访问令牌) 部分。
生成新 Token
点击 "Generate new token"(生成新令牌)。
输入 Token 的名称(例如 "API Token"),并选择权限范围(如 file:read、team:read 等)。
点击 "Create"(创建)。
复制并保存 Token
生成的 Token 会显示一次(请立即复制保存,关闭后无法再次查看)。
⚠️ 重要提示:Token 类似密码,请妥善保管,不要泄露。


 1277
1277

 被折叠的 条评论
为什么被折叠?
被折叠的 条评论
为什么被折叠?
 到【灌水乐园】发言


