


前提:
安装并配置maven
下载maven地址:Download Apache Maven – Maven
 解压
解压
maven环境变量配置
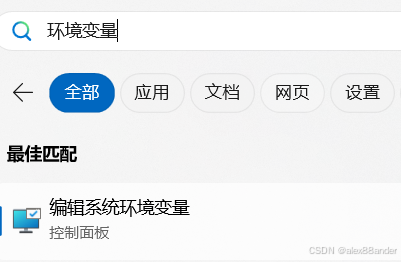
path新建环境变量
![]()
conf文件夹下settings.xml文件,更改mirror标签进行阿里云镜像配置,提高jar包下载速度
   <mirror>
      <id>alimaven</id>
      <name>aliyun maven</name>
      <url>http://maven.aliyun.com/nexus/content/groups/public</url>
	   <mirrorOf>central</mirrorOf>
    </mirror>
maven的localRepository标签更改本地仓库
<localRepository>更改为你的路径/repository/</localRepository>可以利用别人下好的仓库,包含几百个jar包;
profile标签配置jdk
<!-- java版本 -->
<profile>
<id>jdk-1.8</id>
<activation>
<activeByDefault>true</activeByDefault>
<jdk>1.8</jdk>
</activation>
<properties>
<maven.compiler.source>1.8</maven.compiler.source>
<maven.compiler.target>1.8</maven.compiler.target>
<maven.compiler.compilerVersion>1.8</maven.compiler.compilerVersion>
</properties>
</profile>idea设置搜索maven配置
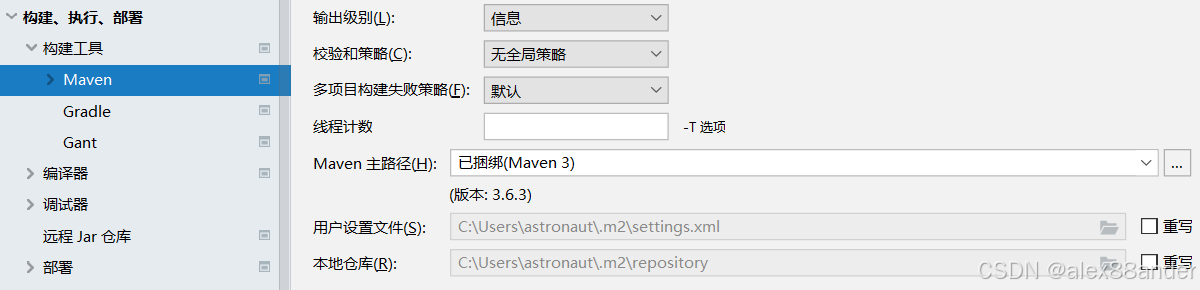
分别更改路径
Maven home path:maven的路径地址 apache-maven-3.8.1目录
User setting file:用户设置的文件地址 setting.xml文件
local repository:本地存储库地址 repository目录
Spring 和 MyBatis 是 Java 开发中非常流行的两个框架。Spring 是一个轻量级的企业级应用开发框架,提供了控制反转(IOC)、依赖注入(DI)、面向切面编程(AOP)、事务管理等功能。而 MyBatis 则是一个持久层框架,简化了与数据库的交互。通过结合 Spring 和 MyBatis,可以高效地构建企业级应用。
控制反转(IOC)
对象的关系复杂时,创建对象的控制权发生转移;
程序由对象的创建者转变为了接收者,容器成为对象的创建者
bean标签用于配置一个bean,它有多个子元素用于定义如何创建和注入依赖对象
id是bean的唯一指代符,通过id可以在其他地方引用该bean
class是bean的实现类名
constructor-arg标签用于构造函数注入 ref用于指定引用的bean,值正是该bean的id
properties标签用于setter方式注入,指定要注入的属性名称name和值value
setter方法注入
public class TestServiceImpl implements TestService{
    private TestMapper testMapper;
    public void setTestMapper(TestMapper testMapper){
    this.testMapper = testMapper;
    }
}
<bean id="testService" class="com.example.test.TestServiceImpl">
<properties name="testMapper" ref="testMapper">
</bean>
<bean id="testMapper" class="com.example.test.TestMapperImpl"/>构造函数注入
public class TestServiceImpl implements TestService{
    private TestMapper testMapper;
    public TestServiceImpl(TestMapper testMapper){
        this.TestMapper  = testMapper;
    }
}
<bean id="testService" class="com.example.test.TestServiceImpl">
<constructor-arg ref="testMapper">
</bean>
<bean id="testMapper" class="com.example.test.TestMapperImpl"/><bean>标签 是用来定义和创建 Bean 的,它指定了 Bean 的类型、初始化方法、销毁方法等,而 Setter 注入和构造函数注入是配置依赖注入的方式。- Setter 注入 和 构造函数注入 是依赖注入的实现方式,而
bean标签本身并不替代它们。<bean>标签是依赖注入配置的基础,通过配置property或constructor-arg来选择不同的注入方式。
加载配置文件,从容器中获取bean
ApplicationContext context = new ClassPathXmlApplicationContext("application.xml");
context.getBean("testService")
可以从容器中获取 testService Bean,容器会自动实例化并注入其所需的依赖(例如 testMapper)。
spring和mybatis整合
为什么要整合spring和mybatis?
spring统一管理bean,spring自动管理mybatis的SqlSessionFactory
Spring 能够自动管理事务的开启、提交和回滚,确保数据库操作的一致性。
使用 Spring 来进行配置和管理,可以避免写大量的重复代码,如数据库连接、SqlSessionFactory 创建等
如何整合spring和mybatis?SpringBoot约定大于配置简化了什么?
步骤 1:pom.xml 中添加相关的依赖
<dependencies>
    <!-- Spring 核心依赖 -->
    <dependency>
        <groupId>org.springframework</groupId>
        <artifactId>spring-context</artifactId>
        <version>5.3.x</version>
    </dependency>

    <!-- MyBatis 核心依赖 -->
    <dependency>
        <groupId>org.mybatis</groupId>
        <artifactId>mybatis-spring</artifactId>
        <version>2.0.x</version>
    </dependency>

    <!-- 数据库连接池(例如 HikariCP 或者 Tomcat JDBC) -->
    <dependency>
        <groupId>com.zaxxer</groupId>
        <artifactId>HikariCP</artifactId>
        <version>3.x</version>
    </dependency>

    <!-- 数据库连接池(Tomcat JDBC) -->
    <dependency>
        <groupId>org.apache.tomcat</groupId>
        <artifactId>tomcat-jdbc</artifactId>
        <version>9.x</version>
    </dependency>


    <!-- MyBatis 与数据库交互的依赖 -->
    <dependency>
        <groupId>org.mybatis</groupId>
        <artifactId>mybatis</artifactId>
        <version>3.5.x</version>
    </dependency>

    <!-- MySQL 驱动 -->
    <dependency>
        <groupId>mysql</groupId>
        <artifactId>mysql-connector-java</artifactId>
        <version>8.x</version>
    </dependency>
</dependencies>
相同点:springboot也要通过pom.xml添加jar包
步骤 2:配置 Spring 和 MyBatis
-
配置数据源: 在
application.xml配置数据源,数据库端口路径,账密,驱动 <bean id="dataSource" class="com.zaxxer.hikari.HikariDataSource"> <property name="jdbcUrl" value="jdbc:mysql://localhost:3306/数据库名"/> <property name="username" value="root"/> <property name="password" value="password"/> <property name="driverClassName" value="com.mysql.cj.jdbc.Driver"/> </bean> 不同点:springboot中application.yaml文件简化了配置
# 数据库配置 spring: datasource: driver-class-name: com.mysql.cj.jdbc.Driver username: root #你本地的数据库用户名 password: root #你本地的数据库密码 url: jdbc:mysql://localhost:3306/数据库名 -
配置 MyBatis SqlSessionFactory: MyBatis 的
SqlSessionFactory用来创建与数据库交互的SqlSession,这是执行 SQL 操作的关键。<bean id="sqlSessionFactory" class="org.mybatis.spring.SqlSessionFactoryBean"> <property name="dataSource" ref="dataSource"/> <property name="configLocation" value="classpath:mybatis-config.xml"/> <property name="mapperLocations" value="classpath:mapper/*.xml"/> </bean>不同点:Springboot中MyBatis的mybatis-spring-boot-starter依赖会为你自动配置SqlSessionFactory,无需手动添加注解配置Sql工厂
<dependency> <groupId>org.mybatis.spring.boot</groupId> <artifactId>mybatis-spring-boot-starter</artifactId> <version>版本号</version> </dependency> -
配置事务管理器: Spring 需要知道如何管理 MyBatis 的事务,可以通过配置
DataSourceTransactionManager来实现:<bean id="transactionManager" class="org.springframework.jdbc.datasource.DataSourceTransactionManager"> <property name="dataSource" ref="dataSource"/> </bean>不同点:springboot只需要添加@Transactional注解即可自动管理事务,注解应用在类上表示类中的所有方法都需要事务管理;注解应用在方法上,仅表示该方法需要事务管理; 方法执行前开启事务;执行后正常提交事务,持久化数据;执行后异常回滚事务,保证数据一致性;
-
配置扫描 Mapper 文件: MyBatis 需要知道如何扫描数据库的 SQL 映射文件。可以通过 Spring 的
MapperScannerConfigurer来自动扫描所有 Mapper 接口。<bean class="org.mybatis.spring.mapper.MapperScannerConfigurer"> <property name="basePackage" value="com.example.mapper"/> </bean>不同点: Springboot只需要在mapper接口上使用@Mapper注解或Spring Boot 的启动类或任意配置类上使用
@MapperScan批量扫描所有的 Mapper 接口,@MapperScan("com.example.mapper")
步骤 3:创建 Mapper 接口和 XML 文件
-
Mapper 接口:定义数据库操作接口,Spring 和 MyBatis 会自动为你实现它们。
@Mapper public interface UserMapper{ User getUserById(int id); } -
Mapper XML 文件:写 SQL 映射文件,指定如何进行数据库查询或更新。
<mapper namespace="com.example.mapper.UserMapper">
    <select id="getUserById" resultType="com.example.entity.User">
        select * from user where id = #{id}
    </select>
</mapper>
步骤 4:创建UserService接口
public interface UserService{
    User getUserById(int id);
}
步骤 5:使用 Service 层调用 Mapper,配置事务管理
你可以在 Service 层中通过 @Autowired 注解自动注入 Mapper 接口,并调用其方法:
在 Service 层上使用 @Transactional 注解来保证事务管理:
@Service
@Transactional
public Class UserServiceImpl implements UserServie{
    @Autowired
    private UserMapper userMapper;
    @Override
    public User getUserById(int id){
        return userMapper.getUserById(id);
}
}
springboot可以自动装配对象
@AutoWired自动装配,注解在方法上
bean的名称不同时,利用通过byName的方式注解@Qualifier(""),指定注入bean的名称
@Component注解指定实现类的
<context:component-scan base-package="com.example"/>
这将会扫描 com.example 包及其子包中的所有组件,自动注册为 Spring 的 Bean。
1. 环境准备
1.1 创建 Spring Boot 项目
最简单的方式是使用 Spring Initializr,选择以下选项:
- Project: Maven Project
- Language: Java
- Spring Boot: 选择稳定版,如 2.5.x
- Project Metadata: 填写项目的名称、包名等
- Dependencies:
- Spring Web
- Spring Data JPA
- MyBatis Framework
- MySQL
点击 Generate 按钮生成项目并下载,解压后导入 IDE(如 IntelliJ IDEA)。
1.2 配置 MyBatis 和数据库连接
在 application.properties 或 application.yml 中配置数据库连接和 MyBatis 配置。
# 数据库连接配置
spring.datasource.url=jdbc:mysql://localhost:3306/test_db?useSSL=false&serverTimezone=UTC
spring.datasource.username=root
spring.datasource.password=root
spring.datasource.driver-class-name=com.mysql.cj.jdbc.Driver

# MyBatis 配置
mybatis.mapper-locations=classpath:mapper/*.xml
mybatis.type-aliases-package=com.example.demo.model
mybatis.configuration.map-underscore-to-camel-case=true
2. 配置 MyBatis
2.1 创建实体类(Model)
假设我们有一个 User 表,首先创建对应的实体类 User.java。
package com.example.demo.model;

public class User {
    private Long id;
    private String name;
    private Integer age;

    // Getters and Setters
}
2.2 创建 Mapper 接口
在 MyBatis 中,Mapper 接口用于定义数据库操作方法。在 UserMapper.java 中定义基本的增、删、改、查方法。
package com.example.demo.mapper;

import com.example.demo.model.User;
import org.apache.ibatis.annotations.*;

import java.util.List;

@Mapper
public interface UserMapper {

    @Select("SELECT * FROM users WHERE id = #{id}")
    User findById(Long id);

    @Insert("INSERT INTO users(name, age) VALUES(#{name}, #{age})")
    void insertUser(User user);

    @Update("UPDATE users SET name = #{name}, age = #{age} WHERE id = #{id}")
    void updateUser(User user);

    @Delete("DELETE FROM users WHERE id = #{id}")
    void deleteUser(Long id);

    @Select("SELECT * FROM users")
    List<User> findAllUsers();
}
2.3 创建 Mapper XML 文件
如果你不想在接口中使用注解,也可以使用 XML 配置 SQL。创建 UserMapper.xml 文件,并定义 SQL 查询。
<mapper namespace="com.example.demo.mapper.UserMapper">
    <select id="findById" resultType="com.example.demo.model.User">
        SELECT * FROM users WHERE id = #{id}
    </select>

    <insert id="insertUser">
        INSERT INTO users(name, age) VALUES(#{name}, #{age})
    </insert>

    <update id="updateUser">
        UPDATE users SET name = #{name}, age = #{age} WHERE id = #{id}
    </update>

    <delete id="deleteUser">
        DELETE FROM users WHERE id = #{id}
    </delete>

    <select id="findAllUsers" resultType="com.example.demo.model.User">
        SELECT * FROM users
    </select>
</mapper>
3. 使用 MyBatis 和 Spring 配合
3.1 启动类配置
在 @SpringBootApplication 注解的启动类上添加 @MapperScan 注解,自动扫描 Mapper 接口。
package com.example.demo;

import org.mybatis.spring.annotation.MapperScan;
import org.springframework.boot.SpringApplication;
import org.springframework.boot.autoconfigure.SpringBootApplication;

@SpringBootApplication
@MapperScan("com.example.demo.mapper")
public class DemoApplication {
    public static void main(String[] args) {
        SpringApplication.run(DemoApplication.class, args);
    }
}
3.2 使用 Service 层调用 Mapper
在服务层创建一个 UserService 类,注入 UserMapper 并调用数据库操作方法。
package com.example.demo.service;

import com.example.demo.mapper.UserMapper;
import com.example.demo.model.User;
import org.springframework.beans.factory.annotation.Autowired;
import org.springframework.stereotype.Service;

import java.util.List;

@Service
public class UserService {

    @Autowired
    private UserMapper userMapper;

    public User getUserById(Long id) {
        return userMapper.findById(id);
    }

    public void addUser(User user) {
        userMapper.insertUser(user);
    }

    public void updateUser(User user) {
        userMapper.updateUser(user);
    }

    public void deleteUser(Long id) {
        userMapper.deleteUser(id);
    }

    public List<User> getAllUsers() {
        return userMapper.findAllUsers();
    }
}
4. 创建 Controller 层
最后,在 Controller 层中处理 HTTP 请求并调用 Service。
package com.example.demo.controller;

import com.example.demo.model.User;
import com.example.demo.service.UserService;
import org.springframework.beans.factory.annotation.Autowired;
import org.springframework.web.bind.annotation.*;

import java.util.List;

@RestController
@RequestMapping("/users")
public class UserController {

    @Autowired
    private UserService userService;

    @GetMapping("/{id}")
    public User getUser(@PathVariable Long id) {
        return userService.getUserById(id);
    }

    @PostMapping
    public void addUser(@RequestBody User user) {
        userService.addUser(user);
    }

    @PutMapping
    public void updateUser(@RequestBody User user) {
        userService.updateUser(user);
    }

    @DeleteMapping("/{id}")
    public void deleteUser(@PathVariable Long id) {
        userService.deleteUser(id);
    }

    @GetMapping
    public List<User> getAllUsers() {
        return userService.getAllUsers();
    }
}
5. 启动项目
- 启动 Spring Boot 应用,确保数据库已经启动并创建了所需的表。
- 利用postman发送http请求,访问接口进行 CRUD 操作,例如:
GET /users/1:获取 ID 为 1 的用户。POST /users:新增用户。PUT /users:更新用户信息。DELETE /users/1:删除 ID 为 1 的用户。
总结
通过本文的快速指南,你已经学会了如何将 Spring 和 MyBatis 集成到一个简单的 Spring Boot 应用中,快速实现对数据库的 CRUD 操作。简单的代码展示了如何配置 Spring、MyBatis 以及如何使用 Mapper 接口和 XML 文件来定义 SQL 查询。你可以根据这个基础的框架,扩展并构建更加复杂的应用。
希望这篇文章能够帮助你快速上手 Spring 和 MyBatis,享受开发的乐趣!


 842
842

 被折叠的 条评论
为什么被折叠?
被折叠的 条评论
为什么被折叠?
 到【灌水乐园】发言


