


我们之前用到过适配器,我们可以上次博客我们用到的适配器是ArrayAdapter()这个适配器可以显示我们的字符串数组,一共有四个参数(context:上下文,android.R.layout.activity_list_item:布局,android.R.id.text1:组件id,data:数据),适配器就是在数据和页面之间的驱动,我们要显示自己想要的数据可以通过适配器在页面上显示,就像显卡一样,在安卓里面,我们的下拉列表(spinner)就很依赖适配器,这里我用一个小案例来讲解一下如何自定义一个适配器:
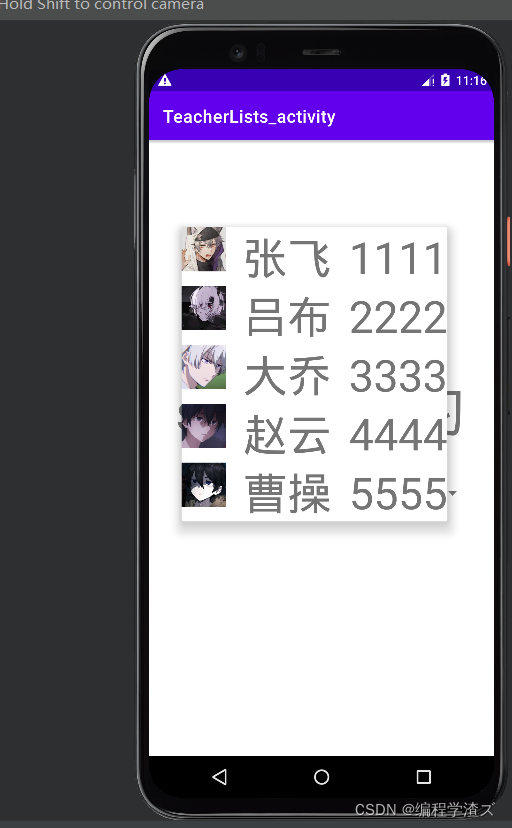
可以很清楚的看到,这是一个下拉列表,但是它里面好像是一个布局,布局里面还有imageview、TextView,没错,这就是用到了布局文件和列表,不过列表里可不是直接放了这么多的布局文件,如果那样做的效率会大打折扣,而且灵活性差没有使用价值,我们可以通过创建一个实体类来做,这样的话我们以后还可以从网络上获取数据来进行显示,大大提高了使用价值;
话不多说,我们先来聊一聊思路:
1、创建一个布局文件,这个布局文件放在layout里面就可以,布局文件里面就存放如上图的列表里面的项的布局,一张图片,用户名和密码。
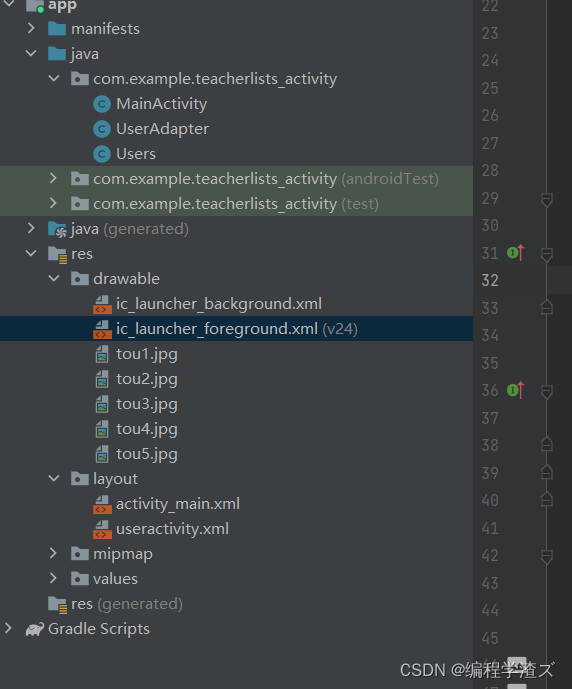
2、创建一个实体类,我们直接放在主类文件夹下面就可以了,
我这里的实体类就是User,里面含有index、username、password属性,这是为数据准备的一个类,我们通过给这个对象赋值,然后自定义适配器来将其显示在我们的布局文件中;
3、图片资源自行下载,我这里一共放了五张头像,自定义一个适配器类,里面含有一个实体类列表,还有将数据赋值到布局文件里的操作;
也就说,我们通过实体类存储的数据,通过适配器来将其显示在布局之中,也就是我们的spinner中,这就是适配器的作用;
代码讲解:
1· 我们先将页面布局好:
<?xml version="1.0" encoding="utf-8"?>
<androidx.constraintlayout.widget.ConstraintLayout xmlns:android="http://schemas.android.com/apk/res/android"
    xmlns:app="http://schemas.android.com/apk/res-auto"
    xmlns:tools="http://schemas.android.com/tools"
    android:layout_width="match_parent"
    android:layout_height="match_parent"
    tools:context=".MainActivity">

    <TextView
        android:layout_width="wrap_content"
        android:layout_height="wrap_content"
        android:text="spinner 演习"
        android:textSize="60sp"
        android:id="@+id/tv_title"
        app:layout_constraintVertical_chainStyle="packed"
        app:layout_constraintLeft_toLeftOf="parent"
        app:layout_constraintRight_toRightOf="parent"
        app:layout_constraintTop_toTopOf="parent"
        app:layout_constraintBottom_toTopOf="@+id/sp_list"/>
    <Spinner
        android:layout_width="wrap_content"
        android:layout_height="wrap_content"
        app:layout_constraintLeft_toLeftOf="parent"
        app:layout_constraintRight_toRightOf="parent"
        app:layout_constraintBottom_toBottomOf="parent"
        android:layout_marginTop="20dp"
        android:id="@+id/sp_list"
        app:layout_constraintTop_toBottomOf="@+id/tv_title" />


</androidx.constraintlayout.widget.ConstraintLayout>
还有spinner成员的布局:
<?xml version="1.0" encoding="utf-8"?>
<LinearLayout xmlns:android="http://schemas.android.com/apk/res/android"
    android:layout_width="match_parent"
    android:layout_height="match_parent"
    android:orientation="horizontal">
    <ImageView
        android:layout_width="50dp"
        android:layout_height="50dp"
        android:id="@+id/img_header"
        android:layout_marginRight="20dp"
        android:scaleType="fitXY"/>
    <TextView
        android:layout_width="wrap_content"
        android:layout_height="wrap_content"
        android:id="@+id/tv_username"
        android:layout_marginRight="20dp"
        android:textSize="50dp"
        />
    <TextView
        android:layout_width="wrap_content"
        android:layout_height="wrap_content"
        android:id="@+id/tv_password"
        android:textSize="50dp"
        />

</LinearLayout>
2· 创建一个实体类来存放数据:
package com.example.teacherlists_activity;

import android.widget.ImageView;
//3.1 创建一个实例类,用来存放数据
public class Users {
    //3.2 实体类对象含有三个属性,第一个是头像的下表,其余两个是用户名和密码
    int index;
    String name ;
    String password;

    //3.3 为了规范同时也为了程序正常运行,我们需要对所有属性构造和设置好get、set方法
    public Users(int index, String name, String password) {
        this.index = index;
        this.name = name;
        this.password = password;
    }

    public int getIndex() {
        return index;
    }

    public void setIndex(int index) {
        this.index = index;
    }

    public String getName() {
        return name;
    }

    public void setName(String name) {
        this.name = name;
    }

    public String getPassword() {
        return password;
    }

    public void setPassword(String password) {
        this.password = password;
    }
}
实体类存放数据就是这些属性,index使我们图片的ID,我们在适配器中就需要将这个图片放在我们spinner项目中的Imageview上;
3· 自定义适配器
package com.example.teacherlists_activity;

import android.content.Context;
import android.media.Image;
import android.view.LayoutInflater;
import android.view.View;
import android.view.ViewGroup;
import android.widget.BaseAdapter;
import android.widget.ImageView;
import android.widget.TextView;

import java.util.List;

public class UserAdapter extends BaseAdapter {
    //1.1 创建好一个上下文对象和一个数据列表对象
    Context context;
    List<Users> userlist;
    //1.2 重写有关BaseAdapter的各个接口方法
    @Override
    public int getCount() {
        return userlist.size();
    }

    @Override
    public Object getItem(int i) {
        return userlist.get(i);
    }

    @Override
    public long getItemId(int i) {
        return i;
    }

    public UserAdapter(Context context, List<Users> userlist) {
        this.context = context;
        this.userlist = userlist;
    }

    @Override
    public View getView(int i, View view, ViewGroup viewGroup) {
        //2.1 通过函数获取到布局文件的对象
        view = LayoutInflater.from(context).inflate(R.layout.useractivity,null);
        //2.2 对布局对象赋值
        ImageView img_header=view.findViewById(R.id.img_header);
        TextView tv_username = view.findViewById(R.id.tv_username);
        TextView tv_password = view.findViewById(R.id.tv_password);
        //2.3 拿到此时下表为i的用户对象
        Users user = userlist.get(i);
        //2.4 对拿到的组件赋值
        img_header.setImageResource(user.getIndex());
        tv_username.setText(user.getName());
        tv_password.setText(user.getPassword());

        return view;
    }
}
我们自定义的适配器需要继承一个基类(BaseAdapter),这是一个抽象类,里面含有几个抽象方法我们可以通过提示来快速导入,getCount()是获取数据的个数的,getItem(i)是获取序号为i的实体类对象的,getItemId(id)是获取id的,一般我们返回参数即可;这里最主要的就是getView()我们通过这个方法来处理我们spinner成员的视图,返回一个view,而这个视图就是我们的布局文件对象,所以我们先通过LayoutInflater.from(context).inflate(R.layout.useractivity,null);来获取到这个对象,这里的context我们通过构造方法获取主类的上下文,拿到之后就去创建好布局文件对象的组件对象,然后在通过实体类的数据来对组件对象的内容赋值就可以了;
4· 数据初始化和自定义适配器的使用
package com.example.teacherlists_activity;

import androidx.appcompat.app.AppCompatActivity;

import android.os.Bundle;
import android.view.View;
import android.widget.AdapterView;
import android.widget.Spinner;
import android.widget.Toast;

import java.util.ArrayList;
import java.util.List;

public class MainActivity extends AppCompatActivity {

    //4.1 创建一个用户数列用来存放数据和初始化变量
    List<Users> usersList;
    UserAdapter myadapter;
    Spinner sp_list;
    @Override
    protected void onCreate(Bundle savedInstanceState) {
        super.onCreate(savedInstanceState);
        setContentView(R.layout.activity_main);
        //4.3 调用函数和初始化适配器
        init_data();
        myadapter = new UserAdapter(this,usersList);
        //4.4 使用适配器并监听
        sp_list.setAdapter(myadapter);
        sp_list.setOnItemSelectedListener(new AdapterView.OnItemSelectedListener() {
            @Override
            public void onItemSelected(AdapterView<?> adapterView, View view, int i, long l) {
                Toast.makeText(MainActivity.this, "您选择了:"+usersList.get(i).getName()+"  "+usersList.get(i).getPassword(), Toast.LENGTH_SHORT).show();
            }

            @Override
            public void onNothingSelected(AdapterView<?> adapterView) {

            }
        });
    }
    //4.2 创建一个方法来进行数据初始化
    private void init_data(){
        //记得初始化数列
        usersList = new ArrayList<>();
        sp_list = findViewById(R.id.sp_list);
        usersList.add(new Users(R.drawable.tou1,"张飞","1111"));
        usersList.add(new Users(R.drawable.tou2,"吕布","2222"));
        usersList.add(new Users(R.drawable.tou3,"大乔","3333"));
        usersList.add(new Users(R.drawable.tou4,"赵云","4444"));
        usersList.add(new Users(R.drawable.tou5,"曹操","5555"));

    }
}
主类里面我们初始化好我们的实体类列表,我这里添加了四个,在写代码的时候特别要注意有没有调用函数,有没有初始化列表
usersList = new ArrayList<>();
很容易漏掉;我们拿到布局中的spinner对象,初始化好实体类列表数据和自定义适配器之后就可以将自定义适配器设置到spinner上:
myadapter = new UserAdapter(this,usersList);
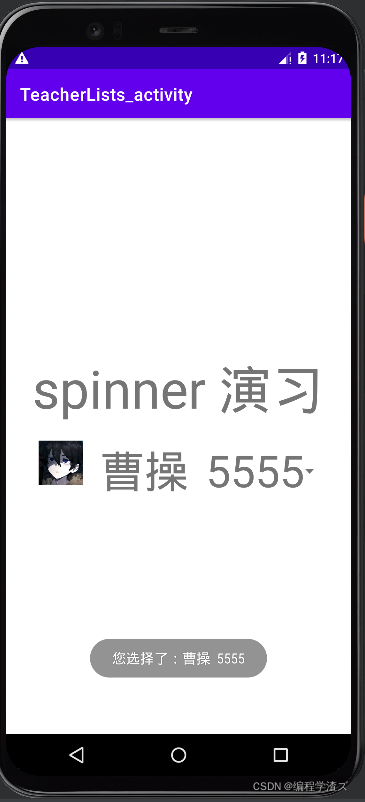
另外,我们可以通过toast来讲我们的选择直观的显示在屏幕上;
好了,这期就到这里,适配器的使用还是挺简单的,快去试试吧!


 237
237

 被折叠的 条评论
为什么被折叠?
被折叠的 条评论
为什么被折叠?
 到【灌水乐园】发言


