


 本文展示了如何使用Locust进行负载测试,包括定义用户行为(TaskSet)和HttpUser类,以及如何处理请求和响应。Locustfile.py中包含了无UI和有UI模式下的命令行参数解读,如用户数、启动速率、运行时间和CSV数据存储。此外,还讨论了wait_time、catch_response的作用,以及分布式测试的设置和用户权重配置。
简单的一个locustfile.py展示
from locust import HttpUser, TaskSet, task

# 定义用户行为
class UserBehavior(TaskSet):

  @task
  def baidu_index(self):
  #请求参数
    payload = {'mobile':'12615990003','password':'XXXXX'}
  #请求头
    headers = {
      'content-type': "multipart/form-data; boundary=----WebKitFormBoundary7MA4YWxkTrZu0gW",
      'Content-Type': "application/x-www-form-urlencoded",
      'version': "2.0.0",
      'Accept': "*/*",
      'version-id': "200",
      'Postman-Token': "01f92812-7bdc-4c6e-a3b8-72f0381dc012"
        }
      #模拟请求
    res=self.client.post(url="/user/login",data=payload, headers=headers,catch_response=True)
       #脚本中的url不要带上环境地址,只允许写path 路径,因为HttpUser中的host无法覆盖它,改起来很麻烦
    #断言
      if 'SUCCESS' in res.text:
        res.success()
      else:
        res.failure("Got wrong response")
'''①建议直接用with self.client.request(method="POST",url="",name='',...) as res:
   ②一旦加上了catch_response=True,就需要 a.success()failure应用,不然locust请求不显示(事实并不是这样,应该是别的原因,乌鱼子了啊啊啊啊,继续找原因吧啊啊,)
   ③另外method大小写也写对,不限locust界面也坑你会不显示,正常method="POST"'''

  class WebsiteUser(HttpUser):
    host = 'http://XXX'
       tasks = [ NewUser ] #tasks指定的任务类对象设置,把该类任务放入统一list中,可以放多个类
       wait_time = constant(2)


if __name__ == "__main__":
  import os
  os.system("locust -f /deskop/load_test.py --headless --users 10 --spawn-rate 1 ")
  #无ui界面,This user will make HTTP requests ,again and again
你可能会需要下面这个
以上是最基本的一个locustfile.py.
这张图片你可能会用到
例子
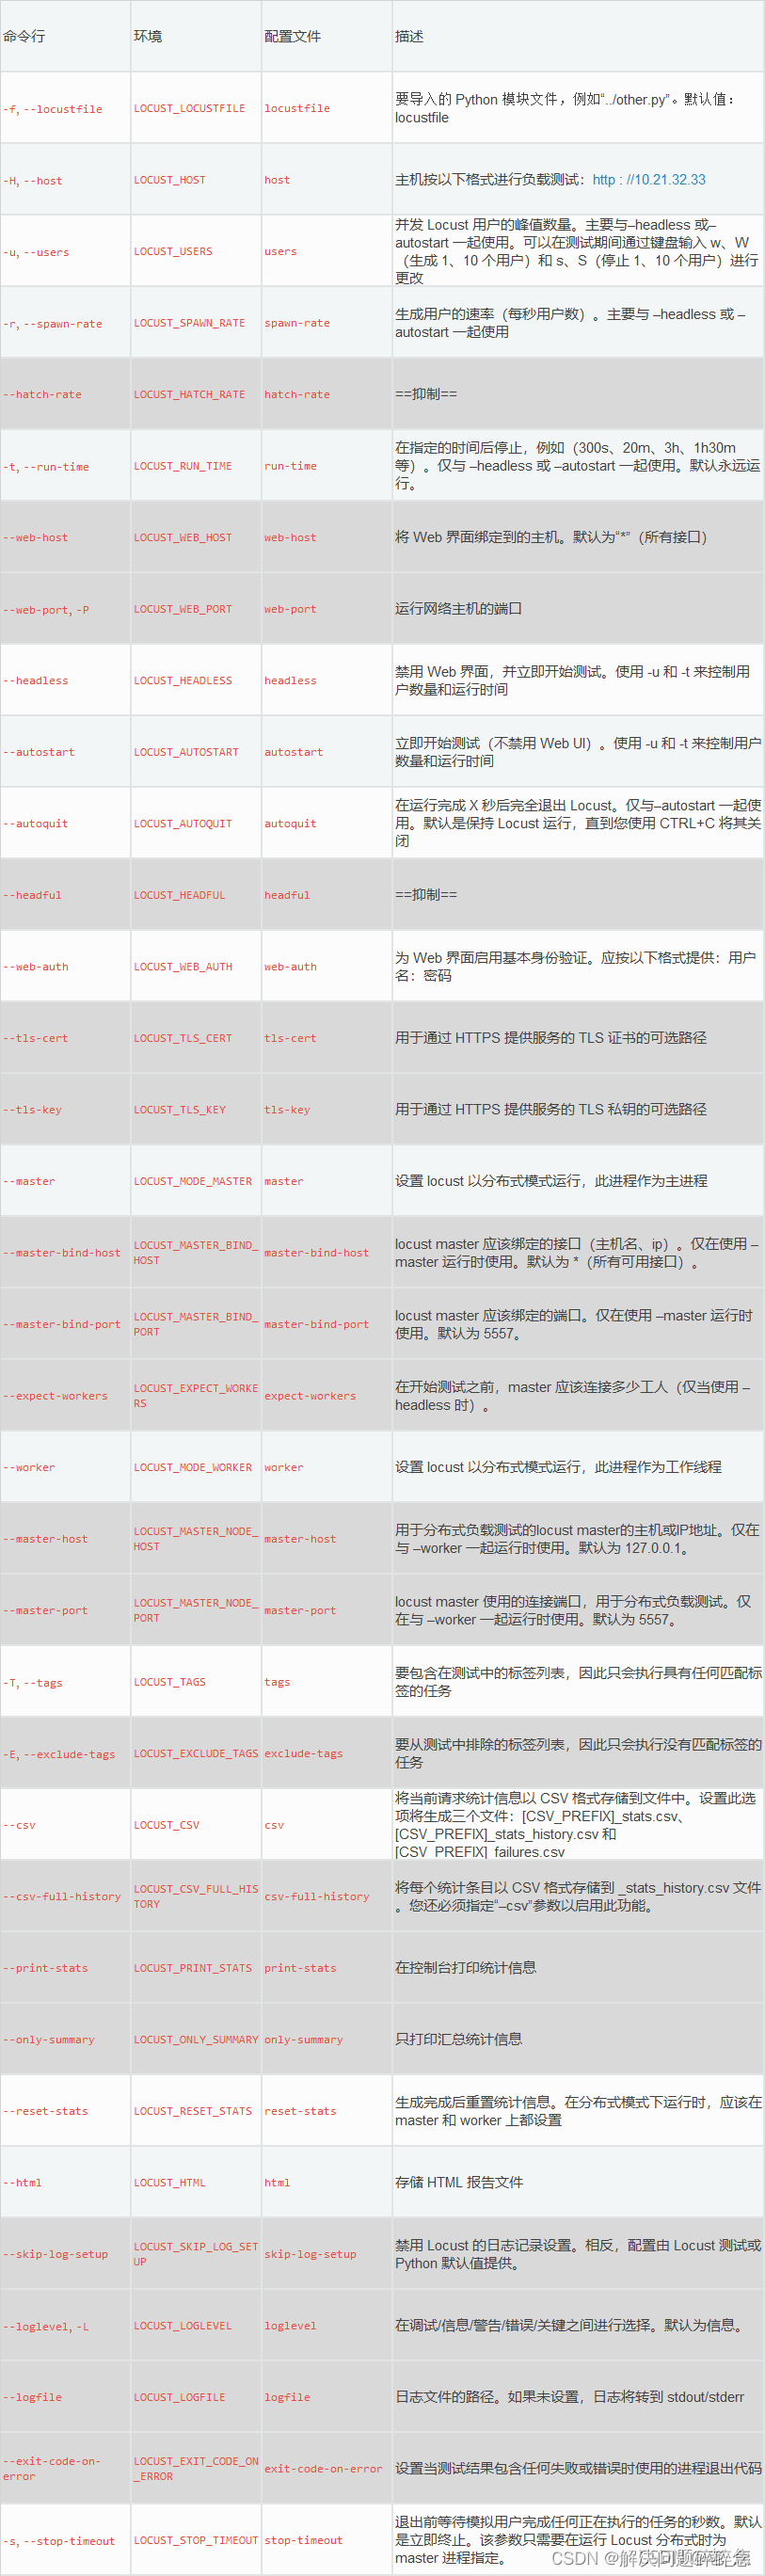
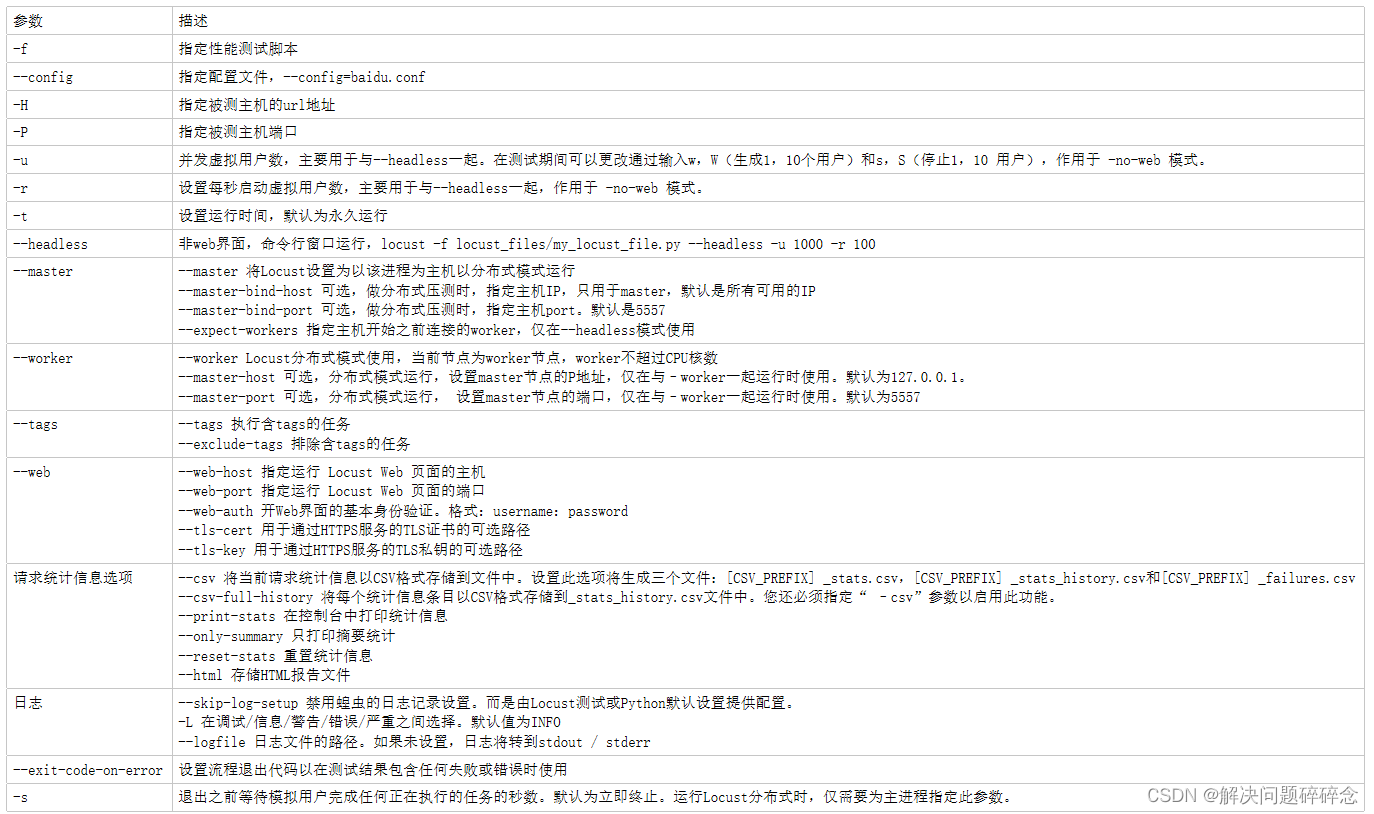
1.1、常用场景参数解读
1.1.1、无web界面,定时运行,数据存储在csv中:
  locust -f per_01_test.py --headless -u 10 -r 1 -t 1m -s 120 --csv=example

–headless :禁用web界面,直接开始运行
-u :你要启动的用户数 --users
-r :每秒启动的用户数 --spawn-rate
-t :指定的运行时间 --run-time ,示例:300s、20m、3h、1h30m 等
-s :接口一直没返回,最大等待 120 秒
–csv=example :当前目录下生成example开头的4个文件,用于记录执行结果
1.1.2、有web界面,定时运行,数据存储在csv及html中:
  locust -f per_01_test.py --autostart -u 1 -r 1 -t 1m -s 120 --csv=example --autoquit 10 --html locust_report.html

–autostart :不禁用web界面
–autoquit 10 :任务停止10秒后,locust停止运行,与autostart连用
–html locust_report.html :当前目录下生成web的测试报告locust_report.html
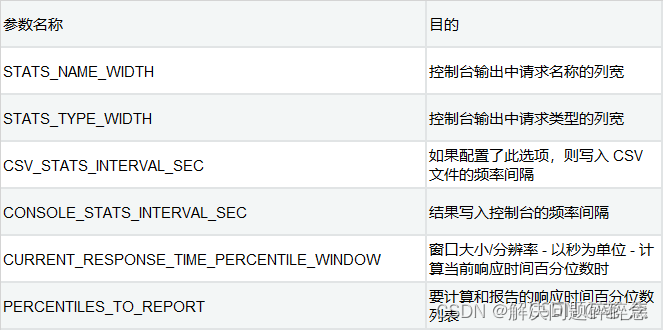
'''此外
Locust 统计的默认配置在 stats.py 文件的常量中设置。它可以通过覆盖这些值来调整到特定的要求。它可以直接在 Locust 文件中完成,也可以提取到单独的文件中,供所有 Locust 文件共同使用。'''
import locust.stats
locust.stats.CONSOLE_STATS_INTERVAL_SEC = 15
解释:
①通过
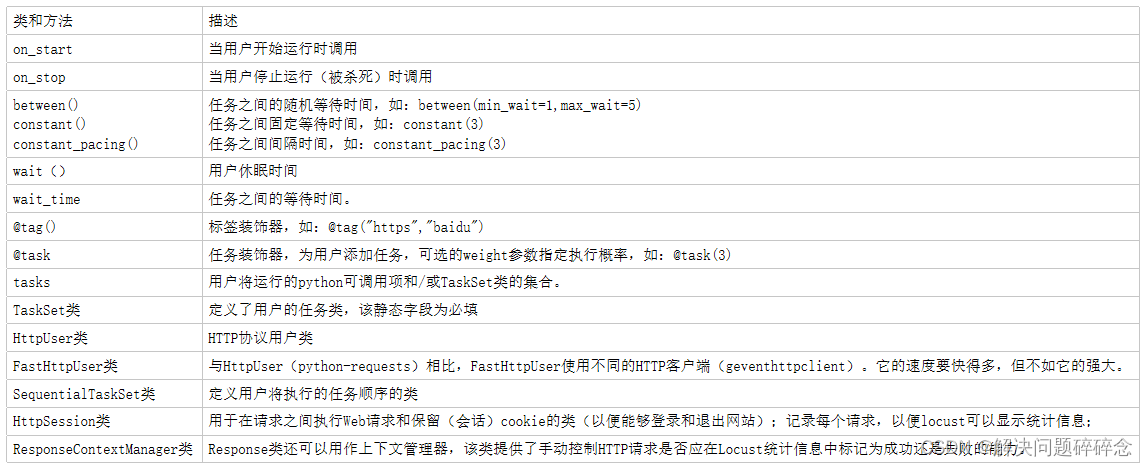
@task
标识该方法是否为测试类,@task(N) 配置测试任务在整个测试对象Live中的权重。
②name
是显示在locust结果集页面的请求标识
③这里具体解释一下HttpUser类
(如果你去看源码的话,将会有更大的收获)
它在HttpUser 类中,源码说明:This class creates a client attribute on instantiation which is an HTTP client with support for keeping a user session between requests.
这个类在实例化时创建一个client属性,它是一个HTTP客户机,支持在请求之间保持用户会话。
client 是一个HttpSession 类型
client: HttpSession = None
"""
Instance of HttpSession that is created upon instantiation of Locust.
The client supports cookies, and therefore keeps the session between HTTP requests.
"""
翻译:在实例化时创建的HttpSession的实例蝗虫客户端支持cookies,因此在HTTP请求之间保持会话。
理解:在任务执行开始之前,首先会实例化一个HttpUser 对象,这个对象中有一个属性交client ,这个属性是一个HttpSession 的类型。
再来看看HttpSession,class HttpSession(requests.Session): 它继承了requests 的Session 类,并且重写了父类的requets 方法,重写方法中去处理了一些相应结果数据和请求数据,源码如下:
response = self._send_request_safe_mode(method, url, **kwargs)

        # record the consumed time
        request_meta["response_time"] = (time.monotonic() - request_meta["start_time"]) * 1000

        request_meta["name"] = name or (response.history and response.history[0] or response).request.path_url

        # get the length of the content, but if the argument stream is set to True, we take
        # the size from the content-length header, in order to not trigger fetching of the body
        if kwargs.get("stream", False):
            request_meta["content_size"] = int(response.headers.get("content-length") or 0)
        else:
            request_meta["content_size"] = len(response.content or b"")

        if catch_response:
            response.locust_request_meta = request_meta
            return ResponseContextManager(
                response, request_success=self.request_success, request_failure=self.request_failure
            )
        else:
            if name:
                # Since we use the Exception message when grouping failures, in order to not get
                # multiple failure entries for different URLs for the same name argument, we need
                # to temporarily override the response.url attribute
                orig_url = response.url
                response.url = name
            try:
                response.raise_for_status()
            except RequestException as e:
                self.request_failure.fire(
                    request_type=request_meta["method"],
                    name=request_meta["name"],
                    response_time=request_meta["response_time"],
                    response_length=request_meta["content_size"],
                    exception=e,
                )
            else:
                self.request_success.fire(
                    request_type=request_meta["method"],
                    name=request_meta["name"],
                    response_time=request_meta["response_time"],
                    response_length=request_meta["content_size"],
                )
            if name:
                response.url = orig_url
            return response
而请求方式是完全沿用父类方法,源码如下:
def _send_request_safe_mode(self, method, url, **kwargs):
        """
        Send an HTTP request, and catch any exception that might occur due to connection problems.
        Safe mode has been removed from requests 1.x.
        """
        try:
            #调用父类request.Session 的请求方法
            return super().request(method, url, **kwargs)
        except (MissingSchema, InvalidSchema, InvalidURL):
            raise
        except RequestException as e:
            r = LocustResponse()
            r.error = e
            r.status_code = 0  # with this status_code, content returns None
            r.request = Request(method, url).prepare()
            return r
HttpSession catches any requests.RequestException thrown by Session (caused by connection errors, timeouts or similar), instead(而不是) returning a dummy Response object with status_code set to 0 and content set to None.
Using catch_response and accessing request_meta directly, you can even rename requests based on something in the response.(这样可以通过使用响应的某个字段key,将请求细分出来在locust页面’Name’展示)
with self.client.get("/", catch_response=True) as resp:
    resp.request_meta["name"] = resp.json()["name"]
④这里你可能对wait_time
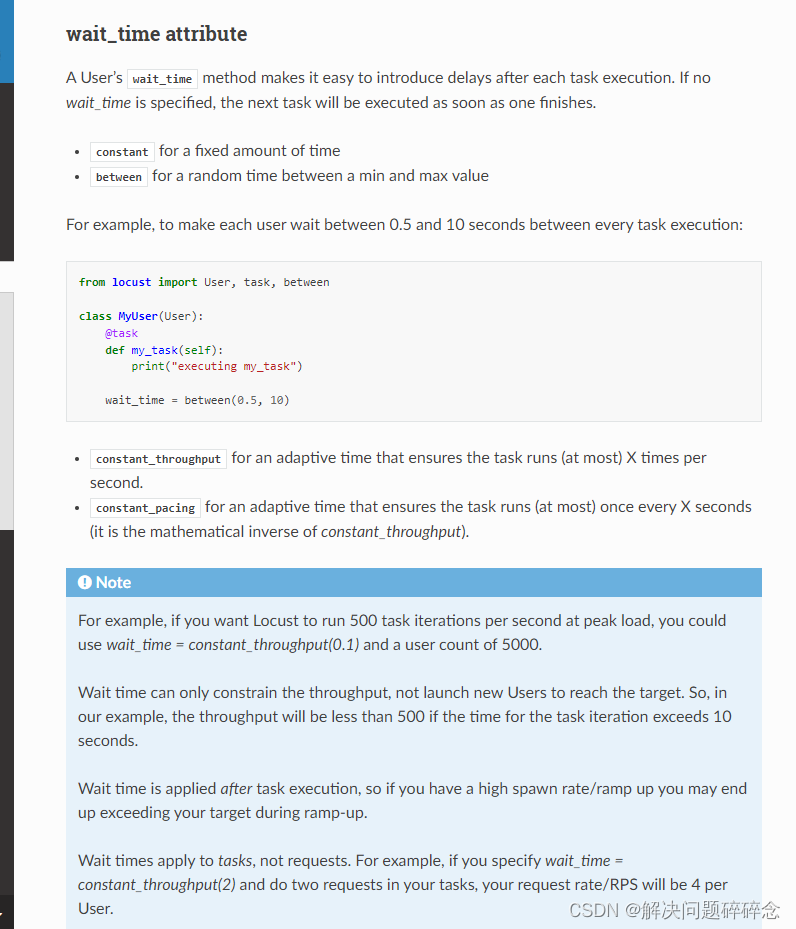
这是翻译出来的
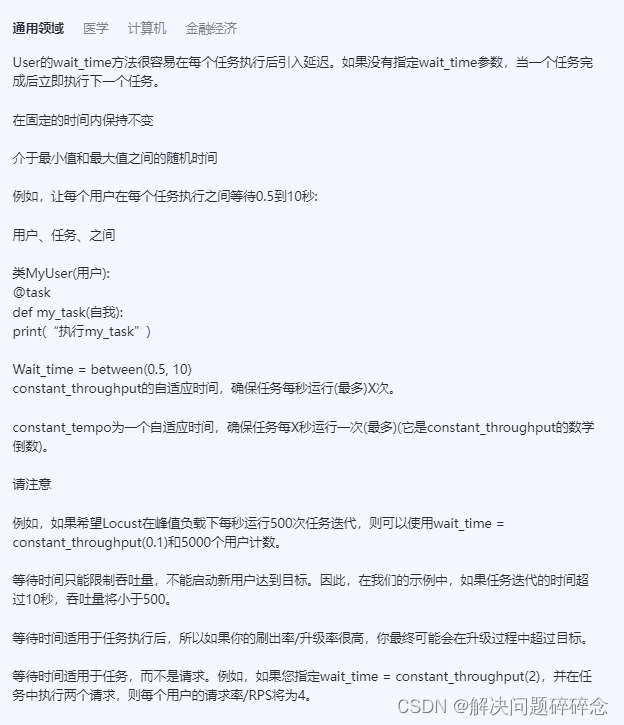
constant是任务间隔多少秒执行;between是取得两个值中的某个时间作为间隔;constant_throughput是每秒执行多少次任务迭代,为0.1是每秒执行0.1次任务迭代,就是说10秒运行一个任务,然后切换任务;pacing是倒数;
我想locust的请求机制是不是就是:每个user从tasks队列中随机取task(会有权重),然后就执行task,发送task中的请求;那么一般-u是固定的,wait_time模拟真实环境也是固定的,那么吞吐量和rps就是可以预期估算的,假如500rps达不到,那是不是就说明一个任务(假设一个任务只有一个请求)的执行超过了10s,就是响应很慢,无法切换到下一个任务,就是可能有问题了???不过我不太理解这个和孵化率又有什么关系了呢(以后有经验了再来看看)
⑤environment这个
可能也需要了解一下
⑥讲一下catch_response

简单来讲,如果需要locust中的Fails正常记录到错误的信息,就需要使用catch_response来捕获请求,将其标记为成功或者失败
⑦ on_start
Users (and TaskSets) can declare an on_start method and/or on_stop method. A User will call its on_start method when it starts running, and its on_stop method when it stops running. For a TaskSet, the on_start method is called when a simulated user starts executing that TaskSet, and on_stop is called when the simulated user stops executing that TaskSet (when interrupt() is called, or the user is killed).
⑧分布式
A single process running Locust can simulate a reasonably high throughput. For a simple test plan it should be able to make many hundreds of requests per second, thousands if you use FastHttpUser.
But if your test plan is complex or you want to run even more load, you’ll need to scale out to multiple processes, maybe even multiple machines.
To do this, you start one instance of Locust in master mode using the --master flag and multiple worker instances using the --worker flag. If the workers are not on the same machine as the master you use --master-host to point them to the IP/hostname of the machine running the master.
The master instance runs Locust’s web interface, and tells the workers when to spawn/stop Users. The workers run your Users and send back statistics to the master. The master instance doesn’t run any Users itself.
Both the master and worker machines must have a copy of the locustfile when running Locust distributed.
通常worker数目是运行worker机器处理器核数的倍数
There is almost no limit to how many Users you can run per worker. Locust/gevent can run thousands or even tens of thousands of Users per process just fine, as long as their total request rate/RPS is not too high.(worker的rps有限制–限制是多少呢,users总数几乎没有限制)
#Example
#To start locust in master mode:
locust -f my_locustfile.py --master

#And then on each worker (replace 192.168.0.14 with the IP of the master machine, or leave out the parameter altogether if your workers are on the same machine as the master):
locust -f my_locustfile.py --worker --master-host=192.168.0.14
#可以在worker文件中,再加入--tags等配置
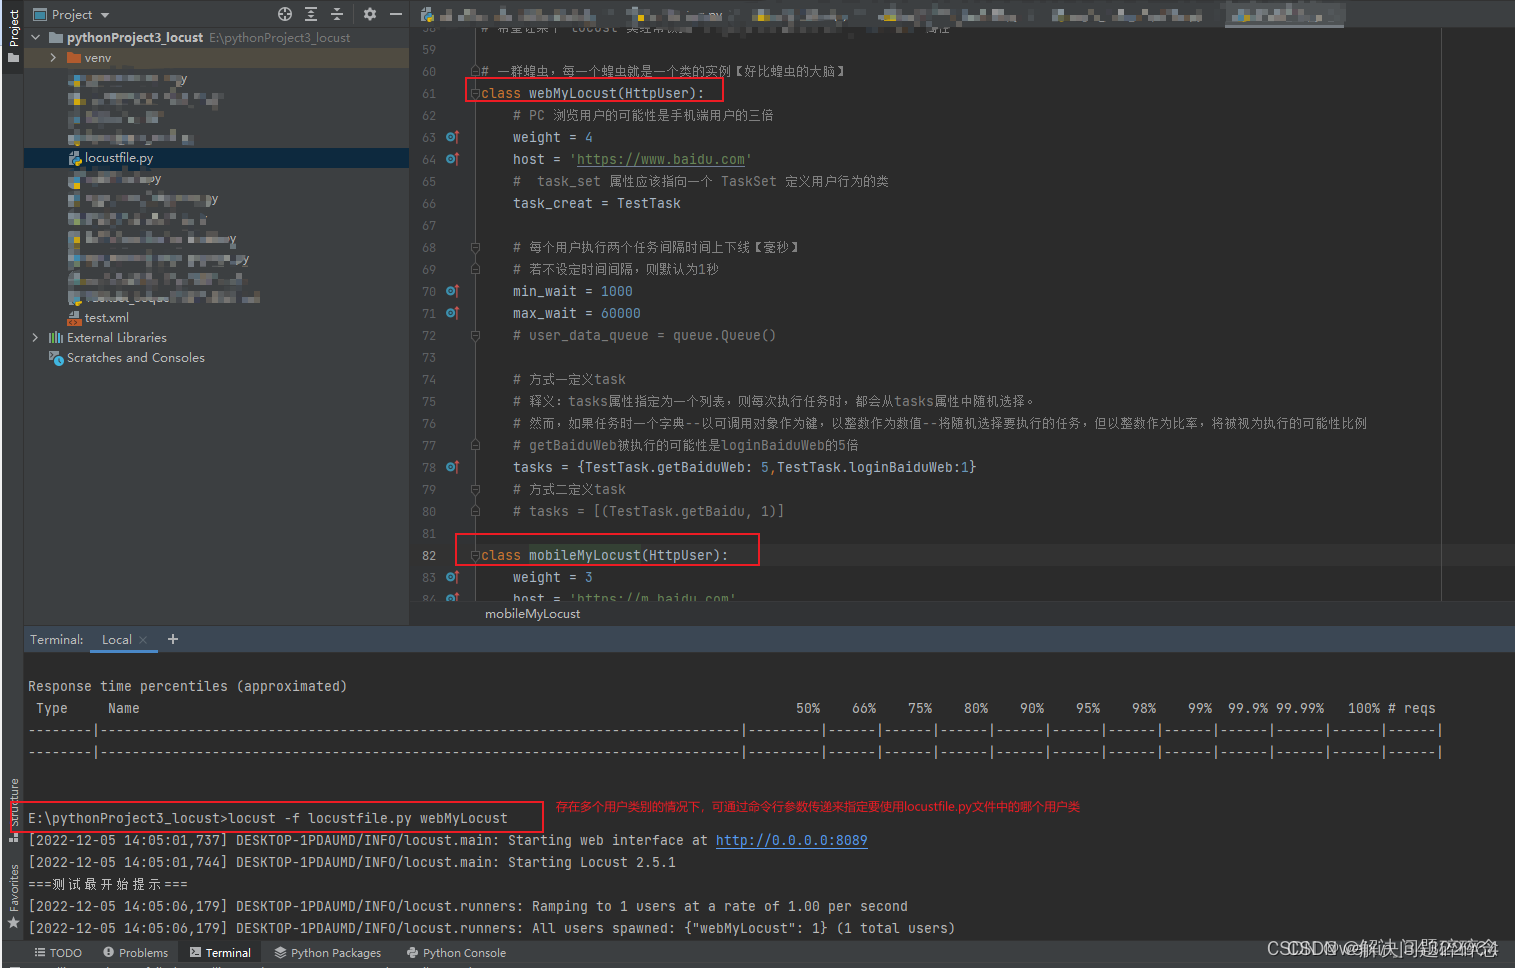
⑨具体说一下多个user类的情况
1、—当测试开始时,locust将为它模拟的每个用户创建一个此类的实例,并且每个用户都将开始再他们自己的绿色gevent线程中运行
要使文件成文有效的locustfile,它必须至少包含一个继承自User
—如果文件中存在多个用户类别,并没有在命令行中指定用户类别,Locust将生成相同数量的每个用户类别。您可通过命令行参数–传递来指定要使用同一locustfile中的哪些用户类:
locust -f locustfile.py webMylocust
如果您希望模拟某种类型的更多用户,您可在这些类上设置权重属性。
举例来说,网络用户的可能性是移动用户的三倍:
class WebUser(User):
    weight = 3
    ...

class MobileUser(User):
    weight = 1
    ...
2、可直接在类上声明自己的wait_time方法
例如,下面的User类会休眠一秒,然后两秒,然后三秒,以此类推
class MyUser(User):
    last_wait_time = 0

    def wait_time(self):
        self.last_wait_time += 1
        return self.last_wait_time

    ...


 494
494


 到【灌水乐园】发言


