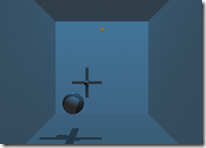
 This sample shows us how to create dynamic volume shadows with OpenGL. The main technology used here are, create the shadow volumes, figure out the shadow area in the stencil buffer.
The first problem is how to create the shadow volumes based on the light source position and cast shadow objects.
1) Calculate the plane equation for each triangle after the objects loaded. Later, we could use the plane parameters to determine whether a light source in the front or back of the plane.
2) Find the connectivity for each triangle edges. We could find which two triangles sharing this edge.
3) In the draw process, we will find out the out-lines of the shadow volume. The out-lines are just edges that one triangle lit by the light source and other one unlit or only one triangles own it. With the edge information and light source position, we could create a big quad that extend some distance along the light direction. Those quads come together is of the shadow volume geometry.
One thing need to mention is that, the shadow volume calculation happen in the object space, that means we need to convert light source position from the world space to the object space. The following is the code for doing the space converting:
glLoadIdentity();
glRotatef(-yrot, 0.0f, 1.0f, 0.0f);
glRotatef(-xrot, 1.0f, 0.0f, 0.0f);
glTranslatef(-ObjPos[0], -ObjPos[1], -ObjPos[2]);
glGetFloatv(GL_MODELVIEW_MATRIX,Minv);
lp[0] = LightPos[0];
lp[1] = LightPos[1];
lp[2] = LightPos[2];
lp[3] = LightPos[3];
VMatMult(Minv, lp);

// the following are the normal process of drawing objects
//glTranslatef(ObjPos[0], ObjPos[1], ObjPos[2]);
//glRotatef(xrot, 1.0f, 0.0f, 0.0f);
//glRotatef(yrot, 0.0f, 1.0f, 0.0f);
//DrawGLObject(obj);
As you see, you could place a ‘-’ and inverse the matrix operation function orders to get a inversed matrix.
Mask Screen Shadow Area in Stencil Buffer
To draw the shadow volumes with stencil buffer:
1) disable the color buffer & depth buffer writing, enable the surface culling feature, set up z-test function to less or equal;
glCullFace(GL_BACK);
glEnable(GL_CULL_FACE);

glDepthMask(GL_FALSE);
glDepthFunc(GL_LEQUAL);

glEnable(GL_STENCIL_TEST);
glColorMask(0, 0, 0, 0);
glStencilFunc(GL_ALWAYS, 1, 0xffffffff);
2) draw the front faces of the shadow volumes (culling the back surfaces), and increase the stencil value when z-test success;
glFrontFace(GL_CCW);
glStencilOp(GL_KEEP, GL_KEEP, GL_INCR);
// draw shadow volumes here
3) draw the back faces of the shadow volumes (culling the front surfaces), and decrease the stencil value when z-test success;
glFrontFace(GL_CW);
glStencilOp(GL_KEEP, GL_KEEP, GL_DECR);
// draw shadow volumes here
4) the area that stencil value not equal to ZERO will be the shadow area. Usually, we draw a black quad or alpah blend full screen quad with the stencil testing.
glFrontFace(GL_CCW);
glColorMask(1, 1, 1, 1);

//draw a shadowing rectangle covering the entire screen
glColor4f(0.0f, 0.0f, 0.0f, 0.4f);
glEnable(GL_BLEND);
glBlendFunc(GL_SRC_ALPHA, GL_ONE_MINUS_SRC_ALPHA);
glStencilFunc(GL_NOTEQUAL, 0, 0xffffffff);
glStencilOp(GL_KEEP, GL_KEEP, GL_KEEP);
glPushMatrix();
glLoadIdentity();
glBegin(GL_TRIANGLE_STRIP);
    glVertex3f(-0.1f, 0.1f,-0.10f);
    glVertex3f(-0.1f,-0.1f,-0.10f);
    glVertex3f( 0.1f, 0.1f,-0.10f);
    glVertex3f( 0.1f,-0.1f,-0.10f);
glEnd();
glPopMatrix();
glDisable(GL_BLEND);
The full source code could be downloaded from here.


 本文详细介绍了如何使用OpenGL创建动态体积阴影,包括计算阴影体积、确定阴影区域在模板缓冲区中的位置等关键技术。通过计算平面方程、寻找三角形边界的连通性和绘制阴影体积,实现了基于光源位置的阴影效果。


 631
631

 被折叠的 条评论
为什么被折叠?


