部署 GitLab 服务器
下载地址
官方教程
[root@root ~]
[root@root ~]
[root@root ~]
[root@root ~]
[root@root ~]
[root@root ~]
[root@root ~]
inet_interfaces = localhost 改成 inet_interfaces = all
[root@root ~]
[root@root ~]
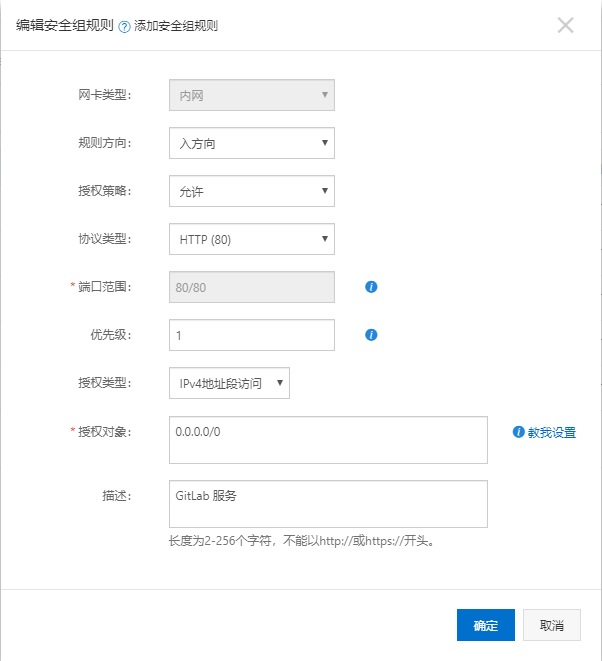
阿里云添加安全组规则
汉化GitLab
下载地址(选择对应版本)
cat /opt/gitlab/embedded/service/gitlab-rails/VERSION
wget方式(指定版本)
wget https://gitlab.com/xhang/gitlab/-/archive/11-9-stable/gitlab-11-9-stable.tar.gz
tar -axvf gitlab-11-9-stable.tar.gz
解压后可以直接删除下载的压缩文件了
cat gitlab-11-9-stable/VERSION
或者
cat gitlab/VERSION
cd /opt/gitlab/embedded/service
mv gitlab-rails pre // 将原配置文件更名为 pre
mv /home/vagrant/gitlab-11-9-stable/ gitlab-rails // 将下载的汉化包,移动过来,并更名
sudo gitlab-ctl reconfigure
sudo gitlab-ctl restart


 本文详细介绍如何在服务器上部署GitLab,包括安装依赖、设置SSH、安装Postfix、添加GitLab软件包仓库、安装GitLab及汉化过程。通过本指南,读者可以了解并掌握GitLab服务器的完整部署步骤。


 8449
8449

 被折叠的 条评论
为什么被折叠?
被折叠的 条评论
为什么被折叠?
 到【灌水乐园】发言


