


安装redis
将redis上传到服务器
解压
tar zxvf redis-5.0.5.tar.gz
因为redis是用C写的所以要安装c依赖
yum -y install gcc-c++ autoconf automake
进入解压目录执行
cd redis-5.0.5
make
创建安装目录
mkdir -p /usr/local/redis
指定安装路径 否则会默认安装到/usr/local/bin目录下
make PREFIX=/usr/local/redis/ install
进入目录/usr/local/redis/bin下
redis-cli :客户端
redis-server :服务器端
启动
./redis-server
Ctrl+c 结束
修改为后台启动
进入redis-5.0.5文件下将redis.conf复制到/usr/local/redis/bin/文件下
cp redis.conf /usr/local/redis/bin/
修改redis.conf
# 将 daemonize 修改为yes
daemonize yes

# 注释掉 bind 127.0.0.1 可以使所有的ip访问redis,若是想指定多个ip访问,但并不是全部的ip 访问,可以bind设置
# bind 127.0.0.1

# 关闭保护模式,修改为no
protected-mode no

# 添加访问认证
requirepass root
杀死进程
[root@kerwin bin]# ps -ef | grep redis
root      11720      1  0 19:28 ?        00:00:01 ./redis-server 127.0.0.1:6379
root      12213   7322  0 19:40 pts/0    00:00:00 grep --color=auto redis
[root@kerwin bin]# kill -9 11720
[root@kerwin bin]# ps -ef | grep redis
进入/usr/local/redis/bin/下 启动时指定启动文件
./redis-server ./redis.conf
进入已启动的
./redis-cli -p 6379 无密码
./redis-cli -p 6379 -a root 有密码
| systemctl status firewalld.service | 查看防火墙状态 |
|---|---|
| systemctl stop firewalld.service | 临时停止firewall |
| systemctl disable firewalld.service | 禁止firewall开机启动 |
读写分离
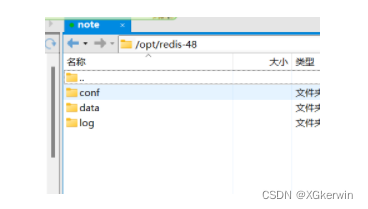
创建一个新的目录 redis-48 在此目录下创建三个文件
找到redis解压的原文件
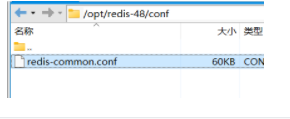
复制redis.conf 并重命名 redis-common.conf
# IF YOU ARE SURE YOU WANT YOUR INSTANCE TO LISTEN TO ALL THE INTERFACES
# JUST COMMENT THE FOLLOWING LINE.
# ~~~~~~~~~~~~~~~~~~~~~~~~~~~~~~~~~~~~~~~~~~~~~~~~~~~~~~~~~~~~~~~~~~~~~~~~
# bind 127.0.0.1              注释掉 bind 127.0.0.1

################################# GENERAL #####################################

# By default Redis does not run as a daemon. Use 'yes' if you need it.
# Note that Redis will write a pid file in /var/run/redis.pid when daemonized.
daemonize yes				# 修改为后台启动 改成yes

# By default protected mode is enabled. You should disable it only if
# you are sure you want clients from other hosts to connect to Redis
# even if no authentication is configured, nor a specific set of interfaces
# are explicitly listed using the "bind" directive.
protected-mode no			# 关闭保护模式 改成no

# Accept connections on the specified port, default is 6379 (IANA #815344).
# If port 0 is specified Redis will not listen on a TCP socket.
# port 6379					# 注释公共配置端口

# Creating a pid file is best effort: if Redis is not able to create it
# nothing bad happens, the server will start and run normally.
# pidfile /var/run/redis_6379.pid   # 注释进程编号记录文件

# Specify the log file name. Also the empty string can be used to force
# Redis to log on the standard output. Note that if you use standard
# output for logging but daemonize, logs will be sent to /dev/null
# logfile ""				# 注释公共配置日志文件

# The filename where to dump the DB
# dbfilename dump.rdb 		# 注释公共配置数据文件

# Note that you must specify a directory here, not a file name.
dir /opt/redis-48/data		# 修改数据文件路径


# If the master is password protected (using the "requirepass" configuration
# directive below) it is possible to tell the replica to authenticate before
# starting the replication synchronization process, otherwise the master will
# refuse the replica request.
#
  masterauth root			# 添加从服务器访问主服务器认证改成root

# Warning: since Redis is pretty fast an outside user can try up to
# 150k passwords per second against a good box. This means that you should
# use a very strong password otherwise it will be very easy to break.
#
   requirepass root			# 添加访问认证改成root

# AOF and RDB persistence can be enabled at the same time without problems.
# If the AOF is enabled on startup Redis will load the AOF, that is the file
# with the better durability guarantees.
#
# Please check http://redis.io/topics/persistence for more information.

appendonly no				# 改成no 根据需求配置是否打开追加文件选项

# Note: read only replicas are not designed to be exposed to untrusted clients
# on the internet. It's just a protection layer against misuse of the instance.
# Still a read only replica exports by default all the administrative commands
# such as CONFIG, DEBUG, and so forth. To a limited extent you can improve
# security of read only replicas using 'rename-command' to shadow all the
# administrative / dangerous commands.
slave-read-only yes		# 服务器只读不允许写 把replica-read-only yes 改成


# appendfilename和dir组合使用,找dir(/opt/redis-48/data)路径生成数据文
appendfilename "appendonly.aof"
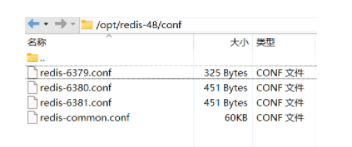
创建3个conf文件
#引用公共配置
include /opt/redis-48/conf/redis-common.conf
#进程编号记录文件
pidfile /var/run/redis-6379.pid
#进程端口号
port 6379
#日志记录文件
logfile "/opt/redis-48/log/redis-6379.log"
#数据记录文件
dbfilename dump-6379.rdb
#追加文件名称
appendfilename "appendonly-6379.aof"


#引用公共配置
include /opt/redis-48/conf/redis-common.conf
#进程编号记录文件
pidfile /var/run/redis-6380.pid
#进程端口号
port 6380
#日志记录文件
logfile "/opt/redis-48/log/redis-6380.log"
#数据记录文件
dbfilename dump-6380.rdb
#追加文件名称
appendfilename "appendonly-6380.aof"
#下面的配置无需在6379里配置
#备份服务器从属于6379推荐配置配局域网IP
slaveof 192.168.72.101 6379


#引用公共配置
include /opt/redis-48/conf/redis-common.conf
#进程编号记录文件
pidfile /var/run/redis-6381.pid
#进程端口号
port 6381
#日志记录文件
logfile "/opt/redis-48/log/redis-6381.log"
#数据记录文件
dbfilename dump-6381.rdb
#追加文件名称
appendfilename "appendonly-6381.aof"
#下面的配置无需在6379里配置
#备份服务器从属于6379推荐配置配局域网IP
slaveof 192.168.72.101 6379
在/usr/local/redis/bin下启动
./redis-server /opt/redis-48/conf/redis-6379.conf
服务启动后连接 密码root
./redis-cli -p 6381 -a root
只能在6379端口写入 剩下的两个只有读没有写
主备切换
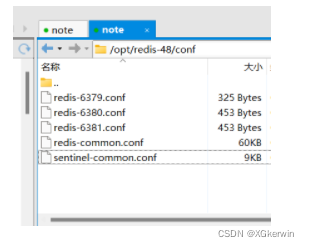
从redis解压后的文件下复制 sentinel.conf 至/opt/redis-48/conf下并重命名为 sentinel-common.conf
编辑 sentinel-common.conf
# port <sentinel-port>
# The port that this sentinel instance will run on
# port 26379				# 注释哨兵监听进程端口号

# Note: master name should not include special characters or spaces.
# The valid charset is A-z 0-9 and the three characters ".-_".
sentinel monitor mymaster 192.168.72.101 6379 2			# 改为局域网ip 哨兵判断6379下线至少2个同意

sentinel auth-pass mymaster root		# 设置master和slaves的密码

# sentinel down-after-milliseconds <master-name> <milliseconds>
#
# Number of milliseconds the master (or any attached replica or sentinel) should
# be unreachable (as in, not acceptable reply to PING, continuously, for the
# specified period) in order to consider it in S_DOWN state (Subjectively
# Down).
#
# Default is 30 seconds.
sentinel down-after-milliseconds mymaster 10000		# 认为服务器已经断线所需的毫秒数 为了更快看到效果设置为10秒

sentinel failover-timeout mymaster 180000			#若 sentinel 在该配置值内未能完成 failover 操作(即故障时master/slave自动切换),则认为本次 failover 失败。


protected-mode no				# 关闭保护模式 修改为no

daemonize yes					#改为后台启动
添加3个哨兵的私有配置文件
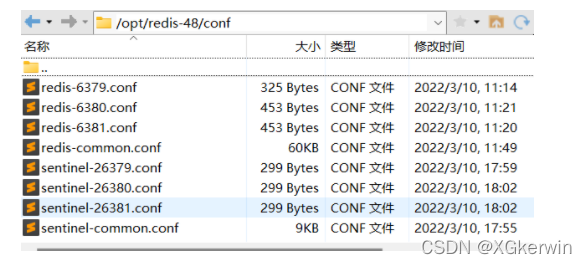
sentinel-26379.conf

#引用公共配置
include /opt/redis-48/conf/sentinel-common.conf
#进程端口号
port 26379
#进程编号记录文件
pidfile /var/run/sentinel-26379.pid
#日志记录文件(为了方便查看日志,先注释掉,搭好环境后再打开)
logfile "/opt/redis-48/log/sentinel-26379.log"


sentinel-26380.conf

#引用公共配置
include /opt/redis-48/conf/sentinel-common.conf
#进程端口号
port 26380
#进程编号记录文件
pidfile /var/run/sentinel-26380.pid
#日志记录文件(为了方便查看日志,先注释掉,搭好环境后再打开)
logfile "/opt/redis-48/log/sentinel-26380.log"


sentinel-26381.conf

#引用公共配置
include /opt/redis-48/conf/sentinel-common.conf
#进程端口号
port 26381
#进程编号记录文件
pidfile /var/run/sentinel-26381.pid
#日志记录文件(为了方便查看日志,先注释掉,搭好环境后再打开)
logfile "/opt/redis-48/log/sentinel-26381.log"
进入/usr/local/redis/bin 目录下启动
./redis-server /opt/redis-48/conf/redis-6379.conf
./redis-server /opt/redis-48/conf/redis-6380.conf
./redis-server /opt/redis-48/conf/redis-6381.conf
[root@kerwin bin]# ps -ef|grep redis
root       7466      1  0 09:35 ?        00:00:04 ./redis-server *:6379
root       7471      1  0 09:35 ?        00:00:04 ./redis-server *:6380
root       7477      1  0 09:35 ?        00:00:04 ./redis-server *:6381
root       7545   7373  0 10:33 pts/0    00:00:00 grep --color=auto redis
[root@kerwin bin]# ./redis-cli -p 6379 -a root
Warning: Using a password with '-a' or '-u' option on the command line interface may not be safe.
127.0.0.1:6379> info replication
# Replication
role:master
connected_slaves:2
slave0:ip=192.168.72.101,port=6380,state=online,offset=4928,lag=0
slave1:ip=192.168.72.101,port=6381,state=online,offset=4914,lag=1
master_replid:e35034e3908d96d72965dfa478e5d8f04a140c48
master_replid2:0000000000000000000000000000000000000000
master_repl_offset:4928
second_repl_offset:-1
repl_backlog_active:1
repl_backlog_size:1048576
repl_backlog_first_byte_offset:1
repl_backlog_histlen:4928

# 查看6380
[root@kerwin bin]# ./redis-cli -p 6380 -a root
Warning: Using a password with '-a' or '-u' option on the command line interface may not be safe.
127.0.0.1:6380> info replication
# Replication
role:slave
master_host:192.168.72.101
master_port:6379
master_link_status:up
master_last_io_seconds_ago:9
master_sync_in_progress:0
slave_repl_offset:5138
slave_priority:100
slave_read_only:1
connected_slaves:0
master_replid:e35034e3908d96d72965dfa478e5d8f04a140c48
master_replid2:0000000000000000000000000000000000000000
master_repl_offset:5138
second_repl_offset:-1
repl_backlog_active:1
repl_backlog_size:1048576
repl_backlog_first_byte_offset:1
repl_backlog_histlen:5138
进入
./redis-cli -p 6379 -a root
查看角色
127.0.0.1:6379> info replication
启动哨兵
[root@kerwin bin]# ./redis-sentinel /opt/redis-48/conf/sentinel-26379.conf
[root@kerwin bin]# ./redis-sentinel /opt/redis-48/conf/sentinel-26380.conf
[root@kerwin bin]# ./redis-sentinel /opt/redis-48/conf/sentinel-26381.conf
查看进程 会有三个哨兵3个redis 相当于启了6太服务器
ps -ef|grep redis
当6379关闭后 10秒以后检测不到6379会6380和6381进行投票,胜出的就可以写数据了
当6379重新启动时6379只能读不能写,还有由6380和6381胜出的进行写。
当6380和6381胜出的也关闭了,写入全还是回归于6379端口
使用服务器对接
配置文件
spring:
  redis:
    # redis 服务器地址
    host: 192.168.72.101
    # redis 服务器端口
    port: 6379
    # 密码
    password: root
    # 选择哪个库,默认0库
    database: 0
    # 连接超时时间
    timeout: 10000ms
    lettuce:
      pool:
        max-active: 1024		# 最大连接数,默认8
        max-idle: 200			# 最大空闲连接,默认8
        max-wait: 10000ms		# 最大连接阻塞等待时间,单位毫秒,默认-1ms
        min-idle: 5				# 最小空闲连接,默认0
    sentinel:
      master: mymaster
      nodes: 192.168.72.101:26379,192.168.10.101:26380,192.168.72.101:26381
@Configuration
public class RedisConfig {

    /**
     * 获取yml中的属性
     */

    //服务器地址
    @Value("${spring.redis.host}")
    private String host;
    //端口
    @Value("${spring.redis.port}")
    private int port;
    //密码
    @Value("${spring.redis.password}")
    private String password;
    //超时时间
    @Value("${spring.redis.timeout}")
    private String timeout;
    //最大连接数
    @Value("${spring.redis.lettuce.pool.max-active}")
    private int maxTotal;
    //最大连接阻塞等待时间
    @Value("${spring.redis.lettuce.pool.max-wait}")
    private String maxWaitMillis;
    //最大空闲连接
    @Value("${spring.redis.lettuce.pool.max-idle}")
    private int maxIdle;
    //最小空闲连接
    @Value("${spring.redis.lettuce.pool.min-idle}")
    private int minIdle;


    @Bean
    public JedisPool redisPoolFactory() {
        JedisPoolConfig jedisPoolConfig = new JedisPoolConfig();
        JedisPool jedisPool = new JedisPool(jedisPoolConfig, host, port, Integer.parseInt(timeout.substring(0, timeout.length() - 2)), password);  //如果有密码在后面加上密码
        return jedisPool;
    }

    @Bean
    @SuppressWarnings("all")
    public RedisTemplate<String, Object> redisTemplate(RedisConnectionFactory factory) {
        // 为了自己方便 一般直接使用 String Object类型
        RedisTemplate<String, Object> template = new RedisTemplate<>();
        template.setConnectionFactory(factory);
        // Json 序列化配置
        Jackson2JsonRedisSerializer<Object> jackson2JsonRedisSerializer = new Jackson2JsonRedisSerializer(Object.class);
        // 使用ObjectMapper转义
        ObjectMapper om = new ObjectMapper();
        om.setVisibility(PropertyAccessor.ALL, JsonAutoDetect.Visibility.ANY);
        om.enableDefaultTyping(ObjectMapper.DefaultTyping.NON_FINAL);
        jackson2JsonRedisSerializer.setObjectMapper(om);
        // string 的序列化
        StringRedisSerializer stringRedisSerializer = new StringRedisSerializer();
        // key 采用string的序列化方式
        template.setKeySerializer(stringRedisSerializer);
        // hash 的key也采用 string 的序列化方式
        template.setHashKeySerializer(stringRedisSerializer);
        // value 序列化方式采用jackson
        template.setValueSerializer(jackson2JsonRedisSerializer);
        // hash 的序列化方式采用jackson
        template.setHashValueSerializer(jackson2JsonRedisSerializer);
        template.afterPropertiesSet();
        return template;
    }

}
@Resource
private RedisTemplate<Object, Object> redisTemplate;

/**
 * 测试连接完成后关闭
 */
@Test
public void test01() {
    redisTemplate.opsForValue().set("2223","5555");

}


 4805
4805

 被折叠的 条评论
为什么被折叠?
被折叠的 条评论
为什么被折叠?
 到【灌水乐园】发言


