


 该博客详细介绍了如何在服务器上安装MMDetection,包括conda环境创建、PyTorch和torchvision版本匹配、MMCV的安装以及MMDetection的源码安装。文章强调了在开发模式下安装MMDetection,使得代码修改能立即生效。此外,还提供了安装验证步骤,检查CUDA、GCC、PyTorch、MMDetection和MMCV的版本是否正确。
一、安装概览
conda create -n openmmlab python=3.7 -y
conda activate openmmlab

conda install pytorch==1.6.0 torchvision==0.7.0 cudatoolkit=10.1 -c pytorch -y

# install the latest mmcv
pip install mmcv-full -f https://download.openmmlab.com/mmcv/dist/cu101/torch1.6.0/index.html

# install mmdetection
git clone https://github.com/open-mmlab/mmdetection.git
cd mmdetection
pip install -r requirements/build.txt
pip install -v -e .  # or "python setup.py develop"
注意点:
pip install -v -e . # or "python setup.py develop"
当指定 -e 或者 develop 的时候 MMDetection 使用安装dev 模式安装,对代码所做的任何本地修改都会生效,无需重新安装。
二、安装指南
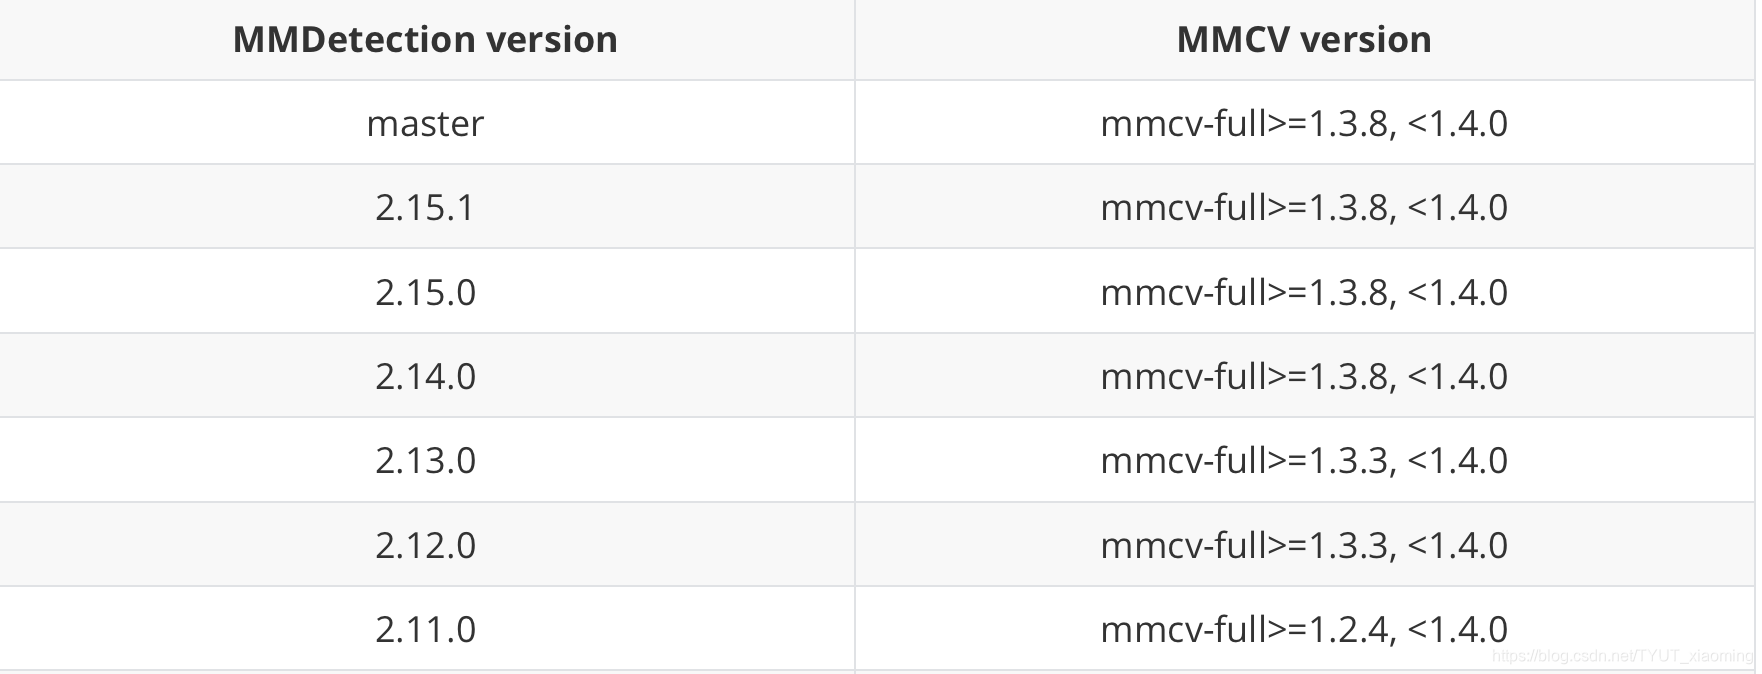
1. 如下所示mmdetection的版本需要和MMCV版本对应
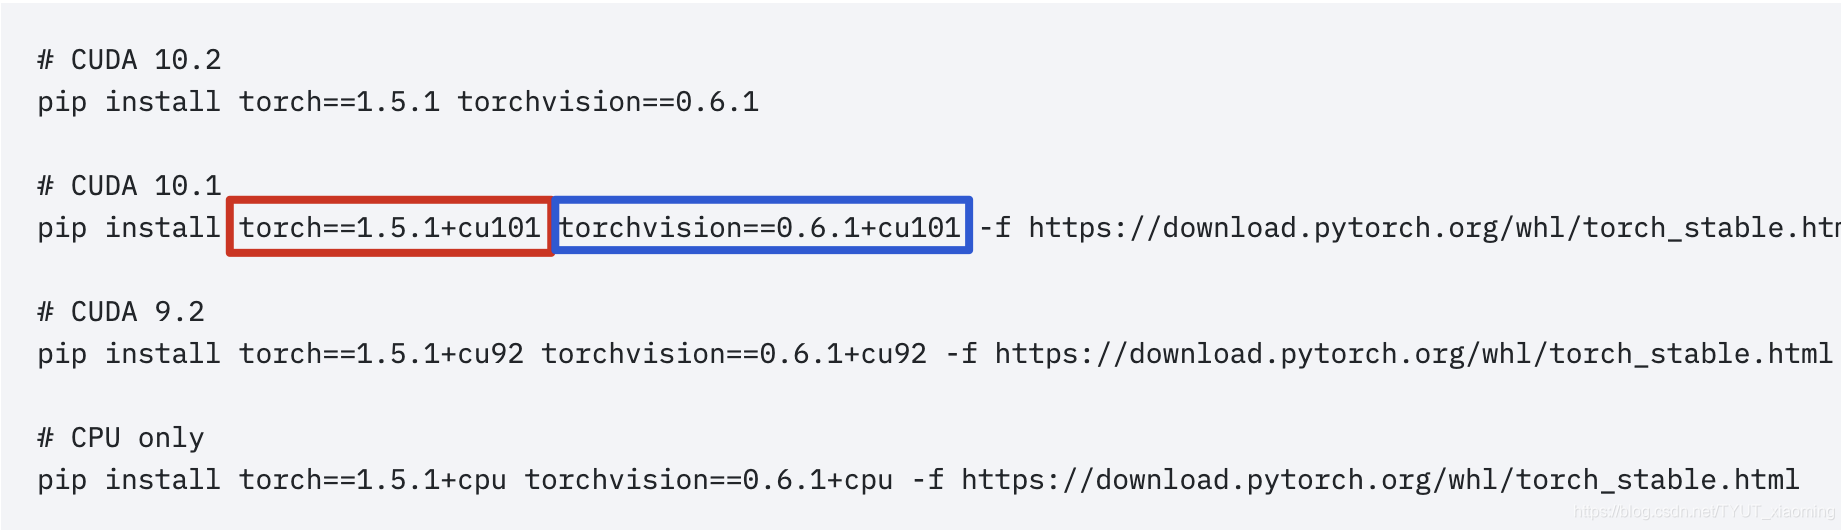
2. pytorch 和 torchvision 的版本也需要对应
参考网址:https://pytorch.org/get-started/previous-versions/
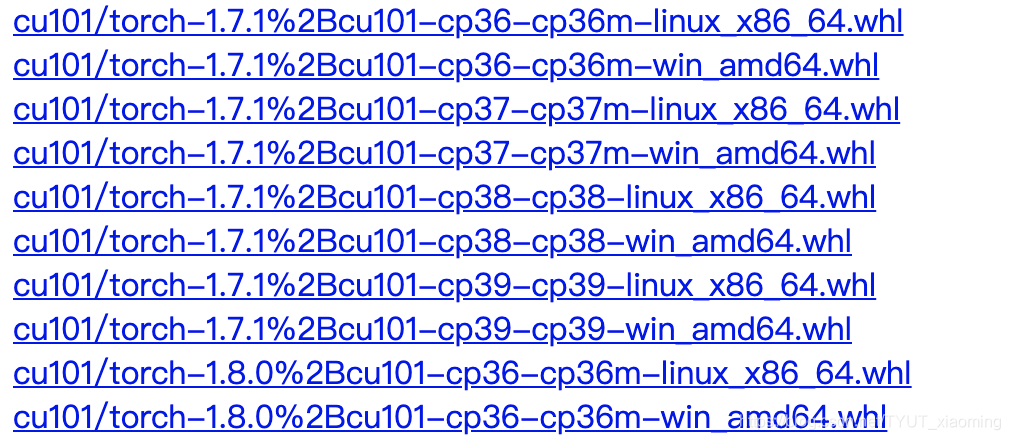
3. pytorch 和 torchvision 需要和服务器已安装的cuda版本,以及python版本对应
# 查看 nvcc version
nvcc -V
例如服务器环境是cuda10.1 + python3.7 那么就下载这两个环境对应的torch版本
pytorch + torchvision 离线安装包下载地址如下:
https://download.pytorch.org/whl/torch_stable.html
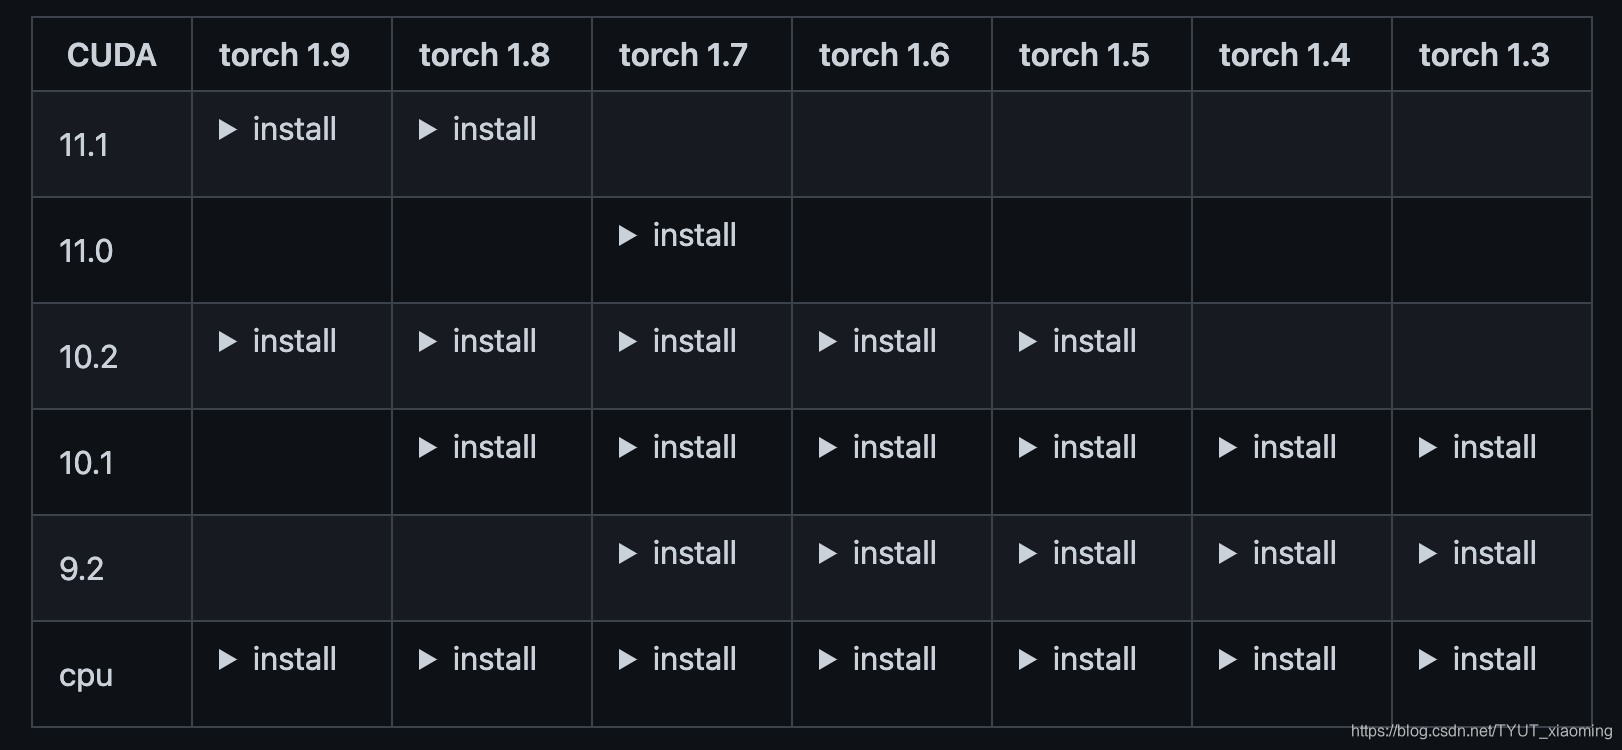
4. MMCV版本下载
根据cuda 版本 + torch版本 + mmdetection版本 下载对应的安装包
torch1.5 + cuda10.1 的离线mmcv-full下载连接如下:
https://download.openmmlab.com/mmcv/dist/cu101/torch1.5.0/index.html
三、安装验证
# Check nvcc version
nvcc -V
# Check GCC version
gcc --version


# Check Pytorch installation
import torch, torchvision
print(torch.__version__, torch.cuda.is_available())


# Check MMDetection installation
import mmdet
print(mmdet.__version__)


# Check mmcv installation
from mmcv.ops import get_compiling_cuda_version, get_compiler_version
print(get_compiling_cuda_version())
print(get_compiler_version())


 10万+
10万+

 被折叠的 条评论
为什么被折叠?
被折叠的 条评论
为什么被折叠?
 到【灌水乐园】发言


